80900-WU-585

Melbourne wedding photography – Night scene with added starlight in post-production

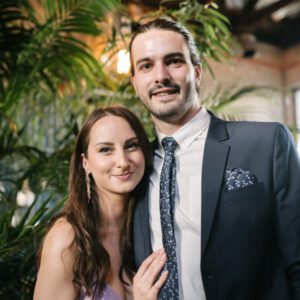
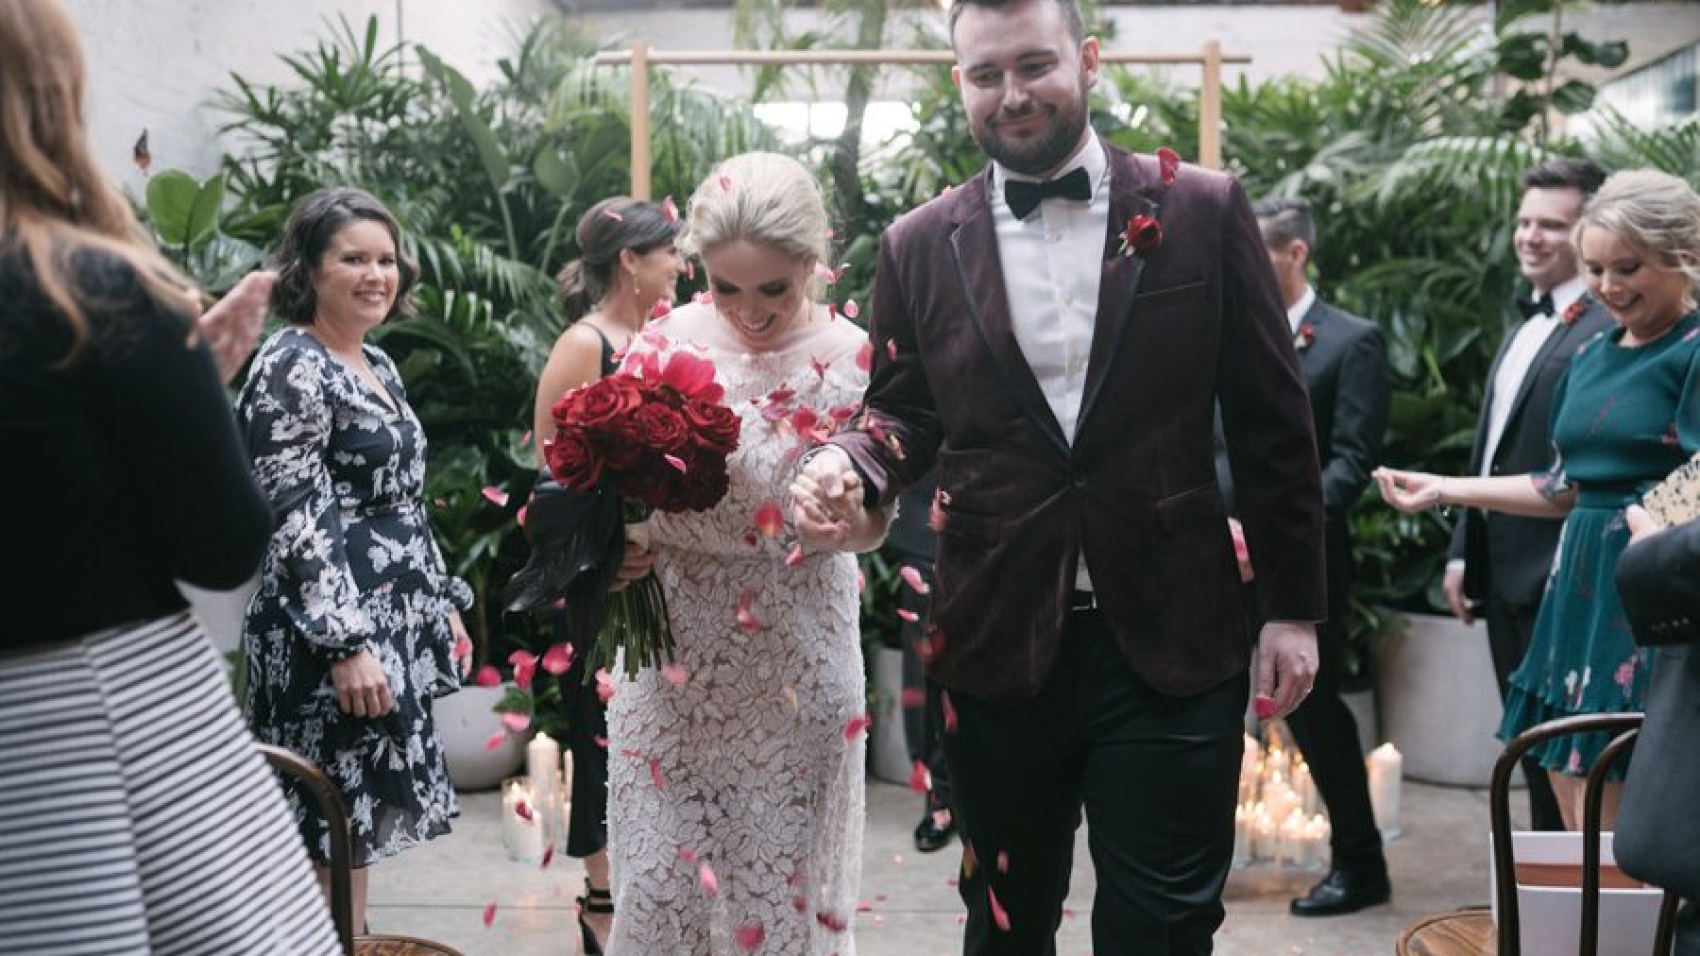
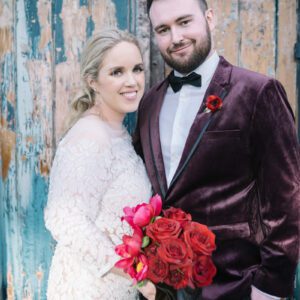
Enhancing Melbourne Wedding Photography with Night Sky Star Effects in Post-Processing

Melbourne’s cityscape and waterfront venues provide stunning backdrops for nighttime wedding photography, but capturing the full magic of the stars often requires creative post-processing techniques. Whether you’re shooting under the glow of the city lights or in a secluded natural setting, adding realistic star effects can elevate your images from ordinary to extraordinary. Here’s how to approach this process with a focus on natural beauty and professional results.

wedding photography melbourne

Understanding the Challenges of Night Wedding Photography

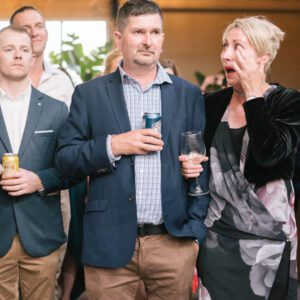
Shooting wedding photos at night presents unique challenges, from limited light to mixed color temperatures. Cityscapes like Federation Square or Southbank introduce artificial lighting that can compete with natural starlight, while darker locations like the Dandenong Ranges may lack ambient light altogether. Balancing these elements is key to creating a cohesive, romantic atmosphere.

Managing Light Pollution and Ambient Glow

Melbourne’s urban areas suffer from light pollution, which can wash out the night sky and make stars difficult to see. When editing, start by reducing the overall brightness of artificial light sources using the brush tool or radial gradients. For example, if a streetlamp is overpowering the scene, lower its exposure while preserving the couple’s faces and surrounding details. This creates a darker, more natural background that makes added star effects look believable.

Preserving Skin Tones Under Artificial Light

Nighttime wedding photos often rely on venue lighting or flash, which can cast unflattering colors on the couple’s skin. Use the white balance tool to neutralize extreme hues, then fine-tune with the temperature and tint sliders. For a photo taken near the Yarra River, where blue-toned city lights might dominate, warming the image slightly can create a more inviting, romantic feel. Adjust the vibrance slider to enhance natural skin tones without making them look artificial.

Creating Realistic Star Effects in Post-Processing

Adding stars to a nighttime wedding photo requires subtlety to avoid a cheesy or overdone look. Here’s how to achieve natural-looking results.

Using the Brush Tool to Paint Stars Manually

For the most authentic results, manually paint stars onto your image using a soft brush with low opacity. Create a new layer and set the blending mode to “Screen” or “Lighten” to ensure the stars blend seamlessly into the sky. Vary the brush size and opacity to mimic the natural variation in star brightness. Focus on areas where stars would naturally appear, such as the upper corners of the frame or around the couple’s silhouette. Avoid clumping stars together, as this can look unrealistic.

Enhancing Existing Stars with Dodge and Burn

If your original photo captures faint stars, you can enhance them using the dodge tool. Set the tool to a low exposure (around 5-10%) and gently brush over existing stars to make them brighter. Use the burn tool to darken the surrounding sky, increasing contrast and making the stars stand out more. This technique works well for photos taken in darker locations like the Royal Botanic Gardens, where light pollution is minimal. Adjust the feathering of your brush to create soft, natural edges around the stars.

Adding Bokeh Lights for a Dreamy Effect

For a softer, more romantic take on star effects, try adding bokeh lights instead of traditional stars. Create a new layer and use a circular brush with a blurred edge to paint small, glowing orbs in the background. Vary the size and opacity of the bokeh lights to mimic the way out-of-focus lights appear in real life. Place them around the couple or along the horizon to create depth and movement. This technique is particularly effective for photos taken near city landmarks like the Eureka Skydeck, where distant lights can be transformed into magical bokeh.

Blending Star Effects with the Overall Scene

The key to successful star enhancement is ensuring the effects complement the rest of the image. Here’s how to integrate stars naturally into your wedding photos.

Matching Star Color to the Ambient Light

Stars in the night sky often have a cool, blueish tone, but city lights can introduce warm hues. Adjust the color of your added stars to match the existing light in the scene. Use the hue slider to shift the star color slightly toward blue or gold, depending on the dominant lighting. For a photo taken near the Melbourne Star Observation Wheel, where artificial lights create a warm glow, adding golden-toned stars can tie the composition together.

Using Layer Masks for Precise Placement

Layer masks allow you to control where star effects appear in your image. After painting stars onto a new layer, add a layer mask and use a black brush to erase stars from areas where they wouldn’t naturally show up, such as directly behind the couple’s faces or over bright light sources. This ensures the stars look like a natural part of the scene rather than an afterthought. For a group photo taken during the reception, this step prevents stars from distracting from the subjects.

Adjusting Opacity for Subtlety

Star effects should enhance the image without overwhelming it. Lower the opacity of your star layer to 50-70% and toggle the visibility on and off to gauge the impact. If the stars look too prominent, reduce the opacity further until they blend seamlessly into the sky. For a formal portrait of the bride and groom under a gazebo, subtle stars can add a touch of magic without detracting from their expressions or the venue’s architecture.

Advanced Techniques for Unique Star Effects

For photographers looking to push their creativity further, these advanced methods can produce one-of-a-kind results.

Creating Star Trails for Dynamic Movement

Star trails add a sense of motion and time to your nighttime wedding photos. Use the path blur tool or a custom brush to create streaks of light that mimic the appearance of stars moving across the sky. Keep the trails subtle and place them in areas with minimal distraction, such as above the couple’s heads or along the horizon. This technique works beautifully for photos taken during long exposures, where the stars naturally blur into trails.

Simulating the Milky Way for Dramatic Impact

If you want to add a truly breathtaking element to your nighttime wedding photos, consider simulating the Milky Way. Find a high-resolution image of the Milky Way (or use a stock photo with permission) and blend it into your scene using the overlay blending mode. Use a layer mask to erase parts of the Milky Way that overlap with the couple or other important elements, then adjust the opacity until it looks natural. This technique is best suited for darker locations like the Mornington Peninsula, where light pollution is minimal.

Adding Shooting Stars for a Whimsical Touch

For a playful, romantic effect, try adding shooting stars to your nighttime wedding photos. Use a thin, white brush to paint a quick streak across the sky, then add a smaller, brighter dot at the end to mimic the tail of a meteor. Vary the direction and length of the shooting stars to create a sense of randomness. Place them in the background or near the edges of the frame to avoid drawing attention away from the couple. This technique is perfect for candid shots taken during the reception’s outdoor dance.

Conclusion: Elevating Night Wedding Photos with Star Effects

Adding star effects to Melbourne wedding photography requires patience, attention to detail, and a commitment to natural-looking results. By understanding the challenges of nighttime shooting, mastering manual painting techniques, and blending effects seamlessly into the scene, you can create images that capture the romance and magic of the couple’s special day. Whether you’re working with urban cityscapes or secluded natural settings, the right approach to star enhancement can turn ordinary night photos into extraordinary keepsakes.

80900-WU-585

Melbourne wedding photography – Post-sunset color grading of the scene

Crafting the Perfect Sunset Glow in Melbourne Wedding Photography Post-Color Grading

Melbourne’s coastline and waterfront venues offer some of the most breathtaking sunset views, making them ideal for wedding photography. However, capturing the full magic of a golden-hour sky often requires careful post-color grading to balance warmth, contrast, and detail. Whether you’re working with a soft pastel sunset or a dramatic fiery horizon, understanding how to enhance these natural tones can transform your wedding photos into timeless works of art.

wedding photography melbourne

Understanding the Science of Sunset Light

Sunset light is unique because of its low angle and long wavelengths, which create warm, golden hues that shift toward pink and purple as the sun dips below the horizon. In Melbourne, coastal locations like St Kilda Beach or Williamstown Pier amplify these colors with reflections off the water, while inland spots such as the Royal Botanic Gardens offer softer, diffused light through foliage.

The Role of White Balance in Capturing Warmth

One of the first steps in post-color grading is adjusting white balance to preserve the natural warmth of the sunset. Many cameras struggle to maintain accurate colors in mixed lighting, especially when artificial lights from venues or street lamps interfere. Start by setting your white balance to “Daylight” or “Shade” in your editing software, then fine-tune the temperature slider to enhance golden tones without making the scene look overly orange. For a sunset photo taken near the Yarra River, a slight increase in temperature can bring out the rich amber glow of the setting sun while keeping the water’s reflections cool and balanced.

Balancing Highlights and Shadows for Depth

Sunset scenes often have extreme contrast between bright sky and dark foreground. To avoid losing detail in either area, use the highlights and shadows sliders to recover information. Lower the highlights to prevent the sky from blowing out into pure white, and raise the shadows to reveal textures in the couple’s clothing or the surrounding landscape. For example, in a photo of a bride and groom standing on Brighton Beach at sunset, reducing highlights can preserve the delicate clouds in the sky while boosting shadows brings out the sand’s grainy texture beneath their feet.

Enhancing Sunset Colors Without Overdoing It

The key to successful sunset color grading is subtlety. Over-saturating the image can make it look artificial, while under-editing may leave the scene flat and lifeless. Here’s how to strike the right balance.

Using the HSL Panel for Targeted Adjustments

The Hue, Saturation, and Luminance (HSL) panel allows you to adjust specific color ranges without affecting the entire image. For sunset photos, focus on the orange, yellow, and red channels. Increase saturation slightly in these areas to deepen the warm tones, then adjust luminance to control brightness. For instance, if the sunset appears too pale, boosting the orange luminance can make it glow more intensely without altering other colors. Conversely, if the sky looks muddy, reducing yellow saturation can clean up the tones and restore clarity.

Adding Vignettes to Draw Focus to the Couple

A subtle vignette can help guide the viewer’s eye toward the center of the image, where the couple is likely positioned. Use a radial gradient mask to darken the edges of the photo, ensuring the effect is gentle and natural. For a sunset wedding portrait, a light vignette can mimic the way light naturally fades at dusk, creating a cozy, intimate atmosphere. Adjust the feathering of the mask to blend the vignette seamlessly into the background, avoiding harsh lines that might distract from the scene.

Refining Skin Tones in Warm Light

Sunset lighting can cast strong orange or pink hues on the couple’s skin, which may look unflattering if not corrected. Use the brush tool to select the bride and groom’s faces, then adjust the temperature and tint sliders to neutralize extreme colors. Aim for a natural, healthy glow that complements the warm background without making them appear sunburned or washed out. For a group photo taken during the reception’s golden hour, this step ensures everyone looks their best against the vibrant sky.

Creative Techniques for Unique Sunset Effects

While realistic color grading is often the goal, adding a touch of creativity can make your wedding photos stand out. Here are some advanced methods to experiment with.

Split Toning for Dramatic Contrast

Split toning involves applying different colors to the highlights and shadows of an image, creating a stylized, artistic effect. For sunset photos, try adding a warm golden tone to the highlights (to enhance the sun’s glow) and a cool blue or purple to the shadows (to mimic the deepening twilight). This contrast adds depth and mood, turning a simple sunset into a cinematic scene. Use the opacity slider to control the intensity of the effect, ensuring it enhances rather than overwhelms the original photo.

Creating Sunset Reflections for Added Romance

If the original photo doesn’t include visible reflections on water, you can simulate them in post-processing. Duplicate the background layer, flip it vertically, and position it below the original image to mimic a reflection. Apply a Gaussian blur filter to soften the duplicated layer, then reduce its opacity to 30-50% for a realistic effect. Use a layer mask to erase parts of the reflection that wouldn’t naturally appear, such as solid objects or distant landscapes. This technique works beautifully for photos taken on Melbourne’s bayside beaches, adding a dreamy, symmetrical quality to the scene.

Using Gradient Maps for Cinematic Color Grading

Gradient maps apply a color gradient to your image based on its tonal values, allowing for precise control over the mood. Choose a gradient that transitions from warm orange or gold in the highlights to deep blue or purple in the shadows. Adjust the blending mode to “Soft Light” or “Overlay” and lower the opacity until the effect looks natural. This method can transform a flat sunset photo into a rich, moody masterpiece, perfect for formal portraits or artistic shots of the wedding venue at dusk.

Conclusion: Elevating Melbourne Sunsets with Thoughtful Color Grading

Sunset wedding photography in Melbourne offers endless opportunities for creativity, but the true magic lies in post-color grading. By mastering techniques like white balance adjustment, HSL targeting, and creative effects like split toning or gradient maps, you can turn ordinary sunset photos into extraordinary memories. Whether you’re capturing a quiet moment between the couple or a grand celebration against a fiery sky, the right approach to color grading ensures every image reflects the beauty and emotion of the day.

wedding photography melbourne

Melbourne wedding photography – Post-processing of blurred background

Mastering Background Blur in Melbourne Wedding Photography Post-Processing

Melbourne’s wedding venues range from historic architecture to lush gardens and modern urban spaces, each offering unique visual opportunities. However, not every background complements the couple perfectly. Background blur, or bokeh, is a powerful post-processing technique that isolates the subjects, draws attention to their emotions, and creates a dreamy, professional aesthetic. Whether you’re working with a busy cityscape or a distracting interior, understanding how to enhance or create background blur can elevate your wedding photos.

wedding photography melbourne

The Role of Background Blur in Wedding Storytelling

Background blur isn’t just about aesthetics—it’s a storytelling tool. By softening or removing distractions, you guide the viewer’s focus to the couple’s expressions, gestures, and connection. In Melbourne’s dynamic environments, this becomes especially important.

Creating Emotional Depth in Busy Settings

Melbourne’s CBD, with its towering buildings and bustling streets, can provide a dramatic backdrop for wedding photos. However, the chaos of traffic, pedestrians, or bright signs might overshadow the couple. Post-processing allows you to blur these elements, turning them into a soft, colorful haze that frames the subjects without competing for attention. For example, a photo taken near Federation Square can be transformed by blurring the crowd and architectural details, leaving the couple in sharp focus against a gentle, impressionistic background.

Enhancing Intimacy in Natural Environments

Lush parks like the Royal Botanic Gardens or coastal spots like St Kilda Beach offer stunning natural settings, but even these can have distracting elements—a stray branch, a passing cyclist, or uneven lighting. Background blur helps simplify the scene, emphasizing the couple’s bond. By adjusting the depth of field in post, you can turn a busy garden into a serene, romantic backdrop, with the bride and groom standing out as the clear focal point. This technique works particularly well for close-up portraits or candid moments where the environment plays a supporting role.

Techniques for Achieving Natural-Looking Background Blur

While some cameras can capture shallow depth of field in-camera, post-processing offers greater control, especially when working with mixed lighting or challenging conditions. Here’s how to refine background blur for a polished, professional result.

Using the Lens Blur Filter for Realistic Results

Many photo editing tools include a lens blur filter that mimics the optical properties of a high-end lens. This filter allows you to adjust the amount of blur, the shape of the bokeh (round, hexagonal, etc.), and even the light falloff. Start by creating a depth map—a grayscale image that identifies which areas should remain sharp (the couple) and which should blur (the background). Apply the lens blur filter to the background layer, refining the settings until the transition between sharp and soft areas looks natural. For a wedding photo taken in a warehouse venue, this method can turn harsh fluorescent lights into soft, glowing orbs in the background.

Refining Edges for Seamless Integration

One common issue with background blur is harsh edges around the subjects, especially if the original photo was taken with a wide aperture or in low light. To avoid this, use precise selection tools like the pen tool or quick selection brush to isolate the couple. Feather the edges of the selection by 1-2 pixels to create a smooth transition between the sharp and blurred areas. After applying blur to the background, zoom in to check for artifacts or halos around the subjects. Use the clone stamp or healing brush to clean up any imperfections, ensuring the blur looks organic and unforced.

Balancing Blur with Ambient Light

Background blur isn’t just about softness—it’s about maintaining the mood of the scene. If the original photo was taken during golden hour, the background should retain some of that warm, directional light even after blurring. Adjust the opacity or brightness of the blurred layer to ensure it doesn’t appear flat or disconnected from the subjects. For a nighttime wedding photo with string lights in the background, blurring the lights into soft bokeh spots can enhance the romantic atmosphere without losing the magic of the scene.

Advanced Tips for Customizing Background Blur

Every wedding photo is unique, and sometimes standard blur techniques need a creative twist. Here are some ways to tailor background blur to specific scenarios.

Adding Motion Blur for Dynamic Energy

In action shots—like the couple dancing or walking down the aisle—a completely static background might feel unnatural. Instead of uniform blur, consider adding subtle motion blur to the background elements. Use the radial blur filter in a direction that matches the couple’s movement, such as a slight swirl for a dancing photo or a horizontal streak for a walking shot. This creates a sense of motion while keeping the subjects crisp, adding energy to the image.

Creating Bokeh Overlays for Artistic Effects

For a truly customized look, you can create bokeh overlays from scratch. Take a photo of out-of-focus lights (like city lights at night or fairy lights) and blend them into your wedding photo as a new layer. Adjust the opacity and blending mode (such as screen or overlay) to integrate the bokeh naturally. This technique works well for adding a touch of whimsy to formal portraits or enhancing the festive feel of reception photos.

Using Gradient Masks for Gradual Blur

In some cases, you might want the background blur to increase with distance from the subjects—a effect that mimics how the human eye perceives depth. Create a gradient mask that applies more blur to the far background and less to the mid-ground. This is particularly useful for outdoor wedding photos with layers of scenery, such as a vineyard or mountain view. The gradual blur creates a sense of three-dimensionality, making the couple appear more prominent in the frame.

Conclusion: Elevating Melbourne Weddings with Thoughtful Background Blur

Background blur is more than a technical trick—it’s a way to highlight the couple’s story while managing the complexities of Melbourne’s diverse venues. By mastering post-processing techniques like lens blur filters, edge refinement, and creative overlays, you can transform distracting backgrounds into complementary elements that enhance the emotional impact of the photo. Whether you’re working with a grand cathedral or a hidden laneway, the right approach to background blur ensures the focus remains where it belongs: on the love and joy of the wedding day.

80900-WU-747

Melbourne wedding photography with natural skin tones and refined post-processing

Achieving Natural Skin Tones in Melbourne Wedding Photography Post-Processing

Melbourne’s diverse lighting conditions—from the soft, diffused light of overcast days to the golden warmth of late-afternoon sun—create a unique challenge for wedding photographers aiming to capture natural-looking skin tones. Post-processing plays a crucial role in refining these tones, ensuring the couple looks radiant without appearing overly edited. The key lies in balancing technical adjustments with an understanding of how light interacts with skin in different environments.

wedding photography melbourne

Understanding Skin Tone Basics in Melbourne’s Light

Skin is a complex subject, reflecting hues influenced by genetics, lighting, and surroundings. In Melbourne, where weather shifts rapidly, photographers must adapt their approach to post-processing based on the scene’s dominant light source.

Overcast Light and Soft Skin

Cloudy skies are common in Melbourne, especially during winter, and they produce even, flattering light that minimizes blemishes and wrinkles. However, this light can sometimes leave skin looking flat or washed out. During post-processing, gently lift midtones to restore vitality while preserving the natural softness. Use the tone curve tool to add subtle contrast in the shadows, ensuring the skin retains depth without appearing harsh. For example, if photographing a couple in Fitzroy Gardens under cloudy skies, slightly warming the highlights on their faces can counteract the coolness of the light while maintaining a natural glow.

Golden Hour and Warm Glows

Melbourne’s golden hour, particularly in summer, casts a warm, directional light that enhances skin tones with a natural radiance. To preserve this warmth during editing, avoid over-cooling the image. Instead, fine-tune the white balance to emphasize orange and yellow tones in the highlights, ensuring the couple’s skin appears sun-kissed rather than artificially tinted. For a beach wedding at Brighton, boosting the warmth in the sand and water while keeping the sky’s blues cool can create a balanced, harmonious look that highlights the skin’s natural luminosity.

Techniques for Balancing Skin Tone Consistency

Wedding photos often involve multiple subjects with varying skin tones, lighting conditions, and distances from the camera. Achieving consistency across these elements requires careful, localized adjustments.

Addressing Mixed Lighting Scenarios

Melbourne’s venues—from historic ballrooms to modern warehouses—often feature mixed lighting, such as natural window light combined with artificial tungsten or LED sources. This can result in uneven skin tones, with some areas appearing too warm or cool. During post-processing, use selective masking to isolate different parts of the image. For instance, if a bride’s face is lit by warm window light while the groom’s is in shadow, adjust the white balance separately for each region. Cooling the groom’s shadowed skin slightly and warming the bride’s highlighted areas ensures both look natural within the same frame.

Correcting Color Casts from Surroundings

Skin tones can pick up reflections from nearby objects, such as green foliage, red brick walls, or colorful decor. These reflections, known as color casts, can make skin appear unnatural if not addressed. To neutralize unwanted hues, use the hue/saturation tool to target specific colors. For example, if a couple is photographed near a green hedge, their skin might take on a slight green tint. Reducing the saturation of greens in the skin’s midtones—while being careful not to affect other elements like the dress or background—can restore a more neutral, natural appearance.

Maintaining Texture While Smoothing Imperfections

The goal of skin retouching is to enhance the subject’s best features without erasing their natural texture. Overly aggressive smoothing can make skin look plastic or artificial. Instead, use frequency separation techniques to separate texture from color. This allows you to address blemishes or unevenness in the color layer while preserving pores and fine lines in the texture layer. For close-up portraits, such as a bride’s makeup shot, this method ensures her skin looks flawless yet real.

Enhancing Natural Radiance Without Over-Editing

The most compelling wedding photos are those where the couple looks like themselves—just at their best. Subtle enhancements to skin tones can elevate an image without drawing attention to the editing process.

Subtle Dodge and Burn for Dimension

Dodge and burn techniques, when used sparingly, can add depth to skin tones by lightening highlights and darkening shadows. This mimics the way light naturally interacts with the contours of the face. For example, slightly brightening the bride’s cheekbones or the groom’s jawline can create a more sculpted appearance. Use a low-opacity brush and build up the effect gradually to avoid harsh transitions. This approach works particularly well for formal portraits or group shots where you want to emphasize the couple’s features without altering their overall look.

Preserving Natural Highlights and Shadows

Skin has a natural range of tones, from the brightest highlights on the forehead or nose to the deeper shadows under the eyes or neck. Over-editing can flatten these variations, making skin look uniform and lifeless. During post-processing, ensure highlights retain detail without blowing out and shadows maintain depth without becoming muddy. For a reception photo taken under dim lighting, lifting the shadows on the couple’s faces just enough to reveal their expressions—while keeping the background dark—can create a moody, intimate atmosphere that still feels authentic.

Adding a Touch of Warmth for a Healthy Glow

A slight warmth in skin tones can convey health and vitality, especially in portraits. After correcting any color imbalances, consider adding a gentle orange or peach tint to the midtones. This can be done using the split toning tool or by adjusting the hue slider in the calibration panel. Be cautious not to overdo it; the goal is to enhance the skin’s natural color, not to make it look sunburned or artificially tanned. For an outdoor ceremony photo, a subtle warmth in the couple’s skin can complement the golden light of the setting sun, creating a cohesive, natural look.

Conclusion: Elevating Melbourne Weddings with Authentic Skin Tones

Natural-looking skin tones are the foundation of timeless wedding photography. By understanding Melbourne’s unique lighting conditions, mastering localized adjustments, and applying subtle enhancements, photographers can ensure the couple looks their best while preserving the authenticity of the moment. Whether capturing the quiet intimacy of a morning ceremony or the joyful energy of a nighttime reception, thoughtful skin retouching transforms good photos into heirlooms that families will cherish for generations.

80900-WU-351

Melbourne wedding photography – Atmosphere and lighting adjustments for post-production

Creating Atmospheric Light and Shadow in Melbourne Wedding Photography Post-Processing

Melbourne’s ever-changing weather and dramatic landscapes—from the misty mornings along the Yarra River to the golden sunsets at St Kilda Beach—provide a dynamic backdrop for wedding photography. To translate these natural moods into captivating images, photographers must master the art of manipulating light and shadow during post-processing. This approach goes beyond basic corrections, focusing instead on crafting visuals that evoke emotion and tell a story.

wedding photography melbourne

Understanding Melbourne’s Unique Lighting Conditions

The city’s latitude and climate create lighting scenarios that demand adaptability. Overcast skies, common in Melbourne’s winters, diffuse light evenly, reducing harsh shadows but sometimes flattening textures. Conversely, sunny days cast sharp contrasts, highlighting architectural details or natural elements like sandstone cliffs or gum trees. Post-processing should enhance these qualities rather than fight them, ensuring the final image reflects the scene’s true character.

Working with Overcast Light

Cloudy conditions soften facial features and create a serene, romantic mood perfect for intimate portraits. However, flat lighting can lack dimension. To compensate, use the tone curve tool to subtly lift midtones while darkening shadows in the background. This adds depth without introducing harshness. For example, if photographing a couple in Fitzroy Gardens under cloudy skies, slightly deepening the greens in the foliage and warming the highlights on their skin can create a cozy, inviting atmosphere.

Harnessing Golden Hour Magic

Melbourne’s golden hour, particularly during summer, bathes scenes in warm, directional light that accentuates textures and creates long, flattering shadows. During post-processing, emphasize this warmth by adjusting the white balance toward amber tones. Be mindful not to overdo it—subtlety is key. For a beach wedding at Brighton, boosting the orange and yellow hues in the sand and water while maintaining cooler tones in the sky can balance the composition and draw attention to the couple’s silhouette against the horizon.

Crafting Depth Through Shadow Play

Shadows are not just absence of light—they’re storytelling tools. In wedding photography, they can convey intimacy, movement, or the passage of time. Thoughtful shadow manipulation during post-processing can transform a good image into a memorable one.

Enhancing Architectural Shadows

Melbourne’s venues often feature bold architectural elements, such as the Art Deco lines of the Manchester Unity Building or the modernist angles of the Melbourne Recital Centre. These structures cast striking shadows that change throughout the day. During editing, use the dodge-and-burn technique to accentuate these patterns. For instance, lightening shadows on a bride’s dress where it catches light from a stained-glass window, while darkening adjacent areas, can create a sense of drama and focus.

Using Shadows to Frame Subjects

Natural frames—like tree branches, archways, or even the couple’s own bodies—can guide the viewer’s eye toward the focal point. In post-processing, deepen shadows within these frames to make them more pronounced. If photographing a ceremony at the Royal Botanic Gardens, darkening the foliage around the altar while keeping the couple’s faces bright ensures they remain the center of attention. This technique also adds a sense of privacy, as if the world outside the frame fades away.

Balancing Shadows in Group Shots

Group photos pose a challenge: ensuring everyone is evenly lit without losing the scene’s natural ambiance. In Melbourne’s variable light, this often means working with mixed lighting sources. During editing, use local adjustments to brighten faces in shadow while preserving the overall mood. For a reception photo in a dimly lit warehouse venue, slightly raising exposure on the guests’ faces and lowering highlights in the background lighting (like string lights or candles) can maintain the venue’s cozy atmosphere while ensuring clarity.

Evoking Emotion Through Color Grading

While light and shadow form the foundation of atmospheric imagery, color grading adds the final layer of emotion. Melbourne’s diverse settings—from urban rooftops to coastal cliffs—call for tailored approaches to hue and saturation.

Warm Tones for Romantic Scenes

Soft, warm colors evoke feelings of love and nostalgia, making them ideal for portraits or quiet moments. During post-processing, add a gentle orange or peach tint to highlights and midtones, particularly on skin and natural elements like flowers or sand. For a pre-wedding shoot in a sunlit loft, warming the wooden floors and the couple’s clothing while keeping window light cool can create a harmonious, timeless feel.

Cool Tones for Moody Dramatics

Cooler palettes—blues, grays, and teals—suit overcast days or evening ceremonies. These hues add mystery and sophistication, perfect for venues like the Melbourne Museum or a rainy lakeside wedding. To achieve this look, reduce saturation in warm colors and introduce a subtle blue cast to shadows. Be cautious with skin tones; use selective masking to avoid making faces appear washed out. A reception photo taken under twilight skies, with deep blue shadows and muted gold accents on table settings, can feel both elegant and intimate.

Vintage-Inspired Matte Finishes

For couples seeking a nostalgic aesthetic, a matte finish can soften modern digital images and mimic the look of film. Reduce clarity slightly and add a faint grain texture to emulate analog imperfections. This works particularly well for black-and-white conversions or desaturated color photos. A vintage-style edit of a couple dancing in a ballroom with aged wallpaper and chandeliers can transport viewers to another era, enhancing the storytelling aspect of the image.

Conclusion: Elevating Melbourne Weddings Through Light and Mood

Atmospheric post-processing is about more than technical adjustments—it’s about interpreting the scene’s emotional core and translating it into visuals that resonate. By understanding Melbourne’s lighting quirks, using shadows purposefully, and applying thoughtful color grading, photographers can create wedding albums that feel both personal and universal. Whether capturing the quiet joy of a morning ceremony or the electric energy of a nighttime reception, mastering light and shadow ensures every image tells a story worth remembering.

80900-WU-712

Melbourne wedding photography – Classic black-and-white post-processing for images

Timeless Elegance: Mastering Black-and-White Post-Processing for Melbourne Wedding Photography

Melbourne’s architectural grandeur, from the cobblestone lanes of Degraves Street to the historic arches of Flinders Station, provides a dramatic canvas for wedding photography. When stripped of color, these scenes gain a timeless quality that emphasizes emotion, texture, and light. For photographers aiming to create monochrome masterpieces, understanding the nuances of post-processing is essential to translating Melbourne’s unique atmosphere into art.

wedding photography melbourne

The Art of Subtraction: Why Black-and-White Works for Melbourne Weddings

Color photography often distracts from the core elements of a scene—the way sunlight filters through stained glass windows or the interplay of shadows on a bride’s veil. Black-and-white imagery eliminates these distractions, forcing viewers to focus on the raw emotion captured in a couple’s embrace or the architectural lines of a venue.

In Melbourne, where weather shifts rapidly from sunny skies to moody clouds, monochrome processing can amplify these natural contrasts. For example, a rainy wedding at the Royal Botanic Gardens becomes a study in grayscale drama, with wet pavement reflecting soft light and foliage rendered in deep, velvety tones. By removing color, photographers highlight the city’s ever-changing moods, creating images that feel both classic and contemporary.

Crafting Depth Through Contrast and Texture

The key to compelling black-and-white wedding photography lies in manipulating contrast and texture during post-processing. Unlike color images, where hues can create separation between elements, monochrome photos rely on tonal variations to define space and form.

Enhancing Architectural Details

Melbourne’s venues often feature intricate designs—think the geometric patterns of the Melbourne Museum or the weathered brick of heritage-listed buildings. In post-processing, slightly increasing contrast in these areas draws attention to their textures without overpowering the subjects. Using tools like the curves adjustment layer, photographers can darken shadows in brickwork or lighten highlights on wrought-iron railings, creating a three-dimensional effect that anchors the couple within their environment.

Softening Skin Tones for Timeless Portraits

While architectural elements benefit from bold contrast, human skin requires a gentler approach. Overly harsh tonal shifts can make faces appear flat or exaggerate imperfections. To maintain a natural look, use the dodge-and-burn technique to selectively lighten areas like the bride’s collarbone or the groom’s jawline, while darkening shadows under the eyes or along the neck. This subtle sculpting adds depth to portraits without sacrificing the softness associated with wedding imagery.

Balancing Highlights and Shadows in Dynamic Lighting

Melbourne’s unpredictable weather often leads to high-contrast lighting scenarios, such as backlighting during golden hour or harsh midday sun bouncing off concrete. In black-and-white processing, these conditions become assets rather than challenges. For backlit scenes, recover blown-out highlights in the veil or dress by reducing the whites slider, while lifting shadows in the couple’s faces to retain detail. In bright sunlight, embrace the drama by deepening shadows on the ground or in the background, creating a vignette effect that guides the eye toward the subjects.

Telling Stories Through Monochrome Narratives

Black-and-white wedding photography isn’t just about technical adjustments—it’s about crafting a visual story that resonates emotionally. By removing color, photographers encourage viewers to engage with the narrative on a deeper level, interpreting the mood and relationships conveyed through body language and composition.

Capturing Candid Moments

Color can sometimes make candid shots feel overly staged or distract from the spontaneity of the moment. In monochrome, a laugh shared between the couple or a tear rolling down a parent’s cheek becomes the focal point. During post-processing, emphasize these emotions by cropping tightly to eliminate empty space, ensuring the viewer’s attention remains fixed on the interaction.

Creating Cohesion Across Albums

For couples seeking a unified aesthetic, black-and-white processing offers consistency across diverse scenes—from pre-wedding portraits in Fitzroy Gardens to reception dance floors in warehouse venues. By applying similar tonal adjustments to every image, photographers can weave disparate moments into a cohesive narrative. For instance, using a cool blue tint in shadows can evoke a vintage feel, while warm sepia tones lend a nostalgic quality to older venues like the Como House.

Embracing Imperfection

Unlike color photography, where blemishes or grain might be considered flaws, black-and-white imagery often celebrates these elements as part of its charm. A slightly grainy texture can evoke the look of film photography, adding authenticity to images shot in digital formats. Similarly, leaving in subtle motion blur from a dance sequence or the soft focus of a veil in the wind can enhance the dreamlike quality of the final product.

Conclusion: Elevating Melbourne Weddings Through Monochrome Mastery

Black-and-white post-processing isn’t a relic of the past—it’s a powerful tool for modern wedding photographers looking to transcend trends and create images that endure. By understanding how to manipulate contrast, texture, and light, and by approaching each image as a storytelling device, photographers can transform Melbourne’s diverse landscapes into timeless works of art. Whether capturing the grandeur of St. Patrick’s Cathedral or the intimacy of a beachside ceremony, monochrome processing allows couples to relive their special day through a lens of elegance and emotion.

wedding photography melbourne

Melbourne Wedding Photography – Filmic Post-Editing for the Final Cut

Crafting a Cinematic Look in Melbourne Wedding Photography Post-Production

Melbourne’s diverse landscapes—from its historic architecture to its rugged coastlines and lush gardens—offer endless inspiration for wedding photography that feels like a story unfolding. To elevate these images into a cinematic experience, post-production should focus on mood, movement, and emotional storytelling. Here’s how to achieve a film-like aesthetic in your Melbourne wedding photo edits.

wedding photography melbourne

Setting the Tone with Color Grading

Cinematic photography often relies on carefully crafted color palettes to evoke specific emotions. For Melbourne weddings, this means choosing tones that complement the city’s unique blend of urban and natural settings.

Mimicking Film Emulation for Timeless Appeal

Many filmmakers use vintage film stocks to create warmth and nostalgia. You can replicate this effect digitally by:

  • Adjusting White Balance for a Golden Hour Glow: Even if photos weren’t taken during sunset, tweaking the white balance toward orange or yellow can simulate the soft, flattering light of golden hour.
  • Adding a Subtle Teal/Orange Split Tone: This classic cinematic technique involves warming the highlights (orange) and cooling the shadows (teal), creating depth and contrast without looking artificial. Use the split-toning panel in your editing software to apply this effect lightly.
  • Reducing Saturation for a Muted Look: Overly vibrant colors can feel unrealistic. Lower the overall saturation slightly, then selectively boost tones that matter most (like the bride’s dress or the groom’s suit) to keep them from getting lost.

Enhancing Mood with Seasonal Palettes

Melbourne’s changing seasons provide a natural color story. Tailor your edits to match the time of year:

  • Summer Weddings: Embrace warm yellows, soft greens, and golden highlights to reflect the sunlit energy of the season.
  • Autumn Weddings: Deepen reds, oranges, and browns in the foliage for a rich, cozy atmosphere.
  • Winter Weddings: Cool down the blues and whites in the background to evoke the crisp, quiet feeling of a Melbourne winter.
  • Spring Weddings: Brighten pastels and fresh greens to capture the renewal and optimism of the season.

Creating Movement and Depth with Visual Effects

Static images can feel flat, but subtle effects can mimic the dynamic quality of film. These techniques add life to your photos without distracting from the couple.

Simulating Motion Blur for a Dynamic Feel

Even if the camera was perfectly still, adding a hint of motion blur can make the scene feel more alive:

  • Directional Blur for Wind or Movement: If the bride’s dress is blowing in the breeze or the couple is walking, apply a light blur in the direction of movement. Use a low opacity and a small radius to keep it natural.
  • Radial Blur for Focus Shifts: To draw attention to the couple, apply a slight radial blur to the background. This creates a shallow depth-of-field effect, as if the camera is focusing on them while the world blurs around them.
  • Pan Blur for Traveling Shots: If the couple moved between locations during the shoot, mimic the look of a tracking shot by blurring the edges of the frame slightly. This works especially well for photos taken in Melbourne’s trams or along the Yarra River.

Adding Light Leaks and Grain for a Vintage Touch

Film photography often has imperfections that add character. You can replicate these in post:

  • Subtle Light Leaks: Overlay a soft, orange-tinted light leak on the edges of the frame to mimic the look of old film exposed to light. Keep it faint—just enough to add warmth without overwhelming the image.
  • Fine Grain for Texture: A light layer of grain can make digital photos feel more organic, like they were shot on film. Adjust the size and opacity until it looks natural, not noisy.
  • Vignetting for Drama: Darken the corners of the frame slightly to draw the eye toward the center. This classic cinematic technique adds mood and intimacy, especially for close-up portraits.

Telling a Story Through Composition and Pacing

A cinematic wedding album should feel like a narrative, with each photo building on the last. Pay attention to how images flow together to create emotional impact.

Sequencing Photos for Emotional Arcs

Think of your album as a movie reel, with each photo representing a scene:

  • Opening Shots: Start with wide-angle views of Melbourne’s landmarks (like Flinders Street Station or St. Kilda Beach) to establish the setting.
  • Mid-Album Focus: Shift to medium shots of the couple interacting—laughing, dancing, or sharing a quiet moment. These photos should feel personal and emotional.
  • Climactic Moments: Reserve close-ups for the most intimate or dramatic parts of the day, like the first kiss or the exchange of vows. These images should carry the most emotional weight.
  • Closing Frames: End with sweeping views or candid shots of the couple leaving the venue, as if the story is continuing beyond the frame.

Using Leading Lines and Framing for Visual Interest

Cinematic composition relies on guiding the viewer’s eye through the frame. Look for natural lines or shapes in Melbourne’s settings:

  • Architectural Lines: Use the lines of buildings, bridges, or staircases to lead toward the couple. For example, a photo taken from the bottom of a spiral staircase in a historic venue can create a dramatic perspective.
  • Nature’s Frames: Tree branches, doorways, or windows can act as natural frames around the couple, adding depth and focus.
  • Symmetry and Balance: Centered compositions can feel formal and grand, while off-center shots create tension and movement. Mix both styles to keep the album visually engaging.

Pacing the Album with Variety

Avoid monotony by mixing up shot types, angles, and focal lengths:

  • Wide Shots: Establish the scene and show the couple in their environment.
  • Medium Shots: Capture interactions and emotions from a slightly closer perspective.
  • Close-Ups: Focus on details like hands, eyes, or the ring to add intimacy.
  • Candid Moments: Include unposed shots of the couple laughing, hugging, or dancing to show genuine emotion.

Final Touches for a Polished, Film-Inspired Album

Once individual edits are complete, review the entire collection to ensure consistency and flow.

Consistent Color and Lighting

Even if photos were taken in different locations or lighting conditions, they should share a similar color palette and exposure level. Adjust global settings to create a cohesive look.

Balanced Contrast and Sharpness

Check that no image feels too flat or too harsh compared to the others. Subtle adjustments to contrast and sharpness can help maintain a smooth visual rhythm.

Natural-Looking Edits

Step back and view the images as a whole to ensure the effects don’t look forced. The goal is to enhance the story and mood of the wedding day while keeping the focus on the couple’s connection.

By combining thoughtful color grading, dynamic visual effects, and intentional storytelling, you can transform Melbourne’s wedding photos into a cinematic masterpiece that feels both timeless and modern.

80900-WU-712

Melbourne wedding photography with a serene and fresh style, featuring post-production editing.

Creating a Fresh, Forest-Inspired Look in Melbourne Wedding Photography Post-Processing

Melbourne’s lush gardens, sprawling parks, and hidden forest trails provide the perfect backdrop for wedding photography that feels natural, romantic, and effortlessly fresh. To bring out the best in these outdoor settings, post-processing should enhance the organic beauty of the surroundings while keeping the focus on the couple. Here’s how to achieve a forest-fresh aesthetic in your wedding photo edits.

wedding photography melbourne

Embracing Natural Light and Soft Tones

The key to a forest-inspired look is letting the natural environment shine through. This means avoiding heavy edits that overpower the scene and instead focusing on subtle enhancements that highlight the light, colors, and textures of the outdoors.

Balancing Exposure for Gentle Brightness

Forest settings often have mixed lighting, with dappled sunlight filtering through trees and softer shadows in shaded areas. To create a cohesive look:

  • Lift Shadows Carefully: Use the shadows slider to brighten darker areas without making them look flat or washed out. This helps reveal details in the foliage or the couple’s attire while maintaining depth.
  • Tame Highlights: If the sun creates harsh bright spots, gently reduce the highlights to soften the contrast. This prevents overexposure while preserving the natural glow of sunlight.
  • Adjust White Balance for Warmth: Forest light can sometimes feel cool or blue, especially in shaded areas. Warming the white balance slightly (toward yellow/orange) adds a cozy, inviting feel without sacrificing realism.

Enhancing Soft, Natural Colors

Forest photography thrives on earthy greens, muted browns, and soft neutral tones. To keep colors looking fresh and natural:

  • Lower Saturation Selectively: Reduce the vibrancy of overly bright colors (like neon greens or artificial blues) while leaving natural tones intact. This creates a more harmonious palette.
  • Boost Greens and Earth Tones: Use the HSL panel to slightly increase the saturation of greens (for foliage) and browns (for tree trunks or paths). Keep the adjustments subtle to avoid an artificial look.
  • Add a Hint of Warmth to Midtones: A light orange or yellow tint in the midtones can make the image feel sun-kissed, as if the couple is bathed in gentle morning or afternoon light.

Adding Depth with Foliage and Texture

A forest setting is rich with texture—from the rough bark of trees to the delicate veins of leaves. Post-processing should emphasize these details without making them distracting.

Sharpening Foliage for Realism

Soft focus can work well for portraits, but the surrounding environment should still feel sharp and detailed:

  • Use Masking for Precision: Apply sharpening selectively to areas like leaves, grass, or tree branches using a mask or brush tool. This keeps the couple’s faces smooth while enhancing the background’s texture.
  • Avoid Over-Sharpening: Too much sharpening can create harsh edges or noise, especially in shadowed areas. Start with a low amount and increase gradually until the texture looks natural.
  • Clarity for Midtone Definition: A light clarity adjustment can add definition to midtones, making foliage and other natural elements appear more three-dimensional.

Creating Atmosphere with Fog or Haze

For a dreamy, ethereal feel, subtle fog or haze can add depth and mystery to forest photos:

  • Add a Gradient Filter: Use a radial or gradient filter to apply a light dehaze adjustment to the edges of the frame, mimicking the way fog softens distant objects.
  • Lower Contrast in the Background: Reducing contrast in the background (while keeping the couple’s faces sharp) creates a sense of depth, as if the forest stretches endlessly behind them.
  • Use a Soft Brush for Localized Effects: If certain areas (like a pathway or a cluster of trees) need a touch of haze, apply it with a soft brush at low opacity for a natural result.

Perfecting the Couple’s Appearance in Natural Settings

While the focus is on the environment, the couple should still look their best. Subtle retouching ensures they blend seamlessly into the forest while maintaining a polished, natural look.

Smoothing Skin Without Losing Texture

Outdoor lighting can highlight skin imperfections, but heavy retouching can make faces look plastic:

  • Frequency Separation: Use frequency separation to separate skin texture from tone, allowing you to smooth blemishes without flattening pores or fine lines.
  • Spot Healing for Small Distractions: Quickly remove acne, stray hairs, or other minor distractions with the spot healing brush, keeping the tool size small for precision.
  • Dodge and Burn for Contouring: Lightly dodge (brighten) highlights on the face (like the cheekbones or brow bone) and burn (darken) shadows (like under the jawline) to enhance natural contours without looking overdone.

Enhancing Eyes and Hair for a Glowing Look

The couple’s eyes and hair should stand out against the forest backdrop:

  • Brighten Eyes Subtly: Use the adjustment brush to slightly increase exposure and clarity in the eyes, making them look more awake and engaged. Add a touch of warmth to the iris color for a natural sparkle.
  • Define Hair with Texture: If the hair looks flat, use a clarity adjustment or texture brush to add volume and separation between strands. For windblown hair, embrace the movement and enhance it lightly for a dynamic effect.
  • Match Hair Color to Lighting: If the hair reflects sunlight, add a warm tint to the highlights. For shaded areas, a cool tint can mimic the natural play of light and shadow.

Adjusting Clothing to Complement the Environment

The couple’s outfits should harmonize with the forest’s colors and textures:

  • Desaturate Bright Colors: If the dress or suit stands out too much against the greenery, gently lower its saturation to create a more balanced composition.
  • Enhance Natural Tones: For earthy-colored attire (like beige, cream, or muted green), slightly boost the saturation to make it pop without clashing with the background.
  • Remove Wrinkles or Distractions: Use the healing brush to smooth out wrinkles in fabric or remove visible seams, ensuring the clothing looks pristine but natural.

Final Touches for a Cohesive Forest-Fresh Album

Once individual edits are complete, review the entire collection to ensure consistency in style and mood.

Consistent Color Grading Across Images

Even if photos were taken in different parts of the forest or at varying times of day, they should share a similar color palette. Adjust hue, saturation, and luminance globally to create a unified look.

Balanced Exposure and Contrast

Check that no image feels too bright or too dark compared to the others. Subtle adjustments to exposure and contrast can help maintain a smooth flow throughout the album.

Natural-Looking Edits

Step back and view the images as a whole to ensure the edits don’t look forced. The goal is to enhance the forest’s beauty while keeping the couple’s connection at the forefront, creating timeless photos that feel both fresh and authentic.

By focusing on natural light, soft colors, detailed textures, and subtle retouching, you can transform Melbourne’s forest settings into a dreamy, romantic backdrop for wedding photography that feels effortlessly fresh.

wedding photography melbourne

Melbourne wedding photography – post-processing of film-like color tones

Creating a Timeless Film Look in Melbourne Wedding Photography Post-Processing

Melbourne’s unique blend of urban charm and natural beauty makes it an ideal setting for wedding photography that tells a story. One way to elevate these images is by giving them a classic film-inspired look through post-processing. This style adds warmth, texture, and a nostalgic feel, making the photos feel both timeless and intimate.

wedding photography melbourne

Understanding the Film Aesthetic in Wedding Photography

Film photography has a distinct look that digital images often lack—soft gradients, subtle grain, and muted colors that evoke emotion and memory. When applied to wedding photos, this aesthetic can transform ordinary shots into artistic keepsakes. The key is to mimic the characteristics of film without making the edits look artificial or overdone.

Why Couples Love the Film Look

The film aesthetic appeals to couples because it feels authentic and enduring. Unlike overly polished digital images, film-inspired photos have a raw, emotional quality that captures the genuine moments of the day. The softness, grain, and color shifts also add a sense of nostalgia, as if the images were pulled from a cherished family album.

Key Elements of a Film-Inspired Edit

To achieve a convincing film look, focus on these core elements:

  • Color Grading: Film often has a unique color palette, with slightly muted tones and a warm or cool bias depending on the stock.
  • Grain and Texture: Film has a natural grain structure that adds depth and character to images.
  • Contrast and Highlights: Film tends to handle highlights differently, with a softer roll-off and less harsh shadows.
  • Vignetting: Subtle darkening around the edges can draw the viewer’s eye to the center of the image, mimicking the natural fall-off of light in film.

Adjusting Color Grading for a Film-Inspired Look

Color grading is the most critical step in creating a film aesthetic. The goal is to shift the colors away from the bright, clinical look of digital and toward a more organic, muted palette.

Creating a Warm, Nostalgic Tone

Many film stocks, especially those from the 1970s and 1980s, have a warm, golden hue. To replicate this:

  • White Balance: Slightly warm the white balance by adjusting the temperature slider toward yellow/orange. Avoid making it too extreme, as this can look unnatural.
  • Color Sliders: Reduce the saturation of bright colors like blues and greens, while boosting the warmth in reds and yellows. This creates a more balanced, vintage feel.
  • Split Toning: Add a subtle warm tone to the highlights (e.g., a light gold) and a cooler tone to the shadows (e.g., a soft blue-gray). This mimics the way film reacts to different light intensities.

Muting Bright Colors for a Timeless Feel

Film rarely has the hyper-saturated colors seen in modern digital photos. To soften the palette:

  • Lower Saturation: Reduce the overall saturation slightly, then fine-tune individual colors. For example, tone down the vibrancy of greens in foliage or blues in the sky.
  • Desaturate Highlights: Use a selective adjustment tool to desaturate the brightest parts of the image, such as white dresses or sunny skies. This prevents harsh, overexposed looks and creates a more cohesive tone.
  • Add a Tint: Some film stocks have a slight color cast, like a faint pink or green tint. Experiment with adding a subtle tint to the midtones for an authentic touch.

Adding Grain and Texture for Authenticity

Grain is a hallmark of film photography, adding a tactile quality that digital images often lack. The key is to apply it in a way that looks natural and enhances the mood.

Choosing the Right Grain Type

Not all grain is created equal. Fine-grain film (like Kodak Portra) has a smooth, subtle texture, while high-speed film (like Ilford Delta 3200) has a more pronounced, gritty grain. For wedding photos, a medium or fine grain usually works best, as it adds character without overwhelming the image.

Applying Grain Subtly

When adding grain in post-processing:

  • Start Low: Begin with a low opacity (around 5-10%) and gradually increase it until it’s noticeable but not distracting.
  • Uniform Distribution: Ensure the grain is evenly applied across the image, including in the shadows and highlights.
  • Match the Lighting: Grain tends to be more visible in darker areas, so adjust the settings to mimic this natural behavior.

Enhancing Texture with Clarity and Dehazing

In addition to grain, film has a unique texture that comes from its chemical composition. To replicate this:

  • Clarity: Use a subtle clarity adjustment to add midtone contrast without making the image look harsh. This enhances the perception of texture.
  • Dehazing: A light dehaze adjustment can add depth and richness to the colors, similar to how film renders tones. Be careful not to overdo it, as this can create an artificial look.

Fine-Tuning Contrast and Highlights for a Film-Like Feel

Film handles contrast differently than digital sensors, with softer transitions between light and dark areas. Adjusting these elements is crucial for achieving an authentic film look.

Softening the Contrast

Digital images often have high contrast, with deep blacks and bright whites. To soften this:

  • Lower Contrast: Reduce the overall contrast slightly to create a more gentle tonal range.
  • Adjust Blacks and Whites: Bring down the blacks slightly to avoid deep, inky shadows, and reduce the whites to prevent harsh overexposure. This creates a flatter, more film-like base.
  • Use Curves: A subtle S-curve in the tone curve panel can add a touch of contrast without making the image look digital. Focus on the midtones for a natural effect.

Managing Highlights for a Dreamy Effect

Film highlights tend to bloom and roll off softly, rather than clipping abruptly. To replicate this:

  • Highlight Recovery: If the image has overexposed areas, use the highlight slider to recover detail without making the highlights look flat.
  • Add Bloom: Some film stocks have a slight glow in the highlights, especially in backlit shots. Use a radial filter or brush tool to add a soft, warm glow to bright areas like the bride’s veil or the groom’s suit.
  • Reduce Clarity in Highlights: Applying negative clarity to the brightest parts of the image can create a soft, ethereal effect, similar to how film renders light.

Incorporating Vignetting for a Classic Film Frame

Vignetting—the darkening of the edges of an image—is a common feature in film photography, especially with older lenses or certain film stocks. When used subtly, it can enhance the mood and focus the viewer’s attention on the couple.

Natural-Looking Vignetting Techniques

To avoid an obvious, artificial vignette:

  • Start Soft: Use a low feather setting and a gentle opacity (around 10-15%) to create a subtle, natural fall-off.
  • Match the Lighting: Adjust the vignette’s shape and size to mimic how light naturally fades at the edges of a frame. For example, a wider vignette works better for landscape-oriented shots, while a tighter one suits portraits.
  • Add Midtone Darkening: Instead of just darkening the edges, try reducing the exposure or brightness in the midtones of the vignette area. This creates a more organic transition between the center and the edges.

Using Vignetting to Enhance Composition

Vignetting can also be used strategically to improve the composition:

  • Draw Attention to the Subject: Place the vignette’s center slightly off-center to align with the couple’s position in the frame, guiding the viewer’s eye naturally.
  • Balance Bright Areas: If the image has a bright sky or window in the background, a vignette can help balance the exposure and prevent the viewer’s attention from drifting away from the couple.
  • Create Mood: A stronger vignette can add drama or intimacy to the image, depending on the overall tone of the wedding. Use it sparingly to avoid overwhelming the photo.

Final Touches for a Cohesive Film-Inspired Album

Once the individual edits are complete, review the entire album to ensure consistency in style and tone.

Consistent Color Grading

Make sure all images share a similar color palette, even if they were taken in different lighting conditions. This creates a cohesive look throughout the album.

Balanced Grain and Texture

Check that the grain and texture adjustments are uniform across all photos. Some images may need slightly more or less grain depending on their composition, but the overall effect should feel consistent.

Natural-Looking Edits

Step back and view the images as a whole to ensure the edits don’t look forced or artificial. The goal is to enhance the photos’ natural beauty, not to create a heavy-handed, stylized look.

By focusing on these elements—color grading, grain and texture, contrast and highlights, and vignetting—you can transform Melbourne wedding photos into timeless, film-inspired masterpieces that couples will treasure forever.

DSC06223

Melbourne Wedding Photography: Creative Shooting with Hand-Holding and Reflections

Capturing Romance Through Reflections: Creative Hand-Holding Wedding Photography in Melbourne

Wedding photography is all about telling a couple’s love story through unique, meaningful images. One way to add a touch of magic and creativity is by incorporating hand-holding reflections into the shoot. Melbourne’s diverse landscapes—from serene lakes to urban waterways—provide the perfect backdrop for this artistic approach, allowing couples to create memories that feel both intimate and extraordinary.

wedding photography melbourne

The Art of Hand-Holding Reflections in Wedding Photography

Reflections add depth and symbolism to wedding photos, representing the couple’s connection and the mirroring of their lives together. When combined with the simple yet powerful gesture of holding hands, these images become timeless expressions of love. The key is to find locations with reflective surfaces—such as water, mirrors, or glass—and use them to enhance the composition.

Why Reflections Add Emotional Depth

Reflections create a sense of duality, showing both the real and the mirrored image. This can symbolize the couple’s journey together, where their individual selves come together to form something new. The act of holding hands in a reflection also adds a layer of tenderness, as if the couple is reaching out to each other across both worlds. For viewers, these images evoke a feeling of warmth and connection, making them truly unforgettable.

Choosing the Right Location for Reflection Photography

Melbourne offers a variety of settings that lend themselves beautifully to reflection shots. The key is to look for calm, still water or smooth surfaces that can clearly mirror the couple’s image.

Natural Water Bodies

Lakes, ponds, and slow-moving rivers are ideal for reflection photography. The stillness of the water ensures a crisp, clear mirror image, while the natural surroundings add a romantic, timeless feel. Early mornings or late afternoons are often the best times, as the light is softer and the wind is minimal, reducing ripples on the water’s surface.

Urban Water Features

Fountains, pools, or even rain puddles in the city can provide unexpected opportunities for reflection shots. These settings add a modern, urban twist to the concept, blending the couple’s love story with Melbourne’s vibrant energy. The contrast between the hard lines of the city and the softness of the reflection creates a visually striking image.

Architectural Glass and Mirrors

Some venues or public spaces feature large glass windows or mirrors that can be used creatively. For example, a couple holding hands in front of a floor-to-ceiling window might see their reflection merge with the view outside, creating a beautiful blend of interior and exterior. Similarly, mirrors in historic buildings or modern art installations can add an artistic, reflective layer to the photos.

Posing Ideas for Hand-Holding Reflection Shots

The way a couple holds hands and positions themselves can greatly influence the mood of the reflection shot. Here are some posing ideas to inspire natural, heartfelt images:

The Classic Side-by-Side Hold

Have the couple stand close together, facing the same direction, and hold hands gently. Their reflection will mirror their posture, creating a symmetrical, harmonious image. This pose works well in front of a large body of water or a long mirror, emphasizing the unity and balance of their relationship.

The Intertwined Fingers Pose

For a more intimate feel, ask the couple to intertwine their fingers while holding hands. This gesture symbolizes closeness and trust, and the reflection will amplify this emotion. Capture the shot from a low angle to include both the couple and their mirrored image, creating a sense of depth and connection.

The Walking Hand-in-Hand Shot

Have the couple walk slowly along the edge of a reflective surface, such as a pond or a wet sidewalk, while holding hands. The movement will create a subtle blur in the reflection, adding a dreamy, ethereal quality to the image. Shoot from behind or at an angle to capture the flow of their outfits and the rippling reflection.

The Forehead-to-Forehead Hold with Reflection

For a deeply romantic moment, have the couple stand very close, almost touching foreheads, while holding hands. Their reflection will show this tender gesture, creating a double image of closeness and love. This pose works best in calm water or a large mirror, where the reflection is clear and undisturbed.

The Playful Splash Reflection

If shooting near a shallow pool or puddle, encourage the couple to gently splash the water with their free hand while holding hands with the other. The ripples will distort the reflection, creating a fun, artistic effect. This pose adds a sense of spontaneity and joy, capturing the couple’s playful side.

The Silhouette Reflection

For a dramatic, artistic shot, position the couple so their silhouette is reflected in the water or a dark surface. The lack of detail in the silhouette allows the viewer to focus on the shape and gesture of the hand-holding, while the reflection adds an extra layer of mystery. This technique works best during sunset or in low-light conditions.

Lighting Techniques for Stunning Reflection Shots

Lighting plays a crucial role in reflection photography, as it affects both the clarity of the mirror image and the overall mood of the photo.

Golden Hour Magic

The soft, warm light of golden hour—shortly after sunrise or before sunset—is ideal for reflection shots. The low angle of the sun creates long shadows and a golden glow, enhancing the romantic feel of the images. The light also reflects beautifully off the water, creating a shimmering effect that adds to the magic.

Backlighting for Drama

Positioning the couple so the light comes from behind them can create a stunning silhouette effect in the reflection. The outline of their bodies and the gesture of holding hands will stand out against the bright background, creating a bold, artistic image. This technique works well near water or large windows, where the light can bounce off the reflective surface.

Diffused Light for Softness

On an overcast day, the diffused light creates a soft, even illumination that minimizes harsh shadows and highlights. This is perfect for reflection shots, as it ensures the mirror image is clear and well-defined. The lack of strong sunlight also allows for more flexibility in posing, as the couple won’t need to squint or shield their eyes.

Using Reflectors to Enhance Light

If the natural light is too dim or uneven, a reflector can help bounce light onto the couple’s faces and hands, ensuring they are well-lit in the reflection. A white or silver reflector works best, as it provides a neutral, natural-looking boost of light without altering the color temperature.

Melbourne’s Top Spots for Hand-Holding Reflection Wedding Shoots

Melbourne’s unique blend of natural beauty and urban charm offers countless opportunities for creative reflection photography. Here are some top locations to consider:

Albert Park Lake

This serene lake is surrounded by gardens and walking paths, providing a peaceful setting for reflection shots. The calm waters of the lake create perfect mirror images, especially in the early morning or late afternoon. The couple can stroll along the edge, hold hands, and capture their reflection against the backdrop of the city skyline or the lush greenery.

St Kilda Pier

The long wooden pier at St Kilda extends into Port Phillip Bay, offering stunning views and reflective opportunities. The couple can stand at the end of the pier, holding hands, and look out at the water. Their reflection will merge with the horizon, creating a beautiful blend of sky, sea, and love. The pier’s iconic structure also adds a sense of place to the images.

Federation Square

For an urban twist on reflection photography, Federation Square’s modern architecture provides interesting surfaces and angles. The large glass windows and geometric designs can create unique reflections, especially when combined with the couple’s hand-holding gesture. The bustling atmosphere of the square also adds energy and vibrancy to the photos.

Royal Botanic Gardens Victoria

The gardens’ tranquil ponds and fountains offer a natural, romantic setting for reflection shots. The couple can sit by the water’s edge, hold hands, and watch their reflection ripple gently in the breeze. The surrounding flowers and trees add color and texture, creating a picturesque backdrop for their love story.

Southbank Promenade

Along the Yarra River, the Southbank Promenade features a mix of water, city views, and modern architecture. The couple can walk along the riverbank, hold hands, and capture their reflection in the calm waters. The reflections of the buildings and bridges create a dynamic, urban backdrop that contrasts beautifully with the couple’s intimate moment.

Brighton Beach Bathing Boxes

The colorful bathing boxes at Brighton Beach are not only visually striking but also offer reflective opportunities. The couple can stand in front of a brightly painted box, hold hands, and capture their reflection in the wet sand or a shallow puddle. The vibrant colors and playful setting add a cheerful, lighthearted feel to the images.

Enhancing Reflection Shots with Creative Details

To make the hand-holding reflection photos truly stand out, pay attention to the small elements that add context and character.

The Couple’s Expression and Connection

Focus on capturing genuine emotions—whether it’s a smile, a laugh, or a quiet, loving glance. The way the couple holds hands and interacts with each other will reflect their personality and relationship. Encourage them to think about their journey together or the future they’re building, as these thoughts will naturally show on their faces.

The Reflection’s Clarity and Detail

Zoom in on the reflection itself, capturing the subtle details of the couple’s hands, the ripples in the water, or the reflection of the surroundings. These close-ups add depth and interest to the album, grounding the images in their reflective concept.

The Surrounding Environment

Include elements of the location in the frame, even if they’re subtle. A seagull flying overhead, a distant landmark, or a ray of sunlight can all enhance the mood and tell a more complete story. These details help connect the reflection to the real world, creating a sense of place and context.

Accessories and Outfit Coordination

Ensure the couple’s outfits and accessories complement the reflective setting. For example, flowing fabrics or light colors can create beautiful movements and reflections in the water, while bold patterns or textures can add visual interest to urban reflection shots. Delicate jewelry or a boutonniere can also catch the light and add a touch of sparkle to the reflection.

Post-Processing Tips for Reflection Wedding Photos

Edit these photos to emphasize their romantic, artistic feel. Adjust the white balance to ensure the colors look natural and balanced, with a slight boost in warm tones if shooting during golden hour.

  • Enhancing Clarity: Use a sharpening tool to bring out the details in the reflection, such as the texture of the water or the couple’s hands. Be subtle to avoid making the image look overly processed.
  • Adjusting Contrast and Saturation: Lower the contrast slightly to create a softer, more dreamy look. Reduce the saturation of overly bright colors to keep the palette balanced and natural, especially if the reflection includes vibrant elements like the bathing boxes at Brighton Beach.
  • Adding a Vignette (Optional): A light vignette can help draw the viewer’s eye to the center of the image, where the couple and their reflection are the main focus. This technique adds a sense of intimacy and depth to the photos.
  • Balancing Exposure: If the reflection is darker than the real image, use the exposure tool to brighten it slightly, ensuring both are visible and well-balanced. Conversely, if the reflection is too bright, reduce the exposure to create a more harmonious composition.

Creating Timeless Memories with Hand-Holding Reflections

A hand-holding reflection wedding shoot in Melbourne is more than just a photography session—it’s a celebration of love, connection, and the beauty of shared moments. By focusing on natural poses, meaningful details, and a creative use of reflections, you can create photos that the couple will cherish for a lifetime. Whether they’re walking hand-in-hand along the river, sitting by a tranquil lake, or standing in front of a colorful bathing box, these images will capture the essence of their love story with elegance and artistry.