wedding photography melbourne

Melbourne wedding photography – soft and elegant atmosphere shooting with hats

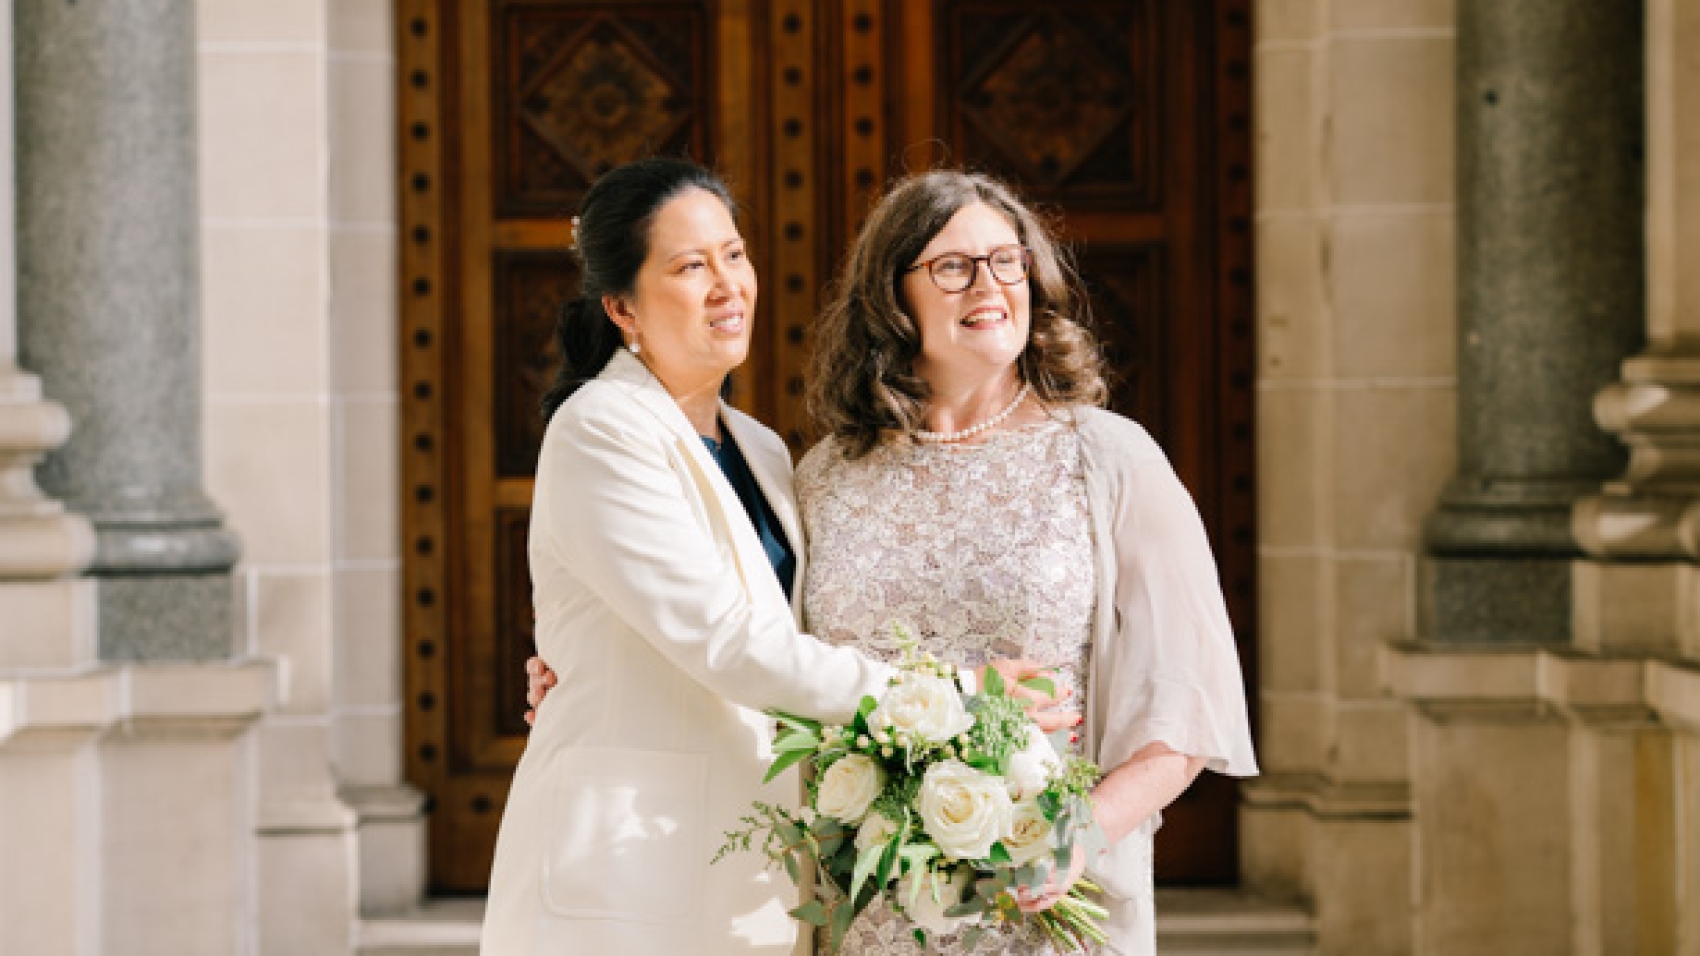
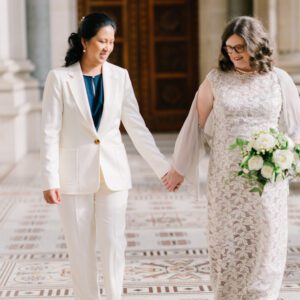
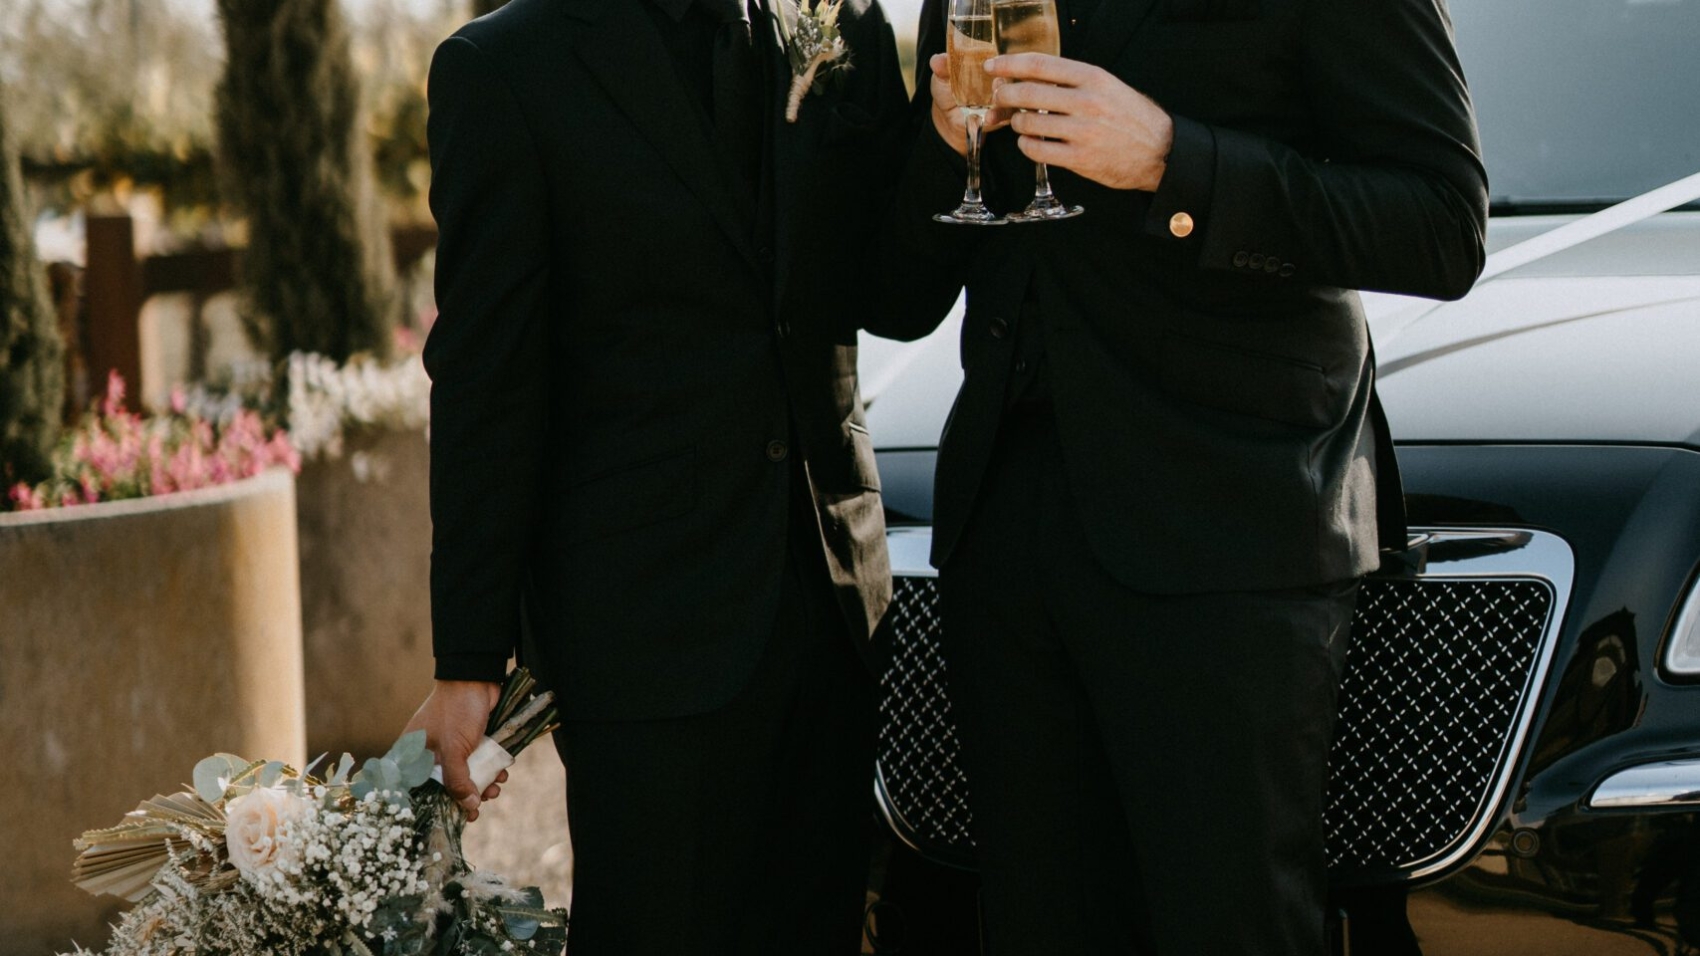
Capturing Elegance: Hat-Enhanced Atmospheric Wedding Photography in Melbourne

Wedding photography thrives on creating images that feel both timeless and personal. For couples seeking a touch of sophistication and romance, incorporating hats into their Melbourne wedding shoot adds a layer of charm and atmosphere. Whether it’s a wide-brimmed sunhat, a delicate fascinator, or a vintage-inspired cloche, the right headpiece can elevate the mood and create unforgettable visuals.

wedding photography melbourne

The Allure of Hats in Wedding Photography

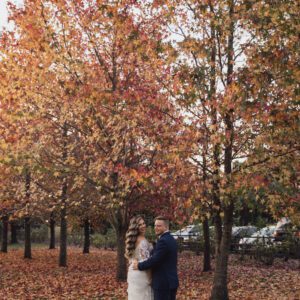
Hats have long been symbols of elegance and poise, making them a natural fit for wedding attire. In Melbourne’s diverse settings—from urban streets to lush gardens—a hat can add a sense of style and personality to the photos. The act of lightly adjusting or holding a hat also creates natural, graceful movements that photographers can capture beautifully.

Why Hats Add Atmosphere

A hat can instantly transform a look, adding a hint of mystery or whimsy depending on its design. It frames the face, draws attention to the eyes, and creates interesting shadows and lines. In photography, these elements translate to depth and texture, making the images more visually engaging. For couples, wearing a hat can also boost confidence, helping them feel more poised and relaxed in front of the camera.

Choosing the Right Hat for the Setting

The hat’s style should complement the location and the couple’s overall aesthetic. For a beach wedding, a wide-brimmed straw hat feels breezy and romantic, while a structured felt hat suits a city or garden setting. Delicate lace or floral details work well for vintage-themed shoots, and bold colors or patterns can add a playful touch to modern styles. The key is to ensure the hat feels like a natural extension of the outfit, not an afterthought.

Lighting Considerations for Hat Photography

Hats can cast shadows on the face, so lighting is crucial. Soft, diffused light—such as that found during golden hour or on an overcast day—works best, as it minimizes harsh shadows and highlights the hat’s texture. If shooting in bright sunlight, position the couple so the light comes from the side or behind, creating a gentle glow around the hat’s edges. Reflectors can also help bounce light onto the face to balance the exposure.

Posing Ideas for Hat-Enhanced Elegance

The way a couple interacts with their hats can create a range of moods, from playful to serene. Here are some posing ideas to inspire natural, atmospheric shots:

The Gentle Adjustment

Have the couple lightly touch or adjust their hats, whether it’s a flick of the brim or a subtle tilt. This movement feels organic and adds a sense of casual elegance. Capture the moment from different angles—close-ups to highlight the hands and hat, or wider shots to show the full outfit and setting.

The Shared Glance

Ask the couple to stand close together, with one person holding their hat while the other looks on. The shared glance can convey intimacy and connection, while the hat adds a focal point. This pose works well for both serious and lighthearted expressions, depending on the couple’s vibe.

The Walking Shot with Hat

For a dynamic feel, have the couple walk slowly while holding or wearing their hats. The movement of the hat in the breeze—whether it’s a straw brim swaying or a ribbon fluttering—adds energy to the image. Shoot from behind or at an angle to capture the flow of their outfits and the hat’s silhouette against the background.

The Hat as a Prop for Interaction

Encourage the couple to use their hats in playful ways, such as passing it back and forth, placing it on each other’s heads, or holding it between them. These interactions create candid, joyful moments that feel authentic and unposed. The hat becomes a tool for connection, making the photos more engaging.

The Quiet Moment with Hat

For a more contemplative mood, have the couple stand still, wearing their hats, and gaze into the distance or at each other. The hat adds a layer of mystery, as if they’re lost in thought or sharing a private moment. This pose works beautifully in serene settings like gardens or parks, where the natural surroundings enhance the atmosphere.

The Backlit Hat Silhouette

If shooting during sunset or in a spot with strong backlighting, position the couple so the light shines from behind, creating a silhouette effect. The outline of the hat against the bright sky or water adds drama and artistry to the image. This technique works best with hats that have distinct shapes, such as wide brims or tall crowns.

Melbourne’s Best Locations for Hat-Themed Wedding Shoots

Melbourne’s eclectic mix of urban and natural settings provides the perfect backdrop for hat-enhanced photography. Here are some top spots to consider:

Royal Botanic Gardens Victoria

With its lush greenery, winding paths, and serene lakes, the Botanic Gardens offer a romantic, timeless setting. The couple can stroll through the flowerbeds, sit by the water, or pose under a canopy of trees. The natural beauty of the gardens complements the elegance of the hats, creating a harmonious blend of style and scenery.

St Kilda Esplanade

For a mix of urban charm and coastal vibes, St Kilda is ideal. The pier, palm trees, and colorful promenade provide a lively backdrop. The couple can walk along the boardwalk, sit on the grassy areas, or pose near the iconic Luna Park entrance. The energy of the area adds a modern, youthful feel to the hat-themed photos.

Fitzroy Gardens

Known for its historic trees, fountains, and manicured lawns, Fitzroy Gardens exude classic elegance. The couple can pose near the Cook’s Cottage or under the shade of a large tree, with the hat adding a touch of sophistication to the scene. The gardens’ tranquil atmosphere lends itself to quiet, intimate moments.

Brighton Beach Bathing Boxes

The colorful bathing boxes at Brighton Beach provide a vibrant, cheerful setting for hat photography. The couple can stand in front of a brightly painted box, with the hat adding a pop of style to the colorful backdrop. The shallow waters and sandy beach also offer opportunities for walking shots or playful interactions with the hat.

Yarra River Walkways

For a cityscape with a touch of nature, the Yarra River walkways are perfect. The couple can stroll along the river, with the skyline in the background, or sit on a bench overlooking the water. The hat adds a focal point to the urban setting, creating a balance between modern and classic elements.

Dandenong Ranges

If the couple prefers a more rustic, natural setting, the Dandenong Ranges offer lush forests, ferns, and mountain views. The couple can pose on a wooden bridge, under a canopy of trees, or near a babbling brook. The hat’s texture and style will stand out against the earthy tones of the surroundings, creating a striking contrast.

Enhancing the Hat’s Role with Details

To make the hat-themed photos feel truly cohesive, pay attention to the small elements that add context and character.

The Couple’s Expression and Body Language

Focus on capturing genuine emotions—whether it’s a smile, a laugh, or a quiet, loving glance. The way the couple holds or interacts with their hats can reflect their personality and relationship. Encourage them to think about their connection or the day ahead, as these thoughts will naturally show on their faces.

The Hat’s Texture and Details

Zoom in on the hat’s material, such as the weave of straw, the sheen of satin, or the softness of felt. Capture close-ups of decorative elements like ribbons, flowers, or feathers. These details add depth and interest to the album, grounding the images in their hat-themed concept.

The Surrounding Environment

Include elements of the location in the frame, even if they’re subtle. A leaf floating in the air, a ray of sunlight, or a distant landmark can all enhance the mood. These details help tell the story of the day and make the photos feel more immersive.

Accessories and Outfit Coordination

Ensure the couple’s outfits and accessories complement the hat. For example, a straw hat pairs well with a flowing linen dress or a lightweight suit, while a felt hat suits a more structured outfit. Delicate jewelry, a boutonniere, or a clutch can also tie the look together, creating a cohesive, polished appearance.

Post-Processing Tips for Hat-Themed Photos

Edit these photos to emphasize their elegant, atmospheric feel. Adjust the white balance to ensure the colors look true to life, with a slight boost in warm tones if shooting during golden hour.

  • Softening the Image: Use a light touch of blur or grain to create a gentle, dreamy effect. Avoid overdoing it—the goal is to enhance the mood, not make the image look artificial.
  • Adjusting Contrast and Saturation: Lower the contrast slightly to create a softer look. Reduce the saturation of overly bright colors to keep the palette balanced and natural, especially if the hat has bold hues.
  • Enhancing Details: Use a sharpening tool to bring out the texture of the hat, such as the weave of straw or the stitching on a ribbon. Be subtle to avoid making the image look overly processed.
  • Adding a Vintage Filter (Optional): If the couple prefers a nostalgic feel, apply a light vintage filter to warm the tones and add a hint of sepia or faded color. This works well for hats with a classic or retro design.

Creating Unforgettable Hat-Themed Memories

A hat-enhanced wedding shoot in Melbourne is more than just a photography session—it’s a celebration of style, personality, and the beauty of the moment. By focusing on natural poses, meaningful details, and a cohesive aesthetic, you can create photos that the couple will cherish for a lifetime. Whether they’re adjusting their hats, sharing a laugh, or gazing into each other’s eyes, these images will capture the essence of their special day with elegance and grace.

DSC05822

Melbourne wedding photography: Casual shooting by the seaside with bare feet

Embrace the Freedom: Barefoot Beach Wedding Photography in Melbourne

Wedding photography thrives on capturing genuine emotions and spontaneous moments. For couples seeking a relaxed, natural aesthetic, a barefoot beach shoot in Melbourne offers the perfect blend of freedom and romance. The city’s stunning coastlines—from the rugged cliffs of the Mornington Peninsula to the serene shores of Port Phillip Bay—provide endless opportunities for intimate, unscripted photos.

wedding photography melbourne

The Magic of Barefoot Beach Photography

There’s something liberating about shedding shoes and feeling the sand between your toes. This simple act instantly creates a sense of ease, making couples more comfortable in front of the camera. Melbourne’s beaches, with their soft sand, gentle waves, and dramatic skies, amplify this feeling, allowing photographers to capture raw, heartfelt moments.

Why Choose a Barefoot Theme?

Barefoot beach photography strips away formality, focusing instead on the couple’s connection to each other and their surroundings. It’s ideal for those who want photos that feel authentic and unposed. The lack of footwear also adds a playful, carefree element—whether the couple is running along the shoreline, sharing a laugh, or simply standing still, the images will feel effortless and genuine.

Lighting and Timing for Perfect Shots

The best beach photos often rely on natural light. Early mornings or late afternoons—known as the golden hour—provide soft, warm tones that flatter skin and create a dreamy atmosphere. Overcast days can also work well, as they diffuse harsh sunlight and prevent strong shadows. If shooting during midday, look for shaded areas or use a reflector to balance the light.

Wardrobe Choices for Effortless Style

To keep the look cohesive, opt for lightweight, flowing fabrics that move with the breeze. Dresses with simple silhouettes or linen suits work beautifully, as they feel both elegant and relaxed. Avoid heavy materials or stiff designs, as they can look out of place against the natural backdrop. Accessories like straw hats, sunglasses, or delicate jewelry can add personality without overwhelming the scene.

Posing Ideas for Spontaneous Beach Moments

The key to barefoot beach photography is capturing movement and interaction. Encourage the couple to forget about perfect poses and focus on enjoying each other’s company. Here are some ideas to inspire natural, beautiful shots:

The Walking Shot

Have the couple stroll hand-in-hand along the water’s edge, letting the waves gently lap at their feet. Ask them to chat, laugh, or share a quiet moment together. The rhythm of their steps and the movement of the water will create a sense of flow in the photos. Shoot from different angles—behind, beside, or in front—to capture varied perspectives.

The Playful Splash

If the couple is comfortable with water, suggest they kick up sand or splash each other lightly. These candid moments add energy and fun to the album. For a softer approach, have them stand still as a wave washes over their feet, capturing the droplets in mid-air. This shot works best with a fast shutter speed to freeze the motion.

The Seated Embrace

Find a quiet spot on the beach where the couple can sit side by side, with their legs stretched out or tucked beneath them. Have them lean into each other, with one arm wrapped around the other’s shoulders. This pose feels intimate and relaxed, especially if the background is slightly blurred to draw attention to their faces.

The Back-to-Back Moment

For a more casual look, ask the couple to sit back-to-back in the sand, with their arms resting on their knees. This pose allows for a natural, unforced interaction, as they can turn their heads to smile at each other or gaze out at the ocean. The symmetry of their postures creates a visually pleasing composition.

The Quiet Contemplation

Sometimes the most powerful images come from stillness. Have the couple stand still, facing the ocean, with their arms around each other or hands clasped. This pose evokes a sense of peace and connection, as if they’re savoring the moment together. Shoot from a distance to include the vastness of the sea in the frame, emphasizing their place in the world.

Melbourne’s Best Beaches for Barefoot Wedding Photography

Melbourne’s coastline offers diverse settings for barefoot shoots, from wild and windswept to calm and secluded. Here are some top locations to consider:

Brighton Beach

Known for its colorful bathing boxes, Brighton Beach provides a vibrant backdrop for playful, cheerful photos. The couple can pose in front of a brightly painted box or sit on the steps leading down to the sand. The shallow waters here are ideal for walking shots, and the boxes add a unique, iconic touch to the images.

St Kilda Beach

For a lively, urban beach vibe, St Kilda is hard to beat. The pier, palm trees, and bustling promenade create a dynamic setting. The couple can stroll along the boardwalk, sit by the water’s edge, or even pose with the iconic Luna Park entrance in the background. The energy of the area adds a modern, youthful feel to the photos.

Mornington Peninsula Beaches

If you’re looking for a more rugged, natural setting, the beaches of the Mornington Peninsula are perfect. Locations like Sorrento Back Beach or Flinders Beach offer dramatic cliffs, rocky outcrops, and wild waves. The couple can explore the terrain together, with the photographer capturing their sense of adventure and discovery.

Half Moon Bay

This sheltered bay features calm waters and soft sand, making it ideal for serene, intimate shots. The couple can wade into the shallow water, sit on the beach, or even pose near the historic Black Rock Yacht Club. The peaceful atmosphere here lends itself to quiet, emotional moments.

Williamstown Beach

With its historic pier and views of the city skyline, Williamstown Beach offers a mix of natural beauty and urban charm. The couple can stand on the pier, sit on the grassy areas, or walk along the shoreline. The juxtaposition of the ocean and the city creates a visually interesting backdrop for the photos.

Enhancing the Beach Vibe with Details

To make the photos feel truly authentic, pay attention to the small elements that add context and character.

The Couple’s Interaction

Focus on capturing genuine emotions—whether it’s a smile, a laugh, or a quiet, loving glance. Encourage the couple to think about their relationship or the future they’re building together. These thoughts will naturally show on their faces, making the photos more heartfelt.

The Sand and Water Details

Zoom in on the texture of the sand, the ripples in the water, or the way the light reflects off the surface. These close-up shots add depth and interest to the album, grounding the images in their beach setting.

The Surrounding Environment

Include elements of the beach in the frame, even if they’re subtle. A seagull flying overhead, a driftwood log, or a patch of seaweed can all enhance the mood. These details help tell the story of the day and make the photos feel more immersive.

Props and Accessories

Consider adding beach-inspired props like a woven basket, a bouquet of wildflowers, or a blanket to sit on. These items can be held by the couple or placed nearby to add context and charm. Keep the props minimal to avoid cluttering the scene.

Post-Processing Tips for Beach Photos

Edit these photos to emphasize their natural, airy feel. Adjust the white balance to ensure the colors look true to life, with a slight boost in blues and greens to enhance the ocean and sky.

  • Softening the Image: Use a light touch of blur or grain to create a gentle, dreamy effect. Avoid overdoing it—the goal is to enhance the mood, not make the image look artificial.
  • Adjusting Contrast and Saturation: Lower the contrast slightly to create a softer look. Reduce the saturation of overly bright colors to keep the palette balanced and natural.
  • Adding a Sunset Glow: If shooting during golden hour, enhance the warm tones in the sky and water to create a magical, romantic feel. Use a gradient filter to apply the effect selectively, avoiding the couple’s skin tones.

Creating Timeless Beach Memories

A barefoot beach wedding shoot in Melbourne is more than just a photography session—it’s a celebration of love, freedom, and the beauty of nature. By focusing on natural poses, meaningful details, and a cohesive aesthetic, you can create photos that the couple will cherish for a lifetime. Whether they’re running along the shore, sharing a quiet moment, or laughing in the waves, these images will capture the essence of their special day.

DSC05679

Melbourne wedding photography: Retro shooting with coats and embraces

Embracing Timeless Romance: Vintage-Inspired Wedding Photography in Melbourne with Coats

Wedding photography is about freezing moments that feel both personal and universal. One of the most charming ways to achieve this is through a vintage-inspired shoot where the couple wraps themselves in cozy coats, evoking a sense of nostalgia and warmth. Melbourne’s mix of historic architecture, leafy parks, and moody weather creates the perfect backdrop for this style, allowing photographers to craft images that feel both timeless and intimate.

wedding photography melbourne

The Allure of Vintage-Inspired Coat Embraces

There’s something inherently romantic about a couple holding each other close, wrapped in oversized coats. The gesture feels protective, tender, and slightly old-fashioned—like a scene from a classic film. This style works well in Melbourne because the city’s cooler seasons and varied landscapes lend themselves to layered, textured outfits. Whether the couple is strolling through a cobblestone alley or standing by a misty lake, the coats add depth and character to the photos.

Why This Theme Resonates

Vintage aesthetics often carry a sense of elegance and simplicity. By focusing on coats, the shoot emphasizes comfort and connection over elaborate poses or props. The couple’s body language becomes the focal point, with their embrace conveying love, trust, and shared warmth. This approach also allows for creativity in styling—think tweed, wool, or faux fur in muted tones like beige, gray, or deep burgundy.

Lighting and Mood Setting

To enhance the vintage feel, opt for soft, diffused lighting. Overcast skies or the golden hour work best, as they create a gentle, flattering glow without harsh shadows. If shooting indoors, use warm-toned lamps or candles to add a cozy ambiance. The goal is to make the images feel inviting and slightly dreamy, as if they’ve been pulled from a forgotten photo album.

Choosing the Right Coats

The coats themselves should complement the couple’s personalities and the setting. For a classic look, choose long, tailored overcoats in neutral colors. For a more bohemian vibe, try textured fabrics like herringbone or plaid. The key is to ensure the coats fit well—not too tight or too loose—so the couple can move naturally while staying warm.

Posing Ideas for Authentic Vintage Moments

The best vintage-inspired photos feel unposed and genuine. Encourage the couple to interact naturally, using the coats as a way to deepen their connection. Here are some posing ideas to try:

The Classic Cuddle

Have the couple stand facing each other, wrapped in their coats, with their foreheads touching. Ask them to close their eyes and breathe deeply, focusing on the feeling of being close. This pose highlights their facial expressions and the way the coats drape around them. For variation, shoot from a slightly lower angle to emphasize their height difference or the texture of the fabric.

The Walking Shot

Capture the couple strolling hand-in-hand through a historic street or park. The movement of their coats as they walk adds dynamism to the photo. To make this shot feel more candid, ask them to chat quietly or laugh about a shared memory. Shoot from behind or at a slight angle to show the setting and their body language.

The Seated Embrace

Find a bench, staircase, or stone wall where the couple can sit side by side. Have them lean into each other, with one arm wrapped around the other’s shoulders and the other hand holding the coat closed. This pose feels relaxed and intimate, especially if the background is slightly blurred to draw attention to their faces.

The Playful Interaction

Not every moment has to be serious. Encourage the couple to play with their coats—adjust a collar, tug on a sleeve, or pretend to “hide” behind the fabric. These small gestures add personality to the photos and make them feel more lively. Shoot from different distances to capture both close-up details and full-body shots.

The Quiet Moment

Sometimes the most powerful images come from stillness. Have the couple stand still, wrapped in their coats, and look off into the distance. This could be at a scenic overlook, by a body of water, or in front of a historic building. The lack of movement creates a sense of contemplation, as if they’re savoring the moment together.

Melbourne’s Top Locations for Vintage Coat Photography

Melbourne’s diverse neighborhoods and landscapes offer endless opportunities for vintage-inspired shoots. Here are some of the best settings to consider:

Historic Streets and Laneways

Areas like Degraves Street, Hosier Lane, or Block Arcade provide a charming backdrop with their cobblestone paths, wrought-iron details, and vintage signage. The couple can walk hand-in-hand or pause by a historic shopfront, with the coats adding a touch of old-world elegance.

Botanical Gardens and Parks

Venues like the Royal Botanic Gardens or Fitzroy Gardens offer lush greenery and quiet corners perfect for intimate shots. The couple can sit on a bench surrounded by trees or stroll along a path lined with autumn leaves. The natural light filtering through the foliage creates a soft, romantic glow.

Waterfront Locations

The Yarra River, St Kilda Beach, or Williamstown Pier provide a moody, atmospheric setting for vintage photography. The couple can stand by the water’s edge, with the coats fluttering slightly in the breeze. The reflection of the sky or the city lights in the water adds depth to the composition.

Urban Rooftops or Terraces

For a more modern take on vintage, consider shooting on a rooftop or terrace with a view of the city skyline. The couple can lean against a railing or sit on a vintage-style couch, with the coats adding texture and warmth. The contrast between the urban setting and the classic outfits creates visual interest.

Heritage Buildings and Mansions

Locations like Como House, Rippon Lea Estate, or the Melbourne Museum offer grand architecture and period details that complement vintage styling. The couple can pose on a staircase, by a fireplace, or in a sunlit room, with the coats adding a layer of coziness to the opulent surroundings.

Enhancing the Vintage Vibe with Details

To make the photos feel truly authentic, pay attention to the small elements that add context and character.

The Couple’s Expressions

Focus on capturing genuine emotions—whether it’s a smile, a laugh, or a quiet, loving glance. Encourage the couple to think about their relationship or the future they’re building together. These thoughts will naturally show on their faces, making the photos more heartfelt.

The Coats’ Details

Zoom in on the fabric’s texture, the buttons, or the way the light hits the material. If the coats have unique features like fur collars or patch pockets, highlight those in the photos. These close-up shots add depth and interest to the album.

The Surrounding Environment

Include elements of the setting in the frame, even if they’re subtle. A patch of sunlight on the ground, a rustling leaf, or a distant sound of traffic can all enhance the mood. These details help tell the story of the day and make the photos feel more immersive.

Props and Accessories

Consider adding vintage-inspired props like an old-fashioned camera, a leather-bound journal, or a bouquet of dried flowers. These items can be held by the couple or placed nearby to add context and charm. Keep the props minimal to avoid cluttering the scene.

Post-Processing Tips for Vintage-Inspired Photos

Edit these photos to emphasize their nostalgic, timeless feel. Adjust the white balance to ensure the colors look natural, with a slight warmth to mimic old film.

  • Softening the Image: Use a subtle blur or grain effect to give the photos a vintage texture. Avoid overdoing it—the goal is to enhance the mood, not make the image look artificial.
  • Adjusting Contrast and Saturation: Lower the contrast slightly to create a softer, more dreamy look. Reduce the saturation of bright colors to keep the palette muted and elegant.
  • Adding a Vignette: Darken the edges of the frame to draw attention to the center, where the couple is positioned. This creates a cozy, intimate feel reminiscent of old photographs.

Creating Unforgettable Vintage Memories

A vintage-inspired wedding shoot with coats is more than just a photography trend—it’s a way to capture the couple’s love in a style that feels both personal and timeless. Melbourne’s unique settings provide the perfect canvas for this theme, allowing photographers to craft images that evoke warmth, nostalgia, and romance. By focusing on natural poses, meaningful details, and a cohesive aesthetic, you can create photos that the couple will cherish for years to come.

DSC05623

Melbourne wedding photography: Soft and gentle bouquet sniffing shot

Capturing the Tender Moment: Sniffing the Bridal Bouquet in Melbourne Wedding Photography

Wedding photography thrives on capturing genuine emotions, and few moments are as delicate as a bride gently holding her bouquet close and taking in its fragrance. This simple, intimate gesture speaks volumes about love, anticipation, and the beauty of the day. In Melbourne, with its mix of lush gardens, historic venues, and modern urban settings, photographers have endless opportunities to frame this tender moment in a way that feels both timeless and personal.

wedding photography melbourne

The Emotional Power of the Bouquet Sniff

A bride’s bouquet is more than just a floral arrangement—it’s a symbol of her style, personality, and the love she shares with her partner. When she pauses to smell its blooms, her expression softens, revealing a mix of joy, nostalgia, and quiet excitement. This moment is perfect for photography because it feels unscripted yet deeply meaningful.

Why This Moment Matters

The act of smelling the bouquet connects the bride to her surroundings and her emotions. It’s a pause in the whirlwind of the wedding day, a chance to breathe and reflect. For photographers, capturing this allows them to tell a story beyond just posed shots. It adds depth to the wedding album, showing the bride’s vulnerability and happiness in equal measure.

Lighting and Composition Tips

To make this moment shine, focus on soft, natural lighting. Position the bride near a window or in a shaded outdoor area where the light wraps around her gently. Avoid harsh shadows or overly bright spots that could distract from her expression. For composition, try a close-up shot of her face and the bouquet, or step back slightly to include her hands and the flowers in full.

Choosing the Right Bouquet Style

While the focus is on the bride’s interaction with the bouquet, the arrangement itself plays a role in the photo’s mood. Soft pastels like blush pink, lavender, or ivory create a romantic, dreamy feel. Bold colors like deep red or sunflower yellow add energy and warmth. The shape matters too—a round, compact bouquet feels classic, while a cascading or loose arrangement feels more whimsical.

Posing Techniques for Natural-Looking Bouquet Sniff Shots

The key to capturing this moment authentically is keeping the bride relaxed. Encourage her to hold the bouquet close to her nose, not too tightly, and to breathe deeply as if savoring the scent. Here are some posing ideas to try:

The Classic Close-Up

Have the bride stand or sit facing the camera, holding the bouquet just below her chin. Ask her to close her eyes briefly and take a slow, deep breath. This pose highlights her facial features and the details of the flowers. For a softer look, shoot from a slightly lower angle to emphasize her expression.

The Side Profile Shot

Position the bride so her side is to the camera, with the bouquet held near her face. This angle shows the curve of her neck and the shape of the flowers without making her feel self-conscious. It’s also a great way to capture the texture of her dress or the backdrop behind her.

The Playful Interaction

If the bride feels comfortable, suggest she play with the bouquet a bit—tuck a flower behind her ear, adjust a ribbon, or gently shake the stems. These small movements add life to the photo and make it feel more candid. Shoot from different angles to catch her laughter or a smile as she interacts with the flowers.

The Quiet Moment

Not every bouquet sniff has to be loud or energetic. Sometimes the most powerful images come from quiet reflection. Have the bride sit on a bench or stand near a tree, holding the bouquet close to her chest. Ask her to look down at the flowers or off into the distance, lost in thought. This creates a serene, contemplative mood.

Melbourne’s Best Settings for Bouquet Sniff Photography

Melbourne’s diverse landscapes offer countless backdrops for this type of shot. From botanical gardens to hidden courtyards, each location adds its own flavor to the photos.

Lush Gardens and Parks

Venues like the Royal Botanic Gardens or Fitzroy Gardens provide a natural, green setting perfect for bouquet shots. The bride can stand among blooming flowers or sit on a bench surrounded by foliage. The soft light filtering through the trees adds a magical touch to the photos.

Historic Venues with Character

For a timeless, elegant feel, consider shooting at a historic venue like Como House or the Melbourne Museum. These locations often have grand staircases, ornate windows, or antique furniture that complement the bouquet’s beauty. The bride can lean against a stone wall or sit on a velvet chair, holding the flowers close.

Urban Streets and Laneways

Melbourne’s laneways are full of color and texture, from street art to cobblestone paths. A bride holding her bouquet against a vibrant mural or a rustic brick wall creates a striking contrast between nature and urban life. These settings work well for couples who want a modern, edgy vibe in their photos.

Waterfront Locations

The Yarra River or St Kilda Beach offers a serene, open backdrop for bouquet shots. The bride can stand by the water’s edge, holding the flowers as the breeze gently moves her hair. The reflection of the sky or the city skyline in the water adds depth to the composition.

Enhancing the Mood with Details

To make the bouquet sniff moment even more special, pay attention to the small details that add context and emotion.

The Bride’s Expression

Focus on capturing her genuine reaction—whether it’s a smile, a tear, or a quiet sigh. Encourage her to think about her partner or the journey leading up to the wedding day. These thoughts will naturally show on her face, making the photo more heartfelt.

The Bouquet’s Details

Zoom in on the flowers themselves—the delicate petals, the dew drops, or the way the light hits the stems. These close-up shots add texture and interest to the album. If the bouquet has a special meaning, like a family heirloom or a flower chosen for its symbolism, highlight that in the photos.

The Surrounding Environment

Include elements of the setting in the frame, even if they’re subtle. A patch of sunlight on the ground, a rustling leaf, or a distant sound of laughter can all enhance the mood. These details help tell the story of the day and make the photos feel more immersive.

Post-Processing Tips for Bouquet Sniff Photos

Edit these photos to emphasize their soft, romantic feel. Adjust the white balance to ensure the flowers’ colors look natural, whether they’re bright whites or deep reds.

  • Softening the Light: Use a slight blur or diffusion effect to make the light feel gentle and dreamy. Avoid harsh contrasts that could make the image look too sharp or staged.
  • Enhancing Colors: Boost the saturation of the bouquet’s flowers slightly to make them stand out against the background. If the setting is muted, like a historic venue, keep the colors subtle to match the mood.
  • Adding Vignettes: Darken the edges of the frame slightly to draw attention to the center, where the bride and bouquet are positioned. This creates a cozy, intimate feel.

Making the Moment Unforgettable

The bouquet sniff is a small, quiet moment, but it holds immense emotional weight. In Melbourne’s beautiful settings, photographers have the chance to turn this simple gesture into a stunning, memorable image. By focusing on natural light, authentic poses, and meaningful details, you can create photos that capture the bride’s joy and the magic of the wedding day.

DSC05427

Melbourne wedding photography with window-side lighting creating an atmosphere of charm and elegance

Capturing Romantic Window Light for Melbourne Wedding Photography

Melbourne’s unique blend of historic charm and modern architecture provides endless opportunities for wedding photographers to play with light and shadow. One of the most magical ways to create atmosphere is by using natural window light. Whether it’s the soft glow of morning or the golden hour warmth, windows can transform ordinary spaces into dreamy settings for intimate, emotion-filled photos.

wedding photography melbourne

The Magic of Window Light in Wedding Photography

Natural light streaming through windows has a way of wrapping couples in a gentle, flattering glow. Unlike harsh artificial lighting, window light creates soft shadows and highlights that add depth without overwhelming the scene. This type of lighting works beautifully for both indoor and outdoor settings, from cozy cafes to grand ballrooms.

Why Window Light Creates Atmosphere

Window light is inherently romantic because it mimics the warmth of candlelight or firelight. It highlights the couple’s features naturally while casting subtle shadows that add dimension. When shot during the right time of day—early morning or late afternoon—the light becomes even more golden, enhancing skin tones and creating a timeless feel.

Best Times of Day for Window Light Shots

The golden hour, which occurs shortly after sunrise or before sunset, is ideal for window light photography. During these times, the sun is low in the sky, casting a warm, diffused glow through windows. If shooting midday, look for north-facing windows to avoid harsh direct sunlight. Cloudy days also work well, as the overcast sky acts like a natural softbox, creating even, flattering light.

Choosing the Right Window Setting

Not all windows are created equal. Look for locations with large, clean windows that allow plenty of light to flood in. Historic buildings often have stained glass or arched windows that add character, while modern venues may feature floor-to-ceiling glass that creates a sleek, contemporary look. Consider the view outside the window as well—a lush garden or city skyline can add an extra layer of beauty to the shot.

Posing Techniques for Window Light Photos

The key to capturing stunning window light photos is keeping poses natural and relaxed. Encourage the couple to interact gently, focusing on their connection rather than stiff, posed shots.

The Classic Embrace

Have the couple stand or sit close to the window, facing each other with their foreheads touching. This pose allows the light to illuminate their faces evenly while creating a sense of intimacy. Ask them to hold hands or wrap their arms around each other for added warmth. If the window is large enough, position them slightly off-center to include more of the light in the frame.

The Silhouette Shot

For a dramatic, artistic look, shoot the couple as silhouettes against the window. This works best when the light outside is brighter than inside, such as during sunset. Have them stand or sit with their backs to the window, then expose for the bright light outside. The result will be a dark, mysterious outline of the couple against a glowing background.

The Casual Sitting Pose

Sitting near a window is a great way to create a relaxed, candid vibe. The bride can sit on a chair or windowsill with her legs crossed, while the groom sits beside her or kneels at her feet. Use the window light to highlight her dress’s details, such as lace or beading, while keeping his face softly lit. For a playful twist, have them share a laugh or steal a quick kiss.

The Window Frame Composition

Use the window frame itself as a natural border for your shot. Position the couple inside the frame, either standing or sitting, and let the light spill in around them. This creates a sense of depth and draws the viewer’s eye directly to the couple. For a more creative approach, shoot through the window from outside, capturing the couple’s reflection in the glass along with the view behind them.

Lighting Tips for Perfect Window Shots

While natural window light is beautiful on its own, a few tweaks can make it even more stunning. Here’s how to enhance the light without relying on artificial sources.

Using Reflectors to Fill Shadows

If the light is too harsh or creates deep shadows on one side of the couple’s face, use a reflector to bounce light back onto them. A white reflector will soften the shadows, while a silver or gold one can add warmth. Position the reflector opposite the window, angling it until the light fills in the shadows naturally.

Diffusing Harsh Light

On sunny days, direct sunlight streaming through a window can be too intense. Hang a sheer curtain or use a piece of white fabric to diffuse the light, creating a softer, more even glow. If you’re shooting in a venue without curtains, bring a portable diffuser or use a large piece of frosted acrylic to scatter the light.

Creating Depth with Backlighting

Backlighting occurs when the main light source is behind the subject. For window light photos, this means positioning the couple with their backs to the window. The light will create a halo effect around their hair and shoulders, adding depth and dimension to the shot. Use a reflector or fill flash to ensure their faces are still properly exposed.

Playing with Shadows for Artistic Effect

Shadows can add drama and mood to window light photos. Experiment with positioning the couple so that the window’s bars or panes cast interesting shadows on their faces or bodies. For example, have the bride stand near a window with vertical blinds, letting the light create stripes across her dress. These patterns can make the image more visually engaging.

Incorporating Melbourne’s Unique Window Settings

Melbourne is home to a variety of window-filled venues, each with its own vibe. From historic landmarks to modern lofts, these locations offer endless opportunities for creative window light photography.

Historic Venues with Character

Venues like the Royal Exhibition Building or Como House feature large, ornate windows that let in plenty of light while adding a touch of elegance. Use the intricate window frames as part of your composition, or position the couple near the windows to capture the soft, diffused light. These settings are perfect for couples who want a classic, timeless look in their photos.

Modern Spaces with Clean Lines

For a sleek, contemporary feel, look for venues with floor-to-ceiling windows or minimalist designs. The Melbourne Museum or art galleries often have large glass walls that flood the space with natural light. These settings work well for couples who prefer a clean, uncluttered aesthetic. Use the window light to highlight the couple’s modern attire or the venue’s architectural details.

Cozy Cafes and Hidden Gems

Melbourne’s laneways are full of charming cafes and hidden venues with unique windows. A small, intimate space with a single large window can create a cozy, romantic atmosphere for photos. Have the couple sit at a table near the window, sipping coffee or sharing a dessert, while the light streams in around them. These shots feel authentic and capture the city’s laid-back vibe.

Capturing Candid Moments with Window Light

The best window light photos often happen when the couple forgets the camera is there. Encourage them to interact naturally, whether it’s sharing a joke, adjusting each other’s hair, or stealing a kiss.

The Whispered Conversation

Have the couple stand near the window, facing each other, and whisper something funny or sweet. Capture the moment they break into laughter or share a secret smile. The window light will illuminate their faces beautifully, highlighting their expressions and the connection between them.

The Playful Gesture

Ask the groom to gently tug the bride’s veil or playfully nudge her shoulder as she sits by the window. These small, spontaneous gestures add movement and show their playful side. Shoot from a low angle to emphasize the action and capture their laughter.

The Quiet Reflection

Not every shot needs to be loud or energetic. Sometimes the most powerful images come from quiet, contemplative moments. Have the couple sit or stand near the window, looking out at the view or at each other. Use a long exposure to blur any movement outside, creating a serene, timeless feel.

Post-Processing for Window Light Photos

Edit window light photos to enhance mood while keeping them natural. Adjust white balance to ensure skin tones look accurate, whether shooting in warm morning light or cool afternoon shade.

  • Softening Details: Use the clarity slider lightly to avoid harsh edges around the couple’s faces or clothing. A slight blur can make the image feel more dreamy and less posed.
  • Color Grading: Match the colors to the setting—warm tones for historic venues, cool blues for modern spaces, or earthy greens for outdoor views. For a cohesive look, apply the same color profile to all images from the session.
  • Dodging and Burning: Lighten shadows under the couple’s eyes or chin to reveal features without losing depth. Darken the edges of the frame slightly to draw attention to the center, where the couple is positioned.

Embracing the Beauty of Window Light in Melbourne

Window light is a versatile, romantic tool for wedding photographers, and Melbourne’s diverse venues provide the perfect backdrop for experimenting with it. By understanding how light behaves and encouraging the couple to relax, you can create photos that feel both timeless and uniquely theirs. Whether shooting in a grand ballroom or a cozy cafe, let the window light guide you toward moments of pure, unfiltered love.

DSC05381

Melbourne wedding photography: Casual shooting of steps with a casual pose

Casual Wedding Photography on Melbourne’s Stairs: Embracing Relaxed Elegance

Melbourne’s architecture is a playground for photographers, with staircases offering a mix of texture, height, and movement that adds depth to wedding photos. From grand marble steps to rustic brick landings, these spaces provide a canvas for couples to showcase their chemistry in a laid-back, authentic way. By leaning into the natural flow of stairs, photographers can capture moments that feel effortless yet intentional, blending the city’s charm with the couple’s unique style.

wedding photography melbourne

The Appeal of Staircase Settings for Casual Shots

Stairs create a dynamic backdrop that encourages interaction and playfulness. Unlike flat surfaces, they offer varying heights and angles, allowing couples to experiment with poses without feeling stiff. Whether it’s a historic building’s sweeping staircase or a hidden alleyway’s weathered steps, these locations add character to photos while keeping the focus on the couple’s connection.

Leveraging Height for Flattering Perspectives

Standing on a higher step can elongate the body and create a sense of grandeur, while sitting or leaning on a lower step adds intimacy. For example, have the bride perch on a middle step with the groom standing below, looking up at her with a smile. This angle highlights her dress’s details while capturing his admiration. Alternatively, both partners can sit side by side, their legs dangling over the edge, creating a relaxed, candid vibe.

Using Lines to Guide the Eye

Staircases naturally create leading lines that draw attention to the couple. Position them at the center of the frame, with the steps converging toward them, to emphasize their importance in the shot. For a more artistic approach, shoot from a low angle, letting the stairs stretch upward and frame the couple like a natural border. In venues like Melbourne’s Royal Exhibition Building, the symmetry of the stairs can add a formal touch to otherwise casual poses.

Incorporating Movement for Authenticity

Static poses can feel forced, but stairs invite movement. Encourage the couple to walk up or down the steps hand-in-hand, capturing the rhythm of their steps and the way they glance at each other. For a playful twist, have them pause mid-stride and share a laugh, or ask the groom to twirl the bride as she descends. These moments feel spontaneous and reflect the joy of the day.

Posing Ideas for Staircase Photography

The key to casual staircase shots is keeping poses natural and unposed. Focus on interactions that highlight the couple’s personality, whether they’re goofy, romantic, or a mix of both.

The Classic Lean

Have one partner lean against a railing or wall while the other stands close, resting a hand on their shoulder or waist. This pose feels relaxed yet intentional, especially if they’re laughing or whispering to each other. In outdoor settings like Fitzroy Gardens, ivy-covered walls can add a romantic, timeless feel to the shot.

Sitting Pretty

Sitting on stairs is a great way to create intimacy. The bride can sit with her legs crossed, while the groom sits beside her, leaning in to share a secret. For a bolder look, have them sit back-to-back, looking out at the view or smiling at the camera. This works well on wide steps with plenty of space, like those found near Melbourne’s waterfront.

The Step Stroll

Walking up or down stairs together is a simple yet effective way to capture connection. Ask the couple to hold hands and walk slowly, looking at each other or ahead. Vary the pace—sometimes slow and romantic, sometimes quick and playful—to capture different moods. Use a wide aperture to blur the background slightly, keeping the focus on their movement and expressions.

The Unexpected Pose

Break the rules by having the couple sit on the steps in an unconventional way, like with one leg stretched out or both leaning backward. This adds a sense of whimsy and shows their fun-loving side. For example, the bride could sit with her skirt spread out around her, while the groom kneels beside her, pretending to “fix” her shoe. These moments feel genuine and memorable.

Lighting Tips for Staircase Shots

Lighting can make or break staircase photos, especially in indoor or shaded areas. Use natural light when possible, but don’t be afraid to get creative with artificial sources.

Natural Light Strategies

On sunny days, position the couple so the light falls softly on their faces, avoiding harsh shadows. If the stairs are in direct sunlight, look for shaded areas nearby or use a reflector to bounce light onto their faces. For golden hour shots, shoot from a lower angle to let the warm light wrap around them, creating a flattering glow. In overcast weather, the diffused light is perfect for capturing soft, even skin tones without harsh contrasts.

Indoor Lighting Hacks

Many staircases are indoors, like those in historic hotels or modern lofts. Use window light by placing the couple near a large window, turning them slightly to avoid direct sunlight. If the light is too harsh, hang a sheer curtain or use a white umbrella to diffuse it. For venues with low lighting, bring a portable LED panel or use a flash with a softbox to avoid flat, washed-out images.

Creating Mood with Shadows

Shadows can add drama to staircase photos. Shoot during the late afternoon when the sun casts long shadows on the steps, creating patterns that frame the couple. Alternatively, use artificial light to cast shadows on a wall behind them, adding depth and texture. For a moody, artistic look, underexpose the image slightly and focus on the interplay of light and dark.

Incorporating Melbourne’s Unique Staircases

Melbourne is home to a variety of staircases, each with its own vibe. From grand to quirky, these locations offer endless opportunities for creative shots.

Historic Grandeur

Venues like Parliament House or the State Library of Victoria feature ornate staircases with marble steps and intricate railings. These settings suit formal, elegant poses, but you can still add a casual twist by having the couple sit or lean in unexpected ways. For example, the bride could rest her elbow on the railing while the groom stands below, looking up at her with a smile.

Urban Edge

In areas like Hosier Lane or Degraves Street, staircases are often part of graffiti-covered walls or industrial buildings. Use these bold backgrounds to create contrast with the couple’s attire. Have them sit on the steps with colorful murals behind them, or stand at the top of a metal staircase for a modern, edgy look. These shots work well in black and white or with vibrant color grading to match the surroundings.

Natural Beauty

Parks and gardens like the Royal Botanic Gardens or Treasury Gardens offer staircases surrounded by greenery. Use the natural light and foliage to create soft, romantic images. The bride could sit on a step with flowers in her hair, while the groom kneels beside her, holding a bouquet. These settings are perfect for couples who want a mix of casual and dreamy in their photos.

Capturing Candid Moments on Stairs

The best staircase photos often happen when the couple forgets the camera is there. Encourage them to interact naturally, whether it’s sharing a joke, adjusting each other’s hair, or stealing a kiss.

The Whispered Secret

Have the couple lean in close, as if sharing a secret, and capture the intimacy of the moment. This works well on narrow steps where they’re forced to be close together. Use a shallow depth of field to blur the background, keeping the focus on their expressions and the connection between them.

The Playful Tug

Ask the groom to gently tug the bride’s veil or playfully pull her toward him as she sits on a step. These small gestures add movement and show their playful side. Shoot from a low angle to emphasize the action and capture their laughter.

The Quiet Moment

Not every shot needs to be loud or energetic. Sometimes the most powerful images come from quiet, contemplative moments. Have the couple sit on the steps, holding hands and looking out at the view or at each other. Use a long exposure to blur any movement in the background, creating a serene, timeless feel.

Post-Processing for Staircase Photos

Edit staircase photos to enhance mood while keeping them natural. Adjust white balance to ensure skin tones look accurate, whether shooting in warm sunlight or cool shade.

  • Softening Details: Use the clarity slider lightly to avoid harsh edges around the couple’s faces or clothing. A slight blur can make the image feel more dreamy and less posed.
  • Color Grading: Match the colors to the setting—warm tones for historic staircases, cool blues for urban shots, or earthy greens for outdoor locations. For a cohesive look, apply the same color profile to all images from the session.
  • Dodging and Burning: Lighten shadows under the couple’s eyes or chin to reveal features without losing depth. Darken the edges of the frame slightly to draw attention to the center, where the couple is positioned.

Embracing the Unpredictable on Melbourne’s Stairs

Staircase photography is all about embracing the unexpected. Whether it’s a sudden gust of wind, a passing stranger, or a playful moment between the couple, these surprises can lead to the most memorable shots. By staying flexible and focusing on the couple’s connection, photographers can turn ordinary stairs into extraordinary backdrops for love stories.

From grand to gritty, Melbourne’s staircases offer a world of possibilities for casual, heartfelt wedding photos. By blending technical skill with a willingness to experiment, photographers can create images that feel both timeless and uniquely theirs.

81688-Sample-160

Melbourne Wedding Photography – Eye-to-eye Smile Emotional Shooting

Capturing Heartfelt Eye Contact and Smiles in Melbourne Wedding Photography

There’s an undeniable magic in the moment two people lock eyes and share a genuine smile during their wedding day. It’s a universal language of love, trust, and joy that transcends words, making it a cornerstone of memorable wedding photography. In Melbourne, a city known for its romantic backdrops and artistic energy, photographers have endless opportunities to frame these intimate exchanges in ways that feel both timeless and personal.

wedding photography melbourne

The Power of Eye Contact in Wedding Storytelling

Eye contact is more than just a photographic technique—it’s a window into the couple’s emotional journey. When a bride and groom look into each other’s eyes, they’re not just posing; they’re reliving moments of their relationship, from first dates to shared dreams. This connection creates images that feel authentic and deeply moving, especially when captured in Melbourne’s iconic settings.

Creating a Safe Space for Vulnerability

To capture meaningful eye contact, couples must feel comfortable enough to be themselves. Start sessions by building rapport—ask about their favorite memories together or what they love most about each other. When they relax, genuine emotions surface. Encourage them to forget the camera exists, focusing instead on the person in front of them. A quiet joke or a whispered compliment can spark the natural smiles that make photos unforgettable.

Timing the Perfect Gaze

The best eye contact moments often happen spontaneously, like when the bride adjusts the groom’s tie or he brushes a strand of hair from her face. Anticipate these interactions by staying alert to body language. If the couple leans in closer or their hands touch, be ready to capture the exchange. Use a soft voice to guide them: “Look into her eyes and tell her how you feel,” or “Hold his hands and smile like you did on your first date.”

Lighting Techniques to Highlight Emotional Connection

The right lighting can transform a simple gaze into a breathtaking image. Melbourne’s diverse weather—from sunny days to moody overcast skies—offers photographers a range of tools to play with.

Natural Light Strategies for Intimacy

For outdoor shoots, golden hour (the hour after sunrise or before sunset) provides soft, warm light that flatters skin tones and adds a romantic glow. Position the couple facing each other with the sun behind them, using a reflector to bounce light onto their faces. This avoids harsh shadows and keeps their expressions bright. On cloudy days, the diffused light creates a natural, even illumination perfect for capturing subtle emotions.

Indoor Lighting Hacks for Cozy Vibes

In venues like historic ballrooms or modern lofts, window light can be your best friend. Place the couple near a large window but angle them slightly to avoid direct sunlight, which can cause squinting. Use sheer curtains to soften harsh rays or add a white umbrella to diffuse artificial light. For a dramatic effect, underexpose the background slightly and focus on the couple’s eyes, letting their connection become the focal point.

Balancing Exposure for Emotional Impact

When photographing eye contact, ensure both faces are well-lit, even if one is turned slightly. Use spot metering to prioritize skin tones, adjusting exposure compensation as needed. If the background is too bright, switch to manual mode and narrow the aperture (f/2.8 or higher) to keep the focus on their expressions. A shallow depth of field can blur distractions, drawing attention to the emotion in their eyes.

Composition Ideas to Frame Emotional Moments

How you frame a couple’s gaze can make or break a photo. Experiment with angles and perspectives to create images that feel dynamic yet intimate.

Close-Ups: The Intimacy of Detail

Zoom in on the couple’s faces as they smile at each other, capturing the sparkle in their eyes or the curve of their lips. Use a macro lens or crop tightly in post-production to highlight details like the bride’s eyelashes or the groom’s dimples. These shots work beautifully in quiet settings like a secluded garden or a dimly lit chapel.

Over-the-Shoulder Shots for Context

Position the camera behind one partner to capture their profile as they gaze at the other. This angle adds depth and storytelling, showing the world from their perspective. Include elements like a trailing veil, a bouquet of native flowers, or Melbourne’s skyline in the background for local flavor. In Fitzroy’s laneways, graffiti murals can add a playful, urban edge to the image.

Symmetry and Balance for Formal Portraits

For traditional poses, center the couple and have them face each other directly, creating a mirrored effect. This works well in symmetrical locations like the Royal Exhibition Building or beneath the arches of a historic bridge. Use a tripod to ensure sharpness and a wide aperture to blur distractions. Add a touch of movement by asking them to sway gently or hold hands, keeping the moment lively.

Incorporating Movement to Enhance Natural Chemistry

Static poses can feel stiff, but adding subtle movement brings eye contact and smiles to life. Encourage the couple to interact gently, whether by holding hands, adjusting each other’s attire, or sharing a quiet laugh.

Walking Hand-in-Hand

Have the couple stroll slowly along a path, looking into each other’s eyes as they move. Capture the rhythm of their steps and the softness of their smiles as they walk. In St. Kilda’s botanical gardens, autumn leaves crunching underfoot add a sensory layer to the image. Use a panning technique to keep them in focus while blurring the background slightly.

The First Dance Reimagined

Instead of traditional dance shots, focus on the couple’s eye contact during slower moments. Have them pause mid-twirl and look at each other, or capture the groom whispering something in the bride’s ear as she smiles. Use a low angle to emphasize their connection, shooting upward to include twinkling lights or a chandelier overhead.

Whispered Conversations

Position the couple close together and have them share a secret or a funny memory. The act of leaning in and smiling creates a natural, intimate vibe. Use a long lens to shoot from a distance, capturing their connection without intruding. In a beachside venue like Brighton, the sound of waves can add to the romantic atmosphere.

Post-Processing: Enhancing Emotion Without Overdoing It

Edit eye contact photos to amplify mood while preserving authenticity. Start by adjusting white balance to ensure skin tones look natural, whether shooting under golden light or cloudy skies.

  • Softening Details: Use the clarity slider sparingly to avoid harsh edges around the eyes or mouth. A slight blur can mimic the gentle focus of human memory, making the image feel more dreamy.
  • Color Grading: Warm tones evoke nostalgia, while cooler hues suit modern, minimalist themes. For Melbourne’s coastal shoots, teal and sandy neutrals complement the scenery. In urban settings, muted blues and grays can add a sophisticated edge.
  • Dodging and Burning: Lighten shadows under the eyes or chin to reveal features without losing the depth of the gaze. Darken the background slightly to draw attention to the couple’s faces, ensuring their connection remains the star of the shot.

Embracing Melbourne’s Romance Through Connected Gazes

Eye contact and smiles aren’t just photographic techniques—they’re the heart of a wedding day’s emotional tapestry. In Melbourne, where historic charm meets contemporary creativity, these moments become a celebration of love’s quiet, powerful language.

By blending technical skill with an understanding of human connection, photographers can turn fleeting glances into timeless art. Whether framed by the Yarra River’s reflections or the graffiti of Hosier Lane, these images remind couples that their story is written in the smallest, most heartfelt exchanges.

wedding photography melbourne

Melbourne wedding photography: Head-down, gentle smile, tender shooting

Capturing the Timeless Charm of Downward Smiles in Melbourne Wedding Photography

There’s a quiet elegance in a bride or groom lowering their gaze and offering a soft, private smile. This gesture—subtle yet deeply intimate—adds a layer of tenderness to wedding albums, especially when framed by Melbourne’s romantic settings. From cobblestone laneways to waterfront vistas, mastering the art of photographing downward smiles requires patience, an eye for detail, and a knack for creating relaxed, genuine moments.

wedding photography melbourne

The Allure of Downward Smiles: Why They Resonate

Downward smiles evoke a sense of shyness, reflection, or quiet joy, making them universally relatable. Unlike broad grins, these gentle expressions feel more personal, as if the couple is sharing a secret moment with the camera. In Melbourne, a city that blends historic charm with modern creativity, these images resonate deeply with couples seeking authenticity over perfection.

Creating a Comfortable Environment

The key to capturing natural downward smiles lies in making the couple feel at ease. Start sessions with light conversation to break the ice, asking about their favorite memories or how they met. When they relax, genuine emotions surface. Encourage them to focus on each other rather than the camera, whispering inside jokes or reminiscing about shared experiences.

Timing the Moment

Downward smiles often happen spontaneously—during a laugh, a touch, or a quiet pause. Anticipate these moments by observing body language. If the bride tucks her hair behind her ear or the groom rests his hand on her back, these are cues to prepare your shot. Use a quiet voice to guide them: “Look down at your hands for a second,” or “Glance at your bouquet and smile softly.”

Lighting Techniques to Enhance Tenderness

Soft, diffused light flatters downward smiles by minimizing harsh shadows and highlighting delicate features. Melbourne’s variable weather offers both challenges and opportunities, from golden-hour glow to overcast skies that act as natural lightboxes.

Natural Light Strategies

For outdoor sessions, schedule shoots during early morning or late afternoon when sunlight is gentle. Position the couple facing away from the sun to avoid squinting, using a reflector to bounce light onto their faces. If shooting midday, seek shade under trees or arcades, where dappled light adds texture without overwhelming the scene.

Indoor Lighting Hacks

In venues with large windows, place the couple near the light source but angled slightly away to create a flattering gradient. Use sheer curtains to soften harsh rays, or diffuse artificial light with a white umbrella. For a moody effect, underexpose the background slightly and focus on the couple’s expressions, letting the downward smile become the focal point.

Balancing Exposure

When photographing downward smiles, ensure the bride’s face is well-lit even if her head is tilted. Use spot metering to prioritize her skin tones, adjusting exposure compensation as needed. If the background is too bright, switch to manual mode and narrow the aperture (f/2.8 or higher) to keep the focus on her expression.

Composition Ideas for Frame-Worthy Shots

Downward smiles shine when paired with thoughtful framing and angles. Experiment with perspectives that emphasize intimacy and connection.

Close-Ups: The Power of Detail

Zoom in on the bride’s hands as she gently touches her veil or the groom’s wrist as he adjusts his cufflinks. These details, combined with a downward smile, tell a story of quiet anticipation. Use a macro lens or crop tightly in post-production to highlight textures like lace, pearls, or the grain of a wooden bench.

Over-the-Shoulder Shots

Position the camera behind the bride or groom to capture their profile as they smile downward. This angle adds depth and context, showing the world from their perspective. Include elements like a trailing veil, a bouquet of native flowers, or Melbourne’s iconic street art in the background for local flavor.

Symmetry and Balance

For formal portraits, center the couple and have them tilt their heads simultaneously, creating a mirrored effect. This works beautifully in symmetrical locations like the Royal Exhibition Building or beneath the arches of a historic bridge. Use a tripod to ensure sharpness and a wide aperture to blur distractions.

Incorporating Movement for Natural Flow

Static poses can feel stiff, but adding subtle movement brings downward smiles to life. Encourage the couple to interact gently, whether by holding hands, adjusting each other’s attire, or sharing a quiet laugh.

Walking Hand-in-Hand

Have the couple stroll slowly along a path, looking down at their feet or at each other’s hands. Capture the rhythm of their steps and the softness of their smiles as they move. In Melbourne’s Fitzroy Gardens, autumn leaves crunching underfoot add a sensory layer to the image.

The Veil Toss

If the bride wears a veil, ask her to toss it gently into the air while looking down. Freeze the moment as the fabric floats around her, creating a dreamy effect. This works well near water, like St. Kilda Pier, where reflections add depth to the shot.

Whispered Conversations

Position the couple close together and have them whisper something funny or sweet. The act of leaning in and smiling downward feels natural and intimate. Use a long lens to shoot from a distance, capturing their connection without intruding.

Post-Processing: Enhancing Without Overdoing

Edit downward smile photos to amplify mood while preserving authenticity. Start by adjusting white balance to ensure skin tones look natural, whether shooting under golden light or cloudy skies.

  • Softening Details: Use the clarity slider sparingly to avoid harsh edges, especially around the eyes and mouth. A slight blur can mimic the gentle focus of human memory.
  • Color Grading: Warm tones evoke nostalgia, while cooler hues suit modern, minimalist themes. For Melbourne’s coastal shoots, teal and sandy neutrals complement the scenery.
  • Dodging and Burning: Lighten shadows under the chin or eyes to reveal features without losing the downward angle’s flattering effect. Darken the background slightly to draw attention to the couple.

Embracing Melbourne’s Romance Through Downward Smiles

Downward smiles aren’t just about photography—they’re about capturing the quiet magic of a wedding day. In Melbourne, where historic architecture meets contemporary art, these images become a celebration of love’s subtle moments.

By blending technical skill with an understanding of human emotion, photographers can turn fleeting glances into timeless art. Whether framed by the graffiti of Hosier Lane or the tranquility of Albert Park Lake, downward smiles remind couples that their story is written in the smallest, most heartfelt gestures.

Melbourne|wedding|photo|Cumulus|Inc|Evermore|-96

Melbourne wedding photography with backlighting and flowing hair shining effect

Mastering Backlit Hair Glow in Melbourne Wedding Photography

Melbourne’s ever-changing light offers a magical canvas for wedding photographers, especially when capturing the ethereal glow of backlit hair. This technique, where sunlight filters through a bride’s locks to create a luminous halo, adds a dreamy, timeless quality to images. Perfect for coastal ceremonies, garden vows, or urban rooftop receptions, mastering backlit hair photography requires understanding light, timing, and camera settings.

wedding photography melbourne

The Magic of Backlit Hair: Why It Works

Backlighting transforms ordinary moments into cinematic scenes. When sunlight hits a bride’s hair from behind, it separates her from the background, emphasizing texture and movement. This effect works beautifully in Melbourne’s diverse settings—whether against the golden sands of Brighton Beach, the lush greenery of the Dandenong Ranges, or the industrial charm of Docklands.

Choosing the Right Time and Location

Golden hour, the hour after sunrise or before sunset, is ideal for backlit shots. The low angle of the sun creates soft, warm light that minimizes harsh shadows. In Melbourne, sunset often provides richer colors due to the city’s western coastline. For morning sessions, head to the Yarra River’s eastern banks, where sunlight bounces off the water for added sparkle.

Location matters. Open areas with unobstructed views of the horizon work best, such as beaches, parks, or hilltops. Avoid shooting under thick tree canopies or tall buildings, which block sunlight. If indoors, position the bride near large windows with sheer curtains to diffuse harsh rays.

Camera Settings for Perfect Backlight

Achieving hair glow without overexposing the background requires balancing exposure and focus. Start by switching to manual mode to control shutter speed, aperture, and ISO.

  • Aperture: Use a wide aperture (f/1.8 to f/2.8) to create a shallow depth of field. This blurs the background while keeping the bride’s face sharp, emphasizing the hair’s glow.
  • Shutter Speed: Keep it fast enough to freeze motion (1/200s or higher) if the bride is moving. For static poses, a slightly slower speed (1/125s) can add softness.
  • ISO: Keep ISO low (100-400) to reduce noise, especially in bright conditions.

Spot metering is crucial. Meter off the bride’s face to ensure proper exposure, even if the background appears overexposed. This technique preserves skin tones while letting the hair glow.

Overcoming Common Challenges

Backlit photography isn’t without hurdles. Melbourne’s unpredictable weather and strong winds can complicate shots, but creativity turns obstacles into opportunities.

Dealing with Harsh Sunlight

On clear days, the sun can create overly bright highlights. Use a reflector or fill flash to bounce light onto the bride’s face, balancing exposure. For a softer look, shoot during cloudy golden hour, when clouds act as natural diffusers.

Managing Windy Conditions

Melbourne’s coastal breezes can tousle hair, but movement adds life to images. Encourage the bride to tilt her head slightly into the wind, letting strands flow naturally. If hair becomes unmanageable, use a lightweight hairspray or ask the stylist to pin back sections without sacrificing volume.

Avoiding Lens Flare

While lens flare can add artistic flair, excessive flare obscures details. Use a lens hood to block stray light, or position the bride so the sun is partially hidden behind her head. For intentional flare, shoot with the sun peeking through hair or a prop like a bouquet.

Composition Ideas to Elevate Backlit Shots

Backlit hair glow shines when paired with thoughtful composition. Experiment with angles, framing, and movement to create visually striking images.

Embrace Negative Space

Let the glowing hair take center stage by framing the bride against a simple, uncluttered background. A vast sky, calm ocean, or empty field provides negative space that draws attention to the light’s effect.

Incorporate Movement

Have the bride toss her veil, spin slowly, or walk toward the camera. Motion blurs the hair slightly, enhancing the glow while adding dynamism. Use a panning technique to keep the bride sharp while blurring the background.

Play with Perspectives

Shoot from low angles to emphasize the sun’s position behind the bride, or capture overhead shots to showcase the halo effect. For intimate portraits, focus on the bride’s profile as sunlight illuminates her hair’s edges.

Post-Processing Tips for a Polished Finish

Edit backlit images to enhance mood without losing authenticity. Start by adjusting exposure and contrast to ensure the bride’s face is properly lit while maintaining the hair’s glow.

  • Highlight Recovery: Use software tools to tame overly bright areas without flattening details.
  • Shadow Adjustment: Lighten shadows on the bride’s face to reveal features without losing the backlit effect.
  • Color Grading: Warm tones complement golden hour shots, while cooler hues suit overcast or twilight sessions.

Add a subtle vignette to draw the eye toward the bride, or use radial gradients to brighten the hair’s glow. For creative flair, experiment with adding a soft glow effect in post-production, but keep it natural to avoid an overedited look.

Capturing Melbourne’s Magic Through Backlit Hair

Backlit hair photography isn’t just about technical skill—it’s about storytelling. In Melbourne, where landmarks like Flinders Street Station and the Eureka Skydeck meet natural wonders like the Great Ocean Road, these images become a celebration of light, love, and location.

By blending patience, creativity, and an understanding of Melbourne’s unique lighting conditions, photographers can turn fleeting moments into timeless art. Whether framed by a sunset-lit pier or a misty morning park, backlit hair glow reminds couples that their wedding day is as much about the magic in between moments as it is about the grand gestures.

Melbourne|wedding|photo|Cumulus|Inc|Evermore|-108

Melbourne wedding photography featuring fun shoe-to-shoe interactions

Playful Shoe-Clinking Moments in Melbourne Wedding Photography

Wedding photography in Melbourne thrives on capturing authentic, lighthearted interactions that reflect a couple’s personality. One charming trend gaining traction is the “shoe-clinking” moment—a playful twist on traditional poses where partners tap their wedding shoes together, creating a whimsical, candid snapshot. This technique adds a touch of humor and spontaneity to albums, especially when set against Melbourne’s eclectic backdrops.

wedding photography melbourne

Why Shoe-Clinking Photos Resonate with Couples

Modern weddings embrace imperfection, and shoe-clinking shots embody this ethos. Unlike stiff, posed portraits, these images celebrate quirks and shared laughter. For couples tying the knot in Melbourne—a city known for its artsy laneways, vibrant street art, and waterfront views—incorporating local flavor into these moments makes them even more memorable.

Choosing the Right Locations for Shoe-Clinking Fun

Melbourne’s diverse settings offer endless inspiration. For a laid-back vibe, head to St. Kilda Beach, where couples can clink shoes in the sand as seagulls circle overhead. The iconic graffiti lanes of Hosier Lane provide a colorful, urban backdrop, while the Royal Botanic Gardens’ lush pathways add a romantic, natural touch.

Indoor venues like historic theaters or industrial-chic warehouses also work well. In a venue with exposed brick or grand staircases, shoe-clinking shots gain a timeless, cinematic quality. The key is to match the location’s mood to the couple’s dynamic—whether they’re goofy, romantic, or a mix of both.

Timing and Spontaneity: The Secret Sauce

The best shoe-clinking photos happen when couples forget the camera’s presence. Encourage them to interact naturally—maybe during a mid-shoot snack break or while walking between locations. A photographer’s ability to anticipate these moments is crucial. For example, as the couple pauses to laugh at a joke, quickly suggest, “Hey, clink your shoes!” to capture the reaction.

Adding movement enhances the playfulness. Have them walk side by side, clinking shoes with each step, or jump slightly mid-clink for a dynamic effect. In Melbourne’s unpredictable weather, rain can even become an asset—puddle reflections add depth to outdoor shots, while indoor sessions benefit from the cozy intimacy of a rainy day.

Lighting and Composition Tips for Standout Shots

Great shoe-clinking photos rely on balancing creativity with technical skill. Natural light is ideal, but Melbourne’s cloudy skies demand adaptability.

Outdoor Lighting Hacks

On overcast days, position the couple facing the light source to avoid harsh shadows. For golden hour sessions near the Yarra River, use backlighting to create a soft glow around their shoes. If the sun is too bright, seek shade under a tree or arcade awning, where diffused light highlights textures without washing out details.

Indoor Lighting Tricks

In dimly lit venues, avoid harsh on-camera flashes. Instead, use off-camera flashes or continuous lights positioned to the side to add dimension. For a moody effect, underexpose the background slightly and focus on the shoes’ interaction. If the venue has large windows, schedule the shoot during daylight hours to leverage natural light.

Composition Ideas to Elevate the Shot

Close-ups of clinking shoes tell a story on their own. Frame the image to include just the feet and a hint of the surrounding environment—a cobblestone street, a patterned rug, or a graffiti wall. For full-body shots, use a wide aperture to blur the background, drawing attention to the couple’s expressions and the shoe-clinking motion.

Incorporate props for extra flair. A vintage suitcase, a bouquet of wildflowers, or even a pet dog can add personality. In Melbourne’s coffee-loving culture, a takeaway cup placed beside the shoes adds a local touch.

Post-Processing: Keeping It Natural Yet Polished

Edit shoe-clinking photos to enhance mood without losing authenticity. Start by adjusting exposure and contrast to ensure the shoes and surrounding details are clearly visible. For outdoor shots, tweak the white balance to reflect the time of day—warmer tones for sunset, cooler hues for midday clouds.

Use the clarity slider sparingly to sharpen textures, like the leather of the shoes or the grain of a wooden floor. If the image feels flat, add a subtle vignette to draw the eye toward the center. For color grading, stick to tones that complement the location—earthy greens and browns for parks, muted blues for beaches, or vibrant pops for street art backdrops.

Embracing Imperfection in Melbourne’s Wedding Scene

Shoe-clinking photos thrive on imperfection. A slightly blurred shoe, a candid grin, or a stray lock of hair adds character. In Melbourne, where creativity is celebrated, these moments resonate deeply with couples seeking to document their love story authentically.

By blending technical expertise with a knack for capturing spontaneity, photographers can turn a simple shoe-clinking gesture into a cherished memory. Whether set against the urban grit of Degraves Street or the serene beauty of Albert Park Lake, these images remind couples that love isn’t just about grand gestures—it’s also about the little, playful moments that make their journey unique.