wedding photography melbourne

Melbourne wedding photography – uniform color tone adjustment for editing

Achieving Consistent Color Tone in Melbourne Wedding Photography Editing

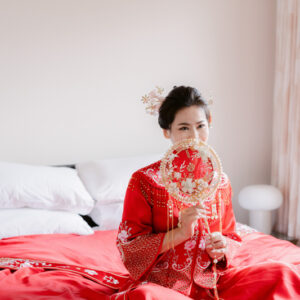
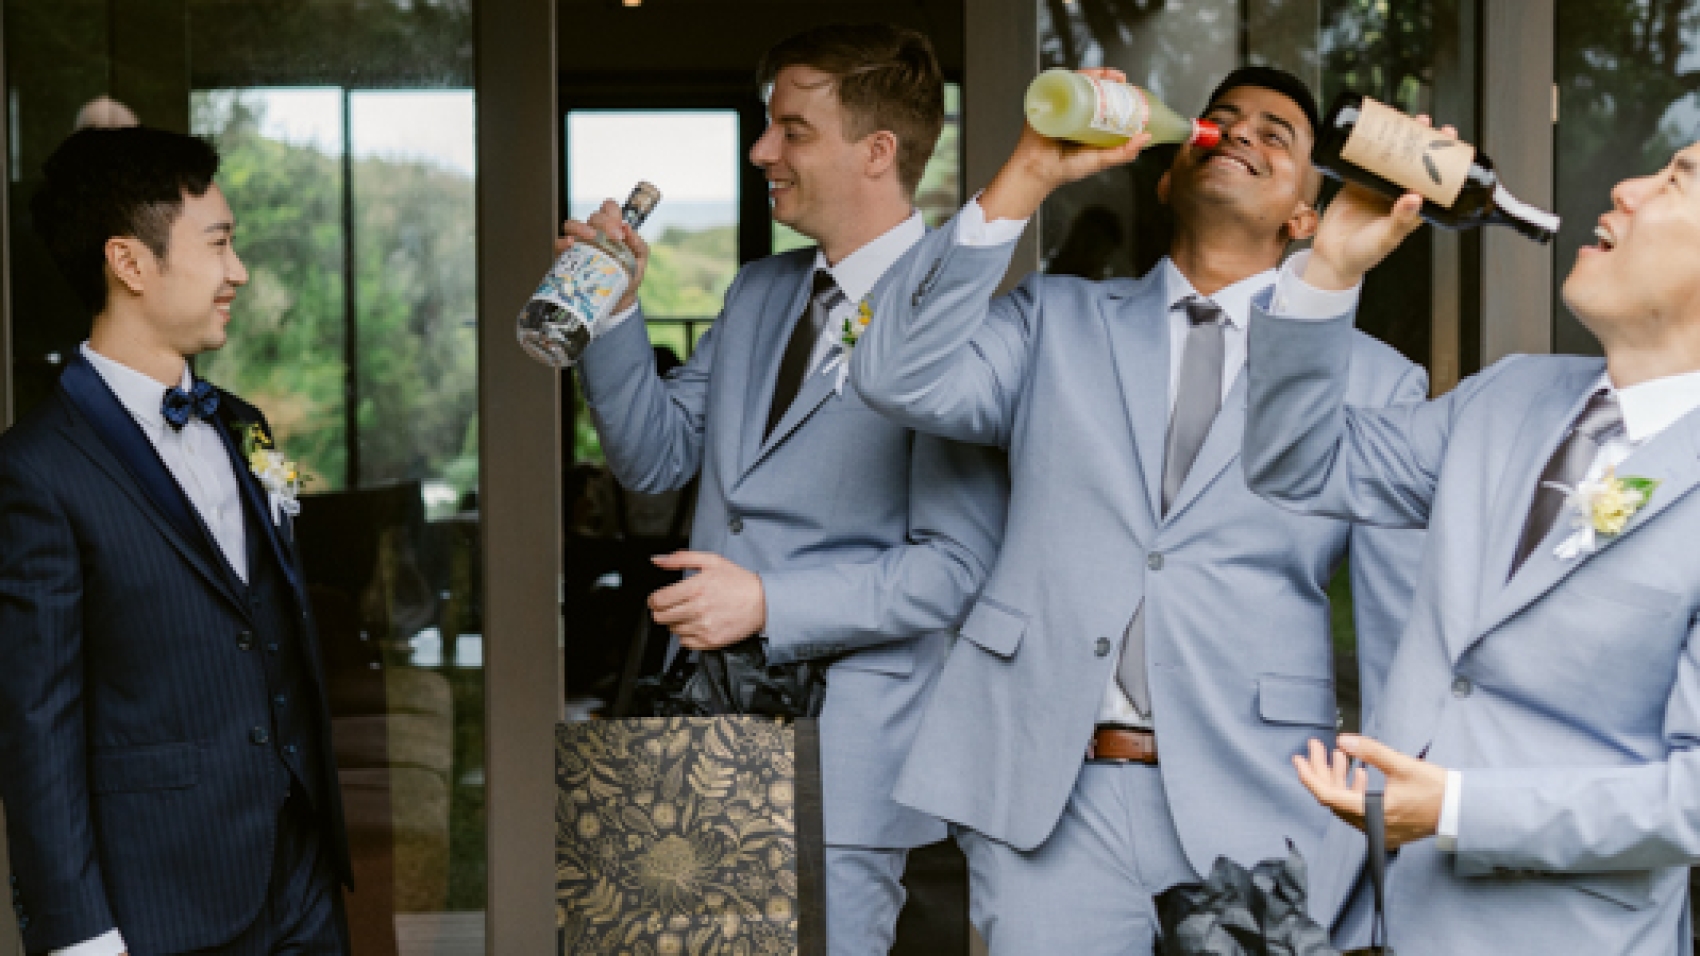
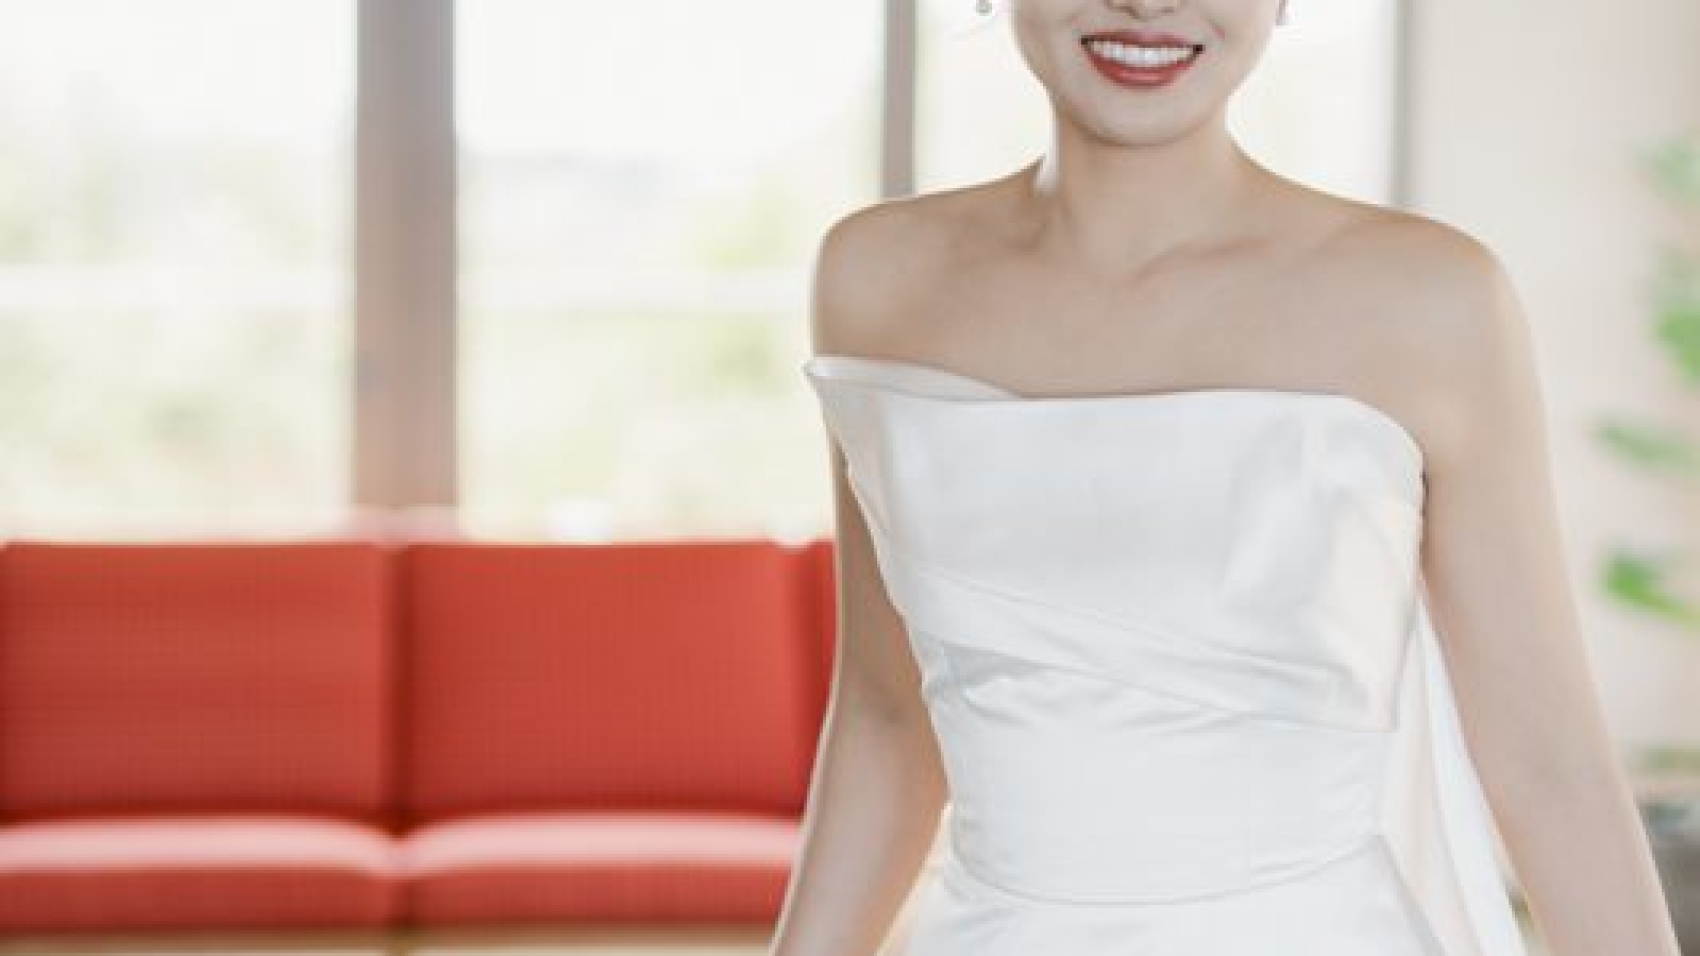
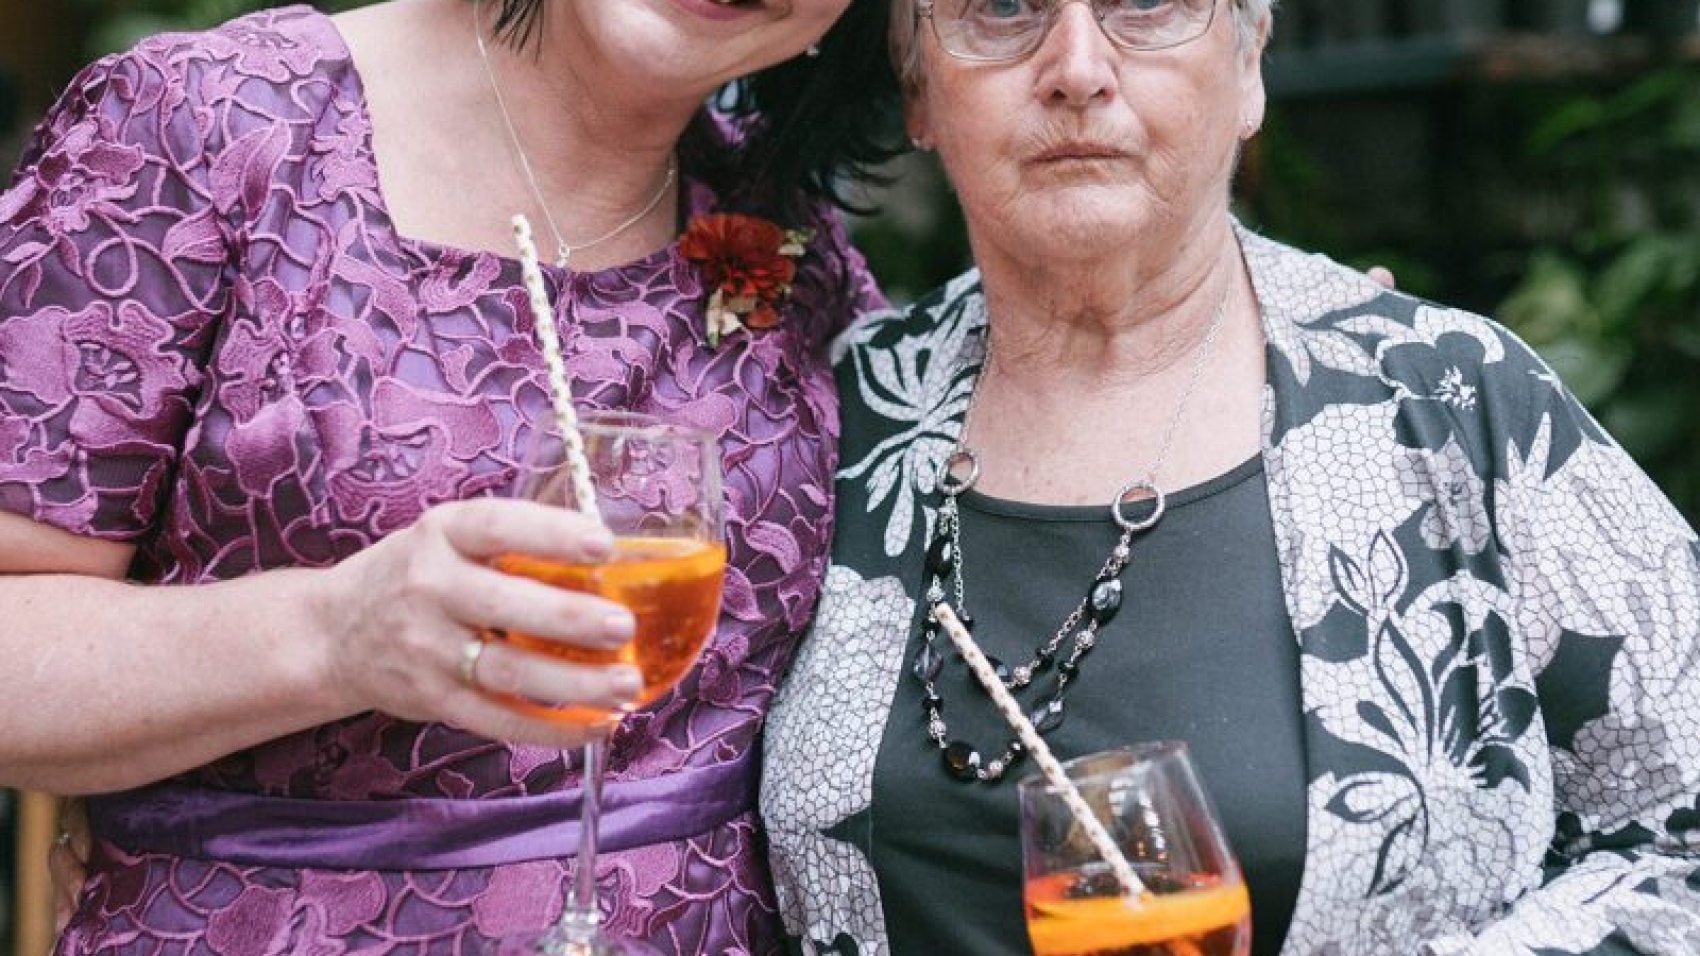
When it comes to wedding photography in Melbourne, a city known for its diverse landscapes and vibrant cultural scenes, achieving a consistent color tone across all images is crucial for creating a cohesive and visually appealing album. Whether you’re capturing the romantic charm of the Yarra Valley or the timeless elegance of the Royal Exhibition Building, here are some essential tips to ensure your wedding photos have a unified and polished look.

wedding photography melbourne

Understanding the Importance of Color Consistency

Color consistency plays a pivotal role in storytelling through wedding photography. It helps to establish a mood, evoke emotions, and create a seamless narrative that flows from one image to the next. Inconsistent colors can disrupt this flow, making the album feel disjointed and less professional. By maintaining a consistent color palette, you can enhance the overall aesthetic appeal of your wedding photos and ensure they stand the test of time.

Analyzing the Scene and Lighting Conditions

Before diving into the editing process, it’s essential to analyze the scene and lighting conditions of each photo. Melbourne’s weather can be unpredictable, with sudden changes in light intensity and color temperature. For instance, a sunny day might cast a warm, golden hue, while an overcast sky could result in cooler, bluish tones. Understanding these variations will help you determine the appropriate color adjustments needed to achieve consistency.

Start by examining the white balance of your images. If the colors appear too warm or too cool, use the white balance tool in your editing software to correct them. This step is crucial for ensuring that skin tones look natural and that the overall color palette remains balanced.

Utilizing Color Grading Techniques

Color grading is a powerful tool for achieving a consistent color tone across your wedding photos. It involves adjusting the colors in your images to create a specific mood or atmosphere. Here are some key color grading techniques to consider:

  1. Adjusting Hue, Saturation, and Luminance (HSL): The HSL panel allows you to fine-tune the colors in your photos by adjusting their hue, saturation, and luminance. For example, if you want to create a warm, romantic look, you might increase the saturation of reds and oranges while decreasing the saturation of blues and greens. Conversely, if you prefer a cooler, more serene atmosphere, you could do the opposite.
  2. Applying Color Lookup Tables (LUTs): LUTs are pre-defined color grading presets that can be applied to your images to achieve a specific look. They’re particularly useful for quickly achieving a consistent color tone across multiple photos. Many editing software programs come with built-in LUTs, or you can create your own custom LUTs based on your preferred color palette.
  3. Using Gradient Maps: Gradient maps are another effective tool for color grading. They allow you to map specific colors to different tonal ranges in your image, creating a unique and customized look. For instance, you could use a gradient map to add a subtle pink hue to the highlights and shadows of your photos, giving them a soft, dreamy quality.

Ensuring Consistency Across Different Shots

Achieving color consistency isn’t just about adjusting individual photos; it’s also about ensuring that all the images in your wedding album look cohesive when viewed together. Here are some strategies to help you maintain consistency across different shots:

  1. Batch Editing: If you have a large number of photos to edit, consider using batch editing techniques to apply the same color adjustments to multiple images at once. This can save you a significant amount of time and ensure that all your photos have a similar look and feel.
  2. Creating a Style Guide: Before you start editing, create a style guide that outlines your preferred color palette, tone, and mood. Use this guide as a reference throughout the editing process to ensure that all your photos adhere to the same visual standards.
  3. Regularly Reviewing Your Work: As you edit your photos, take regular breaks to review your work and ensure that the color tone remains consistent. It can be helpful to view your photos side by side or in a slideshow format to get a better sense of how they look together.

Conclusion

Achieving consistent color tone in Melbourne wedding photography editing requires a combination of technical skill and artistic vision. By understanding the importance of color consistency, analyzing the scene and lighting conditions, utilizing color grading techniques, and ensuring consistency across different shots, you can create a wedding album that’s visually stunning and emotionally resonant. Remember, the goal is to tell a story through your photos, and a consistent color tone is a key element in making that story come to life.

wedding photography melbourne

High-quality hardcover production of the Melbourne wedding photography album

High – Quality Hardcover Production for Melbourne Wedding Photography Physical Albums

When it comes to preserving the precious memories of a Melbourne wedding, a well – crafted physical album holds a special place. A hardcover wedding photography album not only protects the photos but also adds a touch of elegance and sophistication. Here’s a detailed look at the key aspects of creating a top – notch hardcover album for Melbourne wedding photography.

wedding photography melbourne

Selecting the Right Materials

Cover Materials

The cover of the hardcover album is the first thing that catches the eye. For a Melbourne wedding album, you have a range of options. Leather covers exude a classic and luxurious feel. They are durable and can develop a beautiful patina over time, adding to the album’s charm. Faux leather is a great alternative for those who prefer a more budget – friendly option without compromising on aesthetics. Another popular choice is fabric covers. Linen or velvet fabrics can give the album a soft and romantic look, perfect for a wedding theme. You can also consider textured papers for a more modern and artistic feel, which can be customized with embossing or foil stamping to add a unique touch.

Inner Pages

The quality of the inner pages is crucial for displaying the wedding photos. Acid – free paper is a must as it prevents the photos from yellowing or fading over time. This ensures that the memories captured in the photos remain vibrant for generations. You can choose between different paper finishes. Matte paper provides a non – reflective surface, which is ideal for viewing photos in various lighting conditions. It gives the images a soft and elegant look. Glossy paper, on the other hand, enhances the colors and details of the photos, making them appear more vivid and lifelike. However, it can be more prone to fingerprints and glare. A semi – gloss finish offers a good balance between the two, providing some shine while reducing glare.

Design and Layout considerations

Storytelling Layout

A wedding is a story, and the album should reflect that. Start with the pre – wedding preparations, such as the bride getting ready, the groom’s nervous excitement, and the family members’ involvement. Use a combination of full – page spreads and smaller photos to create a sense of flow. For example, a large photo of the bride in her wedding dress can be followed by a series of smaller photos showing the details of her accessories. As you move on to the ceremony, arrange the photos in a chronological order to capture the key moments like the procession, the exchange of vows, and the first kiss. The reception part can be more lively, with photos of the couple dancing, guests having fun, and the cutting of the cake. Use different page layouts, such as grid patterns or overlapping photos, to add visual interest and keep the viewer engaged.

Color Coordination

The color scheme of the album should complement the wedding theme and the photos. If the wedding had a pastel color palette, use soft and muted colors for the album’s design elements, such as the borders or backgrounds. For a more vibrant wedding, you can incorporate bold and contrasting colors. You can also take inspiration from the wedding venue. If the wedding was held in a historic building with warm tones, use similar colors in the album to create a cohesive look. Another approach is to use the dominant colors in the wedding photos as a guide. For example, if the bride’s bouquet had a lot of red flowers, you can use red accents in the album design to tie everything together.

Adding Personal Touches

To make the album truly unique, add personal touches. This could include handwritten notes from the couple, family members, or friends. These notes can be placed on separate pages or as captions next to the photos. You can also incorporate small mementos from the wedding, such as a piece of the wedding invitation, a fabric swatch from the bride’s dress, or a dried flower from the bouquet. These elements add a sentimental value to the album and make it a one – of – a – kind keepsake.

Printing and Binding techniques

High – Resolution Printing

The quality of the prints is essential for a wedding album. Use high – resolution printing to ensure that the photos are sharp and detailed. This is especially important for large – format prints, as any blurriness or pixelation will be more noticeable. Choose a printing service that uses high – quality inks and papers to achieve accurate color reproduction. The colors in the prints should match the original photos as closely as possible, so that the memories are presented in their truest form.

Binding Methods

There are several binding methods available for hardcover albums. Sewn binding is a traditional and durable option. It involves stitching the pages together, which allows the album to lie flat when opened. This is great for viewing full – page spreads without any distortion. Case binding is another popular choice. It involves attaching the pages to a hard cover, creating a sturdy and professional – looking album. You can also consider lay – flat binding, which is similar to sewn binding but with a more modern look. It allows the album to open completely flat, making it easy to view the photos from edge to edge. Choose a binding method that suits the size and style of the album, as well as the couple’s preferences.

Ensuring Long – Term Preservation

Proper Storage

Once the album is completed, it’s important to store it properly to ensure its longevity. Keep the album in a cool, dry place away from direct sunlight. Exposure to heat and light can cause the colors in the photos to fade and the materials to deteriorate. You can also use acid – free storage boxes or sleeves to protect the album from dust and moisture. If you plan to display the album on a shelf, make sure it’s not in a place where it can be easily knocked over or damaged.

Regular Maintenance

Periodically check the album for any signs of damage, such as loose pages, fading colors, or mold growth. If you notice any issues, take the album to a professional for repair or restoration. You can also gently clean the cover and pages with a soft, dry cloth to remove any dust or dirt. Avoid using harsh chemicals or abrasive materials, as they can damage the album’s surface. By taking proper care of the album, you can ensure that the precious memories of the Melbourne wedding are preserved for a lifetime.

DSC05123

Music Combinations for Melbourne Wedding Photography Digital Album

Music Matching for Melbourne Wedding Photography E-albums

Creating a memorable wedding photography e – album for a Melbourne wedding involves more than just stunning visuals. The right music can elevate the entire experience, evoking emotions and enhancing the storytelling aspect of the photos. Here’s a guide on how to match music effectively for your Melbourne wedding photography e – album.

wedding photography melbourne

Understanding the Melbourne Wedding Vibe

The City’s Diverse Influences

Melbourne is a city known for its rich cultural tapestry. It has a blend of historical charm, modern urban energy, and a vibrant arts scene. This diversity should be reflected in the music selection for the e – album. For instance, if the wedding took place in a historic venue like a grand old mansion or a heritage – listed church, music with a classic and elegant touch could be appropriate. On the other hand, if the couple had a beachside or outdoor wedding in one of Melbourne’s beautiful parks, more upbeat and nature – inspired tunes might work better.

Considering the Couple’s Personality

Every couple is unique, and their music preferences are a great way to showcase their individuality. Some couples may be into indie rock, while others might prefer soft acoustic ballads. Take the time to understand the couple’s musical tastes. If they are avid music lovers, you could even incorporate songs that have special meaning to them, such as the song they first danced to or a tune that reminds them of a significant moment in their relationship. This personal touch will make the e – album even more special and meaningful.

Music Genres for Different Parts of the E – album

Pre – wedding Preparations

The pre – wedding preparations are often filled with a mix of excitement, nervousness, and anticipation. For this part of the e – album, light and airy music can set the right mood. Acoustic guitar – based songs with gentle melodies can create a calm and relaxed atmosphere. Soft instrumental pieces, perhaps with a hint of piano or strings, can also work well. These types of music will complement the photos of the bride getting her hair and makeup done, the groom adjusting his tie, and the family members helping out, all while capturing the sense of anticipation in the air.

The Wedding Ceremony

The wedding ceremony is the most solemn and emotional part of the day. The music here should be in line with the significance of the occasion. Classical music, such as pieces by Bach or Mozart, can add a touch of grandeur and elegance. If the couple wants a more contemporary feel, slow – paced ballads with heartfelt lyrics can be a great choice. The key is to select music that enhances the emotions of the moment, whether it’s the exchange of vows, the first kiss, or the signing of the register. The music should build up gradually, reaching a crescendo at the most important parts of the ceremony.

The Reception

The reception is all about celebration, fun, and joy. This is the time to let loose and choose more upbeat and lively music. Pop songs with catchy beats can get everyone on the dance floor. You could also consider incorporating some local Melbourne music if it fits the couple’s style. For example, if they are fans of the city’s indie music scene, a few tracks from local indie bands could add a unique touch. The music at the reception should keep the energy high and encourage guests to dance, mingle, and have a great time, creating a lively and unforgettable atmosphere in the e – album.

Tips for a Seamless Music Experience

Volume and Transition

Pay attention to the volume levels of the music throughout the e – album. You don’t want the music to be too loud and overpower the visuals or too soft that it gets lost. Also, ensure smooth transitions between different songs. Abrupt changes in music can be jarring and disrupt the flow of the e – album. Use fade – ins and fade – outs to create a seamless transition from one track to the next, making the viewing experience more enjoyable.

Length and Pacing

The length of the music should match the length of the corresponding photo sequences in the e – album. If you have a long sequence of photos from the reception, choose a longer song or a medley of songs to keep the momentum going. On the other hand, for shorter sequences, such as a quick montage of the couple’s first look, a shorter and more impactful piece of music would be more appropriate. The pacing of the music should also complement the pacing of the photos. If the photos are moving quickly, a faster – paced song can enhance the sense of excitement, while slower – paced photos can be paired with more mellow music.

Copyright Considerations

When selecting music for the e – album, be mindful of copyright laws. Using copyrighted music without permission can lead to legal issues. There are many royalty – free music libraries available online where you can find a wide variety of songs suitable for wedding e – albums. These libraries offer music that you can use freely without worrying about copyright infringement, ensuring that your e – album can be shared and enjoyed without any legal hassles.

DSC05284

Melbourne wedding photography video editing at key points

Melbourne Wedding Photography Video Beat Editing: A Comprehensive Guide

When it comes to commemorating the most special day of your life in Melbourne, wedding photography and videography hold immense significance. Among the various editing techniques, beat editing for wedding videos has emerged as a popular way to add a dynamic and engaging touch to the final product. This approach syncs the visuals with the rhythm of the music, creating a captivating viewing experience that truly captures the essence of your big day.

wedding photography melbourne

Understanding Beat Editing for Wedding Videos

The Basics of Beat Editing

Beat editing is all about aligning the cuts and transitions in your wedding video with the beats of the chosen soundtrack. It’s a creative way to enhance the emotional impact of the footage by making it flow in harmony with the music. For instance, when the music reaches a crescendo or a powerful beat, you can cut to a significant moment like the exchange of vows, the first kiss, or the couple walking down the aisle. This synchronization creates a sense of excitement and draws the viewer’s attention to the most important parts of the video.

In Melbourne, with its diverse range of wedding venues from historic buildings to modern beachside locations, beat editing can be used to highlight the unique features of each setting. The rhythm of the music can be matched with the movement of the couple, the swaying of the wedding party, or the gentle waves crashing on the shore if it’s a beach wedding, adding an extra layer of charm to the video.

Importance of Music Selection

The choice of music plays a crucial role in beat editing. It sets the tone and mood of the entire wedding video. When selecting a soundtrack for your Melbourne wedding video, consider the style of your wedding, your personal preferences as a couple, and the emotions you want to evoke.

For a romantic and elegant wedding, a classical piece or a soft ballad might be the perfect fit. If you’re having a more lively and upbeat celebration, a pop or rock song could add energy and fun to the video. Make sure the music has a clear and consistent beat structure, as this will make the beat editing process much smoother. Also, check the copyright status of the music to avoid any legal issues when sharing your video online or using it for commercial purposes.

Steps to Create a Stunning Beat-Edited Wedding Video in Melbourne

Organizing Your Footage

Before you start the beat editing process, it’s essential to organize your wedding footage. Go through all the videos and photos captured during the day and categorize them based on different events, such as the pre-wedding preparations, the ceremony, the reception, and the couple’s portraits. This will help you quickly find the clips you need when you’re editing and ensure that you don’t miss any important moments.

In Melbourne, where the weather can be unpredictable, having a well-organized footage library is especially useful. If there were sudden changes in weather during the outdoor parts of the wedding, you can easily locate the clips that were taken in different lighting conditions and use them effectively in the video.

Syncing with the Beat

Once you have your footage organized and your music selected, it’s time to start syncing the visuals with the beat. Import both the video clips and the music into your video editing software. Listen to the music carefully and mark the beats on the timeline. You can use the software’s built-in tools or manually place markers at each beat.

Next, start placing your video clips on the timeline and align the key moments with the marked beats. For example, if you have a clip of the bride walking down the aisle, you can cut it precisely when the music reaches a strong beat to emphasize the significance of the moment. Experiment with different cuts and transitions to find the most visually appealing and emotionally resonant combination.

Adding Visual Effects and Enhancements

To take your beat-edited wedding video to the next level, consider adding some visual effects and enhancements. This could include color correction to give the video a consistent and appealing look, slow-motion effects to highlight certain moments, or text overlays to display important information like the couple’s names and the wedding date.

In Melbourne, with its iconic landmarks and beautiful scenery, you can also use visual effects to enhance the background of your shots. For instance, if you have a clip of the couple taking photos in front of the Melbourne skyline, you can add a subtle glow or a vignette effect to make the skyline stand out even more. However, be careful not to overdo the effects, as they should complement the footage rather than distract from it.

Tips for a Successful Beat-Edited Wedding Video in Melbourne

Tell a Story

A great wedding video should tell a story, and beat editing can be a powerful tool to help you achieve this. Instead of just showing random clips of the wedding day, use the beat of the music to guide the narrative. Start with the pre-wedding preparations to set the scene, then move on to the ceremony to build up the tension and emotion, and finally, end with the reception to show the celebration and joy.

In Melbourne, with its rich cultural heritage and diverse communities, you can incorporate elements of the local culture into the story. For example, if the couple is having a traditional Chinese tea ceremony as part of their wedding, you can use the beat editing to highlight this unique aspect of their celebration and show how it fits into the overall story of their big day.

Practice and Experiment

Beat editing is a skill that takes time and practice to master. Don’t be afraid to experiment with different techniques and styles. Try out different music genres, cut lengths, and transition effects to see what works best for your wedding video. You can also watch other beat-edited wedding videos for inspiration and ideas.

In Melbourne, where there are many talented wedding videographers, you can attend local wedding expos or join online communities to connect with other professionals and learn from their experiences. Share your work with them and ask for feedback, as this can help you improve your skills and create even better beat-edited wedding videos in the future.

Keep the Couple’s Preferences in Mind

Ultimately, the wedding video is for the couple, so it’s important to keep their preferences in mind throughout the editing process. Ask them about their favorite music, the moments they want to highlight, and the overall style they envision for the video. By incorporating their input, you can create a beat-edited wedding video that truly reflects their personalities and the magic of their special day in Melbourne.

DSC05987

Melbourne Wedding Photography – Enhancing the Texture of Wedding Photos in the Post-Production Stage

Enhancing Wedding Dress Texture in Post-Processing for Melbourne Wedding Photography

The wedding dress is often the centerpiece of bridal portraits, and capturing its intricate details and luxurious texture is essential for creating timeless images. In Melbourne’s diverse photography settings—from coastal beaches to historic gardens—the right post-processing techniques can elevate the dress’s appearance, ensuring it stands out in every frame. Here’s how to refine and enhance the fabric’s texture for a polished, professional finish.

wedding photography melbourne

Understanding the Role of Light in Dress Texture

Light plays a critical role in how textures appear in photographs. Soft, diffused light—common in Melbourne’s overcast days or during golden hour—can highlight delicate details like lace or beading without creating harsh shadows. Conversely, harsh midday sunlight may wash out textures or create uneven highlights. Post-processing allows you to correct these issues and emphasize the dress’s natural beauty, regardless of the original lighting conditions.

Adjusting for Natural Light Variations

Melbourne’s weather can be unpredictable, with sunny spells followed by sudden cloud cover. If the dress appears flat or overly bright due to direct sunlight, reducing the highlights and increasing contrast can restore depth and dimension. For example, if the bodice’s beading looks lost in bright light, gently darkening the surrounding fabric can make the details pop. Similarly, if the skirt appears too dark in shadowy areas, lifting the shadows slightly can reveal hidden textures without overexposing the image.

Balancing Indoor and Outdoor Lighting

Many Melbourne wedding shoots transition between indoor and outdoor venues, such as moving from a chapel to a garden reception. Indoor lighting—whether artificial or natural through windows—can cast color tints on the dress, such as yellow or blue hues. Using white balance adjustments, you can neutralize these tints and restore the dress’s true color. For instance, if fluorescent lighting gives the dress a greenish tint, shifting the white balance toward warmer tones can counteract the effect and create a more natural look.

Refining Fabric Details Through Targeted Adjustments

The dress’s texture is defined by its fabric type, embellishments, and construction. Post-processing allows you to enhance these elements individually for a customized result.

Enhancing Lace and Embroidery

Lace and embroidery are common features in wedding dresses, adding elegance and intricacy. However, these details can easily blend into the fabric if not properly highlighted. Using the clarity slider, you can increase the mid-tone contrast of the lace or embroidery, making the patterns stand out against the background fabric. For finer adjustments, the brush tool can target specific areas, allowing you to boost contrast or sharpness only where needed. This technique works particularly well for delicate details like floral appliqués or vine-like embroidery.

Sharpening Beading and Sequins

Beaded or sequined dresses catch the light beautifully, but capturing their sparkle can be challenging in low-light conditions. To make these elements shine, use the sharpening tool selectively on the beads or sequins. Avoid applying sharpening to the entire dress, as this can create a grainy appearance in softer fabrics like tulle or chiffon. Instead, zoom in on the embellishments and adjust the sharpness until they glisten without looking artificial.

Smoothing Silk and Satin Surfaces

Silk and satin dresses have a smooth, reflective quality that can appear either luxurious or overly shiny depending on the lighting. If the fabric looks too glossy, reducing the highlights and adding a subtle matte effect can soften its appearance. Conversely, if the silk appears dull or flat, increasing the clarity slightly can restore its natural sheen. For satin, pay attention to folds and creases—enhancing their contrast can add depth and dimension to the fabric.

Correcting Common Texture Issues in Post-Processing

Even with careful shooting, certain texture problems can arise. Here’s how to fix them during editing.

Reducing Wrinkles Without Losing Texture

Wrinkles are inevitable in wedding dresses, especially after hours of wear. While some clients may want wrinkles removed entirely, others prefer a natural look that retains the fabric’s character. Using the healing brush tool, you can gently smooth out distracting wrinkles—such as those across the bust or waist—while preserving the overall texture. For deeper creases, the clone stamp tool can copy nearby fabric patterns to fill in the area seamlessly.

Fixing Discoloration or Stains

Spills or dirt can mar a dress’s appearance, but post-processing offers solutions. The spot healing brush is ideal for small stains, as it automatically blends the corrected area with the surrounding fabric. For larger discolorations, such as yellowing on older dresses, the selective color adjustment tool can target specific hues and neutralize them. For example, if a stain appears brownish, reducing the saturation of yellows and oranges can minimize its visibility.

Restoring Faded Details in Older Dresses

Vintage or heirloom dresses may have faded lace or dulled embellishments. To revive these elements, use the dodge and burn tools to selectively brighten or darken areas. For instance, lightening faded lace can restore its delicate appearance, while darkening the background fabric can make the lace stand out more prominently. This technique requires patience but can breathe new life into aging garments.

Final Touches for a Flawless Finish

Once the major adjustments are complete, a few finishing touches can ensure the dress looks its best in every image.

Adding a Subtle Glow to Highlight Areas

A soft glow effect can enhance the dress’s romantic quality, especially in portraits. Using the radial filter tool, create a subtle vignette around the dress and increase the exposure slightly in the center. This draws attention to the fabric while maintaining a natural balance. Avoid overdoing this effect, as it can make the image look overly processed.

Ensuring Consistency Across Multiple Images

If the shoot includes multiple poses or venues, consistency is key. Use presets or saved adjustment settings to apply the same texture enhancements to all dress images. This creates a cohesive look throughout the album, even if lighting conditions varied during the shoot. For example, if you boosted the clarity of lace in one image, apply the same clarity adjustment to all lace-detailed shots.

Trusting Your Artistic Judgment

While technical adjustments are important, the goal is to create images that resonate emotionally. If a texture enhancement feels too harsh or unnatural, dial it back until the dress looks beautiful but still realistic. Your clients chose their dress for its unique style, and your post-processing should celebrate that choice rather than overshadow it.

By mastering these techniques, you can ensure the wedding dress looks stunning in every photograph, whether the shoot takes place in Melbourne’s sun-drenched parks or its moonlit waterfront venues. With careful attention to texture, lighting, and detail, you’ll create images that highlight the dress’s beauty and the bride’s joy on her special day.

DSC05984

Melbourne Wedding Photography – Blues Moments – Post-Processing Color Correction

Mastering Blue Hour Wedding Photography Post-Processing in Melbourne

Melbourne’s blue hour—that magical time just after sunset or before sunrise when the sky takes on a deep, cool hue—offers a dreamy backdrop for wedding photography. However, capturing and enhancing this fleeting moment requires careful post-processing to bring out its full potential. Here’s how to refine your blue hour wedding images for a timeless, romantic look.

wedding photography melbourne

Understanding Blue Hour Lighting in Melbourne

Blue hour occurs when the sun is below the horizon, but its indirect light still illuminates the sky. In Melbourne, this period can vary in duration and intensity depending on the season and location. For example, coastal venues like St Kilda Beach may experience a longer blue hour due to the open horizon, while urban settings near Flinders Street Station might see quicker transitions as city lights begin to dominate.

The Unique Characteristics of Blue Hour Light

During blue hour, the sky shifts from warm sunset tones to cool blues and purples, creating a soft, diffused glow. This lighting minimizes harsh shadows and highlights, resulting in a balanced, ethereal quality. However, the low light levels can make it challenging to capture details without introducing noise or losing color accuracy. Post-processing becomes essential to enhance the scene’s natural beauty while maintaining a clean, polished look.

How Melbourne’s Weather Affects Blue Hour

Cloud cover plays a significant role in blue hour photography. On clear nights, the sky may appear darker and more saturated, while overcast conditions can diffuse the light, creating a softer, more muted effect. For instance, a blue hour shoot at the Royal Botanic Gardens on a cloudy evening might produce gentler blues compared to a crisp, starry night at the Dandenong Ranges. Adjusting your post-processing approach based on weather conditions ensures consistent results.

Essential Post-Processing Techniques for Blue Hour

Achieving a stunning blue hour look involves a combination of technical adjustments and artistic choices. Here are the key steps to refine your images.

Adjusting White Balance for Cool Tones

White balance is critical in blue hour photography, as it determines whether your image leans toward warm or cool tones. Most cameras struggle to auto-adjust during low light, often producing images that appear too warm or neutral. Manually setting the white balance to a cooler temperature—around 3200–4000K—can enhance the blues and purples in the sky without making the scene look unnatural. For example, if the bride’s dress appears slightly yellow under artificial lighting, cooling the white balance can restore its true white color while preserving the blue hour ambiance.

Enhancing Sky Colors with Gradient Filters

The sky is often the focal point of blue hour images, but capturing its full range of colors can be tricky. Gradient filters allow you to target the upper portion of the image—where the sky resides—and adjust its brightness, contrast, and saturation independently. For instance, if the sky looks too dark or lacks vibrancy, gently increasing the saturation of blues and purples can bring out its natural beauty. Similarly, if the horizon appears overly bright due to city lights, reducing the exposure in that area can create a more balanced composition.

Balancing Exposure for Details in Shadows and Highlights

Blue hour’s low light levels can lead to underexposed shadows or overexposed highlights, especially in urban scenes with artificial lighting. Using the exposure slider, you can brighten dark areas—like the couple’s faces or nearby foliage—without blowing out the highlights in streetlights or building windows. For a more nuanced approach, try the shadows and highlights sliders, which allow you to adjust these areas separately. This helps maintain texture and detail throughout the image, ensuring nothing gets lost in the darkness.

Refining Specific Elements in Blue Hour Wedding Photos

Different components of your image may require tailored adjustments to achieve a cohesive look. Here’s how to handle common elements in blue hour scenes.

Perfecting Skin Tones Under Artificial Light

Many blue hour wedding shoots incorporate artificial lighting, such as string lights, lanterns, or city streetlights. While these add warmth and ambiance, they can also cast unflattering color tints on the couple’s skin. To correct this, use selective color adjustment tools to target oranges and yellows in the skin tones and reduce their saturation slightly. This neutralizes unwanted warmth while keeping the overall image cool and balanced. For example, if the groom’s face appears too orange due to nearby lighting, desaturating the oranges in that area can restore a natural look.

Adding Depth to Water and Reflections

Venues near water, like the Yarra River or Brighton Beach, offer stunning opportunities for blue hour photography. However, capturing the subtle interplay of light on water requires careful adjustment. Boosting the contrast in reflective areas—such as the ripples on the river’s surface—can enhance their texture and make them stand out against the cooler tones of the sky. Similarly, if the water appears too dark or flat, increasing its brightness slightly can reveal hidden details without washing out the blues.

Highlighting Architectural Features in Urban Settings

City venues like the Melbourne Town Hall or Eureka Skydeck provide dramatic backdrops for blue hour shoots, but their artificial lighting can compete with the natural sky colors. To make architectural elements pop, adjust the clarity and contrast of buildings or monuments. This sharpens edges and defines details, creating a sense of depth against the soft blue hour glow. For instance, if the Flinders Street Station clocks appear blurry or faded, increasing their clarity can restore their prominence in the image.

Final Touches for a Polished Blue Hour Look

Once you’ve made the major adjustments, a few finishing touches can elevate your blue hour wedding photos from good to great.

Reducing Noise for a Clean Finish

Low light conditions often lead to grainy or noisy images, especially in darker areas like shadows or the sky. Using noise reduction tools in post-processing can smooth out these imperfections while preserving sharpness in key areas like the couple’s faces or architectural details. Be mindful not to overdo it, as excessive noise reduction can make the image look overly soft or artificial.

Sharpening Details Without Overdoing It

A light application of sharpening can enhance textures and make your image appear more crisp. Focus on areas like the bride’s lace veil, the groom’s suit buttons, or the intricate patterns on a venue’s facade. Avoid sharpening the entire image uniformly, as this can create harsh edges or amplify noise in smoother areas like the sky or water.

Trusting Your Creative Vision

While technical adjustments are important, the goal of blue hour post-processing is to evoke emotion and tell a story. If a color adjustment or crop feels right, even if it deviates slightly from “perfect” technical standards, go with it. Your unique perspective is what makes your wedding photography stand out, especially in a city as vibrant and diverse as Melbourne.

By mastering these techniques, you can transform blue hour wedding photos into timeless works of art that capture the magic of Melbourne’s twilight moments. Whether you’re shooting along the Yarra River, in a hidden garden, or amidst the city’s glowing skyline, the right post-processing approach will help you create images that couples will cherish forever.

DSC06081

Color restoration of outdoor wedding photography scenes in Melbourne during the post-production stage

Achieving Authentic Color Restoration in Melbourne Wedding Photography Outdoor Scenes

Melbourne’s outdoor wedding venues offer a stunning array of backdrops, from the vibrant greens of the Royal Botanic Gardens to the dramatic coastlines of Brighton Beach. However, capturing these scenes accurately requires more than just a skilled photographer—post-production color restoration plays a vital role in ensuring the final images reflect the true beauty of the moment. Here’s how to achieve natural, balanced colors in outdoor wedding photography.

wedding photography melbourne

Understanding the Challenges of Outdoor Lighting

Outdoor lighting in Melbourne can vary dramatically depending on the time of day, weather, and location. The golden hour near the Yarra River bathes scenes in warm, soft tones, while midday sun at venues like the Melbourne Zoo can create harsh shadows and overexposed highlights. Even cloudy days at the Docklands can result in flat, muted colors that lack depth. Each lighting condition presents unique challenges for color restoration, requiring photographers to adapt their techniques to maintain authenticity.

The Impact of Time of Day on Color

Early morning light tends to be cool and blue, which can make skin tones appear washed out or unnatural. By contrast, late afternoon sunlight casts a warm, golden hue that enhances reds and yellows but may oversaturate greens and blues. During post-production, adjusting white balance is crucial to neutralizing these effects. For example, a morning ceremony at Como House might require warming up the image slightly to counteract the cool tones, while a sunset shoot at Williamstown Beach may need cooling adjustments to prevent overly orange skin tones.

Weather Conditions and Color Accuracy

Cloudy skies can diffuse light, reducing contrast and making colors appear dull. In such cases, restoring vibrancy without introducing artificiality is key. Overcast days at St Kilda Beach, for instance, might result in pale blues and grays in the water and sky. Using selective color adjustments can help bring back the richness of these tones while keeping the overall image natural. Similarly, rainy weather can create reflective surfaces that enhance certain colors, such as the wet pavement near Federation Square, which may require careful balancing to avoid overemphasis.

Techniques for Natural Color Restoration

Achieving accurate colors in outdoor wedding photography involves a combination of technical adjustments and artistic judgment. Here are some effective methods for restoring colors authentically.

White Balance Adjustment for Realistic Tones

White balance is the foundation of color restoration. Most cameras offer automatic white balance settings, but these can struggle in mixed lighting conditions, such as a shaded area under a tree at the Melbourne Museum. Manually adjusting white balance in post-production ensures skin tones look natural and the overall scene feels balanced. For example, if the bride’s dress appears too blue due to cool lighting, warming the white balance slightly can restore its true white color without affecting other elements of the image.

Selective Color Correction for Problem Areas

Not all colors in an outdoor scene need the same level of adjustment. For instance, grass at the Royal Botanic Gardens might appear overly yellow under midday sun, while the sky looks perfectly balanced. Using selective color tools, you can target specific hues—such as greens or blues—and adjust their saturation, brightness, or hue without altering the rest of the image. This approach maintains the overall harmony of the scene while fixing isolated issues.

Using Histograms to Guide Adjustments

A histogram is a valuable tool for evaluating color distribution in an image. If the histogram shows clipping in the red channel, for example, it means the reds are overexposed and lack detail. Adjusting the exposure or saturation of the red channel can help restore balance. Similarly, if the blues are underrepresented, as might happen in a shaded area near the Shrine of Remembrance, boosting the blue channel slightly can bring out the natural colors of the sky or water.

Enhancing Specific Outdoor Elements

Different outdoor venues in Melbourne have unique color characteristics that require tailored approaches. Here’s how to handle some common scenarios.

Restoring Vibrancy in Coastal Scenes

Beaches like Brighton or St Kilda offer breathtaking backdrops, but the combination of sand, water, and sky can create challenging lighting conditions. Sand often reflects sunlight, making it appear overly bright, while the water may look dull or gray. To restore vibrancy, increase the saturation of blues and greens slightly while reducing the brightness of the sand to avoid blowouts. For example, in a photo of the couple walking along the shoreline, enhancing the turquoise of the water and the deep blue of the sky can create a more dynamic image without looking artificial.

Balancing Colors in Urban Settings

City venues like Hosier Lane or the Melbourne Central Shopping Centre feature a mix of artificial and natural light, which can create complex color casts. Streetlights, neon signs, and reflective surfaces can introduce unwanted tints, such as orange or magenta. Using gradient filters or adjustment brushes, you can target specific areas of the image—like the couple’s faces or the background buildings—and correct color imbalances. For instance, if the groom’s suit appears too red due to nearby lighting, desaturating the reds in that area can restore its true color.

Preserving Natural Tones in Garden Venues

Gardens like the Fitzroy Gardens or the Cranbourne Gardens are known for their lush greenery and colorful flowers, but capturing these hues accurately can be tricky. Overcast weather may mute the vibrancy of the foliage, while direct sunlight can cause harsh contrasts. To restore natural tones, adjust the green channel to bring out the richness of the leaves without making them look oversaturated. Similarly, if the flowers appear too bright or washed out, fine-tuning their saturation and brightness can help them stand out while maintaining a cohesive look with the rest of the scene.

Final Tips for Authentic Color Restoration

Achieving natural-looking colors in outdoor wedding photography requires patience and attention to detail. Here are some additional tips to help you refine your approach.

Shoot in RAW Format for Flexibility

RAW files retain more color information than JPEGs, giving you greater flexibility during post-production. This is especially important in challenging lighting conditions, as it allows you to recover details in overexposed or underexposed areas without sacrificing color accuracy.

Compare Images Side by Side

When making color adjustments, it’s helpful to view the edited image alongside the original to ensure you’re not straying too far from the natural scene. This can prevent over-processing and help you maintain a balanced, realistic look.

Trust Your Eyes

While tools like histograms and color pickers are valuable, ultimately, the goal is to create images that look natural to the human eye. If a color adjustment feels off, even if the numbers say it’s correct, trust your instincts and make further refinements.

By mastering these techniques, you can ensure that outdoor wedding photos from Melbourne’s most iconic venues look as beautiful in print as they did in person. Whether you’re capturing the romance of a sunset ceremony at Point Ormond or the playful energy of a reception in a city park, authentic color restoration will help preserve the magic of the moment for years to come.

DSC06185

Melbourne wedding photography – Retouching of human subjects while preserving details

Enhancing Melbourne Wedding Photography: Retaining Details in Portrait Retouching

Melbourne’s diverse landscapes, from urban rooftops to coastal vistas, provide stunning backdrops for wedding photography. However, capturing these moments is only half the challenge—post-production retouching plays a crucial role in ensuring the final images look polished yet natural. One of the most important aspects of portrait retouching is preserving intricate details while enhancing the subject’s features. Here’s how to achieve flawless results without sacrificing authenticity.

wedding photography melbourne

Understanding the Importance of Detail Retention

When retouching wedding portraits, the goal is to enhance the subject’s appearance while maintaining their natural beauty. Over-editing can lead to a plastic, artificial look, which is especially undesirable in wedding photos meant to capture genuine emotions. Retaining details like skin texture, hair strands, and facial expressions ensures the images remain timeless and relatable. For Melbourne weddings, where lighting conditions can vary dramatically—from the soft glow of a sunset at St Kilda Beach to the harsh midday sun at Federation Square—preserving details helps balance the image and keep the focus on the couple.

The Role of Lighting in Detail Preservation

Lighting is a key factor in how details appear in photos. Backlit scenes, common during Melbourne’s golden hour, can create beautiful rim lighting but may also cast the subject’s face in shadow. In such cases, retouching should focus on brightening shadows without erasing skin texture or fine lines. Similarly, high-contrast lighting—such as that found in industrial-style venues like The Warehouse—requires careful handling to avoid losing details in bright highlights or deep shadows. Using tools like dodge and burn selectively can help maintain balance while enhancing the subject’s features.

Common Challenges in Detail Retention

Several factors can make retaining details difficult during retouching. One is the use of high-ISO settings in low-light situations, which can introduce digital noise that masks fine details. Another challenge is over-smoothing skin, a common pitfall that removes pores and wrinkles, giving the subject an unnatural appearance. Additionally, aggressive sharpening can create harsh edges or artifacts, especially around the eyes, lips, and hair. Addressing these issues requires a nuanced approach that prioritizes subtlety over dramatic changes.

Techniques for Preserving Details During Retouching

Achieving natural-looking results requires a combination of technical skill and artistic judgment. Here are some effective methods for retaining details while enhancing wedding portraits.

Frequency Separation for Skin Retouching

Frequency separation is a powerful technique that separates an image into two layers: one for texture (high frequency) and one for color and tone (low frequency). This allows you to smooth blemishes or uneven skin tone on the low-frequency layer without affecting the high-frequency details like pores or fine lines. For example, if retouching a close-up of the bride’s face, you can use the low-frequency layer to reduce redness or discoloration while keeping her skin texture intact on the high-frequency layer. This method ensures the skin looks flawless yet natural.

Selective Sharpening for Key Features

Sharpening is essential for bringing out details, but it should be applied selectively to avoid creating a crunchy or overly processed look. Focus on enhancing the eyes, lips, and hair, as these are areas where details matter most. Use a masking tool to paint sharpening only where needed, such as along the lashes or the edges of the bride’s veil. For group shots, sharpen the faces of the couple and immediate family while keeping the background slightly softer to draw attention to the subjects.

Noise Reduction Without Losing Texture

Digital noise can obscure details, especially in photos taken in low light or at high ISOs. However, aggressive noise reduction can also smooth out important textures, making the image look flat. To strike a balance, use noise reduction tools that allow you to adjust luminosity and color noise separately. Apply stronger noise reduction to smooth areas like the background or clothing, while using a lighter touch on the face to preserve skin texture. For example, in a nighttime photo taken at the Melbourne Star Observation Wheel, reducing noise in the dark sky while keeping the couple’s faces sharp ensures the image remains clear and detailed.

Balancing Retouching with Natural Beauty

The key to successful wedding portrait retouching is knowing when to stop. While it’s tempting to fix every imperfection, doing so can strip the image of its authenticity. Here are some tips for maintaining a natural look while enhancing details.

Embracing Subtle Imperfections

Not all flaws need to be removed. Small blemishes, laugh lines, or freckles can add character and make the subject more relatable. Instead of erasing these details, focus on enhancing the subject’s best features while minimizing distractions. For example, if the groom has a scar on his cheek, you might soften its appearance slightly without removing it entirely, ensuring it doesn’t draw attention away from his smile.

Matching Retouching to the Scene’s Mood

The retouching style should complement the mood of the photo. For a romantic, dreamy shot taken during a sunset ceremony at the Royal Botanic Gardens, you might use softer lighting and gentle retouching to enhance the warm, golden tones. In contrast, a candid photo of the couple dancing at a modern venue like Melbourne Museum might call for a more vibrant, high-contrast look with sharper details. Adjusting your retouching approach based on the scene ensures the images feel cohesive and intentional.

Consistency Across All Images

For a wedding album to feel polished, the retouching style should be consistent throughout. This doesn’t mean every photo needs to look identical, but they should share a similar level of detail retention and enhancement. For example, if you choose to preserve skin texture in the bride’s portraits, apply the same approach to the groom’s photos and group shots. Consistency helps create a unified visual narrative that tells the story of the couple’s special day.

Final Tips for Detail-Oriented Retouching

Achieving professional-quality results takes practice, but these tips can help you refine your approach to wedding portrait retouching.

Work on a High-Resolution Copy

Always retouch on a high-resolution version of the photo to avoid losing details during editing. Once you’re satisfied with the results, you can resize the image for printing or sharing online without sacrificing quality.

Zoom In and Out Frequently

Retouching at 100% zoom allows you to see fine details, but it’s also important to zoom out periodically to check how the changes look at a normal viewing size. What appears subtle at high zoom might look overdone when viewed as a whole, so adjust accordingly.

Take Breaks Between Sessions

Retouching can be time-consuming, and it’s easy to lose perspective after staring at the same image for hours. Take short breaks to rest your eyes and come back with fresh eyes. This can help you spot issues you might have missed earlier, such as uneven skin tone or overly sharp edges.

By focusing on detail retention and using these techniques, you can create wedding portraits that are both beautiful and authentic. Whether you’re capturing the joy of a ceremony at St Patrick’s Cathedral or the playful energy of a reception at a waterfront venue, preserving details ensures the images will be cherished for years to come.

80900-WU-501

Melbourne wedding photography – post-production with film-like grain effect

Creating a Timeless Film Grain Aesthetic in Melbourne Wedding Photography Post-Production

Melbourne’s eclectic mix of urban charm and natural beauty provides the perfect backdrop for wedding photography that feels both modern and nostalgic. One way to achieve this is by adding a subtle film grain effect during post-production, which can evoke the warmth and authenticity of analog photography. This technique works especially well for couples who want their images to have a classic, enduring quality. Here’s how to master film grain in wedding photo editing without losing the essence of the moment.

wedding photography melbourne

Understanding the Appeal of Film Grain in Wedding Photography

Film grain isn’t just about adding texture—it’s about creating a mood. Unlike digital noise, which often feels harsh or distracting, film grain adds a soft, organic layer that enhances the emotional depth of an image. For Melbourne weddings, this can mean transforming a bright, sunny day at the Royal Botanic Gardens into a dreamy, timeless scene or giving a rainy ceremony at a historic venue like Como House a romantic, moody atmosphere. The key is to use grain sparingly, ensuring it complements rather than overpowers the photo.

When to Use Film Grain

Not every wedding photo needs grain, but certain moments lend themselves beautifully to this effect. Candid shots, such as the couple sharing a laugh during speeches or a quiet moment before the ceremony, often benefit from the added warmth and intimacy. Portraits with soft lighting, like those taken during golden hour at St Kilda Beach, can also take on a magical quality with a light grain overlay. On the other hand, highly detailed images—such as close-ups of the wedding rings or the intricate lace on a dress—might not need grain, as it could obscure important details.

Choosing the Right Type of Grain

Film grain comes in many forms, from fine-grained textures reminiscent of 35mm film to coarser patterns that mimic medium-format or even vintage instant film. The choice depends on the mood you want to convey. For a delicate, romantic feel, opt for a fine, even grain that adds subtle texture without drawing attention to itself. For a more dramatic or retro look, a coarser grain can create a sense of nostalgia or grit. Experiment with different grain patterns to see which one best suits the photo’s lighting, composition, and emotional tone.

Applying Film Grain in Post-Production

Adding film grain is a relatively simple process, but doing it well requires attention to detail and a light touch. Here’s a step-by-step guide to achieving a natural, film-like effect.

Step 1: Start with a Clean Edit

Before adding grain, ensure your photo is properly edited for exposure, color balance, and contrast. Grain works best when applied to an image that already looks polished and balanced. For example, if you’re editing a photo taken during a cloudy day at Brighton Beach Bathing Boxes, first adjust the white balance to remove any bluish tints and brighten the shadows to reveal details in the colorful boxes. Once the colors and tones are accurate, you can move on to adding grain.

Step 2: Add the Grain Layer

Most photo editing software allows you to add grain through a dedicated filter or by creating a new layer with a noise texture. If using a filter, look for options like “grain” or “noise” in the effects panel and adjust the intensity to a low setting—around 5-10% is a good starting point. If creating a noise layer, fill a new layer with 50% gray, then apply the “add noise” filter. Set the layer’s blending mode to “overlay” or “soft light” and reduce the opacity until the grain looks natural.

Step 3: Refine the Grain Distribution

Not all areas of a photo need the same amount of grain. For example, in a portrait of the bride and groom, you might want the grain to be more pronounced in the background to create depth, while keeping the faces smoother to highlight their expressions. Use a layer mask to paint over areas where you want less grain, or adjust the opacity of the grain layer locally using a brush tool. This selective approach ensures the grain enhances the photo without distracting from the main subjects.

Balancing Grain with Other Elements

Film grain is just one part of the equation—it needs to work in harmony with the photo’s lighting, composition, and color palette to create a cohesive look.

Complementing Lighting Conditions

The type of lighting in your photo can influence how grain is perceived. Soft, diffused light—such as that found during golden hour or on an overcast day—pairs well with fine grain, as it adds texture without disrupting the gentle mood. Harsher lighting, like direct sunlight or artificial lights at a reception venue, might call for a slightly coarser grain to balance the contrast and prevent the image from looking too digital.

Enhancing Mood and Atmosphere

Grain can also be used to reinforce the emotional tone of a photo. For a romantic, dreamy feel, combine fine grain with soft focus and muted colors. For a more dramatic or vintage look, pair coarser grain with high contrast and warm tones. In a photo taken during a sunset ceremony at the Yarra River, for example, a light grain overlay with warm color grading can create a warm, nostalgic atmosphere that captures the magic of the moment.

Maintaining Detail and Clarity

While grain adds texture, it’s important not to let it obscure important details. In close-up shots of the wedding rings or the couple’s hands, keep the grain subtle to ensure the intricate details remain visible. You can also use sharpening tools to enhance clarity in key areas before adding grain, ensuring the photo looks polished even with the added texture.

Final Tips for a Natural Film Grain Effect

Achieving a believable film grain aesthetic takes practice, but these tips can help you get started on the right foot.

Use Grain Sparingly

Less is often more when it comes to film grain. Start with a low intensity and gradually increase it until you find the right balance. A heavy-handed approach can make the photo look dated or artificial, while a subtle touch adds timeless charm.

Test Different Grain Patterns

Not all grain is created equal. Experiment with fine, medium, and coarse patterns to see which one best suits the photo’s style and mood. You can even create custom grain textures by scanning real film or using high-resolution grain samples from trusted sources.

View Photos at Different Sizes

Grain can look different depending on how large the photo is displayed. After adding grain, zoom in and out to check how it appears at various sizes. What looks subtle on a small screen might become distracting when enlarged, so adjust accordingly.

By following these guidelines, you can add a beautiful film grain effect to your Melbourne wedding photos that feels authentic, timeless, and emotionally resonant. Whether you’re capturing the energy of a city wedding or the serenity of a coastal ceremony, grain can help turn ordinary moments into extraordinary memories.

wedding photography melbourne

Melbourne Wedding Photography – Simple and Sophisticated High-End Post-Processing Photos

Elevating Melbourne Wedding Photography with Minimalist, High-End Retouching

Melbourne’s diverse landscapes—from its historic architecture to coastal vistas—provide a stunning canvas for wedding photography. For couples seeking a timeless, sophisticated aesthetic, minimalist retouching focuses on enhancing natural beauty while maintaining a clean, polished look. This approach avoids heavy filters or dramatic edits, instead emphasizing subtle adjustments that let the subject and scenery shine. Here’s how to achieve this elegant style in post-processing.

wedding photography melbourne

Embracing Subtlety in Color Grading

Minimalist wedding photography relies on soft, balanced tones that evoke calmness and romance. The goal is to enhance the scene without altering its essence, creating images that feel both modern and classic.

Softening Harsh Lighting for a Gentle Mood

Melbourne’s weather can shift quickly, leading to mixed lighting conditions during outdoor shoots. If harsh sunlight creates strong shadows or overexposed highlights, use the highlights and shadows sliders to balance the exposure. For example, in a photo taken at St Kilda Beach, gently reduce the highlights to prevent the sky from blowing out while lifting the shadows to reveal details in the couple’s attire. This creates a harmonious, airy feel that complements the minimalist aesthetic.

Creating a Cohesive Color Palette

Consistent coloring ties the entire wedding album together. Start by adjusting the white balance to neutralize any unwanted color casts, such as the cool tones of an overcast day or the warm glow of indoor lighting. Then, use the hue/saturation sliders to fine-tune individual colors. For a shoot in the Royal Botanic Gardens, you might desaturate greens slightly to prevent them from overpowering the couple, while boosting the warmth of skin tones for a flattering, natural look. Avoid extreme adjustments—subtle shifts are key to maintaining elegance.

Enhancing Natural Skin Tones

The bride and groom should always be the focal point of any wedding photo. Use the brush tool to selectively brighten their faces, ensuring their skin looks radiant without appearing overly edited. For a portrait taken near Federation Square, where city lights might cast a bluish tint, warm the skin tones slightly using the temperature slider. Reduce redness or blemishes with the spot healing tool, but keep edits minimal to preserve authenticity. A light touch ensures the couple looks their best while maintaining a natural, timeless quality.

Refining Composition and Focus

Minimalist retouching extends beyond color—it also involves refining the image’s structure to draw attention to what matters most.

Cropping for Impact and Balance

A well-composed photo tells a story without distractions. Use the crop tool to eliminate unnecessary elements, such as a stray bystander or a cluttered background. For a candid shot taken during the reception, cropping tightly around the couple’s faces can emphasize their emotions and connection. Alternatively, leaving negative space around the subjects—like the empty sky above a coastal ceremony—can create a sense of grandeur and simplicity. Experiment with different ratios to find the most flattering frame.

Sharpening Details Without Overdoing It

Crisp details add sophistication to wedding photos, but over-sharpening can create harsh edges or noise. Apply sharpening selectively using the masking slider in the details panel. This targets only the areas with important details, such as the lace on a wedding dress or the texture of a suit jacket, while leaving smoother areas like skin untouched. For a close-up of the rings, a light application of sharpening can make the diamonds sparkle without making the metal look artificial.

Removing Distractions Discreetly

Even the most carefully planned shoots can have unexpected interruptions, like a photobombing seagull or a power line in the background. Use the clone stamp or healing brush tool to remove these distractions seamlessly. For a photo taken at Brighton Beach Bathing Boxes, erasing a stray umbrella from the background can keep the focus on the couple and the colorful boxes. Always zoom in to check your work, ensuring the edits blend naturally into the scene.

Achieving a Timeless, Polished Finish

The final touches of minimalist retouching involve refining the image’s overall atmosphere to ensure it feels both current and classic.

Adding a Subtle Matte Effect

A matte finish reduces contrast and gives photos a soft, vintage-inspired look. Create a new adjustment layer and lower the contrast slightly, then increase the blacks slider to add depth without harshness. For a photo taken in the Dandenong Ranges, where lush greenery might look too vibrant, a matte effect can tone down the colors while maintaining their richness. Adjust the opacity of the layer to control the intensity of the effect—a little goes a long way.

Balancing Vignetting for Framing

A gentle vignette can draw the viewer’s eye toward the center of the image, creating a natural frame around the couple. Use the vignette tool in the effects panel to darken the edges slightly, then adjust the feathering to ensure the transition is smooth. For a formal portrait taken at a historic venue like Como House, a subtle vignette can enhance the grandeur of the architecture while keeping the focus on the subjects. Avoid heavy vignetting, which can make the image feel dated or artificial.

Preserving Authenticity in Every Edit

The hallmark of minimalist retouching is its commitment to authenticity. Every adjustment should serve to enhance the natural beauty of the scene and the couple, not to transform them into something unrecognizable. For example, when editing a candid moment during the first dance, focus on refining the lighting and composition rather than altering the couple’s expressions or body language. This approach ensures the photos feel genuine and emotionally resonant, capturing the true spirit of the day.

Conclusion: The Art of Understated Elegance

Minimalist, high-end retouching for Melbourne wedding photography is about striking the perfect balance between refinement and authenticity. By focusing on subtle color adjustments, clean composition, and discreet edits, you can create images that stand the test of time while celebrating the couple’s unique story. Whether shooting in the heart of the city or along the coast, this approach ensures every photo exudes sophistication and grace.