81688-Sample-122

Melbourne Sunset Golden Hour Wedding Photography Session

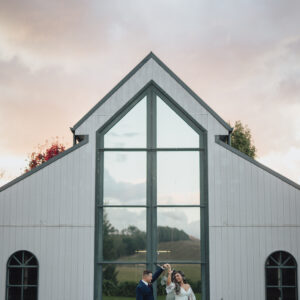
Melbourne Golden Hour Wedding Photography: How To Shoot The Sunset Window That Everyone Chases

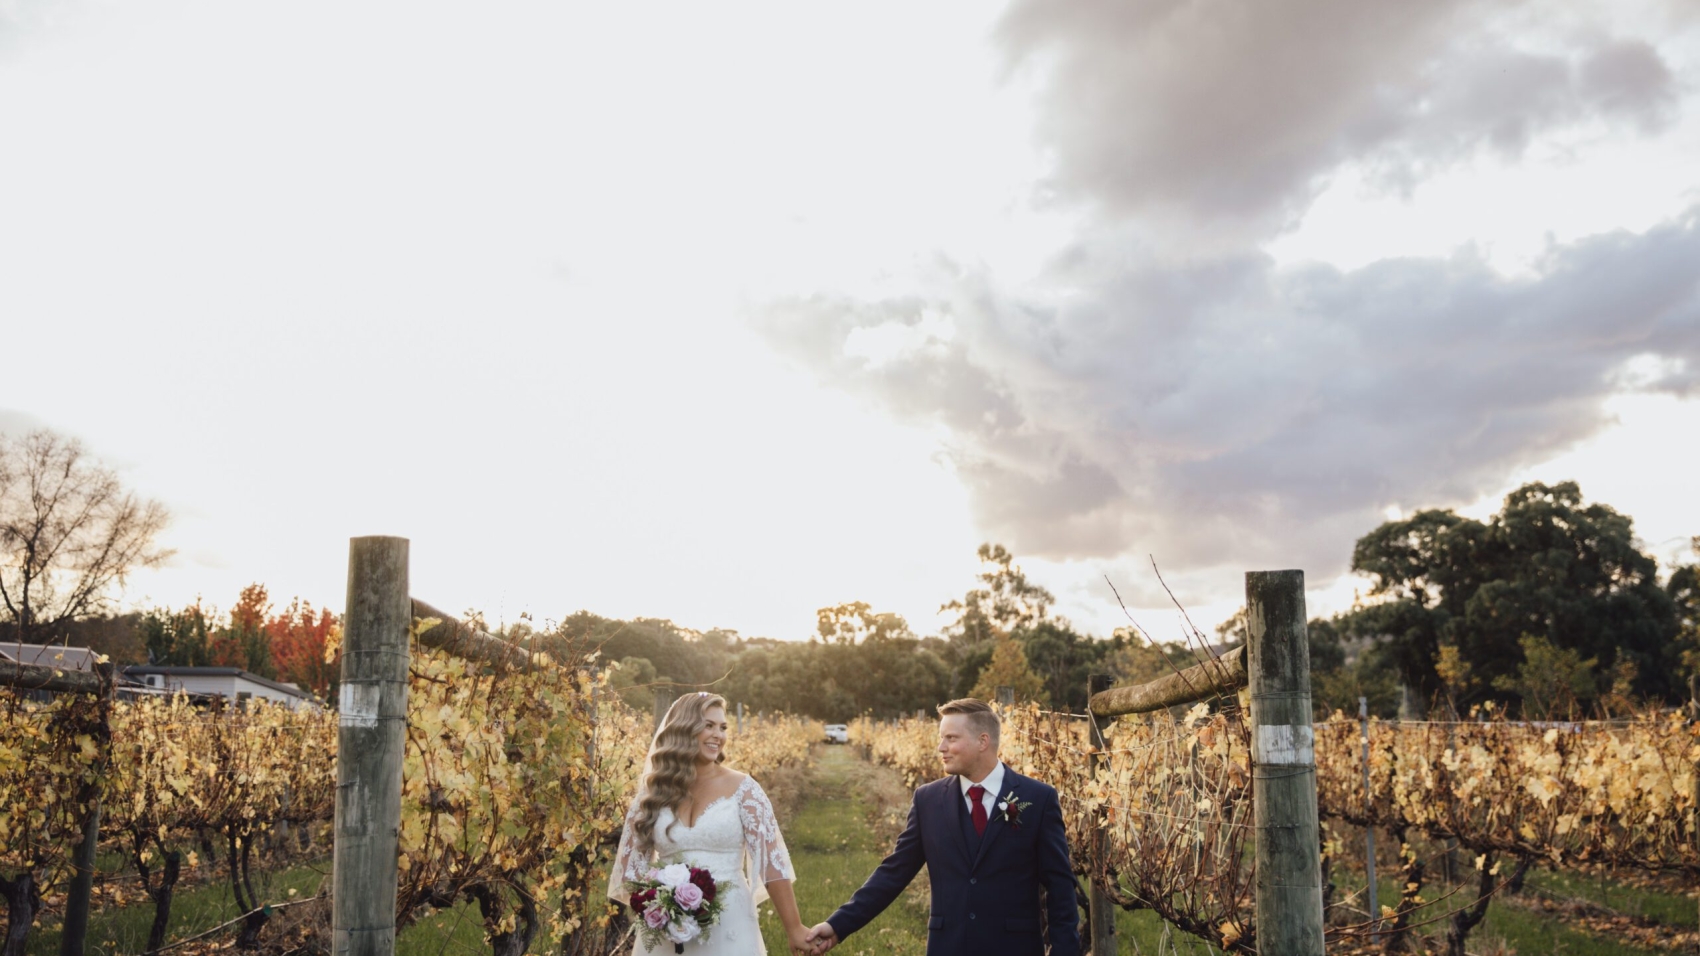
There is a reason golden hour is the most booked time slot for wedding photography in Melbourne. The light does something no other time of day can do. It turns skin to gold, makes white dresses glow, and wraps the whole city in this warm, honeyed tone that feels like the world is holding its breath. Melbourne’s golden hour in particular has a quality to it that photographers from overseas constantly talk about. The air is cleaner here, the light is softer, and the city skyline catches the last sun in a way that creates silhouettes and reflections you will not find anywhere else. But here is the thing most couples do not realize: golden hour in Melbourne is only about 20 minutes of usable light, and if you do not plan for it, you will spend the whole session chasing a sun that already set.

wedding photography melbourne

What Makes Melbourne’s Golden Hour Different From Everywhere Else

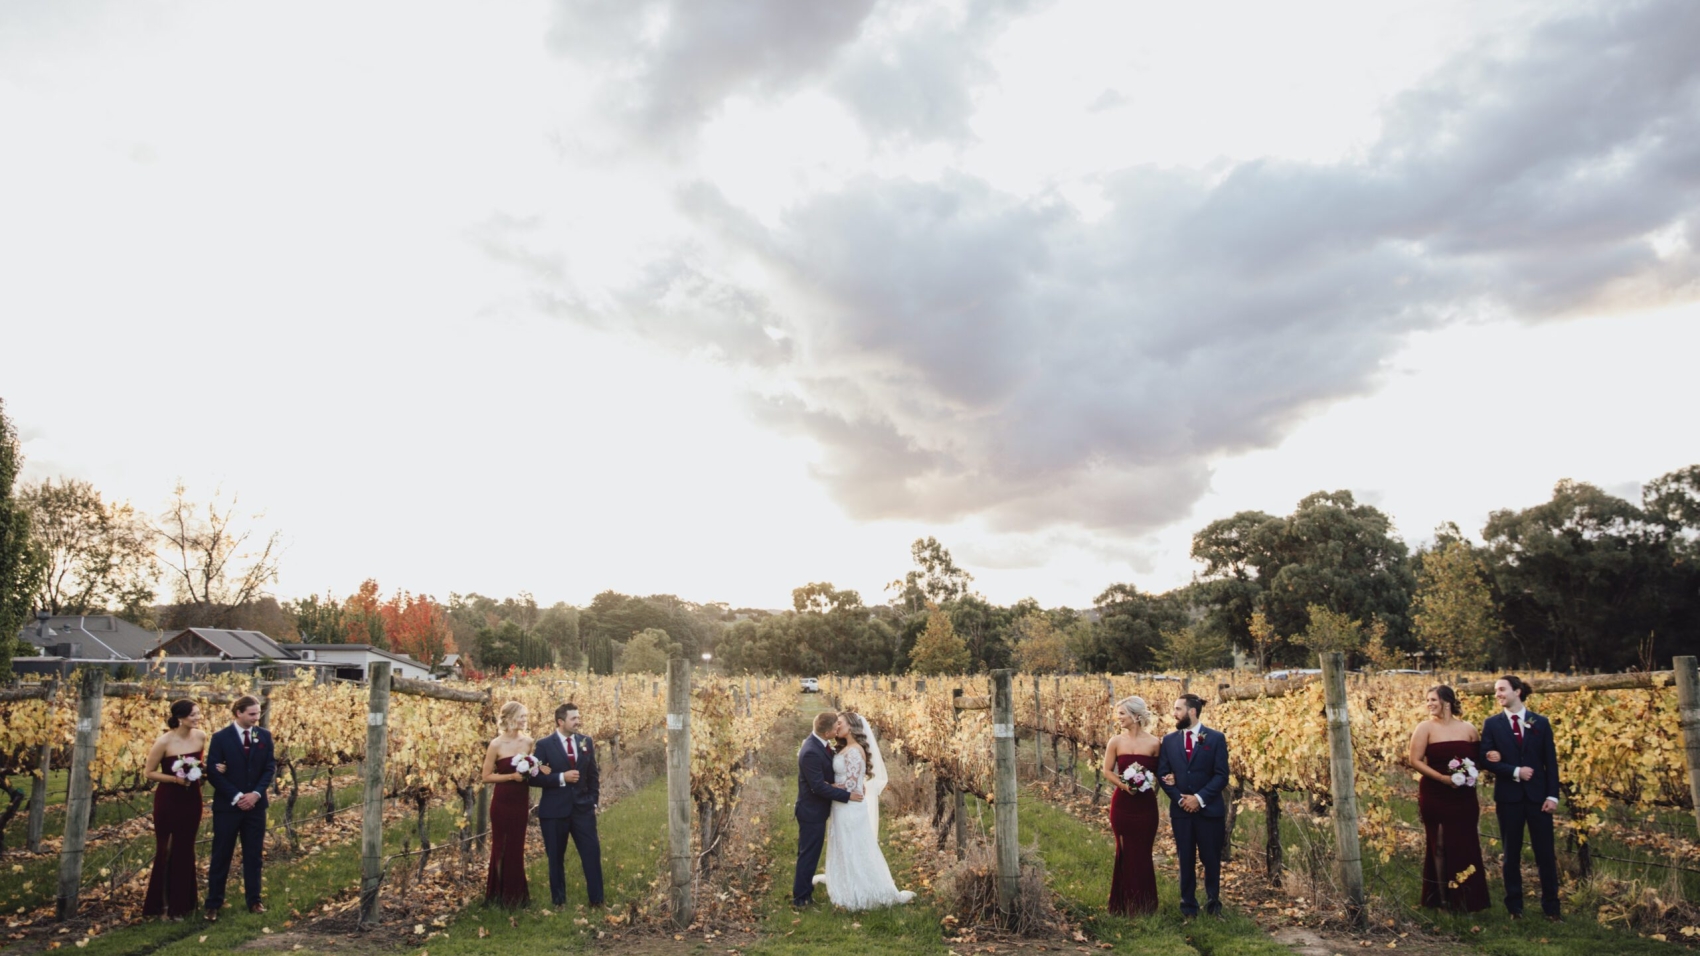
Golden hour exists in every city on earth. But Melbourne gives you something most places do not: a long, low-angle sunset that stretches the warm tones across the sky for nearly half an hour. In cities closer to the equator, the sun drops fast and the golden window is 10 minutes, maybe 15. In Melbourne, especially in summer, the sun hangs low on the horizon from about 7:15pm to 8pm, and the light shifts through amber, orange, peach, and pink in a slow, gradual way that gives you time to actually shoot instead of panicking.

The other thing Melbourne has going for it is the Yarra River. Water reflects the sunset and doubles the warm tones in every frame. The city skyline across the river catches the last light and turns gold while the sky behind it burns orange and pink. That combination of reflected light and direct light creates a layered, multidimensional glow that flat-land cities simply cannot match.

The air quality in Melbourne also plays a role. The city sits far from heavy industry, and on a clear evening, the atmosphere is clean enough that the light travels through without getting muddied by haze or pollution. The result is a golden tone that is rich and saturated instead of washed out and pale. You get deep amber instead of pale yellow. That difference shows up in every photo.

The Color Shifts You Need To Watch For

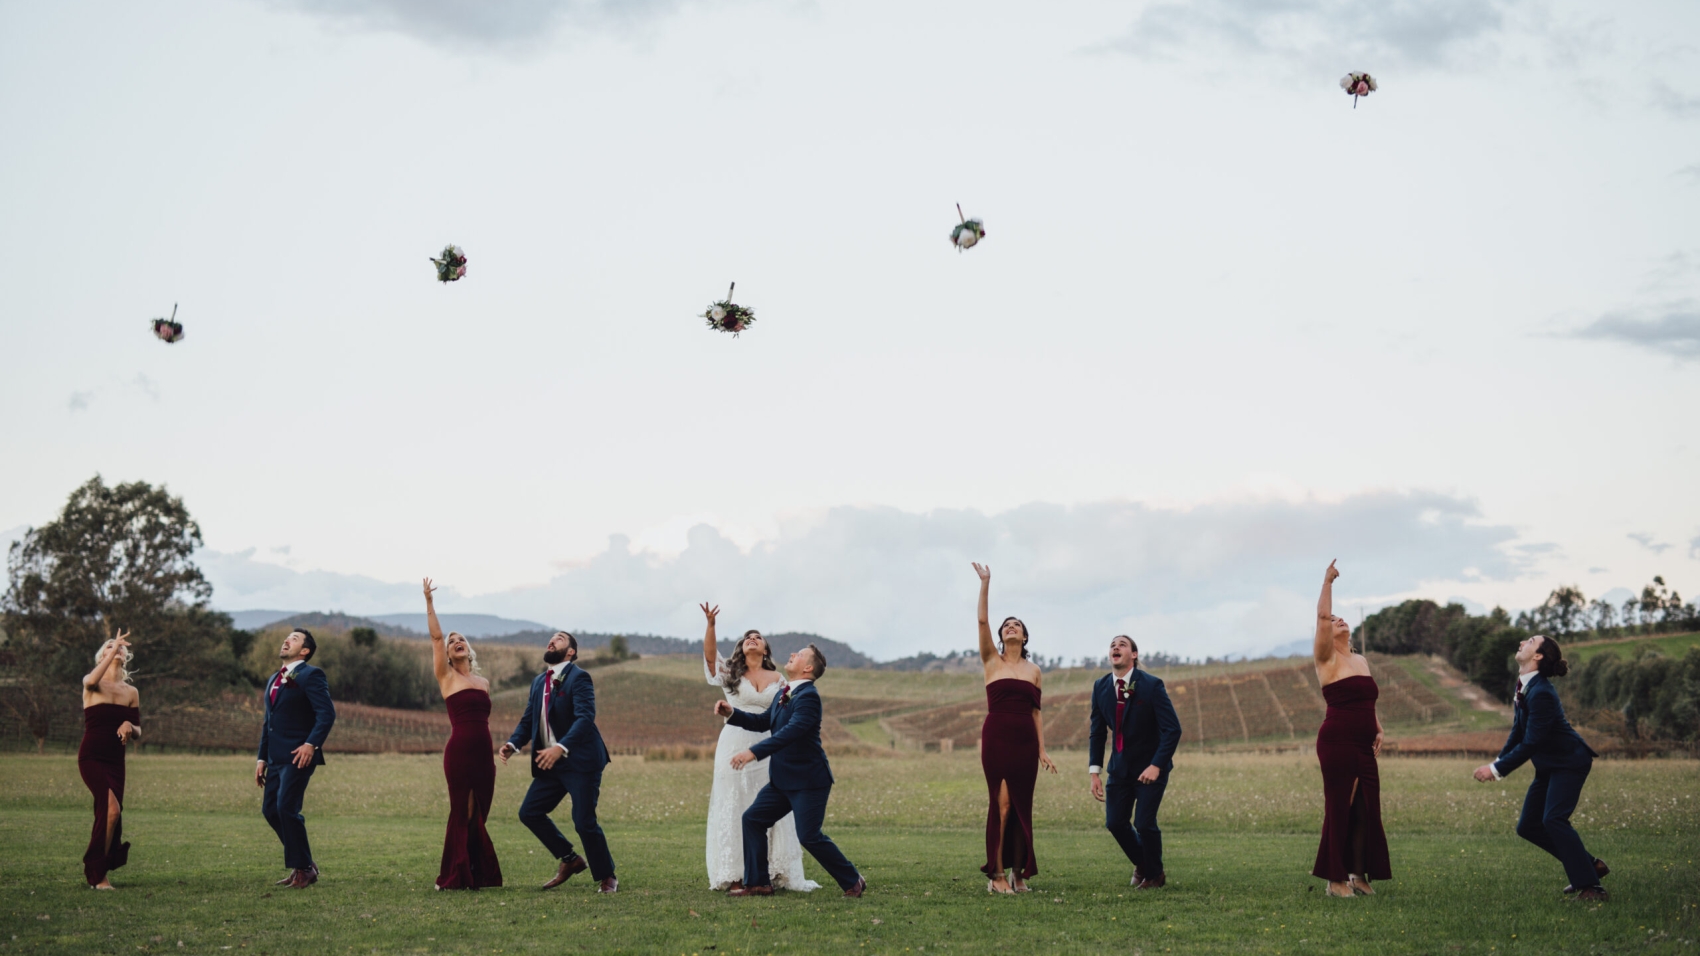
Golden hour is not one color. It is a sequence. The first 10 minutes after the sun hits the horizon, the light is deep orange and the shadows are long and warm. This is the most dramatic window. Skin looks bronze, dresses look gold, and every shadow has a rich, saturated tone.

The next 10 minutes, the light shifts to peach and pink. The orange fades and the sky turns into a gradient of warm pastels. This is the most romantic window but it is also the shortest. The light is softer, the contrast is lower, and the tones are more delicate. This is when you want tight portraits, close-ups, and detail shots.

The last 5 to 10 minutes, the light goes blue and purple. This is not golden hour anymore, this is blue hour, and it is a completely different look. The sky turns deep blue, the city lights start popping, and the warm tones are gone. Some photographers love this window for its moody, cinematic feel. But if you came for golden hour, you need to be done before this starts.

The Best Melbourne Spots For Golden Hour Wedding Photos

You cannot shoot golden hour just anywhere. You need a location that faces west, has an unobstructed view of the horizon, and gives you something interesting to put in the frame besides a flat sky. Melbourne has a handful of spots that nail this every time.

St Kilda Beach And The Pier

St Kilda is the classic golden hour spot in Melbourne and it is classic for a reason. The pier extends west into Port Phillip Bay, which means you get open sky on one side and water reflecting the sunset on the other. The reflection doubles the orange. The pier itself gives you leading lines that draw the eye straight to your couple.

The palm trees along the Esplanade catch the golden light and create silhouettes that frame your couple without any effort. The beach crowds thin out by 6pm, so you get clean backgrounds. The sand turns gold in the low light, which means even the ground becomes part of the color palette.

Position your couple at the end of the pier or on the grass near the kiosk. The sun sets behind them, which means you get that rim light around their hair and shoulders that makes every portrait look editorial. The water in front of them reflects the sky, which fills in the shadows on their faces with soft, warm light. It is the kind of lighting setup that looks like it took a crew of ten people to build, but it is just the sun and the bay doing their thing.

Williamstown And The Bay

If you want a wider, more dramatic backdrop, head to Williamstown. The beach faces west and the view across the bay toward the city skyline gives you something St Kilda cannot. The sun sets over the water, and the city buildings catch the last light and turn gold one by one as the sun drops lower.

The old boat sheds along the waterfront add texture and character. Rusty metal, weathered wood, peeling paint, all of it looks incredible in golden light. Your couple can lean against a shed, walk along the jetty, or stand on the sand with the city behind them. Every angle works because the light is coming from behind and wrapping around everything.

The rocky outcrop near the point gives you foreground elements that anchor the frame. Dark rocks against an orange sky is one of the most reliable compositions in wedding photography. It never gets old because the light is different every single evening.

The Yarra River And Southbank

Southbank gives you something the beach cannot: urban golden hour. The river acts as a mirror, doubling every light in the skyline. The promenade is wide and open, which gives you room to breathe compositionally. The lights from the arts center, the casino, and the buildings across the water create a layered backdrop that looks incredible in any frame.

The pedestrian bridges are the real play here. Standing on a bridge with the river below and the city behind you gives you depth, leading lines, and reflections all in one shot. The bridge railings create natural frames. The water catches every color and turns it into a painted surface.

Get to Southbank by 6:30pm in summer. The light starts shifting around 7pm, and you want to be set up and shooting before the sun hits the horizon. The first 10 minutes of direct golden light on the river are the best. After that, the light softens and the reflections get more diffuse, which is beautiful but a different look.

How To Actually Shoot Golden Hour Without Wasting The Window

The light is gorgeous but it moves fast. If you show up at 7pm and start scouting locations, you are already too late. You need a plan before you arrive.

Scouting The Day Before

Walk your location the evening before your shoot. Find the exact spot where the sun will set relative to your backdrop. Note where the shadows will fall. Check if there are any obstructions like trees, buildings, or cranes that will block the sun at the critical moment.

Mark your spots with tape or a pin on your phone. Know exactly where your couple will stand, where you will stand, and what the composition will look like before the sun even comes up on shoot day. Golden hour does not give you time to figure things out. It gives you time to execute a plan you already made.

Check the exact sunset time. Weather apps give this down to the minute. Work backward from there. If sunset is at 7:45pm, you need to be shooting by 7:15pm at the latest. The best light is between 7:15pm and 7:35pm. After that, you are chasing a fading glow.

Camera Settings For Golden Hour

Shoot manual. There is no other option. The light is changing too fast for auto anything.

Start with an aperture of f/2.8 to f/4. You want the background to glow but you also want your couple sharp. Going wider than f/2.8 risks missing focus on eyes, especially if your couple is moving. Stopping down past f/5.6 lets in less light and you will need to compensate with ISO, which adds noise.

Shutter speed depends on whether you are handheld or on a tripod. Handheld, do not go below 1/125th of a second or you will get motion blur from your own hands. On a tripod, you can go as slow as you need. For walking shots, 1/60th to 1/100th usually works if your couple moves slowly.

ISO is where golden hour gets tricky. The light is dimming fast, which means you will need to push ISO higher as the session goes on. Start at ISO 400 to 800 and work your way up to 1600 or 3200 by the end of the window. Modern cameras handle this well. A little grain actually adds to the warm, film-like quality of golden hour photos. It looks intentional, not sloppy.

White balance is critical. Set it manually to around 5000K to 5500K. This keeps the orange tones warm and rich instead of letting the camera cool them down. If you shoot RAW, you can adjust this later, but getting it close in-camera gives you a better starting point. Auto white balance will try to neutralize the warm light and turn your golden hour into a flat, gray mess.

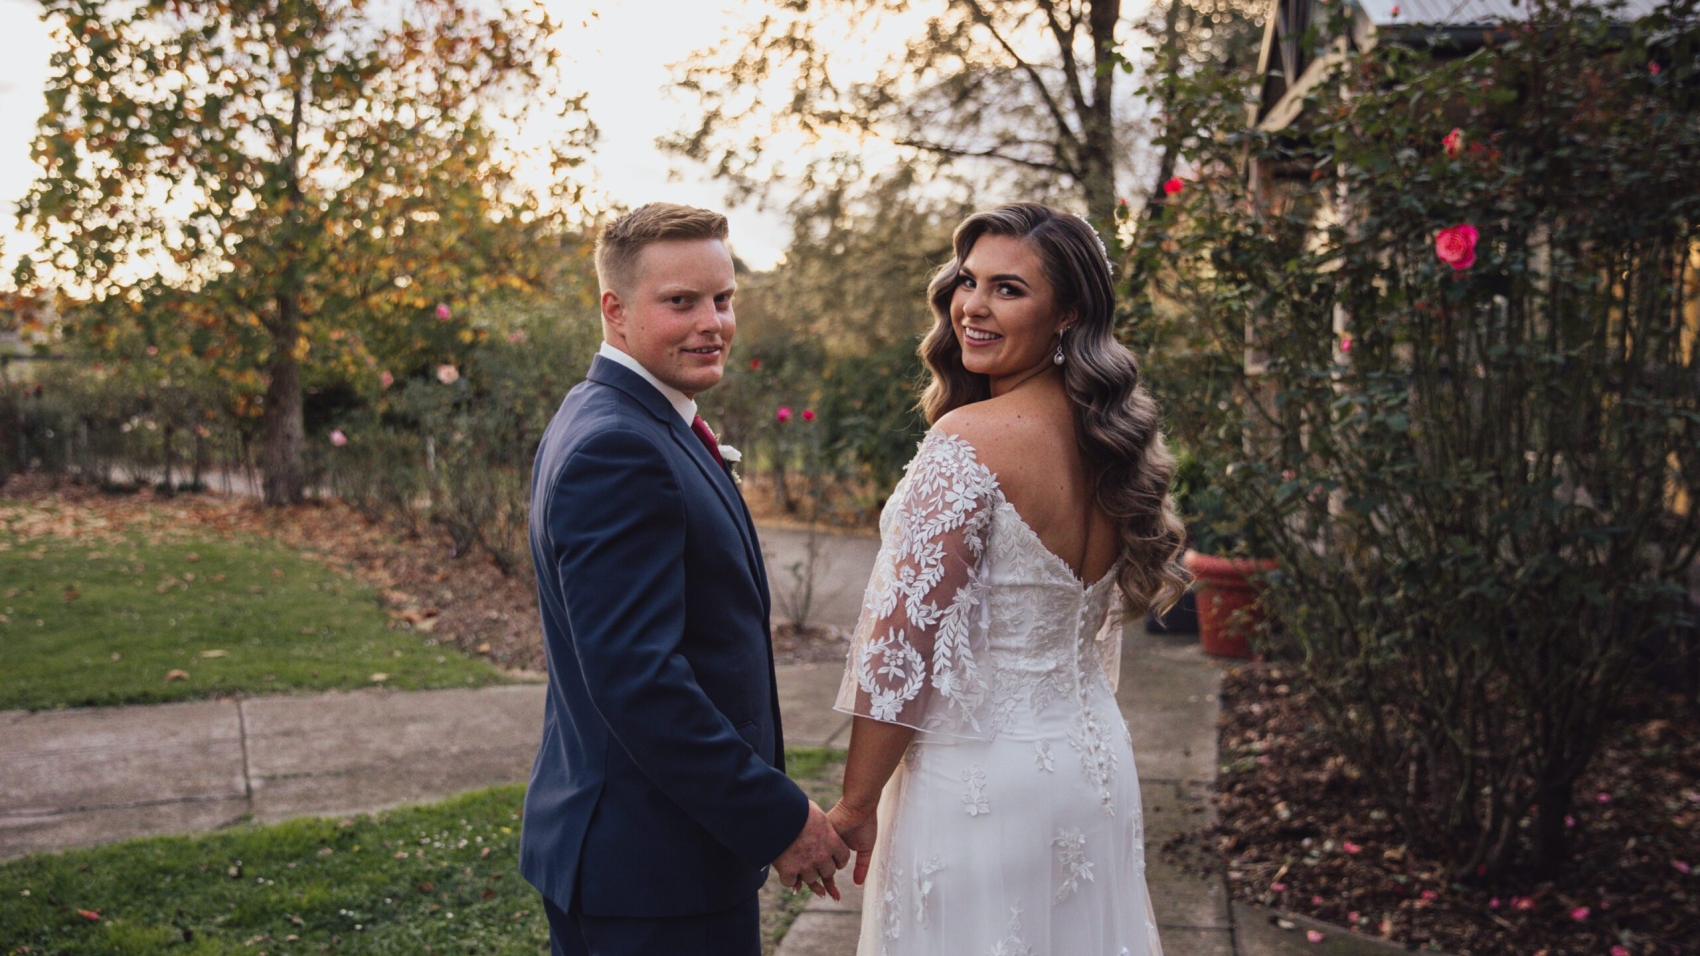
Backlighting Your Couple The Right Way

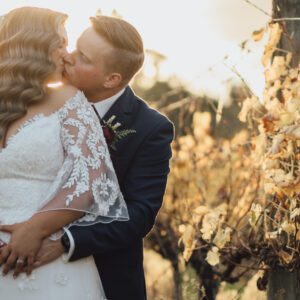
The move for golden hour is backlighting. Put the sun directly behind your couple and let it rim their hair, their shoulders, the edges of their dress. This creates that glowing outline that separates them from the background and makes them look like they are lit from within.

Do not put the sun dead center behind their head. That creates a blown-out white hole. Offset it slightly to one side. Let it peek out from behind a shoulder or through the branches of a tree. This gives you a controlled flare that adds warmth without washing out the image.

Expose for your couple’s faces, not the sky. The sky will be bright. That is fine. Let it be bright. Your couple’s faces are what matter. If the sky blows out to pure white, it looks clean and intentional. If your couple’s faces are dark because you exposed for the sky, the photo is ruined.

Use lens flare intentionally. A small amount of flare in the corner of the frame adds to the golden mood. Too much and it looks cheap. Find the balance by changing your angle slightly until the flare sits where you want it.

Common Mistakes That Kill Golden Hour Shoots

The first mistake is showing up late. I mean late. Golden hour in Melbourne moves fast, especially in summer when the sun drops quickly. If you arrive at 7pm for a 7:30pm sunset, you have lost your setup time. Arrive at least 45 minutes before sunset. Use that time to scout, compose, and let your couple settle in.

The second mistake is overshooting. You have maybe 20 minutes of peak golden light. Do not waste it taking 500 frames of the same pose. Take 20 good ones, then move on. Change the location, change the pose, change the composition. The light is shifting every minute, so every frame should look different from the last.

The third mistake is ignoring the couple. Golden hour is stressful. The light is fading, the clock is ticking, and everyone is rushing. But your couple needs to feel relaxed. If they are tense, the photos will look tense. Talk to them. Make them laugh. Give them something to do with their hands. The golden light will do the rest, but only if your couple is actually enjoying themselves.

The fourth mistake is not shooting into the sun. The best golden hour portraits have the sun behind or beside your couple, never in front of them. Front light in golden hour is flat and unflattering. Side light and backlight are where the magic lives. The sun should be your backlight, not your key light.

What To Do After The Sun Goes Down

Golden hour ends. The orange fades, the sky turns blue, and the city lights come on. Most photographers pack up and leave. But the next 15 to 20 minutes, called blue hour, is its own window.

The sky turns deep blue and the city lights turn warm yellow. That contrast between cool blue and warm yellow is one of the most beautiful color combinations in photography. Your couple stands in the blue light with the warm city glowing behind them, and the photo looks like it belongs in a film.

Shoot wide during blue hour. The city skyline is fully lit, the sky is still visible, and the light is soft and even. Your couple becomes a silhouette against the glowing city, or they are lit by a nearby streetlamp with the blue sky behind them. Either way, the photos are stunning and completely different from the golden hour shots.

You get two moods from one session. The warm, orange, romantic golden hour. And the cool, blue, cinematic blue hour. Tell your couple to expect both. The golden hour shots are what they came for. The blue hour shots are what they will not stop posting on Instagram.

81688-Sample-145

Melbourne cloudy-day wedding photography with a soft mist atmosphere effect

Melbourne Overcast Wedding Photography: The Soft Mist Mood That Makes Every Portrait Feel Like A Dream

Everyone wants golden hour. Everyone chases the sun. But the best wedding photographers in Melbourne know a secret that most couples never hear: overcast days are where the magic actually lives. The sky turns into one giant softbox. The light wraps around everything evenly. Shadows disappear. Skin looks flawless. And the whole city takes on this quiet, misty, almost cinematic quality that no amount of post-processing can fake. Melbourne gets more overcast days than most people realize, and if you learn to shoot in that light, you unlock a look that is cleaner, softer, and more emotional than anything bright sun can give you.

wedding photography melbourne

Why Overcast Light Is The Most Underrated Wedding Light Source

Most couples hear the word overcast and think disaster. Gray sky, flat light, boring photos. That is what they have been told. But that advice comes from people who do not understand how light actually works. Overcast sky is not the absence of light. It is the presence of perfect light. The clouds act as a massive diffuser, scattering the sunlight in every direction so it hits your couple from all angles at once. No harsh shadows. No blown-out highlights. No squinting. Just soft, even, wraparound illumination that makes every face look its best.

The color temperature on an overcast day in Melbourne sits around 6500K to 7500K, which is cooler than golden hour but warmer than you might think. It gives skin a natural, rosy tone without any orange cast. White dresses look clean and bright instead of yellow. And the overall mood of the image feels calm, intimate, and timeless. This is the look that ages well. Ten years from now, these photos will still feel fresh. Golden hour shots from the same year will already look dated.

The Mist Factor That Makes Melbourne Overcast Days Special

Melbourne is not just overcast. It is misty. The city sits close to the coast, the humidity fluctuates wildly, and on a gray day, that humidity turns the air into a natural fog machine. Buildings fade into the background. Trees become silhouettes. The Yarra River disappears into a white haze. And your couple stands in the middle of it all, sharp and clear against a world that has gone soft.

This is not something you can replicate in Los Angeles or Miami or any other sunny city. Melbourne’s overcast mist has a specific quality to it. It is not heavy fog that kills visibility. It is a light, airy haze that reduces contrast in the background while keeping your couple in focus. The result is portraits that look like they were shot in a studio with professional lighting, except you used nothing but the sky.

The mist also affects color. It desaturates the background, which means the colors in your couple’s clothing, their skin, their flowers, all of it pops against the muted gray. A red bouquet against a misty Melbourne skyline is one of the most striking color combinations you will ever see in a wedding photo. The mist does the work for you.

Melbourne Locations That Deliver Overcast Magic

Not every spot handles overcast light the same way. Some places look flat and gray. Others look like a painting. You need to pick your ground carefully.

The Yarra River And Southbank On A Gray Day

Southbank on an overcast day is something else entirely. The river turns silver-gray and reflects the sky like a mirror. The city skyline across the water fades into the mist, which means your couple becomes the clear focal point of every frame. The promenade is wide and open, the light is even, and there are no harsh shadows anywhere.

The pedestrian bridges are incredible in this light. Standing on a bridge with the river below and the misty skyline behind you gives you depth, reflection, and atmosphere all at once. The bridge railings create leading lines that draw the eye toward your couple. The water below catches the gray sky and turns it into a smooth, reflective surface that doubles every element in the frame.

Go in the morning when the mist is still low. By midday, the clouds often break and the light gets patchy. The early morning overcast window, roughly 8am to 10am, is when the mist is thickest and the light is most even. That is your golden window, ironically.

Carlton Gardens And The University Precinct

The old sandstone buildings at the University of Melbourne look incredible on a gray day. The warm tones of the stone contrast with the cool gray sky, which creates a color tension that makes every photo feel editorial. The elm trees along the paths create a canopy that diffuses the light even further, and the grass stays green and vibrant while everything else goes muted.

The lawns here are wide and open, which means you get clean backgrounds without any visual clutter. Your couple walks across the grass with the old buildings behind them and the gray sky above, and the photo looks like it belongs in an architecture magazine. The mist adds a layer of depth that makes the buildings feel distant and dreamy instead of flat and boring.

Shoot near the old buildings with the warm stone visible. The contrast between the warm stone and the cool gray sky is one of the most reliable color combinations in wedding photography. It works every time, no matter the season.

Fitzroy Gardens And The Tree-Lined Paths

Fitzroy Gardens on an overcast day has this quiet, melancholic beauty that is perfect for wedding portraits. The elm trees form a tunnel overhead, and in the mist, the canopy becomes a soft gray ceiling that diffuses the light even further. Walking down these paths with your couple feels like walking through a memory.

The ornamental lake is the star here. On a gray day, the water turns pewter-colored and reflects the mist like a foggy mirror. Your couple standing by the lake with the water and the mist behind them looks like they are standing at the edge of the world. The reflections are soft and muted, which adds to the dreamlike quality of the image.

The rose gardens are quieter on overcast days, which means you get the space to yourselves. No crowds, no distractions, just your couple and the mist and the old trees. That is when the best photos happen.

How To Shoot Overcast Light So It Looks Intentional And Not Flat

Overcast light is forgiving, but it can also look boring if you do not push it. A few deliberate choices will separate good overcast photos from great ones.

Exposing For The Mood Instead Of The Meter

Your camera’s light meter will see all that gray sky and think the scene is darker than it actually is. It will want to overexpose, which kills the mood. The whole point of shooting overcast is the soft, muted tone. If you let the camera brighten everything up, you lose that.

Underexpose by about one-third to one-half of a stop. This keeps the gray sky rich and moody instead of washing it out to white. Your couple will be slightly darker, but you can lift them in post without losing the overcast atmosphere. The key is to protect the mood first and fix the exposure second.

If you shoot RAW, you have even more control. Pull the highlights down slightly to keep the sky from blowing out. Lift the shadows just enough to see your couple’s faces clearly. The result should feel dim and soft, not bright and flat. That is the overcast look.

Using The Mist As A Natural Filter

The mist is not a problem. It is your best tool. It reduces contrast in the background, which means distant elements fade away and your couple stands out without any artificial vignette. It softens edges, which means harsh architectural lines become gentle and the whole image feels cohesive.

Position your couple so the mist is behind them, not in front of them. Back mist creates depth and separation. Front mist creates a soft, dreamy foreground that frames your couple. Both work, but back mist is more dramatic and front mist is more intimate.

If the mist is too thick and your couple is losing contrast, move them closer to the camera. The mist affects distant objects more than nearby ones, so even a few feet of distance can make a big difference in how sharp your couple looks against the background.

White Balance That Keeps The Cool Tone Without Going Blue

Auto white balance on an overcast day will push the image toward blue, which can make skin look cold and lifeless. Set your white balance manually to around 6000K to 6500K. This keeps the cool tone that makes overcast photos feel moody but prevents the image from going fully blue.

If you want a warmer overcast look, push toward 5500K. The skin tones will look rosier and the overall image will feel more inviting. This works especially well if your couple is wearing warm-toned clothing like ivory, champagne, or blush. The warm clothes against the cool gray sky create a beautiful color contrast.

Do not go above 7000K. That turns the image clinical and cold. Do not go below 5000K. That warms everything up too much and kills the overcast mood. Stay in that 5500K to 6500K range and you will get the soft, cool, dreamy tone that makes overcast wedding photos so special.

Working With The Lack Of Shadows

The biggest technical challenge of overcast photography is the absence of shadows. Shadows give photos dimension. Without them, faces can look flat and features can disappear. You need to create dimension in other ways.

Using Direction And Positioning Instead Of Shadows

Since the light is coming from everywhere, you have to create direction by positioning your couple relative to the environment. Turn your couple so the light hits one side of their face more than the other. Even a slight angle creates enough contrast to define cheekbones and jawlines.

Use the environment to create depth. A row of trees receding into the mist gives you layers even without shadows. A path leading into the distance creates perspective. A building on one side of the frame creates a visual anchor. These compositional elements replace the shadows that overcast light removes.

Get low sometimes. Shooting from waist height or below changes the perspective and creates dimension that overhead flat light cannot. Your couple looks powerful, the background becomes a wash of gray, and the lack of shadows stops mattering because the composition is doing the work.

Embracing The Flatness As A Style Choice

Here is something most photographers will not tell you: flat light is a style. It is not a limitation. Japanese wedding photography, Scandinavian editorials, Korean wedding trends, all of them use flat, soft, shadowless light on purpose. It looks clean, modern, and minimal. It feels calm instead of dramatic. And it ages better than high-contrast golden hour shots because there is less to look dated.

If your couple wants a modern, editorial look, lean into the flatness. Do not fight it. Let the light wrap around everything evenly and let the composition and the emotion carry the photo. The result will look intentional and stylish instead of like you forgot to check the weather.

Practical Things To Know Before Your Overcast Shoot

Overcast days in Melbourne can turn rainy without warning. Bring an umbrella. Not for your couple, for your gear. A light drizzle will not ruin the shoot, but a downpour will. Check the radar the night before and have a backup indoor location ready.

The light on an overcast day does not change much from morning to afternoon. You have a long, stable window, which means you do not need to rush. Use that time to move slowly, scout compositions, and let your couple relax into the session. The lack of dramatic light means the mood has to come from them, not the sky.

Dress your couple in colors that contrast with the gray. White dresses pop against a misty skyline. Deep red, navy, or forest green all stand out beautifully. Avoid gray or beige clothing because it will blend into the background and your couple will disappear.

And shoot more than you think you need. Overcast light is forgiving, which means your hit rate will be high. Almost every frame will be usable. Take advantage of that and give your couple twice as many options as you would on a golden hour shoot. They will thank you when they see the gallery.

81688-Sample-127

Melbourne sunny-day wedding photography with natural light penetrating the scene

Melbourne Sunny Day Wedding Photography: How To Shoot Clean, Airy, Natural Light Portraits

There is something deceptively simple about shooting weddings on a clear, sunny day in Melbourne. No fog, no drama, no golden hour games. Just bright, honest light pouring over everything. And yet, this is the look that most couples actually want when they flip through their final gallery. Clean skin, bright eyes, white dresses that actually look white, and a sense of air and space that makes every photo feel like a deep breath. The problem is, most photographers overcomplicate it. They chase shadows, they add gels, they fight the sun. But the truth is, Melbourne’s midday sun on a clear day is already your best light source. You just need to know how to use it without wrecking it.

wedding photography melbourne

Why Clear Sunlight Gets A Bad Reputation In Wedding Photography

Walk into any photography forum and you will hear the same thing over and over: never shoot weddings at midday. The light is too harsh, the shadows are too deep, the colors are too flat. And that advice is not entirely wrong. If you are shooting in open field with no shade and no plan, midday sun will absolutely destroy your photos. Harsh shadows under the eyes, blown-out highlights on the dress, skin that looks washed out and overexposed.

But that is not what happens when you shoot with intention. Clear sunlight in Melbourne is different from clear sunlight in, say, Dubai or Phoenix. Melbourne sits at a southern latitude where the air is cleaner, the humidity is lower, and the light has a quality to it that feels almost European on a good day. The sun is bright but it is not oppressive. The shadows are sharp but they are not black. And when you learn to work with the light instead of against it, the results are portraits that look cleaner, brighter, and more alive than anything you get during golden hour.

What Actually Makes Sunlight Look Airy Instead Of Harsh

The difference between a harsh midday photo and an airy, clean one comes down to three things: direction, diffusion, and exposure. If the sun is hitting your couple straight on from above, you get flat light with no dimension. If the sun is coming from the side or from behind, you get shape, texture, and that glowing rim light that makes skin look incredible.

Direction matters more than anything. Front light is the enemy of dimension. Side light creates shadows that define cheekbones, jawlines, and the folds of a dress. Backlight creates that halo effect around hair and shoulders that makes every portrait look ethereal. The sun is your friend when it is not staring your couple directly in the face.

Diffusion is the second piece. Melbourne’s clear sky acts like a giant softbox, but it is still too direct for close-up portraits. You need something between the sun and your couple. A sheer curtain, a tree canopy, a white wall bouncing light back, even a large white reflector held just out of frame. These things soften the light just enough to smooth out skin without killing the brightness.

Exposure is the third piece. Most photographers underexpose midday sun because they are afraid of blowing out the highlights. But underexposing kills the airy feeling. You want the image to feel bright, not dark. Expose for the highlights, let the shadows go a little deep, and lift them in post. The result is a photo that feels light and open instead of heavy and moody.

Melbourne Locations Where Clear Sunlight Shines The Brightest

Not every spot in Melbourne handles midday sun the same way. Some places turn into ovens with no shade. Others have architecture and landscape that work with the light instead of fighting it.

The Royal Botanic Gardens In Full Sun

The Botanic Gardens on a clear day are stunning in a way that most people do not expect. The open lawns give you nowhere for harsh shadows to hide, which sounds like a problem but is actually an advantage. The light wraps around your couple evenly from every direction because there are no tall buildings or dense trees blocking it. The result is a bright, even illumination that makes skin look flawless.

The lake area is even better. The water reflects the sunlight back up onto your couple’s faces, acting as a natural fill light that no reflector can match. Stand your couple near the water’s edge with the lake behind them and the sun in front or to the side. The light hits their faces, bounces off the water, and fills in every shadow. It is clean, it is bright, and it looks effortless.

The glasshouses in the gardens also work beautifully in clear sun. The glass diffuses the light just enough to soften it while keeping everything bright and airy. Your couple walking through a glasshouse on a sunny day looks like they are floating in light. The green plants inside add color without competing with the brightness.

Go between 10am and 12pm when the sun is high but still angled enough to create some dimension. After 1pm, the light starts to flatten out and the shadows get shorter. You still get brightness but you lose the shape that makes midday portraits interesting.

Melbourne’s White-Walled Heritage Buildings

This is the secret weapon that most photographers overlook. Melbourne is full of old buildings with white or cream-colored walls, and on a clear day, those walls become giant natural reflectors. The sun hits the wall and bounces back onto your couple, filling in shadows and softening the light without any equipment.

The National Gallery of Victoria has these massive white columns and walls that throw light everywhere. Stand your couple near a column and the light wraps around them from multiple directions. The shadows are soft, the skin looks glowing, and the white architecture gives you a clean, minimal backdrop that does not distract from your couple.

Federation Square works the same way. The geometric white panels reflect light in interesting patterns that create natural dappled light on the ground and on your couple. The angular surfaces throw light at different angles, which means you get dimension even in what should be flat midday sun.

Old churches and cathedrals with white stone walls are goldmines for this kind of shooting. The light bounces off the stone and fills every corner of the frame. Your couple standing in front of a white church wall on a sunny day looks bright, clean, and almost angelic. The contrast between the dark doorway and the bright wall creates natural framing that draws the eye directly to your couple.

Open Rooftops And Elevated City Spots

Melbourne’s skyline gives you something few other cities can match: open, elevated spaces with unobstructed views and clear sky in every direction. Rooftop bars, hotel terraces, and elevated parks all give you wide-open light with no shadows from buildings or trees.

The view from a rooftop on a clear day is breathtaking for wedding photos. The sky is deep blue, the light is bright and even, and the city sprawls out behind your couple without any visual clutter. The wind is usually stronger up there, which means hair and veils move naturally, adding life to every frame.

Shoot these spots around 11am to 1pm when the sun is at its highest. The light is directly overhead, which means minimal shadows on faces. Your couple looks bright and even from every angle. The blue sky behind them pops against white dresses and creates that clean, airy look that couples go crazy for.

How To Shoot Natural Light That Looks Clean And Not Blown Out

The technique is simple but it requires discipline. Most photographers see bright sun and panic, underexposing everything to death. That is the wrong move.

Exposing For Brightness Without Losing Detail

Set your camera to spot meter mode. Point the meter at your couple’s face, not the sky, not the dress, their face. Lock that exposure. The sky might blow out a little. That is fine. A pure white sky looks clean and airy, not ruined. A blown-out sky with your couple properly exposed looks intentional and bright. A properly exposed sky with your couple underexposed looks dark and muddy.

If the dress is blowing out, that is a different problem. White fabric reflects a lot of light, and the camera’s meter does not know it is looking at a dress. It thinks the whole scene is brighter than it actually is and underexposes. Compensate by adding about one stop of positive exposure compensation. This keeps the dress white and bright instead of letting it turn gray.

Shoot RAW. This is non-negotiable for sunny day wedding photography. RAW files give you enormous latitude to recover highlights and lift shadows without destroying the image. You can pull back a blown-out sky, brighten a dark shadow under the chin, and adjust the white balance all in post. JPEG doesn’t give you that flexibility.

Using Shadows As Compositional Tools

In clear sunlight, shadows are not the enemy. They are your compositional tools. A sharp shadow from a tree branch across your couple’s dress adds texture and interest. A diagonal shadow from a building creates a leading line that draws the eye into the frame. A shadow under a hat brim frames the face and adds mystery.

The key is to not let shadows fall across your couple’s eyes. A shadow over the eyes kills the portrait instantly. But shadows on the neck, the shoulders, the dress, the ground, all of that is gold. It adds dimension to an otherwise flat, bright image.

Look for dappled light under trees. The leaves break up the direct sunlight and create patches of bright light and soft shadow across your couple. This is the most flattering light you can get on a sunny day because it gives you dimension without harshness. The light is bright but it is broken up, which means the shadows are soft-edged instead of hard-edged.

White Balance That Keeps Everything Feeling Fresh

Auto white balance on a sunny day will try to cool everything down, which turns the warm sunlight into a flat, neutral tone. That is not what you want. Set your white balance manually to around 5200K to 5600K. This keeps the sunlight warm and golden while still letting the white dress look white and the blue sky look blue.

If you want a cooler, more editorial look, push it toward 4800K. The sunlight will take on a slight blue cast that contrasts beautifully with warm skin tones. This is the look you see in a lot of high-end wedding magazines, and it works incredibly well in Melbourne’s clear, blue-sky environment.

Do not go above 6000K. That turns the sunlight yellow and makes skin look sickly. Do not go below 4500K. That turns the sky purple and the shadows blue, which looks unnatural. Stay in that 5000K to 5600K range and you will get clean, fresh, natural-looking color every time.

Making The Most Of A Clear Day Session

Clear days are predictable, which is both a blessing and a curse. The light does not change much from hour to hour, which means you have a long, stable window to work with. But it also means you need to bring energy and creativity because the light is not doing the dramatic work for you.

Pacing Your Session Around The Sun

Start when the sun is still angled, around 9am to 10am. The light has direction and dimension, which gives your photos shape and texture. Shoot your widest, most scenic shots during this window. The couple is fresh, the energy is high, and the light is doing interesting things.

Move into tighter portraits around 11am to 1pm. The sun is overhead, the light is bright and even, and this is your clean, airy window. Shoot close-ups, detail shots, and tight portraits where the brightness works in your favor. The lack of harsh shadows on faces makes this the best time for headshots and ring shots.

Wrap up around 2pm to 3pm with relaxed, candid shots. The light is still bright but the couple is looser and more natural. Shoot them walking, laughing, interacting. The clean, bright light makes every candid moment look like a magazine cover.

Keeping The Energy Up When The Light Is Flat

The biggest challenge of a clear day shoot is that the light does not change much, which means you cannot rely on the light to create variety. You have to create it yourself. Move your couple constantly. Change locations every 20 to 30 minutes. Shift from wide shots to tight shots to detail shots. Keep the camera moving and the couple engaged.

Bring props that interact with the light. A sheer veil catches the sunlight and glows. A white bouquet reflects light onto the couple’s faces. A linen suit moves in the breeze and catches the sun. These small things add movement and life to a shoot that could otherwise feel static.

And shoot more than you think you need. On a clear day, the light is forgiving, which means you can afford to take more shots. The couple will have more options in the final gallery, and you will have more keepers to choose from. A clear day shoot should produce twice as many images as a golden hour shoot because the conditions are stable and the light is consistent.

wedding photography melbourne

Melbourne Flower Season Wedding Photography – Rose Garden Shooting

Melbourne Spring Wedding Photography: Shooting Among The Rose Seas

There is a reason people lose their minds over roses in wedding photos. They are romantic without trying too hard. They are colorful without being overwhelming. And in Melbourne, spring is when the city basically turns into a rose garden. Climbing roses on heritage walls, rose arches in botanical gardens, wild roses along fence lines, and rows of hybrid tea roses in park beds all blooming at once. The window is short, maybe three to four weeks, and the petals do not wait. If you want wedding portraits surrounded by roses that look like a dream and not a stock photo, you need to know where to go, when to shoot, and how to make the roses work for you instead of against you.

wedding photography melbourne

Why Roses Are The Hardest Flower To Photograph Well

Everyone assumes roses are easy. They are beautiful, they are everywhere, they are obviously photogenic. But roses are actually one of the trickiest flowers for wedding photography. The petals are dense and the color is so saturated that cameras often blow them out or crush them into a flat pink blob. The thorns are a nightmare for couples in flowing dresses. And the bushes are messy, with branches going every which way, which means your background can look cluttered in seconds.

The good news is that roses reward patience. When you get them right, there is nothing else that looks like it. The texture, the color depth, the way the light catches the edges of the petals, none of that translates to any other flower. Peonies are soft but they do not have the same structure. Tulips are colorful but they are too uniform. Roses have layers, dimension, and a wildness to them that makes every frame feel alive.

The Rose Varieties That Photograph Best

Not all roses are created equal when it comes to camera. Deep red and burgundy roses like the Black Baccara or the Monsieur Tillier photograph incredibly well because their dark color absorbs light and creates rich, moody tones that do not blow out. They look almost velvety on camera and they contrast beautifully against white dresses.

Pale pink and blush roses like the Pierre de Ronsard or the Eden Rose are softer and more romantic. They photograph well in open shade because their light color does not blow out as easily. But in direct sun, they can turn white and lose all their detail. Shoot them in the morning or late afternoon when the light is gentle.

Climbing roses are the secret weapon. They grow on walls, fences, and trellises, which means they give you a vertical backdrop instead of a flat one. The David Austin climbing roses in particular have huge, full blooms that fill the frame and create a wall of color behind your couple. They are messy by nature, but that messiness is exactly what makes them look real and not staged.

The Best Melbourne Spots For Rose Sea Wedding Photos

Melbourne has more roses per capita than almost any city in the southern hemisphere. The climate is perfect for them, the spring rains make them explode, and the city has enough heritage architecture to give them something beautiful to climb on.

The Royal Botanic Gardens Rose Bed

The ornamental rose garden in the Botanic Gardens is the most obvious spot and it is obvious for good reason. In spring, the beds are packed with hundreds of roses in every shade from deep crimson to pale blush. The paths between the beds are narrow, which means you can shoot down the rows with roses on both sides and your couple in the middle. The effect is a tunnel of color that looks incredible from every angle.

The key is to shoot early. The garden opens at 7:30am, and if you are there by 8am, you have the place to yourself. The light is soft, the dew is still on the petals, and there are no other couples or tourists in the frame. By 10am, the crowds show up and the magic is gone.

Shoot from a low angle. Get down near the rose bed and shoot upward through the blooms. The roses in the foreground blur into a soft wash of color, and your couple rises above them. This gives the photo depth and makes the roses feel like they are surrounding your couple instead of just sitting behind them.

Fitzroy Gardens And The Rose-Covered Walls

Fitzroy Gardens has these incredible heritage walls covered in climbing roses that have been growing for decades. The blooms cascade over the stone and brick, creating a natural backdrop that looks like it belongs in a fairy tale. The color here is usually a mix of deep pinks and reds, which photographs beautifully against the old stone.

The trick with these walls is to find a section where the roses are thickest but the wall behind them is clean. A wall covered in roses with exposed brick peeking through gives you texture and color without looking like a wallpaper. Stand your couple close to the wall, maybe a foot or two in front of it, and shoot with a wide aperture like f/2.8. The roses behind them blur into a painterly backdrop while your couple stays sharp.

Go in the late afternoon around 4pm. The sun hits the wall at a low angle and makes the roses glow from within. The light wraps around the petals and creates this warm, golden edge that you cannot get at any other time of day. The shadows are long and soft, and the whole scene looks like a painting from the 1800s.

Inner-City Laneways And Hidden Rose Walls

This is where most couples never think to look. Melbourne’s laneways are full of surprises, and in spring, several of them have climbing roses spilling over fences and walls. Hosier Lane has a section near the bottom end where pink roses drape over a brick wall. Centre Place has roses climbing the sides of the buildings. Degraves Street has pockets of color that most people walk right past.

These spots are not as grand as the Botanic Gardens, but they have something the gardens do not: context. Your couple is standing in a real Melbourne laneway, surrounded by real roses, with the city life happening around them. It feels candid and alive instead of posed and staged. That is the look modern couples want.

Shoot these spots on a weekday morning. The laneways are empty before 9am, and the light is soft and even. The roses are fresh, the walls are clean, and you get the whole lane to yourselves. By midday, the crowds arrive and the light gets harsh. That early morning window is everything.

How To Make Roses Look Incredible In Your Photos

The roses are beautiful but they will not save a bad composition. You still need to know how to work with them.

Getting The Color Right Without Blowing Out The Petals

Roses are bright. Cameras see that brightness and want to underexpose, which kills the color. Or they want to overexpose, which turns deep reds into washed-out pink. The sweet spot is to expose for the roses, not your couple.

Spot meter on the brightest rose petal and lock that exposure. Your couple will be slightly underexposed, but you can lift them in post. The roses will look rich and saturated instead of flat and blown out. If you shoot RAW, you have even more room to recover detail in the highlights without losing the color.

White balance matters a lot here. Set it to around 5200K to 5800K to keep the roses warm and true to life. Auto white balance tends to cool everything down, which turns red roses purple and pink roses gray. Do not let the camera decide. You know what roses are supposed to look like.

Using Roses As Foreground, Not Just Background

The most common mistake is shooting a couple standing in front of a rose bush with the bush as a flat backdrop. It looks like a passport photo with flowers. Instead, use the roses as foreground elements. Hold a stem close to the lens and let it blur into a soft wash of color in the corner of the frame. Have your couple reach into the bush and pick a rose. Shoot through an arch of roses so they frame your couple from above.

Getting your couple physically interacting with the roses changes everything. Touching a petal, smelling a bloom, tucking a rose behind an ear, these small actions make the photos feel real instead of staged. The roses are not just decoration, they are part of the story.

Shooting Detail Shots Among The Roses

The wide shots get the glory but the detail shots are what couples cry over. A close-up of a hand holding a single red rose with the wedding ring catching the light. A shot of the bouquet resting on a bed of fallen petals. The hem of a dress brushing against the rose bushes. These small images tell the story that the wide shots cannot.

Shoot these with a macro lens or a wide aperture like f/1.4 to f/2.8. Get close, really close, and let the background dissolve into a blur of color. The tighter the frame, the more intimate the shot feels. A single rose in sharp focus with everything else soft and dreamy is one of the most powerful images you can deliver.

Timing Your Rose Session Around The Bloom

The rose season in Melbourne is short and it does not care about your schedule. The peak bloom usually hits in late October through mid November, sometimes stretching into early December depending on the weather. The rain in spring is what triggers the big bloom, so a wet September often means an explosive October.

Check the bloom status before you book. Walk the gardens a few days before your shoot and look at the roses. If the buds are still tight, you have a week or two. If they are fully open and starting to drop petals, you need to shoot now. Once the petals start falling, the window closes fast.

Morning is always better than afternoon for roses. The petals are turgid and fresh in the morning, which means they hold their shape and color better. By afternoon, the heat starts to wilt them and the colors fade. Shoot between 7:30am and 10am for the freshest, most vibrant roses you will see all season.

And bring a small pair of pruning shears. Not to cut the roses, but to clear a path through the bushes so your couple can stand without getting scratched. A few snips here and there to open up the frame makes a huge difference in how clean the final images look. The roses will grow back. The photo will not.

81688-Sample-176

Winter wedding photography in Melbourne, featuring an elegant and warm interior style.

Melbourne Winter Wedding Photography: The European Indoor Warm Tone Everyone Wants

Melbourne in winter is cold, gray, and windy outside. But step indoors and something magical happens. The city is full of heritage buildings, old churches, grand hotels, and intimate venues that were built a century ago with high ceilings, arched windows, dark wood, and stone walls. These spaces were never designed for wedding photography, but they were built for exactly this kind of light. The low winter sun barely reaches through the tall windows, and what comes in is soft, golden, and warm. Pair that with tungsten lamps, candlelight, and vintage fixtures, and you get a color palette that feels like it belongs in a European film. This is the look couples are searching for when they say they want something timeless, and Melbourne delivers it better than almost anywhere else.

wedding photography melbourne

Why Winter Is The Best Season For Indoor Wedding Photos

Most couples book their wedding photography in spring or summer because the weather is nice. That makes sense for outdoor sessions. But for indoor work, winter is secretly the better choice. The light behaves differently. The sun sits lower in the sky, which means it streams through windows at a shallow angle and paints everything in warm gold instead of harsh white. The days are shorter, so you are not fighting bright midday light that blows out every window in the frame. And the crowds are thinner, which means you get more time in the space without strangers walking through your shots.

There is also something about the mood. Winter weddings feel intimate by nature. The couple is inside, away from the wind and the cold, surrounded by warmth and light. That feeling translates directly into the photos. The portraits look closer, softer, more connected. Summer indoor shoots can feel stuffy and bright by comparison. Winter indoor shoots feel like a secret.

The Warm Tone That Makes Indoor Photos Feel Expensive

Warm tone is not just a color. It is a feeling. When you walk into an old Melbourne church with stained glass windows and candlelight, the light that hits your skin is amber and honeyed. It smooths out imperfections, warms up skin tones, and makes everything look like it belongs in a Renaissance painting. That is the warm tone people are chasing, and it is almost impossible to replicate outdoors in summer because the light is too bright and too cool.

Indoors in winter, the light source is controlled. Windows give you directional warm light. Lamps give you soft ambient glow. Candles give you flickering, intimate warmth. When you combine all three, you get a layered, multidimensional light that wraps around your couple in a way that feels effortless but is actually very deliberate. This is why the best indoor wedding photos look like they were lit by a professional film crew, even when they were shot with natural light and a few candles.

Melbourne Venues That Give You That European Indoor Look

Melbourne has more heritage architecture per capita than almost any city in the world. And in winter, these spaces become your private studio. You do not need to travel to Europe. The look is already here.

Historic Churches And Cathedrals

St Paul’s Cathedral in the CBD is the obvious one, but there are dozens of smaller churches that are just as beautiful and far less crowded. Old St Patrick’s in East Melbourne has these incredible Gothic arches and tall narrow windows that throw long beams of golden light across the stone floor. The light moves slowly throughout the day, which means you get a different look every hour.

Smaller churches in Fitzroy, Carlton, and Richmond often have wooden pews, stained glass, and high vaulted ceilings that create natural depth in every frame. The dark wood absorbs light and creates rich shadows, while the windows let in just enough warm light to illuminate your couple. The contrast between the dark interior and the golden window light is exactly the European look people want.

Book a mid-morning slot around 10am to 11am. The sun is high enough to reach through the windows but still at an angle that creates long beams of light across the floor. By midday, the light gets too direct and washes out the details. After 2pm, it starts fading fast. That two-hour window is your goldmine.

Grand Hotels And Heritage Ballrooms

Melbourne’s old hotels were built in an era when everything was oversized and ornate. The Windsor Hotel, the Langham, the National, the Treasury Building, all of them have ballrooms and foyers with marble floors, crystal chandeliers, and walls of dark wood paneling. These spaces were designed to impress, and they still do.

The Langham on Collins Street has a lobby with these massive arched windows and a grand staircase that looks like it belongs in a period drama. The light that comes through those windows in winter is low and golden, and it hits the marble floor and bounces back up as a soft, warm fill. Your couple standing on that staircase with the light wrapping around them looks like they just stepped out of a 1940s film.

The Treasury Building has these incredible corridors with vaulted ceilings and stone columns. The light filters in from high windows and creates this cathedral-like glow that is perfect for dramatic portraits. The darker corners of these spaces give you natural vignettes that frame your couple without any editing.

Intimate Restaurants And Private Dining Rooms

Not every indoor shoot needs to be grand. Some of the most beautiful winter wedding photos come from small, intimate spaces. A private dining room in a Fitzroy restaurant with candlelight on the table and a single window letting in warm afternoon light. A cozy corner in a Carlton wine bar with exposed brick and Edison bulbs hanging from the ceiling. These spaces feel personal and real, and the photos reflect that.

The key is to find a space with warm-toned surfaces. Wood, brick, stone, velvet, leather, all of these materials absorb and reflect warm light in ways that make skin tones look incredible. Avoid spaces with white walls and fluorescent lighting. They will kill the warm tone no matter what you do.

How To Shoot Warm Indoor Tones Without Losing The Mood

Indoor light is tricky. It is dim, it is mixed, and it changes constantly. But when you get it right, the results are unmatched.

White Balance And Exposure For Indoor Warmth

Auto white balance will ruin your warm tones every time. The camera sees the mixed indoor light and tries to neutralize it, which cools everything down and kills the golden glow. Set your white balance manually to around 3800K to 4500K. This keeps the light warm and rich instead of letting the camera turn it blue.

Expose for the highlights. Indoor spaces usually have bright windows and dark corners. If you let the camera meter for the whole scene, it will underexpose the windows and overexpose the dark areas. Spot meter on your couple’s face or on the brightest window and lock that exposure. The dark corners will go deeper, which actually helps the mood. Dark backgrounds with warm-lit subjects look dramatic and cinematic.

If the windows are blowing out, use a graduated neutral density filter to bring the highlights down. This keeps the detail in the window light while letting your couple stay properly exposed. Without it, you lose the beautiful golden light that makes the whole shot work.

Using Available Light Creatively

The best indoor wedding photos use only the light that is already there. Windows, lamps, candles, chandeliers, all of it. Do not bring flash unless you absolutely have to. Flash indoors looks artificial and kills the warm tone. The whole point of shooting indoors in winter is to let the existing light do the work.

Position your couple near the windows. The light that comes through is your main source. It is directional, warm, and soft. If the light is too strong on one side of their face, move them a few feet to the left or right until the light wraps around both sides evenly. If the light is too dim, bring them closer to the window. The falloff from a window is rapid, so even a small move can make a big difference.

Use lamps and candles as fill light. A table lamp on a side table throws warm light across your couple’s faces and fills in the shadows that the window light creates. Candles on a table create flickering, intimate light that looks incredible in close-up portraits. The key is to let these secondary sources add warmth without competing with the window light. They should complement it, not overpower it.

Composing With Architecture In Mind

Indoor spaces give you something outdoor locations never will: natural frames. Arched doorways, window frames, staircases, columns, all of these create compositions that draw the eye directly to your couple. Use them. Do not fight the architecture, work with it.

Shoot through doorways. Frame your couple inside an arch or between two columns. The dark foreground creates depth and the warm light in the background draws the eye forward. This technique works in almost every heritage building in Melbourne because they were all designed with frames in mind.

Use the leading lines of the space. A long corridor, a row of columns, a staircase, all of these draw the viewer’s eye into the frame and toward your couple. The architecture does the composing for you. You just have to stand in the right spot.

Get tight sometimes. Indoor spaces are perfect for close-up detail shots. Hands holding each other by a window. Rings catching the candlelight. The hem of a dress against a marble floor. These small shots in warm indoor light are often the most emotional images in the entire gallery.

Working With Mixed Light Sources

Indoor winter light is never just one color. You have cool daylight from the windows mixing with warm tungsten from the lamps and candles. This mixed light can look messy if you do not manage it, but it can look incredibly rich if you embrace it.

Balancing Cool And Warm Tones

The trick is to let one tone dominate. If the window light is your main source, set your white balance to match it and let the lamps and candles add warmth as a secondary tone. The result is a natural, layered look that feels real. If you try to balance both perfectly, the image ends up looking flat and neutral, which is the opposite of what you want.

Let the warm tones win. The windows might be slightly cool, but the lamps and candles will warm up the shadows and midtones. Your couple’s skin will look golden and rich, and the cool window light will create a subtle contrast that adds depth. This is the look that makes indoor winter wedding photos feel like they belong in a magazine.

Shooting In Low Light Without Noise

Indoor winter light is dim. Your camera will want to push the ISO high, and high ISO means noise. But a little noise actually helps the warm tone. It adds texture and grain that looks film-like and vintage, which is exactly the aesthetic most couples want for their indoor winter shots.

Shoot at ISO 1600 to 3200 if you have to. Modern cameras handle this well. If you are shooting on a tripod, you can go even higher because you do not have to worry about motion blur. A slightly noisy image with rich warm tones looks better than a clean image with flat, cool tones.

Use a wide aperture like f/1.4 to f/2.8 to let in as much light as possible. This also gives you that shallow depth of field with creamy bokeh in the background lights. The chandeliers and lamps behind your couple turn into soft, warm orbs that frame them beautifully.

Practical Tips For A Winter Indoor Shoot

Dress your couple in layers. Heritage buildings are beautiful but they are not heated for comfort. The stone floors are cold, the air is still, and standing in one spot for an hour will make anyone shiver. Bring blankets, scarves, and warm drinks. A couple that is cold will not look relaxed in the photos.

Arrive early. Walk the space before your couple gets there. Note where the light falls, where the shadows pool, and where the best compositions are. Scout the background for anything distracting. A fire exit sign, a random chair, a messy table, all of these will show up in the frame if you do not move them.

Shoot in the morning when the light is freshest. The low winter sun comes through the windows at a shallow angle and creates those long beams of golden light that define the whole look. By afternoon, the sun is higher and the light gets flatter. You still get warmth, but the drama is gone.

And do not forget to shoot outside the main space. The hallways, the staircases, the entrance doors, the courtyards, all of these have their own light and their own mood. A couple walking down a dimly lit corridor with warm light spilling from a room at the end looks like a scene from a novel. Those in-between moments are often the most beautiful shots of the entire session.

wedding photography melbourne

Caramel-colored atmosphere for wedding photography in Melbourne’s autumn season

Melbourne Late Autumn Wedding Photography: Nailing That Caramel-Toned Warmth

There is a two-week window in Melbourne every year when the city turns into something out of a painting. The leaves go gold, then amber, then deep burnt orange. The light gets low and honeyed. The air gets crisp. And every single surface, from the brick buildings to the park benches to the fallen leaves on the ground, takes on this rich caramel tone that makes wedding photos look effortlessly cinematic. Late autumn in Melbourne is not just a season, it is a color palette. And if you know how to use it, your wedding portraits will have a warmth that no filter can replicate.

wedding photography melbourne

Why Caramel Tone Is The Most Underrated Wedding Color

Everyone chases golden hour. Everyone wants that orange sunset glow. But caramel is different. It is deeper, richer, and more complex. Golden hour gives you yellow and amber. Caramel gives you brown, copper, rust, and honey all at once. It is the color of dried leaves, of old brick, of warm coffee, of late afternoon light filtering through a canopy of turning trees. It feels nostalgic without being sad. It feels romantic without being cheesy. It just feels real.

The reason most wedding photographers overlook caramel tone is that it is subtle. It does not scream at you the way bright pink cherry blossoms or bright green summer foliage do. You have to look for it. You have to see it. And once you do, you realize it is everywhere in Melbourne during late autumn.

The Science Behind The Caramel Glow

When leaves change color, they stop producing chlorophyll and start revealing carotenoids and anthocyanins. These pigments reflect longer wavelengths of light, which is why autumn foliage glows in shades of yellow, orange, and red. When the low autumn sun hits these leaves, the light that bounces back is already warm-toned. It is like the whole world is wrapped in a natural color filter.

This is why autumn wedding photos have that cohesive, warm look without any editing. The light source itself is colored. Your camera does not need to do anything. Just point it at your couple surrounded by falling leaves and the caramel tone does the rest.

Melbourne’s late autumn also brings a specific quality of light that is hard to find elsewhere. The city sits at a latitude where the sun stays low even at midday. The light comes in at a shallow angle all day long, which means warm tones dominate from morning to evening. You are not racing a 20-minute golden hour window. You have hours of usable caramel light.

Melbourne Locations That Own The Caramel Aesthetic

Late autumn transforms Melbourne’s most familiar spots into something completely new. The same park you walked through in summer now looks like a different planet. Here is where to go.

The Royal Botanic Gardens In Late Autumn

The Botanic Gardens in April and May are something else. The deciduous trees along the lake paths turn deep gold and rust. The leaves fall slowly and cover the ground in a thick carpet of caramel. The lake reflects the warm tones of the trees and the sky, which means you get double the color in every frame.

The ginkgo trees near the glasshouse are the real stars though. Their leaves turn a uniform, brilliant gold that looks almost artificial. Standing under a ginkgo tree with leaves falling around you is one of those moments that does not need any direction. Just tell your couple to look at each other and let the leaves do the rest.

Go in the late afternoon around 3:30pm to 4:30pm. The sun is low enough to backlight the leaves, making them glow from within. Your couple stands in front of a wall of gold and the light wraps around them in warm caramel tones. It is the kind of shot that makes people stop scrolling.

Fitzroy Gardens And The Grand Autumn Avenues

Fitzroy Gardens in late autumn has this quiet, melancholic beauty that is perfect for wedding photos. The elm trees line the avenues in long rows, and when the leaves turn, the whole path becomes a tunnel of gold and brown. Walking down these paths with your couple feels like walking through a memory.

The ornamental lake here has weeping willows that turn copper in autumn. The branches drape into the water and the reflections create layers of caramel on caramel. It is monochromatic in the best possible way. Every shade of brown and gold works together without clashing.

The rose gardens are mostly done by late autumn, but the remaining foliage and the bare branches against the sky create a more minimal, editorial look. If your couple wants something less traditional and more moody, this is the spot.

Inner-City Streets With Autumn Trees

This is the sleeper pick. Melbourne’s inner-city streets are lined with plane trees, elms, and maples that turn spectacular colors in late autumn. Streets like Victoria Parade in Fitzroy, Lygon Street in Carlton, and tree-lined pockets of the CBD become corridors of caramel without any effort.

The trick is to find a street where the trees form a canopy overhead. The leaves filter the sunlight and turn it into a warm, dappled glow that falls on your couple as they walk. The brick buildings and old tram lines add texture and context that pure nature shots do not have.

Go on a weekday morning when the streets are quiet. The leaves on the ground give you a carpet of color. The low sun hits the buildings and turns the brick warm. Your couple walks slowly down the street and every frame tells a story.

How To Shoot Caramel Tone Without Overdoing It

The warmth is beautiful but it can turn muddy fast. A few decisions in-camera will keep your caramel tone rich instead of flat.

White Balance And Exposure For Warm Tones

Do not let your camera auto white balance cool the scene down. Set it manually to around 5500K to 6000K. This preserves the warm tones instead of neutralizing them. If you shoot RAW, you can push it even warmer in post, but starting warm gives you a better foundation.

Expose slightly to the right. Caramel tones live in the midtones and highlights. If you underexpose, the warm tones turn muddy and brown instead of rich and golden. Let the highlights breathe. The leaves will glow, the sky will stay warm, and your couple will look luminous.

If the background is significantly brighter than your couple, use a graduated neutral density filter to balance the exposure. This keeps the sky and foliage from blowing out while letting your couple stay properly exposed. Without it, you either lose the caramel sky or your couple goes dark.

Composing With Warm Tones In Mind

Caramel photography works best when the frame is dominated by warm tones. Look for compositions where the warm colors fill at least 70 percent of the frame. Your couple sits in a sea of gold leaves. They stand against a wall of rust-colored brick. They walk under a canopy of copper trees. The warm tones are not just the background, they are the mood.

Use complementary colors sparingly. A pop of deep blue sky above the caramel leaves creates contrast that makes the warm tones pop even more. A teal scarf or a blue boutonniere against the brown and gold backdrop draws the eye and adds visual interest. But keep it minimal. Too much cool color kills the caramel vibe.

Shoot tight details in the warm light. A hand holding a bunch of dried leaves. Rings catching the low sun. The hem of a dress against a carpet of fallen foliage. These small shots in caramel tone are often the ones couples love the most.

Working With The Falling Leaves

Late autumn in Melbourne means leaves are falling constantly. This is not a problem, it is your best prop. Have your couple toss leaves in the air. Have them walk through a pile of leaves. Have them hold a branch and let the leaves fall around them. Movement brings the caramel tones to life in a way that static poses never will.

The falling leaves also catch the light beautifully. Each leaf becomes a tiny golden disc as it falls through a sunbeam. If you shoot at a fast shutter speed like 1/1000th of a second, you freeze the leaves mid-air and they look like confetti. At a slower speed like 1/60th, they blur into streaks of gold. Both look incredible, just pick the mood you want.

Practical Things To Know Before Your Shoot

Late autumn in Melbourne is beautiful but it is also unpredictable. The weather can shift from warm and sunny to cold and windy in an hour. Dress your couple in layers. A linen suit with a wool overcoat looks great against the caramel backdrop and keeps them comfortable if the temperature drops.

The leaves do not last forever. The peak caramel window is usually mid to late April, sometimes stretching into early May depending on the year. Check the trees before you book. If the leaves are still green, you are too early. If they are all on the ground and the trees are bare, you are too late. You want that perfect moment when the trees are still full but the color is at its deepest.

Morning light in late autumn is your friend. It is soft, warm, and comes in at a low angle that makes every surface glow. Shoot between 8am and 10am for the freshest caramel light. The air is crisp, the dew is on the leaves, and the light has not yet turned harsh. By midday, the sun climbs higher and the warm tones start to flatten. The afternoon light around 3pm to 4:30pm is your second window, and it gives you a deeper, more saturated caramel than the morning.

Bring a blower for your lens. Leaves get everywhere. They stick to your lens, they get in your gear bag, they settle on your couple’s shoulders. A simple rocket blower takes care of it in seconds. Also bring a small bag to collect leaves for detail shots. A handful of golden leaves in your couple’s hands is worth more than any prop you could buy.

wedding photography melbourne

Springtime wedding photography in Melbourne featuring fresh greenery as the backdrop

Melbourne Early Summer Wedding Photography: Capturing That Fresh Green Vibe

There is something about Melbourne in early summer that just works. The city shakes off the cold, the parks explode with green, and every corner suddenly looks like it was designed for wedding photos. The light is bright but not harsh, the air smells like jasmine and eucalyptus, and the foliage is at its absolute peak. If you want wedding portraits that feel alive, fresh, and effortlessly beautiful, early summer in Melbourne is your window. And the green backdrop alone will do half the work for you.

wedding photography melbourne

Why Early Summer Green Is Different From Any Other Season

Spring in Melbourne can be unpredictable. One day it is warm, the next it is raining. Autumn is gorgeous but the leaves start turning and the light gets harder. Winter is moody but everything looks gray and bare. Early summer, though, that first few weeks of December and January, the city is lush without being overgrown. The grass is bright green but not yellowed. The trees are full but not so dense that they block all the light. The flowers are still blooming but not wilting. It is that sweet spot where everything looks its best.

The green you get in early summer is not the dark, heavy green of midsummer. It is lighter, fresher, almost neon in places. New growth on the trees catches the light and glows. The ivy on old buildings looks vibrant against the brick. The ferns in the botanical gardens are at their tallest and most photogenic. This is the green that makes wedding photos look like they belong in a magazine without any heavy editing.

What Makes This Green So Photogenic

It comes down to saturation and light. Early summer sunlight in Melbourne is strong but still angled enough to create dimension. When that light hits fresh green foliage, the leaves almost glow from within. Chlorophyll reflects green light most efficiently, and when the sun is behind or beside the leaves, you get this translucence that looks incredible on camera.

The contrast between the green foliage and a white wedding dress is one of the most reliable combinations in wedding photography. The white pops against the green without looking forced. Skin tones look warm and natural against green backgrounds. And the green itself has so many shades, from lime to emerald to forest, that you can find the exact tone you want just by moving a few feet.

Melbourne Locations Where The Green Is Unreal

Melbourne is one of the greenest cities in the world, and in early summer, that green hits different. You do not need to drive hours out of the city to find stunning botanical backdrops. Some of the best spots are right in the heart of the city.

The Royal Botanic Gardens

This is the obvious one but it is obvious for a reason. The gardens in early summer are at their most lush. The lawn areas give you wide, open frames with trees framing the edges. The lake reflects the sky and the green, which doubles the color in every shot. The ornamental beds are full of seasonal flowers that add pops of color against the green without overwhelming it.

The northern section near the Conservatory has these beautiful arched walkways covered in climbing plants. Your couple can walk through them and every angle looks like a painting. The southern section near the Ornamental Lake has weeping willows that drape into the water, and that reflection with green on green is something you will not find anywhere else.

Go early in the morning around 8am or late afternoon around 4pm. The midday sun in early summer can be too strong under the trees, creating harsh shadows on faces. The morning and afternoon light filters through the canopy and wraps around your couple in soft, diffused green-tinted light.

Fitzroy Gardens and the Grand Avenues

Fitzroy Gardens has a different energy than the Botanic Gardens. It is more formal, more structured, and the tree-lined avenues create natural corridors that draw the eye straight to your couple. The elm trees form a canopy overhead, and in early summer, the leaves are so dense that the light coming through is dappled and golden-green.

The rose gardens here are in full bloom in early summer, and the red and pink roses against the green backdrop create a color combination that is classic for a reason. Your couple can stand among the roses and the frame practically composes itself. The grand fountains add a sense of scale and elegance without looking pretentious.

The inner circle of Fitzroy Gardens has these massive, ancient trees with trunks so wide you need two people to wrap around them. The bark texture alone makes incredible portraits. Leaning against one of these trees with the green canopy above you gives you a shot that feels timeless.

Carlton Gardens and the University Green

If you want something more urban but still drowning in green, Carlton Gardens delivers. The lawns here are immaculate, the trees are mature, and the university buildings in the background add architecture without competing with the nature. The contrast between old sandstone buildings and fresh green grass is one of those combinations that just works.

The northern end near the Melbourne Museum has these beautiful mature figs and oaks that create natural shade. Under these trees in early summer, the light is soft and green-tinted. Your couple can sit on the grass with the trees above them and the city behind them, and it looks like a scene from a European film.

Shooting Techniques That Make Green Wedding Photos Pop

The green is already doing most of the work. Your job is to not mess it up. A few technical decisions will make the difference between good green photos and great ones.

Exposing For Green Without Losing The Detail

Green foliage can trick your camera’s meter. The camera sees all that green and thinks the scene is darker than it actually is, so it overexposes. The result is washed-out, pale green that looks nothing like what you saw with your eyes.

Compensate by underexposing about one-third to two-thirds of a stop. This keeps the green rich and saturated. The foliage will look deep and vibrant instead of flat and pastel. Your couple might be slightly darker, but you can lift the shadows in post without losing the green tone.

If you are shooting RAW, you have even more flexibility. Pull down the highlights slightly and push the greens in the hue slider toward yellow if you want a warmer tone, or toward teal if you want something cooler. But start with accurate exposure in-camera and adjust from there.

Using The Green As A Frame, Not Just A Background

The biggest mistake photographers make with green backdrops is shooting a couple standing in front of a wall of trees. It looks like a school photo. Instead, use the green to frame your couple. Shoot through branches, under archways of leaves, between two trees that create a natural window. This gives the photo depth and draws the eye directly to your couple.

Get close to the foliage sometimes. Shoot with a wide aperture like f/2.8 and put your couple a few feet in front of some leaves. The leaves in the foreground blur into a soft green wash that frames your couple without distracting from them. This technique works especially well with ferns and ivy, which have interesting shapes that add texture even when blurred.

Use the green to create leading lines too. A row of trees, a hedge-lined path, a vine-covered archway, all of these draw the eye into the frame and toward your couple. The green does not just sit behind them, it guides the viewer to them.

Working With Natural Light In Early Summer

Early summer light in Melbourne is strong but the green foliage acts as a natural diffuser. When you shoot under trees, the leaves break up the direct sunlight and turn it into something soft and wrapped. This is why green locations often look better in open shade than in direct sun.

Direct sun on green foliage can create hot spots where the light punches through the canopy and blows out the leaves. Open shade gives you even, consistent light across the entire frame. Your couple looks good, the green looks good, and you do not have to fight with harsh shadows.

If you do shoot in direct sun, use the dappled light to your advantage. The spots of sunlight on the ground and on your couple add texture and energy to the photo. A couple standing in a patch of dappled light with green all around them looks alive and dynamic.

Getting The Couple To Look Natural In Green Settings

The location is only half the equation. Your couple needs to feel comfortable in the green, otherwise the photos will look stiff and forced.

Directing Poses That Work With Nature

Do not make your couple stand still in front of a tree. That is the fastest way to kill the mood. Instead, give them something to do. Walk through the garden. Sit on the grass. Lean against a tree. Play with the leaves. The more movement, the more natural the photos look.

Have them interact with the environment. Pick a flower. Touch the bark of a tree. Look at each other instead of the camera. The green backdrop does not need to be the focus, it just needs to be there. Your couple is the story, the green is the setting.

Get low sometimes. Shooting from ground level with the green foliage above your couple creates an immersive feeling. The viewer feels like they are lying in the grass looking up at the couple. It is intimate and different from every other angle they will see in their gallery.

Timing Your Session Around The Light And The Crowds

Early summer in Melbourne means long days. The sun rises around 5:45am and does not set until after 8:30pm. You have a massive window to work with, but the best green light happens in the first two hours after sunrise and the last two hours before sunset.

The morning light is soft, the dew is still on the leaves, and the gardens are empty. You get clean backgrounds and your couple has the whole place to themselves. The afternoon light is warmer and the green looks more golden, but the crowds start picking up around 3pm.

If you want the best of both worlds, shoot two sessions. One early morning for the fresh, dewy green look. One late afternoon for the warm, golden green look. You get two completely different moods from the same location, and your couple gets variety without spending the whole day in front of a camera.

wedding photography melbourne

Melbourne Night View Wedding Photography – City Lights Shooting

Melbourne Night Wedding Photography: How to Shoot Stunning City Light Portraits After Dark

Most couples stop shooting when the sun goes down. That is their mistake. Melbourne at night is a completely different animal. The city lights up, the streets empty out, and every neon sign, streetlamp, and illuminated building becomes a potential backdrop for portraits that feel edgy, cinematic, and totally unlike anything you would get during the day. Night wedding photography is not easy, but when you get it right, the results are unforgettable.

wedding photography melbourne

What Makes Melbourne Nights So Good For Wedding Photos

Melbourne has a reputation for being moody, and honestly, that reputation is earned. The weather shifts fast, the light changes fast, and the city itself has a raw, urban energy that does not exist in polished tourist destinations. At night, that energy amplifies. The laneways glow with warm tungsten light. The Yarra River reflects every color in the skyline. The trams roll past with their headlights cutting streaks through the frame. It is chaotic and beautiful at the same time, and that tension is what makes night wedding photos so compelling.

The biggest advantage of shooting at night is the lack of crowds. Laneways that are packed at 2pm are completely empty by 9pm. You get clean backgrounds, unobstructed sightlines, and the freedom to set up wherever you want without asking strangers to move. For a wedding couple who wants privacy and intimacy, nighttime is a gift.

Understanding City Light as Your Main Light Source

Forget about flash for a moment. At night, the city itself is your strobe. Streetlights, shop signs, car headlights, building windows, neon bars, tram lights, all of it becomes usable light if you know how to see it. The trick is not to fight the available light but to work with it. Every light source has a color temperature and a direction, and your job is to match your couple to the best one.

Warm tungsten from old-school streetlamps gives you that classic golden glow. Cool white LED from modern storefronts creates a cleaner, more editorial look. Neon signs throw colored light onto skin, which can be stunning or disastrous depending on how you use it. The key is to observe first. Spend 10 minutes walking the location before you pick up your camera. Watch where the light falls, where the shadows pool, and where your couple will look best.

The Best Melbourne Spots For Night Wedding Shoots

Not every location works at night. Some spots are too dark, some are too bright, and some have light that looks terrible on skin. You need to pick your ground carefully.

Hosier Lane and the Surrounding Laneways

This is the obvious choice but for good reason. The street art on the walls gets a whole new life under colored light. The lane itself is narrow, which means the light from the shops and bars bounces off both sides and creates this enclosed, warm tunnel effect. Your couple walks through it and every step looks like a scene from a movie.

The trick here is to find the right wall. Not every wall is lit equally. Look for sections where the light hits at an angle, not straight on. Angled light creates shadows and dimension on faces. Straight-on light flattens everything. Also, avoid the sections with too much neon. A little color is great, but too much and your couple looks like they are standing inside a nightclub.

Go between 9pm and 11pm. Earlier than that and the crowds are still around. Later than that and some of the lights start turning off. That two-hour window is your sweet spot.

The Yarra River and Southbank

Southbank at night has a completely different personality. The river acts as a mirror, doubling every light in the skyline. The promenade is wide and open, which gives you room to breathe compositionally. The lights from the casino, the arts center, and the city buildings across the water create a layered backdrop that looks incredible in any frame.

The pedestrian bridges are goldmines. Standing on the bridge with the river below and the city lights behind you gives you depth, leading lines, and reflections all in one shot. The bridge railings create natural frames. The water below catches every color and turns it into a painted surface.

One thing to watch out for: the lights on the bridge itself can be harsh and overhead. They create unflattering shadows under the eyes and chin. Position your couple so the bridge lights are behind them, not above them. Let the city lights across the river do the work.

Federation Square and the CBD Core

If you want something more architectural and less gritty, Federation Square delivers. The geometric patterns of the buildings catch light in interesting ways. The large LED screens throw color onto the ground and onto your couple, which can create some wild, editorial-looking portraits.

The laneways around Flinders Street Station also work well. The station’s yellow facade glows against the dark sky, and the narrow streets around it funnel light in ways that create natural vignettes. The tram lines add leading lines that draw the eye into the frame.

The CBD core around Collins Street and Bourke Street gives you tall buildings, bright shop windows, and that dense urban energy that screams city wedding. The light here is mixed, which means you need to be deliberate about your white balance, but the results are worth the extra effort.

Camera Settings That Actually Work At Night

Night photography is technically demanding. If you do not dial in your settings before you shoot, you will spend hours trying to fix images that were ruined in-camera.

Dialing In Exposure and White Balance

Shoot manual. There is no other option at night. Start with an aperture of f/1.4 to f/2.8 if you want that shallow depth of field with creamy bokeh in the background lights. If you want more of the scene in focus, stop down to f/4 or f/5.6, but be aware that smaller apertures let in less light and you will need to compensate with ISO or shutter speed.

Shutter speed is your balancing act. If you are handheld, do not go below 1/60th of a second or you will get motion blur from your own hands. If you have a tripod, you can go as slow as you need. For walking shots, 1/30th to 1/60th usually works if your couple moves slowly.

ISO is where night photography gets tricky. Push it to 1600 or 3200 if you have to. Modern cameras handle high ISO much better than they used to. You will get some noise, but a little grain actually adds to the mood of night photos. It looks film-like and raw, which is exactly the aesthetic most couples want for their night session.

White balance is critical. Do not trust auto. Tungsten streetlights are around 3200K and they will make everything look orange if you let the camera compensate. Set your white balance manually to around 3800K to 4200K to keep the warmth without letting it go overboard. If you are mixing light sources, like tungsten streetlights with cool LED signs, pick one dominant source and set your white balance to match it. The mixed colors can actually work in your favor if you embrace them.

Using Available Light Creatively

The best night wedding photos are not lit by any artificial light you bring. They are lit by the city. Find a streetlamp and put your couple under it. The light falls from above and creates that classic Rembrandt triangle on their faces. Find a neon sign and let it throw color across one side of their face. Find a shop window and use it as a giant softbox.

Backlighting works incredibly well at night. Put a bright light source behind your couple and let it rim their hair and shoulders. The dark foreground contrasts with the bright background and your couple pops out of the frame. This is one of the easiest ways to get a dramatic night portrait without any special equipment.

Reflections are your secret tool. Puddles, wet pavement, car windshields, glass buildings, all of them give you a second image for free. A couple standing on wet ground with their reflection below them looks like two people in a dream. Get low and shoot into the puddle. The reflection will be slightly distorted, which adds to the surreal quality of the image.

Common Mistakes That Ruin Night Wedding Shoots

The first mistake is shooting too early. If you start at 8pm in summer, the sky is still blue and the city lights have not fully popped. Wait until it is properly dark. The sky should be black or deep navy, not purple. The lights need to be the dominant source in the frame, and that only happens after full darkness.

The second mistake is over-lighting. Couples want to see their faces, so they ask for flash. Resist this urge. Flash at night looks artificial and kills the mood. The whole point of night photography is to let the city light do the work. If the faces are too dark, lift them in post. A little shadow on a face at night is not a problem, it is an asset.

The third mistake is ignoring the background. During the day, you can blow out a busy background with a wide aperture. At night, every light in the background becomes a bokeh circle. If there is a trash can, a random car, or an ugly sign behind your couple, it will show up as a distracting blob of light. Scout the background before you shoot. Move your couple a few feet to the left or right if it cleans up the frame.

Making The Most Of Your Night Session

Night sessions are short. You have maybe two to three hours of usable darkness before the light shifts or the couple gets tired. Use that time wisely.

Start with the widest, most scenic shots. Get the big environment portraits out of the way while the energy is high. Then move into tighter shots in the laneways and on the bridges. Save the most intimate, close-up portraits for last when your couple is relaxed and the mood is settled.

Bring a small portable light if you must, but use it sparingly. A single LED panel held low and to the side can fill in shadows on faces without looking like a flash. It gives you control without killing the natural feel.

And shoot more than you think you need. Night photography has a higher miss rate than daylight. Frames that looked perfect on the back of your camera often turn out noisy or underexposed when you get home. Give yourself a buffer. The couple will thank you when they see how many keepers you delivered.

81688-Sample-130

Melbourne Sunset Wedding Photography – Orange Tone Atmosphere Scenery

Melbourne Sunset Wedding Photography: How to Nail That Orange-Toned Dream

There is a reason everyone says golden hour is the best time for wedding photos. But let us be honest, it is not really about the gold. It is about the orange. That deep, saturated, almost unreal orange that fills the sky for about 20 minutes before the sun disappears. Melbourne gives you some of the most dramatic sunset wedding backdrops on the planet, and if you know where to stand and when to shoot, you can capture portraits that look like they belong in a film.

wedding photography melbourne

Why Orange Tone Is the Secret Weapon in Wedding Photography

Most couples want their photos to feel warm. But warm is vague. Orange tone is specific. It is that rich, honey-colored light that turns skin into porcelain, makes white dresses glow, and turns an ordinary street into something cinematic. It is also the hardest tone to get right because the window is so short and the light shifts so fast.

The orange you see during a Melbourne sunset is not the same orange you get in tropical destinations. It is cooler, more muted, and it fades into purple and pink within minutes. That is what makes it so beautiful and so frustrating at the same time. You have maybe 15 to 25 minutes of usable light, and if you are not ready, it is gone.

What Actually Creates That Orange Glow

It comes down to atmosphere. When the sun is low on the horizon, its light has to travel through more of the earth’s atmosphere to reach you. The shorter blue wavelengths scatter away, and the longer orange and red wavelengths make it through. That is basic physics, but for wedding photography, it means the light wraps around your couple in a way that feels almost three-dimensional.

Melbourne’s dry air and occasional haze amplify this effect. Dust particles and humidity in the atmosphere add texture to the light. You get layers of color, not just a flat orange wash. The sky near the horizon burns deep orange, then fades to peach, then to soft lavender above. That gradient is what gives sunset wedding photos their depth.

Melbourne Locations That Deliver Orange-Toned Sunset Magic

Not every sunset spot in Melbourne gives you the same orange. Some give you pink, some give you purple, and some give you a flat, dull gray. You need to pick your location based on what you want the sky to do behind your couple.

St Kilda Beach and the Pier

This is the classic for a reason. The pier extends into Port Phillip Bay, which means you get open sky on one side and water reflecting the sunset on the other. The reflection doubles the orange. The pier itself gives you leading lines that draw the eye straight to your couple.

Go about 45 minutes before sunset. Set up near the end of the pier or on the grassy area near the kiosk. The palm trees there catch the light beautifully and add a silhouette element that frames your couple without any effort. The beach crowds thin out by late afternoon, so you get clean backgrounds.

The water is calm on most evenings, which means the reflection is mirror-smooth. If there is any wind at all, the water breaks up the reflection into a thousand orange sparks. Both looks are stunning, just different.

Williamstown and the Bay

If you want drama, head to Williamstown. The beach is wide and open, and the view across the bay toward the city skyline gives you something St Kilda cannot. The sun sets over the water, and the city buildings catch the last light and turn gold.

The old boat sheds along the waterfront add texture and character. Rusty metal, weathered wood, peeling paint, all of it looks incredible in orange light. Your couple can lean against a shed, walk along the jetty, or stand on the sand with the city behind them. Every angle works because the light is coming from behind and wrapping around everything.

The Narrabeen-style rock formations near the point give you foreground elements that anchor the frame. Dark rocks against an orange sky is one of the most reliable compositions in wedding photography, and it never gets old.

Royal Park and the City Skyline

For couples who want urban sunset without the beach, Royal Park delivers. The open grassland gives you a clean, minimal foreground, and the Melbourne skyline rises in the background. When the sun sets behind the city, the buildings become silhouettes and the sky turns into a canvas of orange, pink, and deep blue.

The elm trees in the park create natural frames. Shoot through the branches and let the sun peek through. The light filters through the leaves and creates dappled orange spots on the ground and on your couple. It looks effortless but it requires you to be in the right spot at the right time.

How to Capture That Orange Tone Without Ruining It in Post

Getting the orange right starts in-camera. If you blow it there, no amount of editing will save you.

White Balance and Exposure Decisions

Do not shoot auto white balance. Set it manually to around 4500K to 5000K. This keeps the orange warm and rich instead of letting the camera cool it down to neutral. If you shoot RAW, you can adjust this later, but getting it close in-camera gives you a better starting point.

Expose for the highlights. The sky is the brightest part of the frame, and if you let the camera meter for the whole scene, it will underexpose the sunset and kill the orange. Spot meter on the sky near the horizon and lock that exposure. Your couple will be slightly darker, but that is fine. You can lift the shadows in post without destroying the tone.

If you want silhouettes, expose even lower. Let the couple go dark and keep the sky rich. Silhouettes in orange light are some of the most iconic wedding photos you will ever take.

Composing With the Sun Behind Your Couple

Backlighting is the move. Put the sun directly behind your couple and let it rim their hair, their shoulders, the edges of their dress. This creates that glowing outline that separates them from the background and makes them look like they are lit from within.

Do not put the sun dead center behind their heads. That creates a blown-out white hole. Offset it slightly to one side. Let it peek out from behind a shoulder or a tree branch. This gives you a controlled flare that adds warmth without washing out the image.

Use lens flare intentionally. A small amount of flare in the corner of the frame adds to the orange mood. Too much and it looks cheap. Find the balance by changing your angle slightly until the flare sits where you want it.

Timing Your Sunset Session Like a Pro

The math is simple but people get it wrong every time. Sunset in Melbourne varies from about 5pm in winter to 8:30pm in summer. You need to be at your location at least 40 minutes before the actual sunset time. The best light starts about 30 minutes before the sun hits the horizon.

Check the exact sunset time the morning of your shoot. Weather apps give you this down to the minute. Then work backward. If sunset is at 7:15pm, you need to be shooting by 6:45pm at the latest. The orange tone peaks between 6:45 and 7:05pm. After that, it shifts to pink and purple, which is beautiful but not what you came for.

Have your couple arrive 15 minutes before you start shooting. They need time to settle in, get comfortable, and stop thinking about the camera. The first 10 minutes of any session are usually stiff and awkward. By the time the light hits, they should be relaxed and natural. That is when you get the real shots.

One more thing. Shoot vertical and horizontal. The orange sky fills a vertical frame beautifully, but horizontal frames let you include more of the environment. Give your couple both options so they have variety when they see the final gallery. And do not forget to shoot a few tight details in that light. Hands intertwined, rings catching the sun, the hem of a dress glowing orange. Those small moments are what people remember most.

wedding photography melbourne

Melbourne afternoon wedding photography with soft natural lighting

Melbourne Afternoon Wedding Photography: The Soft Light Everyone Is Chasing

There is a reason some of the most beautiful wedding portraits were never taken at sunrise. Afternoon light in Melbourne has a quiet confidence to it. It is warm without being harsh, golden without being overdone, and it wraps around your couple like it was made for them. If morning mist gives you drama, afternoon soft light gives you intimacy. And for couples who want their wedding photos to feel like a slow, unhurried love story, this is the window you want.

wedding photography melbourne

What Makes Afternoon Light So Different From Golden Hour

People confuse these two all the time, but they are not the same thing. Golden hour is that narrow band right before sunset when everything turns amber and the shadows stretch long. It is gorgeous, yes, but it lasts maybe 20 minutes and the light changes fast. You are racing the clock.

Afternoon soft light, on the other hand, hits from about 2pm to 4:30pm depending on the season. It is more diffused, more even, and it does not demand that you rush. The sun sits higher but still at an angle that creates gentle modeling on faces. Shadows are there but they are soft-edged, not dramatic. Skin tones look warm and natural. Dresses catch the light without blowing out. It is the kind of light that makes everyone look good without any heavy editing.

How Cloud Cover Becomes Your Best Friend

Here is something most couples do not realize. A perfectly clear afternoon in Melbourne can actually be too bright for soft portraits. You want some cloud cover. Thin, high-altitude clouds act like a giant softbox spread across the sky. They break up the direct sunlight and turn it into something wrapped and diffused.

Overcast afternoons are even better. The whole sky becomes one massive light source. There are no harsh shadows at all. Every face gets the same beautiful, even illumination. This is why some of the most sought-after wedding photographers in Melbourne actually pray for a cloudy day. It sounds counterintuitive but the results speak for themselves.

Partly cloudy is the sweet spot though. You get patches of direct sun breaking through, which creates those gorgeous dappled light spots on the ground and on your couple. It adds texture and dimension without any of the harshness. If you see clouds rolling in around 1pm, do not panic. That is your green light.

Melbourne Locations That Shine in Afternoon Light

The city has a way of looking completely different after lunch. The crowds thin out, the light angles shift, and certain spots just come alive.

Fitzroy Gardens and the Botanical Backdrops

Fitzroy Gardens is where you go when you want romance without pretension. The grand avenues of elm trees create natural tunnels of light. In the afternoon, the sun filters through the canopy and throws soft, scattered patterns on the ground. Your couple can walk slowly down these paths and every step looks like a movie frame.

The ornamental lake gives you reflections without the chaos of a busy waterfront. The rose gardens, if you are shooting in the right season, add pops of color that look incredible against the warm afternoon tones. And the best part? It is all within the city, so you are not losing hours driving somewhere remote.

The Royal Botanic Gardens right next door works the same way but with a more open, expansive feel. The lake there catches afternoon light beautifully, and the skyline of the CBD rises in the background without overwhelming the scene.

The Yarra River and Southbank Promenade

Southbank in the afternoon has a relaxed energy that is hard to fake. The river reflects the sky and the light bounces off the water onto your couple’s faces. It is a natural fill light that no reflector can match. Walk along the promenade, find a quiet bench, and let the light do its thing.

The pedestrian bridges give you elevation and clean lines. Standing on the bridge with the river below and the city behind you creates a composition that is simple but powerful. The afternoon light keeps everything warm and cohesive so you do not have to worry about mixing color temperatures.

Inner-City Laneways With Afternoon Glow

This is the one people overlook. Laneways like Degraves Street, Centre Place, and AC/DC Lane look incredible in afternoon light. The narrow walls bounce light around, creating this warm, enclosed feeling. The sun hits one side of the lane and the other side stays in soft shadow. That contrast is perfect for portraits.

Go between 2pm and 3:30pm when the sun is high enough to reach into the lanes but still at an angle. The cafes and restaurants are quiet, so you get clean backgrounds without tourists photobombing every shot. The brick walls take on a rich, warm tone that makes every color in the frame pop.

Shooting Techniques That Make Afternoon Light Work For You

The light is beautiful, but you still need to know how to use it. A few technical choices will separate good shots from great ones.

Exposure and White Balance Decisions

Afternoon light is generally forgiving, but it can trick your camera’s meter. If you are shooting in open shade, the meter will want to overexpose because it sees mostly bright sky. Dial in about minus one-third to minus two-thirds of a stop to keep your exposure accurate. You want the light to look bright, not blown out.

White balance is where afternoon light really shines. Set it to around 5500K to 6000K and you get that clean, natural warmth. If you are under tree cover, the light gets cooler and greener. Bump your white balance toward 6500K to compensate. If you want the warmth dialed up even more, shoot in shade and let the ambient light do the work. The result is a rich, golden tone that looks expensive without any color grading.

Using Natural Frames and Depth

Afternoon light gives you something morning light often does not: time. You can move slowly, scout compositions, and build layers into every frame. Use doorways, archways, tree branches, and fences as natural frames. They draw the eye to your couple and add depth that a flat, open field never will.

Shoot with a wide aperture like f/2.8 or f/4 when you want the background to melt into a creamy blur. The afternoon light makes bokeh look especially smooth and warm. If you want more of the environment in focus, stop down to f/5.6 or f/8. Both approaches work, but the shallow depth of field is what gives afternoon wedding portraits that dreamy, editorial feel.

Get low sometimes. Shooting from waist height or even the ground changes the entire mood. It makes your couple look powerful and the background becomes a wash of warm color. It also eliminates distracting elements at eye level like passing cars or stray pedestrians.

Working With Shadows Instead of Fighting Them

In harsh midday sun, shadows are the enemy. In afternoon soft light, shadows are your collaborator. They add shape to faces, define jawlines, and create dimension that flat light never could. Do not rush to fill every shadow with a reflector. Let some of them stay. A half-lit face with soft shadow on one side is infinitely more interesting than a face lit evenly from every direction.

If the shadows are too deep for your liking, a simple white bounce card held just out of frame can lift them without killing the mood. Even a white wall nearby works as a natural reflector. The goal is not to eliminate shadow but to control it.

Timing Your Session Around the Light

The window is real, and it moves. In summer, the harsh midday sun peaks around 12:30pm and does not soften until close to 3pm. In winter, the light is softer earlier, around 1:30pm to 2pm, and fades by 4pm. Always check the sun position before you arrive.

Start your session when the light first turns soft, not when it is at its peak. The first hour of soft afternoon light is often the most magical because the sun is still strong enough to create dimension but diffused enough to stay gentle. As the afternoon goes on, the light gets flatter and cooler. That is not bad, it just means a different look.

If you have the flexibility, shoot two short sessions instead of one long one. One in the late morning around 11am when the light is still fresh, and one in the afternoon around 3pm when everything goes golden. You get two completely different moods from the same day, and your couple gets variety without exhaustion.