81688-Sample-112

Melbourne Spring Gentle Breeze Wedding Photography – A Flowing and Euphoric Atmosphere

Melbourne Spring Breeze Wedding Photography: Capturing That Effortless Flow

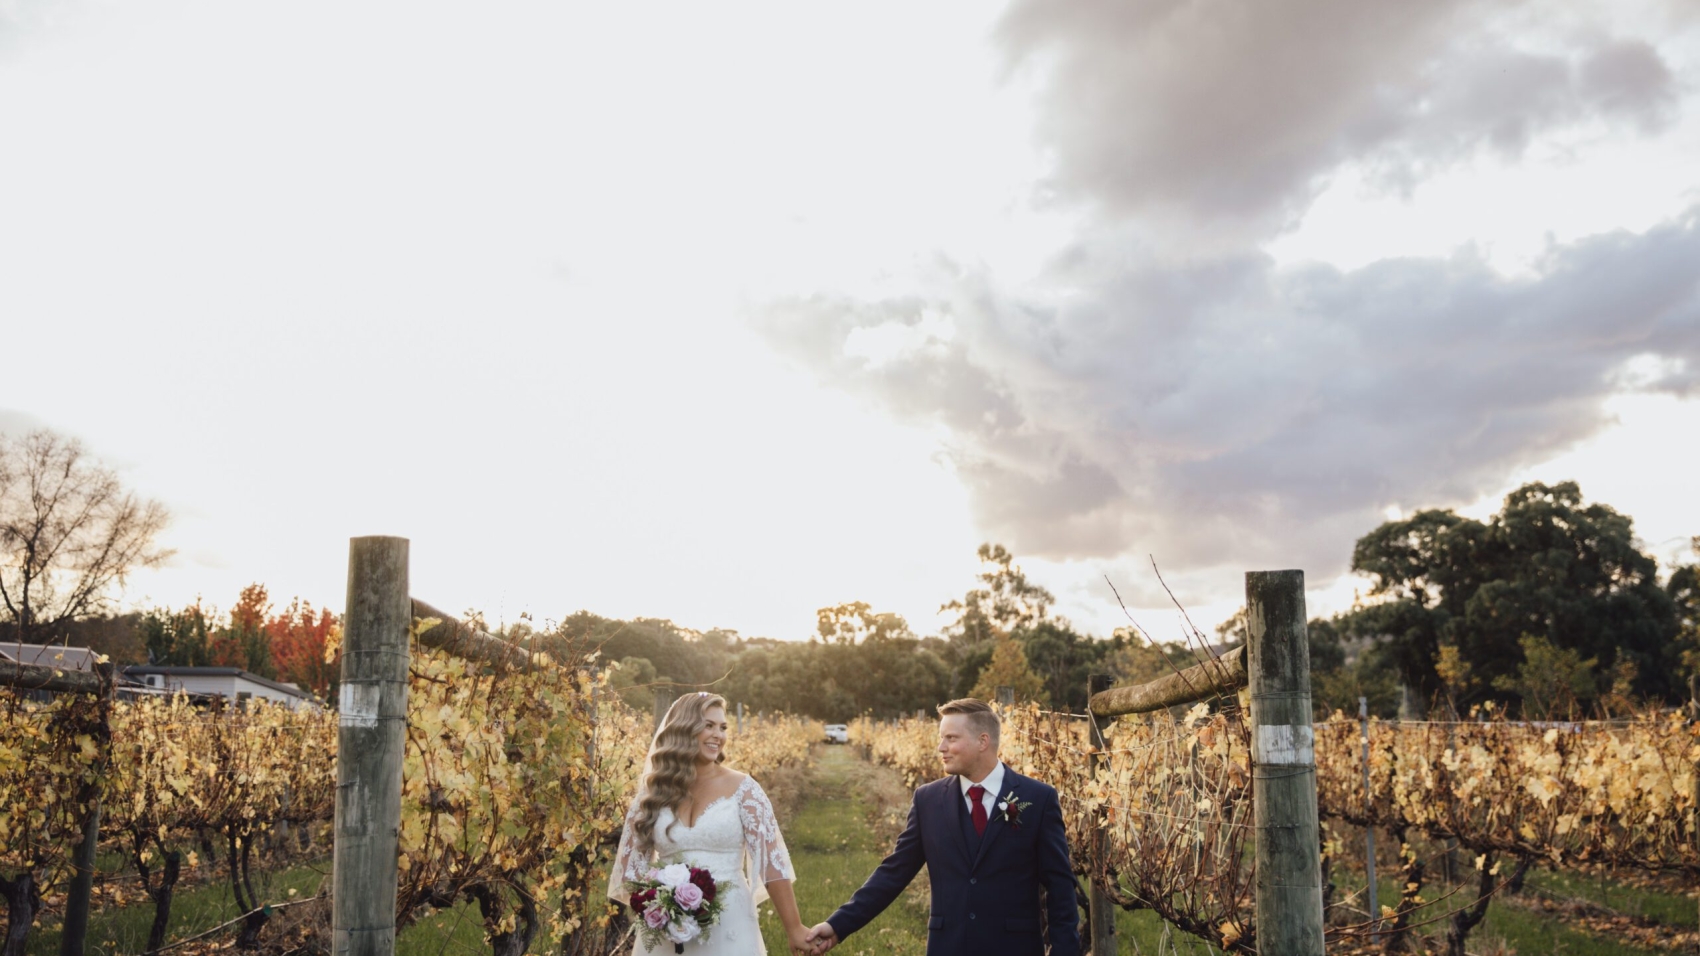
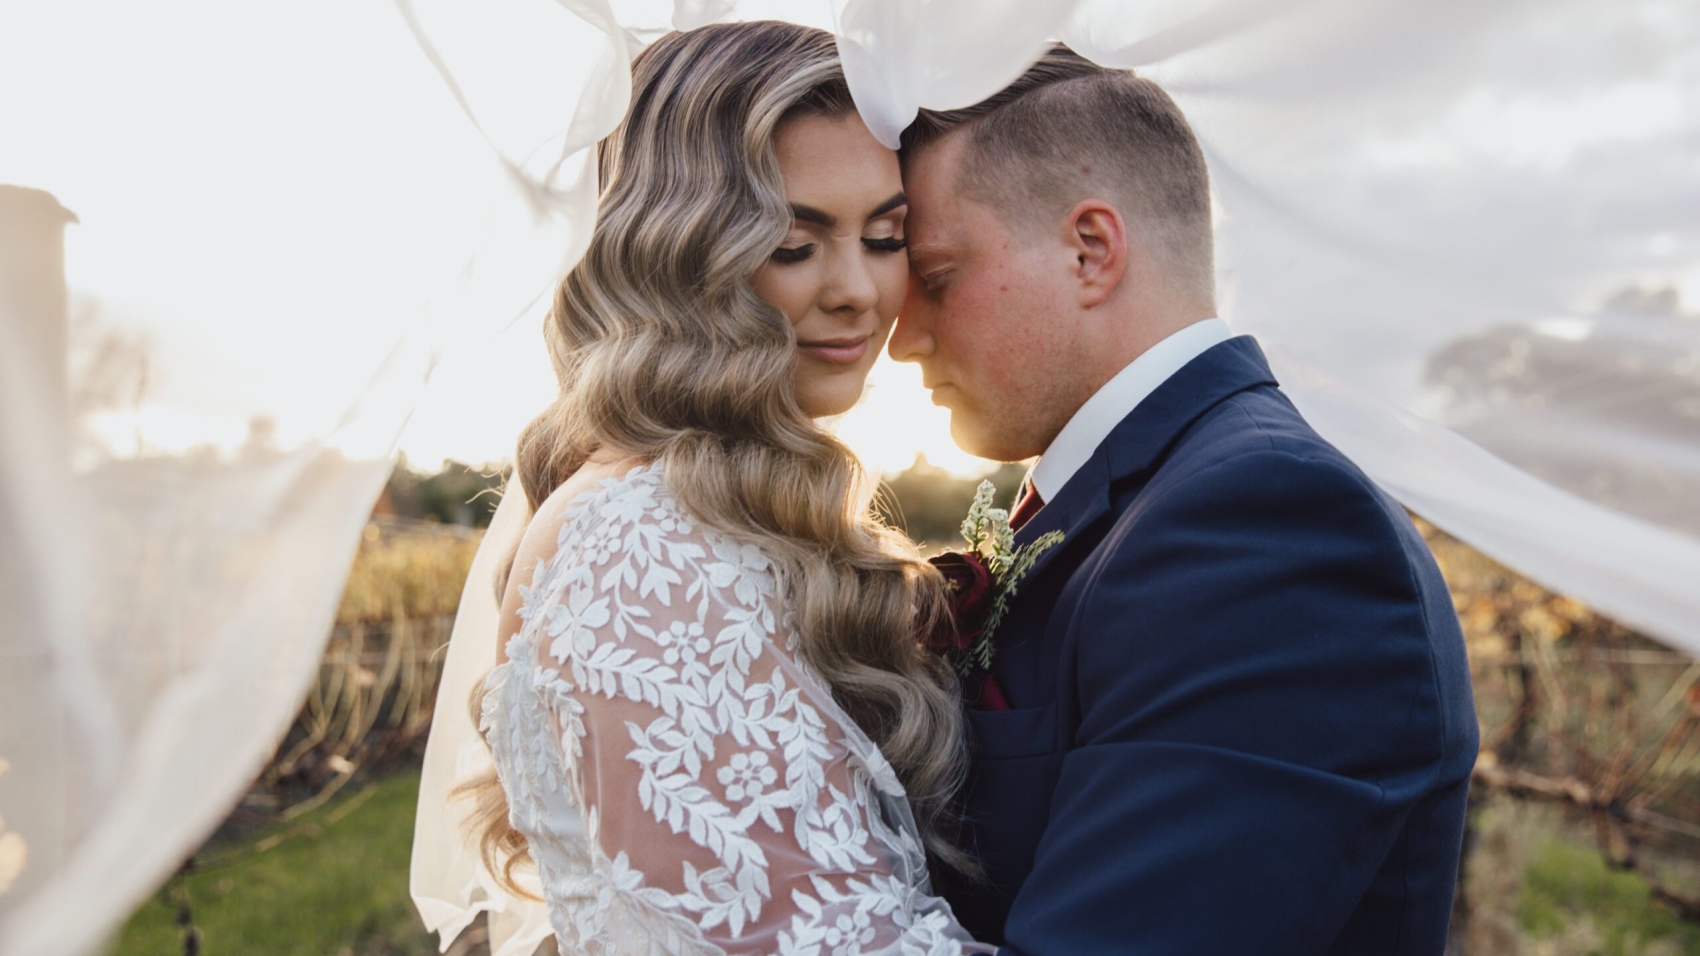
Spring in Melbourne comes with something most couples do not plan for: wind. Not the kind that ruins your hair and sends your veil flying into traffic. The kind that moves just enough to make everything look alive. The dress lifts. The hair shifts. The fabric dances. And if you know how to work with it instead of fighting it, you get wedding photos that feel like they are breathing. This is the look every couple wants but almost nobody knows how to shoot. Flowing fabric, soft movement, that sense of weightlessness. It looks accidental but it is not. It takes timing, patience, and a deep understanding of how wind and light work together in a Melbourne spring.

wedding photography melbourne

Why Spring Wind Is Your Secret Weapon

Most photographers treat wind as the enemy. They see a breeze coming and start panicking. They clamp down on the veil, hold the dress still, and shoot everything as fast as possible before the wind messes up the frame. And they end up with stiff, lifeless photos that look like they were taken in a studio.

But wind is actually one of the most dynamic elements you can have in a wedding photo. It adds motion to still images. It creates shape in fabric that would otherwise hang flat. It makes hair look wild and romantic instead of posed and perfect. And in Melbourne spring, the wind is usually gentle enough to control but strong enough to create movement. That sweet spot is what separates boring wedding photos from ones that make people stop scrolling.

The breeze also interacts with light in a way that is hard to replicate indoors. When sunlight hits moving fabric, it catches different angles and creates shifting highlights and shadows across the material. A white dress in the wind with spring sun behind it looks like it is made of light. That is not something you can fake with a reflector or a strobe. It only happens when wind and sun and fabric all meet at the same time.

The Specific Quality Of Melbourne Spring Wind

Melbourne spring wind is not the same as spring wind anywhere else. The city sits on a bay, and the temperature difference between the land and the water creates a consistent, gentle breeze that rolls in from the south or southwest most afternoons. It is not gusty. It does not come in bursts. It is a steady, rolling movement that lasts for hours.

This consistency is what makes it so useful for photography. You can predict it. You can plan for it. You can position your couple so the wind hits the fabric at the exact angle you want and it will stay there for 20 or 30 minutes instead of changing every 10 seconds like it would in a mountain valley or on an open plain.

The wind also picks up in specific spots around the city. Waterfront locations like St Kilda, Williamstown, and Southbank get the full bay breeze. Open parks like the Botanic Gardens and Royal Park get the land breeze, which is slightly softer but still strong enough to move fabric. And elevated spots like Arthur’s Seat get wind from every direction, which can be chaotic but also creates the most dramatic movement if you know how to use it.

Melbourne Locations Where Spring Wind Creates Magic

Not every spot in Melbourne handles wind the same way. Some places are too sheltered and the breeze dies before it reaches your couple. Others are too exposed and the wind becomes uncontrollable. You need to find the middle ground.

St Kilda Esplanade And The Beach

The Esplanade is the best wind location in Melbourne for wedding photography and it is not even close. The bay breeze rolls in unobstructed, the palm trees sway in a way that adds movement to the background without dominating the frame, and the open space gives you room to work with fabric that is moving in every direction.

The grass along the Esplanade is wide and flat, which means the wind hits your couple from the side or from behind with nothing blocking it. A long veil trailing behind your couple in the breeze looks like it goes on forever. A flowing dress caught mid-lift creates a shape that no pose can replicate. The palm trees in the background sway gently, which adds subtle motion to the frame without distracting from your couple.

Go in the late afternoon between 3pm and 5pm. The wind is strongest during this window, and the sun is low enough to backlight the fabric and make it glow. The light catches every fold and ripple in the moving material, which creates highlights that shift and change with every gust. It looks alive in a way that still photos should not be able to capture, but they do.

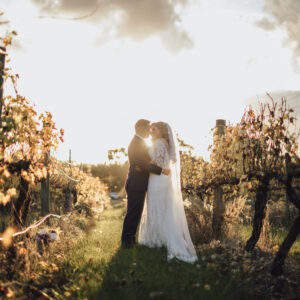
The Royal Botanic Gardens Near The Lake

The Botanic Gardens have a microclimate that makes them perfect for windy spring shoots. The lake creates its own breeze that rolls across the open lawns, and the trees along the edges block the wind just enough to give you a calmer pocket in the middle. Your couple stands in the open with the wind hitting them full-on, but the background trees are only swaying slightly, which gives you movement without chaos.

The ornamental lake is the real star. The wind ripples the water surface, which creates a shimmering, textured backdrop that moves in every frame. Your couple standing near the water with the breeze catching their dress and the lake shimmering behind them looks like a scene from a period film. The reflections on the water break up and reform with every gust, which adds a layer of motion that static backgrounds never have.

Shoot near the edge of the lake where the wind is unobstructed. The trees on the far side of the lake sway in the breeze, which gives you a moving background that frames your couple without competing with them. The combination of moving water, moving trees, and moving fabric creates a photo that feels like the whole world is in motion, even though your couple is standing perfectly still.

Williamstown Waterfront

Williamstown gives you wind plus drama. The bay is wide open here, which means the breeze is stronger and more consistent than in sheltered spots. The old boat sheds and jetties add texture and character, and the view across the bay toward the city skyline gives you depth and scale.

The wind hits the waterfront head-on, which means your couple’s hair, veil, and dress all move in the same direction. This creates a unified sense of motion that looks intentional and cinematic. The old wooden structures along the waterfront have textures that the wind brings to life. Rusty metal creaks, weathered wood glows in the spring sun, and the water behind them churns with whitecaps.

Position your couple at the end of a jetty or on the grass near the water. The wind comes from behind them, which means the fabric lifts and flows away from the camera. This creates leading lines that draw the eye into the frame and gives the photo a sense of forward motion. The city skyline across the bay provides a static backdrop that contrasts with the moving foreground, which makes the wind look even more dramatic.

How To Shoot Moving Fabric Without Losing Sharpness

Wind creates movement, and movement creates blur. That is the challenge. You want the fabric to look like it is flowing, but you want your couple’s faces to be tack sharp. Getting both in the same frame takes some deliberate technique.

Shutter Speed For Motion Without Blur

The mistake most photographers make is shooting too slow. They see the wind moving the dress and think they need a slow shutter to capture the motion. But a slow shutter blurs everything, including faces, hands, and eyes. The result is a dreamy but unusable photo.

Shoot at 1/250th of a second or faster. This freezes your couple’s faces and hands while still allowing the fabric to show some movement. The dress will have a slight softness at the edges, which actually looks more natural than a completely frozen fabric. Completely still fabric in a windy shot looks fake. A little motion at the edges tells the viewer that wind is present without destroying the sharpness where it matters.

If you want more dramatic motion, drop to 1/125th of a second. The fabric will blur more, the veil will trail, and the dress will lift with visible movement. But your couple needs to hold completely still. Any movement from them and the whole frame goes soft. This works for artistic shots where the motion is the point, but it does not work for every frame in the gallery.

Using Continuous Autofocus To Track Moving Subjects

When fabric is moving, your camera’s autofocus can hunt. The dress shifts, the veil moves, and the camera gets confused about where to focus. Switch to continuous autofocus mode and set your focus point on your couple’s nearest eye. Let the camera track them as they move.

If your couple is turning or walking in the wind, pre-focus on where they will be in a second. Focus on the spot, not on them. When they step into that spot, the shutter fires and they are sharp. This takes practice but it is the only way to get consistently sharp faces in a windy shoot.

Back-button focus helps here. Separate the focus function from the shutter button so you can lock focus and recompose without the camera refocusing every time you half-press. It sounds technical but it makes a massive difference when everything is moving.

Letting The Wind Do The Work Instead Of Forcing It

The biggest mistake in windy wedding photography is trying to control every piece of fabric. Holding the veil in place, pinning the dress down, wrapping the hair so it does not move. This kills the whole point. The wind is what makes these photos special. If you remove the wind, you remove the magic.

Let the veil fly. Let the dress lift. Let the hair move. Your only job is to keep your couple’s faces in the light and their expressions natural. The wind handles the rest.

Sometimes the wind does something you did not plan. The veil wraps around the couple’s face. The dress billows out to one side. The hair covers one eye. These accidents are often the best shots in the entire gallery. Do not stop the shoot every time the wind does something unexpected. Keep shooting. The unplanned moments are usually the ones that look the most real.

Working With Spring Light And Wind Together

The light in Melbourne spring is bright but not harsh. The sun is lower than in summer, which means it comes in at an angle that creates dimension even on open, windy locations. When that angled light hits moving fabric, it catches every fold and creates shifting highlights that make the material look almost liquid.

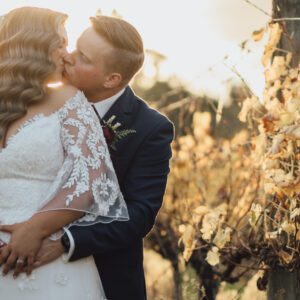
Backlighting For The Glow Effect

The best light for windy spring shoots is backlight. Position your couple so the sun is behind them. The light hits the fabric from behind and makes it glow. Every piece of moving material becomes a light source. The veil turns into a halo. The dress edges light up. The hair catches the sun and shines.

This only works when the wind is moving the fabric. If everything is still, backlight just creates a silhouette. But when the fabric is flowing, backlight turns it into something ethereal. The light passes through the sheer material and makes it translucent. The folds and ripples catch the sun at different angles, which creates a shifting, glowing effect that is impossible to replicate in any other way.

The downside is that backlighting makes faces dark. Expose for the highlights on the fabric, not for your couple’s faces. Their faces will be underexposed, but you can lift them in post. The fabric needs to be bright and glowing. If you expose for the faces, the backlight washes out and you lose the entire effect.

Side Light For Texture And Dimension

If backlight is too dramatic for your couple’s taste, try side light. The sun hits the fabric from one side, which creates shadows in the folds and highlights on the ridges. This gives the material texture and dimension that front light cannot.

Side light also catches the wind more visibly than backlight. When the sun is to the side, the moving fabric casts shifting shadows on the ground and on your couple’s body. Those shadows move with the wind, which adds another layer of motion to the image. It is subtle but it makes the photo feel alive.

Shoot between 3pm and 4:30pm for the best side light in spring. The sun is low enough to create long shadows and warm tones, but still high enough to light your couple’s faces without making them too dark. This window gives you about 90 minutes of usable light, which is plenty of time if you have a plan.

Directing Your Couple In The Wind

Wind changes how your couple moves. Their instincts tell them to hold still, to grip their dress, to brace against the gusts. That is the opposite of what you want. You need them to lean into it.

Movement That Works With The Breeze

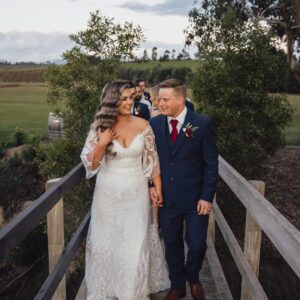
Have your couple walk slowly into the wind. Not fast, not running, just a slow, deliberate walk. The fabric trails behind them, the veil lifts, and the hair moves. It looks effortless because it is. The wind is doing all the work.

Have them turn their heads with the wind. If the breeze is coming from the left, have them turn their head to the right. The hair sweeps across their face, the veil lifts on one side, and the photo has a sense of direction and motion that static poses never achieve.

Have them lift their arms. Even a small movement like raising one hand to adjust their hair creates a ripple in the fabric that the wind amplifies. The sleeve flows, the dress shifts, and the whole frame comes alive. These small movements are more effective than big dramatic poses because they look natural instead of performed.

Keeping Expressions Natural When Everything Is Moving

The wind is distracting. Your couple’s hair is in their face, their dress is lifting, and they cannot stop thinking about how they look. That self-consciousness shows up in their photos as stiff smiles and forced expressions.

The fix is simple: give them something to focus on besides the wind. Talk to them. Ask them questions that make them laugh. Tell them a story. The moment they forget about the camera, their expressions go natural and the wind does its thing in the background. The best windy photos are the ones where your couple does not know they are being photographed. The wind adds the drama. Their genuine reactions provide the emotion.

Practical Things To Know Before A Windy Spring Shoot

Check the wind forecast the night before. Melbourne spring wind usually comes from the south or southwest, and it picks up between 11am and 4pm. If the forecast shows winds above 30km/h, you might want to pick a more sheltered location. Above 40km/h and you are fighting the wind instead of working with it.

Bring hair clips and bobby pins. Not to control the hair, but to give your couple options. Sometimes they want the hair down and flowing. Sometimes they want it pinned back so the wind does not cover their face. Let them choose. Giving them control makes them more relaxed, and relaxed couples give you better photos.

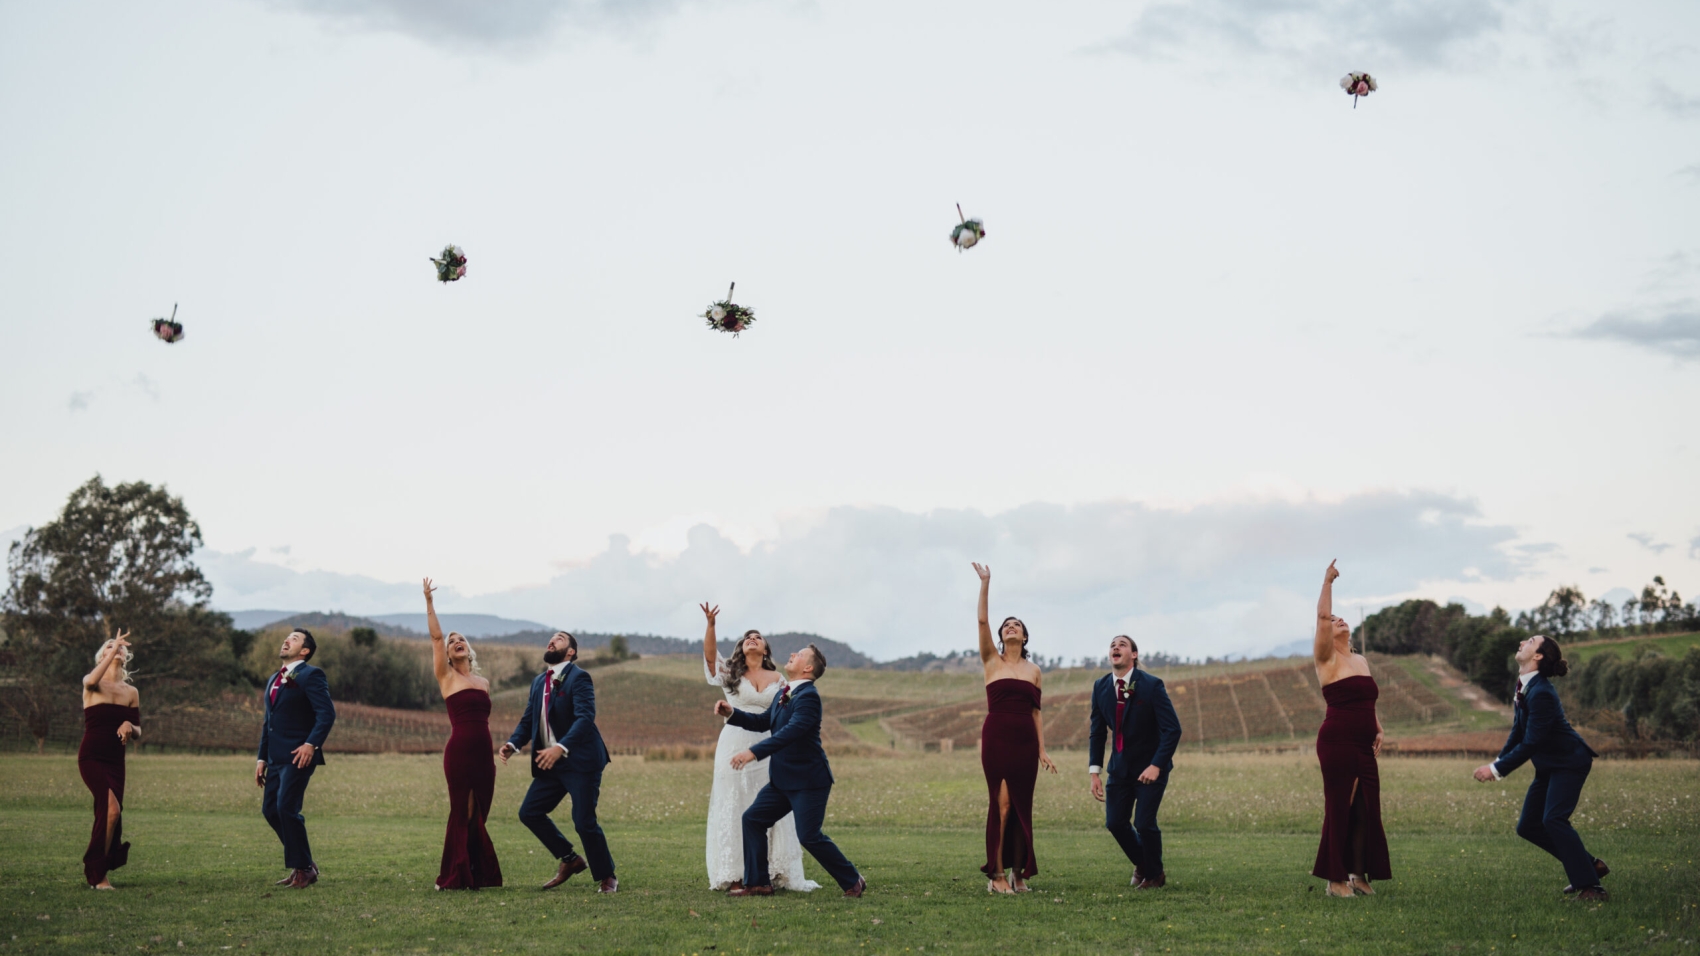
Shoot in bursts. When the wind catches the fabric at the right angle, you have maybe two seconds before it shifts. Burst mode at 5 to 10 frames per second gives you a sequence of shots where the fabric is in the perfect position. Pick the best one from the sequence. One perfect frame is worth more than 20 almost-perfect ones.

And embrace the mess. The wind will do things you did not plan. The veil will wrap around the groom’s head. The bouquet will blow sideways. The dress will lift higher than expected. These moments are the ones your couple will remember most. The planned poses are nice. The windy accidents are the ones they will frame and hang on the wall.

81688-Sample-122

Melbourne Sunset Golden Hour Wedding Photography Session

Melbourne Golden Hour Wedding Photography: How To Shoot The Sunset Window That Everyone Chases

There is a reason golden hour is the most booked time slot for wedding photography in Melbourne. The light does something no other time of day can do. It turns skin to gold, makes white dresses glow, and wraps the whole city in this warm, honeyed tone that feels like the world is holding its breath. Melbourne’s golden hour in particular has a quality to it that photographers from overseas constantly talk about. The air is cleaner here, the light is softer, and the city skyline catches the last sun in a way that creates silhouettes and reflections you will not find anywhere else. But here is the thing most couples do not realize: golden hour in Melbourne is only about 20 minutes of usable light, and if you do not plan for it, you will spend the whole session chasing a sun that already set.

wedding photography melbourne

What Makes Melbourne’s Golden Hour Different From Everywhere Else

Golden hour exists in every city on earth. But Melbourne gives you something most places do not: a long, low-angle sunset that stretches the warm tones across the sky for nearly half an hour. In cities closer to the equator, the sun drops fast and the golden window is 10 minutes, maybe 15. In Melbourne, especially in summer, the sun hangs low on the horizon from about 7:15pm to 8pm, and the light shifts through amber, orange, peach, and pink in a slow, gradual way that gives you time to actually shoot instead of panicking.

The other thing Melbourne has going for it is the Yarra River. Water reflects the sunset and doubles the warm tones in every frame. The city skyline across the river catches the last light and turns gold while the sky behind it burns orange and pink. That combination of reflected light and direct light creates a layered, multidimensional glow that flat-land cities simply cannot match.

The air quality in Melbourne also plays a role. The city sits far from heavy industry, and on a clear evening, the atmosphere is clean enough that the light travels through without getting muddied by haze or pollution. The result is a golden tone that is rich and saturated instead of washed out and pale. You get deep amber instead of pale yellow. That difference shows up in every photo.

The Color Shifts You Need To Watch For

Golden hour is not one color. It is a sequence. The first 10 minutes after the sun hits the horizon, the light is deep orange and the shadows are long and warm. This is the most dramatic window. Skin looks bronze, dresses look gold, and every shadow has a rich, saturated tone.

The next 10 minutes, the light shifts to peach and pink. The orange fades and the sky turns into a gradient of warm pastels. This is the most romantic window but it is also the shortest. The light is softer, the contrast is lower, and the tones are more delicate. This is when you want tight portraits, close-ups, and detail shots.

The last 5 to 10 minutes, the light goes blue and purple. This is not golden hour anymore, this is blue hour, and it is a completely different look. The sky turns deep blue, the city lights start popping, and the warm tones are gone. Some photographers love this window for its moody, cinematic feel. But if you came for golden hour, you need to be done before this starts.

The Best Melbourne Spots For Golden Hour Wedding Photos

You cannot shoot golden hour just anywhere. You need a location that faces west, has an unobstructed view of the horizon, and gives you something interesting to put in the frame besides a flat sky. Melbourne has a handful of spots that nail this every time.

St Kilda Beach And The Pier

St Kilda is the classic golden hour spot in Melbourne and it is classic for a reason. The pier extends west into Port Phillip Bay, which means you get open sky on one side and water reflecting the sunset on the other. The reflection doubles the orange. The pier itself gives you leading lines that draw the eye straight to your couple.

The palm trees along the Esplanade catch the golden light and create silhouettes that frame your couple without any effort. The beach crowds thin out by 6pm, so you get clean backgrounds. The sand turns gold in the low light, which means even the ground becomes part of the color palette.

Position your couple at the end of the pier or on the grass near the kiosk. The sun sets behind them, which means you get that rim light around their hair and shoulders that makes every portrait look editorial. The water in front of them reflects the sky, which fills in the shadows on their faces with soft, warm light. It is the kind of lighting setup that looks like it took a crew of ten people to build, but it is just the sun and the bay doing their thing.

Williamstown And The Bay

If you want a wider, more dramatic backdrop, head to Williamstown. The beach faces west and the view across the bay toward the city skyline gives you something St Kilda cannot. The sun sets over the water, and the city buildings catch the last light and turn gold one by one as the sun drops lower.

The old boat sheds along the waterfront add texture and character. Rusty metal, weathered wood, peeling paint, all of it looks incredible in golden light. Your couple can lean against a shed, walk along the jetty, or stand on the sand with the city behind them. Every angle works because the light is coming from behind and wrapping around everything.

The rocky outcrop near the point gives you foreground elements that anchor the frame. Dark rocks against an orange sky is one of the most reliable compositions in wedding photography. It never gets old because the light is different every single evening.

The Yarra River And Southbank

Southbank gives you something the beach cannot: urban golden hour. The river acts as a mirror, doubling every light in the skyline. The promenade is wide and open, which gives you room to breathe compositionally. The lights from the arts center, the casino, and the buildings across the water create a layered backdrop that looks incredible in any frame.

The pedestrian bridges are the real play here. Standing on a bridge with the river below and the city behind you gives you depth, leading lines, and reflections all in one shot. The bridge railings create natural frames. The water catches every color and turns it into a painted surface.

Get to Southbank by 6:30pm in summer. The light starts shifting around 7pm, and you want to be set up and shooting before the sun hits the horizon. The first 10 minutes of direct golden light on the river are the best. After that, the light softens and the reflections get more diffuse, which is beautiful but a different look.

How To Actually Shoot Golden Hour Without Wasting The Window

The light is gorgeous but it moves fast. If you show up at 7pm and start scouting locations, you are already too late. You need a plan before you arrive.

Scouting The Day Before

Walk your location the evening before your shoot. Find the exact spot where the sun will set relative to your backdrop. Note where the shadows will fall. Check if there are any obstructions like trees, buildings, or cranes that will block the sun at the critical moment.

Mark your spots with tape or a pin on your phone. Know exactly where your couple will stand, where you will stand, and what the composition will look like before the sun even comes up on shoot day. Golden hour does not give you time to figure things out. It gives you time to execute a plan you already made.

Check the exact sunset time. Weather apps give this down to the minute. Work backward from there. If sunset is at 7:45pm, you need to be shooting by 7:15pm at the latest. The best light is between 7:15pm and 7:35pm. After that, you are chasing a fading glow.

Camera Settings For Golden Hour

Shoot manual. There is no other option. The light is changing too fast for auto anything.

Start with an aperture of f/2.8 to f/4. You want the background to glow but you also want your couple sharp. Going wider than f/2.8 risks missing focus on eyes, especially if your couple is moving. Stopping down past f/5.6 lets in less light and you will need to compensate with ISO, which adds noise.

Shutter speed depends on whether you are handheld or on a tripod. Handheld, do not go below 1/125th of a second or you will get motion blur from your own hands. On a tripod, you can go as slow as you need. For walking shots, 1/60th to 1/100th usually works if your couple moves slowly.

ISO is where golden hour gets tricky. The light is dimming fast, which means you will need to push ISO higher as the session goes on. Start at ISO 400 to 800 and work your way up to 1600 or 3200 by the end of the window. Modern cameras handle this well. A little grain actually adds to the warm, film-like quality of golden hour photos. It looks intentional, not sloppy.

White balance is critical. Set it manually to around 5000K to 5500K. This keeps the orange tones warm and rich instead of letting the camera cool them down. If you shoot RAW, you can adjust this later, but getting it close in-camera gives you a better starting point. Auto white balance will try to neutralize the warm light and turn your golden hour into a flat, gray mess.

Backlighting Your Couple The Right Way

The move for golden hour is backlighting. Put the sun directly behind your couple and let it rim their hair, their shoulders, the edges of their dress. This creates that glowing outline that separates them from the background and makes them look like they are lit from within.

Do not put the sun dead center behind their head. That creates a blown-out white hole. Offset it slightly to one side. Let it peek out from behind a shoulder or through the branches of a tree. This gives you a controlled flare that adds warmth without washing out the image.

Expose for your couple’s faces, not the sky. The sky will be bright. That is fine. Let it be bright. Your couple’s faces are what matter. If the sky blows out to pure white, it looks clean and intentional. If your couple’s faces are dark because you exposed for the sky, the photo is ruined.

Use lens flare intentionally. A small amount of flare in the corner of the frame adds to the golden mood. Too much and it looks cheap. Find the balance by changing your angle slightly until the flare sits where you want it.

Common Mistakes That Kill Golden Hour Shoots

The first mistake is showing up late. I mean late. Golden hour in Melbourne moves fast, especially in summer when the sun drops quickly. If you arrive at 7pm for a 7:30pm sunset, you have lost your setup time. Arrive at least 45 minutes before sunset. Use that time to scout, compose, and let your couple settle in.

The second mistake is overshooting. You have maybe 20 minutes of peak golden light. Do not waste it taking 500 frames of the same pose. Take 20 good ones, then move on. Change the location, change the pose, change the composition. The light is shifting every minute, so every frame should look different from the last.

The third mistake is ignoring the couple. Golden hour is stressful. The light is fading, the clock is ticking, and everyone is rushing. But your couple needs to feel relaxed. If they are tense, the photos will look tense. Talk to them. Make them laugh. Give them something to do with their hands. The golden light will do the rest, but only if your couple is actually enjoying themselves.

The fourth mistake is not shooting into the sun. The best golden hour portraits have the sun behind or beside your couple, never in front of them. Front light in golden hour is flat and unflattering. Side light and backlight are where the magic lives. The sun should be your backlight, not your key light.

What To Do After The Sun Goes Down

Golden hour ends. The orange fades, the sky turns blue, and the city lights come on. Most photographers pack up and leave. But the next 15 to 20 minutes, called blue hour, is its own window.

The sky turns deep blue and the city lights turn warm yellow. That contrast between cool blue and warm yellow is one of the most beautiful color combinations in photography. Your couple stands in the blue light with the warm city glowing behind them, and the photo looks like it belongs in a film.

Shoot wide during blue hour. The city skyline is fully lit, the sky is still visible, and the light is soft and even. Your couple becomes a silhouette against the glowing city, or they are lit by a nearby streetlamp with the blue sky behind them. Either way, the photos are stunning and completely different from the golden hour shots.

You get two moods from one session. The warm, orange, romantic golden hour. And the cool, blue, cinematic blue hour. Tell your couple to expect both. The golden hour shots are what they came for. The blue hour shots are what they will not stop posting on Instagram.

81688-Sample-145

Melbourne cloudy-day wedding photography with a soft mist atmosphere effect

Melbourne Overcast Wedding Photography: The Soft Mist Mood That Makes Every Portrait Feel Like A Dream

Everyone wants golden hour. Everyone chases the sun. But the best wedding photographers in Melbourne know a secret that most couples never hear: overcast days are where the magic actually lives. The sky turns into one giant softbox. The light wraps around everything evenly. Shadows disappear. Skin looks flawless. And the whole city takes on this quiet, misty, almost cinematic quality that no amount of post-processing can fake. Melbourne gets more overcast days than most people realize, and if you learn to shoot in that light, you unlock a look that is cleaner, softer, and more emotional than anything bright sun can give you.

wedding photography melbourne

Why Overcast Light Is The Most Underrated Wedding Light Source

Most couples hear the word overcast and think disaster. Gray sky, flat light, boring photos. That is what they have been told. But that advice comes from people who do not understand how light actually works. Overcast sky is not the absence of light. It is the presence of perfect light. The clouds act as a massive diffuser, scattering the sunlight in every direction so it hits your couple from all angles at once. No harsh shadows. No blown-out highlights. No squinting. Just soft, even, wraparound illumination that makes every face look its best.

The color temperature on an overcast day in Melbourne sits around 6500K to 7500K, which is cooler than golden hour but warmer than you might think. It gives skin a natural, rosy tone without any orange cast. White dresses look clean and bright instead of yellow. And the overall mood of the image feels calm, intimate, and timeless. This is the look that ages well. Ten years from now, these photos will still feel fresh. Golden hour shots from the same year will already look dated.

The Mist Factor That Makes Melbourne Overcast Days Special

Melbourne is not just overcast. It is misty. The city sits close to the coast, the humidity fluctuates wildly, and on a gray day, that humidity turns the air into a natural fog machine. Buildings fade into the background. Trees become silhouettes. The Yarra River disappears into a white haze. And your couple stands in the middle of it all, sharp and clear against a world that has gone soft.

This is not something you can replicate in Los Angeles or Miami or any other sunny city. Melbourne’s overcast mist has a specific quality to it. It is not heavy fog that kills visibility. It is a light, airy haze that reduces contrast in the background while keeping your couple in focus. The result is portraits that look like they were shot in a studio with professional lighting, except you used nothing but the sky.

The mist also affects color. It desaturates the background, which means the colors in your couple’s clothing, their skin, their flowers, all of it pops against the muted gray. A red bouquet against a misty Melbourne skyline is one of the most striking color combinations you will ever see in a wedding photo. The mist does the work for you.

Melbourne Locations That Deliver Overcast Magic

Not every spot handles overcast light the same way. Some places look flat and gray. Others look like a painting. You need to pick your ground carefully.

The Yarra River And Southbank On A Gray Day

Southbank on an overcast day is something else entirely. The river turns silver-gray and reflects the sky like a mirror. The city skyline across the water fades into the mist, which means your couple becomes the clear focal point of every frame. The promenade is wide and open, the light is even, and there are no harsh shadows anywhere.

The pedestrian bridges are incredible in this light. Standing on a bridge with the river below and the misty skyline behind you gives you depth, reflection, and atmosphere all at once. The bridge railings create leading lines that draw the eye toward your couple. The water below catches the gray sky and turns it into a smooth, reflective surface that doubles every element in the frame.

Go in the morning when the mist is still low. By midday, the clouds often break and the light gets patchy. The early morning overcast window, roughly 8am to 10am, is when the mist is thickest and the light is most even. That is your golden window, ironically.

Carlton Gardens And The University Precinct

The old sandstone buildings at the University of Melbourne look incredible on a gray day. The warm tones of the stone contrast with the cool gray sky, which creates a color tension that makes every photo feel editorial. The elm trees along the paths create a canopy that diffuses the light even further, and the grass stays green and vibrant while everything else goes muted.

The lawns here are wide and open, which means you get clean backgrounds without any visual clutter. Your couple walks across the grass with the old buildings behind them and the gray sky above, and the photo looks like it belongs in an architecture magazine. The mist adds a layer of depth that makes the buildings feel distant and dreamy instead of flat and boring.

Shoot near the old buildings with the warm stone visible. The contrast between the warm stone and the cool gray sky is one of the most reliable color combinations in wedding photography. It works every time, no matter the season.

Fitzroy Gardens And The Tree-Lined Paths

Fitzroy Gardens on an overcast day has this quiet, melancholic beauty that is perfect for wedding portraits. The elm trees form a tunnel overhead, and in the mist, the canopy becomes a soft gray ceiling that diffuses the light even further. Walking down these paths with your couple feels like walking through a memory.

The ornamental lake is the star here. On a gray day, the water turns pewter-colored and reflects the mist like a foggy mirror. Your couple standing by the lake with the water and the mist behind them looks like they are standing at the edge of the world. The reflections are soft and muted, which adds to the dreamlike quality of the image.

The rose gardens are quieter on overcast days, which means you get the space to yourselves. No crowds, no distractions, just your couple and the mist and the old trees. That is when the best photos happen.

How To Shoot Overcast Light So It Looks Intentional And Not Flat

Overcast light is forgiving, but it can also look boring if you do not push it. A few deliberate choices will separate good overcast photos from great ones.

Exposing For The Mood Instead Of The Meter

Your camera’s light meter will see all that gray sky and think the scene is darker than it actually is. It will want to overexpose, which kills the mood. The whole point of shooting overcast is the soft, muted tone. If you let the camera brighten everything up, you lose that.

Underexpose by about one-third to one-half of a stop. This keeps the gray sky rich and moody instead of washing it out to white. Your couple will be slightly darker, but you can lift them in post without losing the overcast atmosphere. The key is to protect the mood first and fix the exposure second.

If you shoot RAW, you have even more control. Pull the highlights down slightly to keep the sky from blowing out. Lift the shadows just enough to see your couple’s faces clearly. The result should feel dim and soft, not bright and flat. That is the overcast look.

Using The Mist As A Natural Filter

The mist is not a problem. It is your best tool. It reduces contrast in the background, which means distant elements fade away and your couple stands out without any artificial vignette. It softens edges, which means harsh architectural lines become gentle and the whole image feels cohesive.

Position your couple so the mist is behind them, not in front of them. Back mist creates depth and separation. Front mist creates a soft, dreamy foreground that frames your couple. Both work, but back mist is more dramatic and front mist is more intimate.

If the mist is too thick and your couple is losing contrast, move them closer to the camera. The mist affects distant objects more than nearby ones, so even a few feet of distance can make a big difference in how sharp your couple looks against the background.

White Balance That Keeps The Cool Tone Without Going Blue

Auto white balance on an overcast day will push the image toward blue, which can make skin look cold and lifeless. Set your white balance manually to around 6000K to 6500K. This keeps the cool tone that makes overcast photos feel moody but prevents the image from going fully blue.

If you want a warmer overcast look, push toward 5500K. The skin tones will look rosier and the overall image will feel more inviting. This works especially well if your couple is wearing warm-toned clothing like ivory, champagne, or blush. The warm clothes against the cool gray sky create a beautiful color contrast.

Do not go above 7000K. That turns the image clinical and cold. Do not go below 5000K. That warms everything up too much and kills the overcast mood. Stay in that 5500K to 6500K range and you will get the soft, cool, dreamy tone that makes overcast wedding photos so special.

Working With The Lack Of Shadows

The biggest technical challenge of overcast photography is the absence of shadows. Shadows give photos dimension. Without them, faces can look flat and features can disappear. You need to create dimension in other ways.

Using Direction And Positioning Instead Of Shadows

Since the light is coming from everywhere, you have to create direction by positioning your couple relative to the environment. Turn your couple so the light hits one side of their face more than the other. Even a slight angle creates enough contrast to define cheekbones and jawlines.

Use the environment to create depth. A row of trees receding into the mist gives you layers even without shadows. A path leading into the distance creates perspective. A building on one side of the frame creates a visual anchor. These compositional elements replace the shadows that overcast light removes.

Get low sometimes. Shooting from waist height or below changes the perspective and creates dimension that overhead flat light cannot. Your couple looks powerful, the background becomes a wash of gray, and the lack of shadows stops mattering because the composition is doing the work.

Embracing The Flatness As A Style Choice

Here is something most photographers will not tell you: flat light is a style. It is not a limitation. Japanese wedding photography, Scandinavian editorials, Korean wedding trends, all of them use flat, soft, shadowless light on purpose. It looks clean, modern, and minimal. It feels calm instead of dramatic. And it ages better than high-contrast golden hour shots because there is less to look dated.

If your couple wants a modern, editorial look, lean into the flatness. Do not fight it. Let the light wrap around everything evenly and let the composition and the emotion carry the photo. The result will look intentional and stylish instead of like you forgot to check the weather.

Practical Things To Know Before Your Overcast Shoot

Overcast days in Melbourne can turn rainy without warning. Bring an umbrella. Not for your couple, for your gear. A light drizzle will not ruin the shoot, but a downpour will. Check the radar the night before and have a backup indoor location ready.

The light on an overcast day does not change much from morning to afternoon. You have a long, stable window, which means you do not need to rush. Use that time to move slowly, scout compositions, and let your couple relax into the session. The lack of dramatic light means the mood has to come from them, not the sky.

Dress your couple in colors that contrast with the gray. White dresses pop against a misty skyline. Deep red, navy, or forest green all stand out beautifully. Avoid gray or beige clothing because it will blend into the background and your couple will disappear.

And shoot more than you think you need. Overcast light is forgiving, which means your hit rate will be high. Almost every frame will be usable. Take advantage of that and give your couple twice as many options as you would on a golden hour shoot. They will thank you when they see the gallery.