71576 - Slaven & Vesna - Preview-25

Production of a cinematic wedding photography film opening video in Melbourne

If you are looking to craft a cinematic opening sequence for your pre-wedding shoot in Melbourne, the process goes far beyond simply stringing together pretty clips. It is all about wrapping the unique vibe of this city, the quiet chemistry between you two, and that soft, unscripted warmth into the very first few seconds that make anyone who presses play feel like they are stepping right into your little love story.

wedding photography melbourne

Pick your core story anchor before you press record

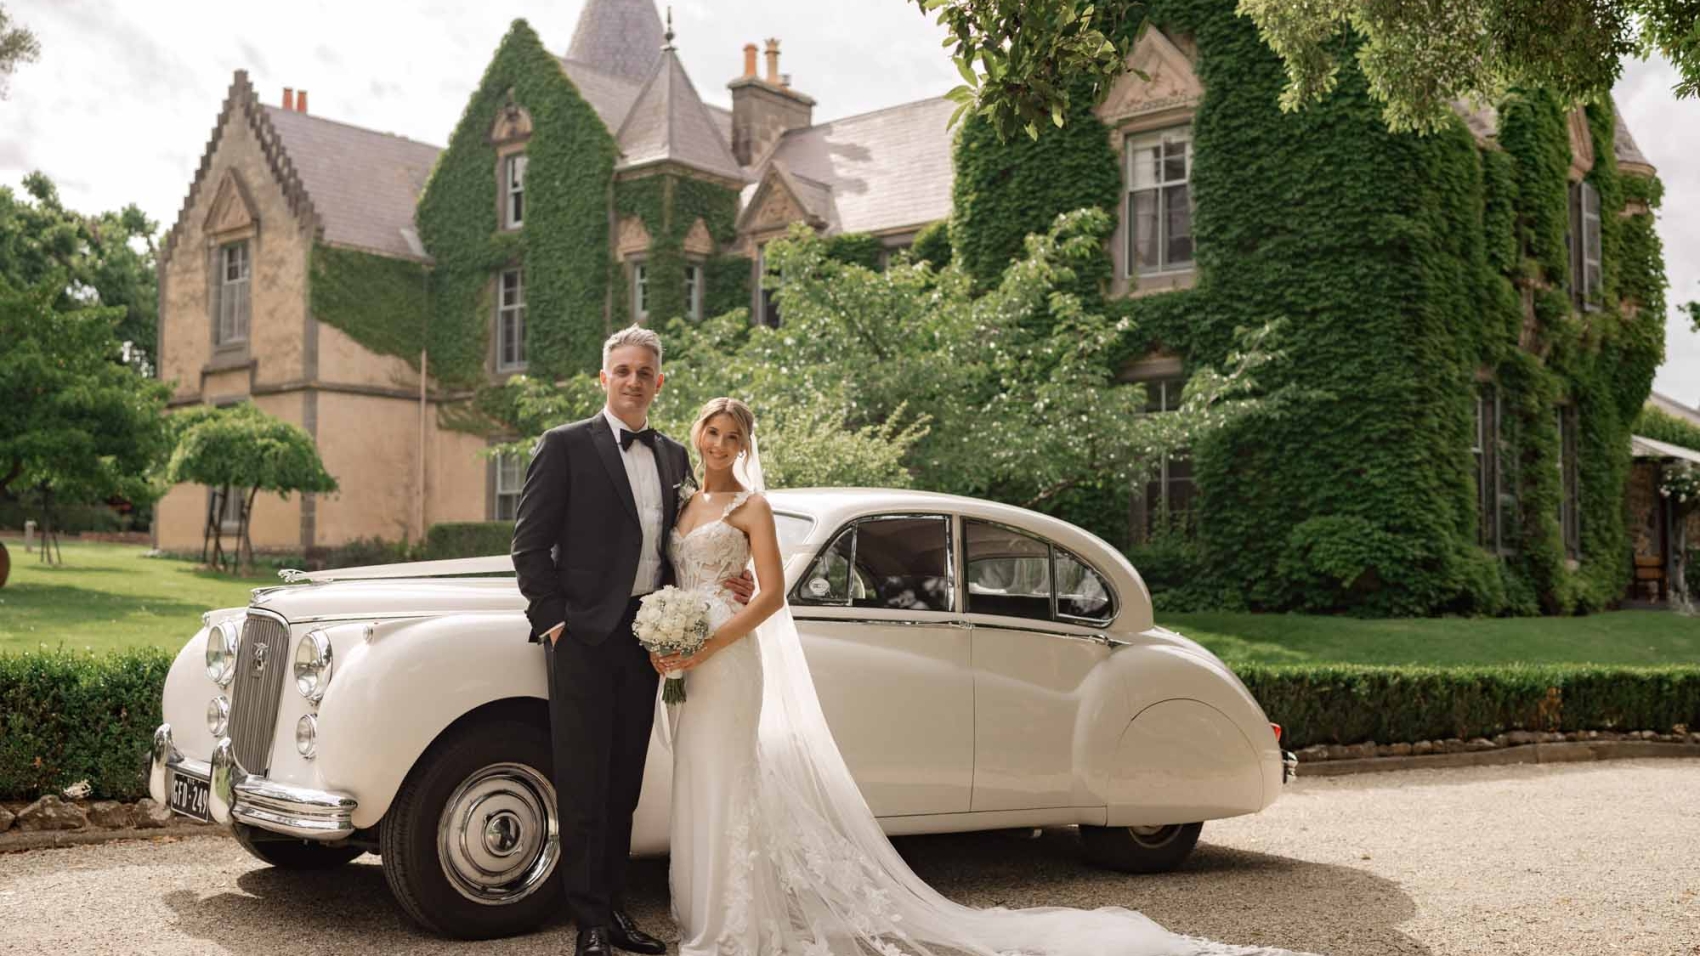
You do not need a complicated, over-the-top plot to make the opening feel alive. Think about the small, specific moments that tie your relationship to Melbourne. Maybe it is the way you two used to wander through laneways covered in street art after grabbing coffee, or the lazy afternoon you spent sitting on a Brighton beach pier watching the tide roll in. Start the sequence with a single, quiet anchor shot that does not even show your faces at first. It could be a close-up of wind tangling the edge of a wedding veil against a backdrop of the Royal Botanic Gardens’ old oak trees, or the faint steam curling up from a shared takeaway cup placed on a weathered wooden windowsill in a CBD lane. These tiny, specific details do not look staged, and they immediately pull viewers into the world you are building.

Map out your shot flow with natural cause and effect

A common mistake many new creators make is filling the opening with nothing but beautiful B-roll of scenery, with no clear connection between each frame. That makes the whole sequence feel hollow, like a travel ad with no heart. Instead, build each new shot based on what the previous one shows. If your first frame is sunlight filtering through the leaves of a gum tree, the next shot can follow that streak of light as it falls across the back of the bride’s hand, then pan slowly over to catch the groom glancing over at her with that quiet, half-smile only they share. This kind of flow does not feel forced, and it lets the audience feel like they are discovering these little moments right alongside you.

Use Melbourne’s natural light to set the opening mood

The golden hour glow over Port Phillip Bay is one of this city’s most underrated superpowers for cinematic work. Plan to shoot the core opening clips in the 45 minutes just after sunrise, when the light is soft and diffused, no harsh shadows cutting across your faces. If you are shooting in one of the city’s iconic lane ways, wait for the moment when the sun dips low enough to stream in through the narrow gaps between buildings, painting the brick walls in warm, honey-toned light. You do not need fancy filters to make these shots feel like they belong in a film. The natural, unrushed light of Melbourne will do most of the work for you, and it will make the opening feel far more authentic than any over-staged studio setup.

Build subtle camera movement that feels unplanned

Nothing kills the cinematic feel faster than stiff, locked-off shots that look like they were set up on a tripod and never touched. But that does not mean you need to swing the camera around wildly for no reason. Every small movement should follow the energy of the moment in front of you.

Slow, drifting motion for quiet, intimate beats

For the opening clips where you are not yet showing the full couple, use a very slight, handheld drift instead of a perfectly stabilized gimbal shot. Keep the movement slow, almost unnoticeable, like someone is leaning in gently to catch a quiet moment they do not want to interrupt. A tiny, almost imperceptible shake in the frame adds that human touch that perfectly smooth, AI-generated footage can never replicate. It makes the whole sequence feel like a real person was there, witnessing the moment, not a perfectly calibrated machine.

Match your pace to the rhythm of the city

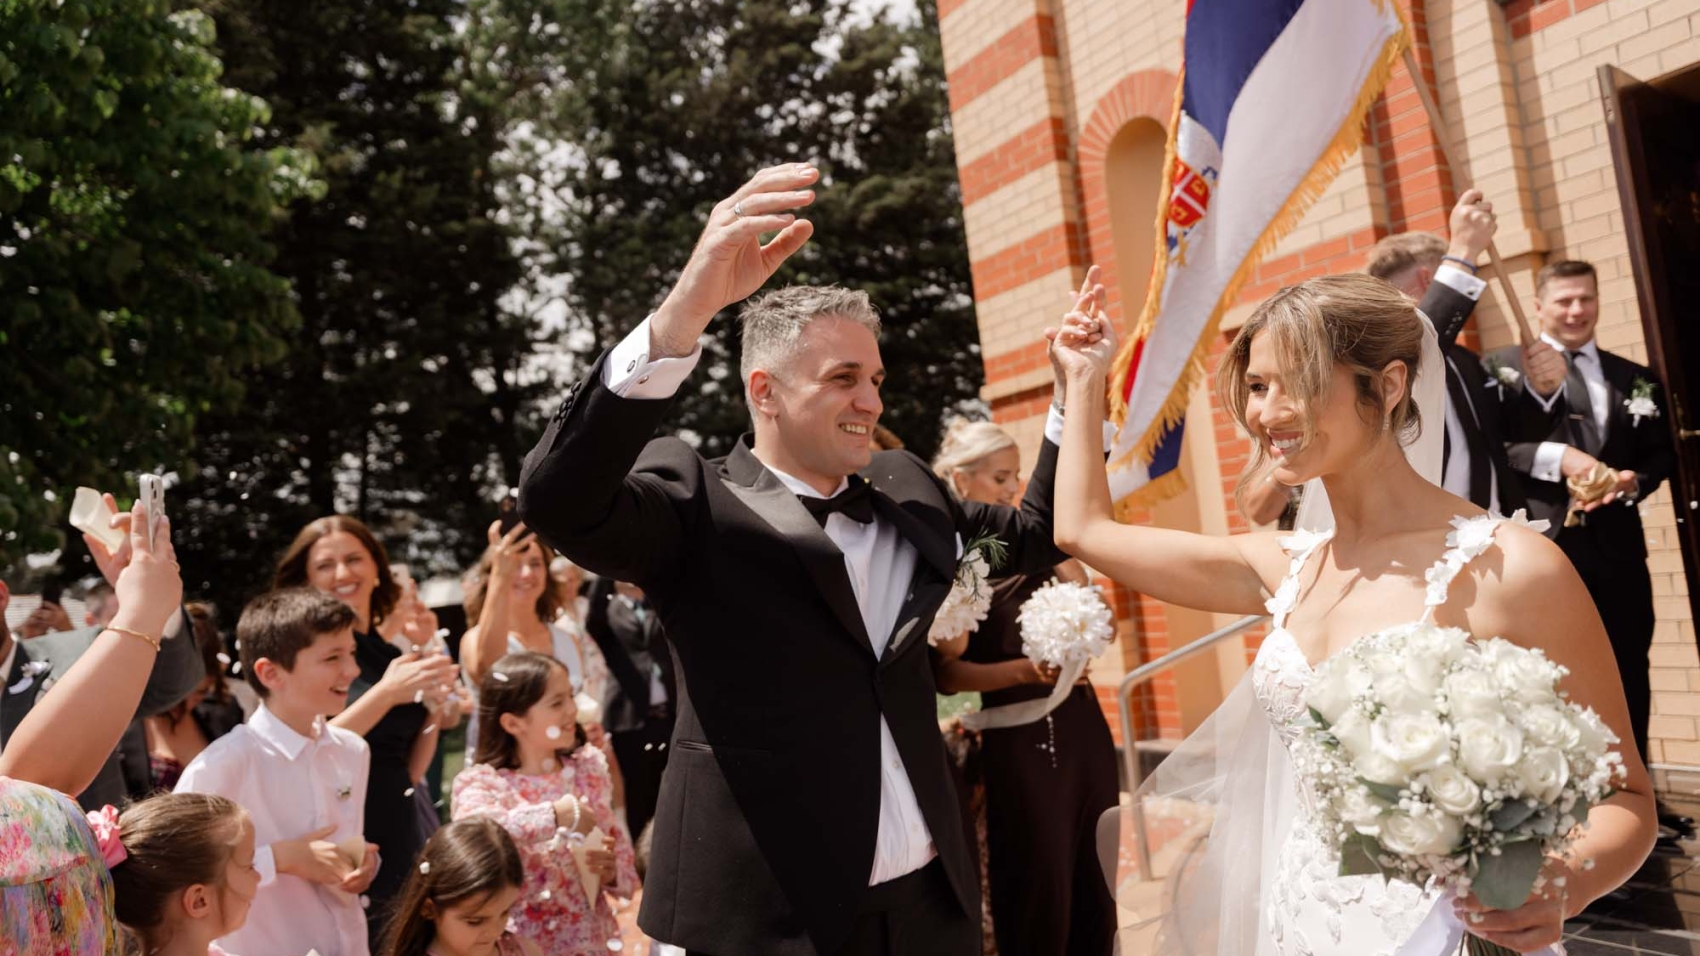
If you are shooting an opening clip along a tram route, let the camera move slowly alongside the passing tram for a few seconds, letting the blur of the city slide past in the background before it locks onto the couple walking hand in hand on the footpath. This small, intentional choice ties your love story directly to the everyday rhythm of Melbourne, and it makes the whole opening feel rooted in the real world, not some disconnected fantasy set. You can also throw in a few slow-motion clips for the very first moment the couple sees each other, but keep the speed subtle, not over-the-top. A 60fps slowdown, not an exaggerated 120fps stretch, keeps the moment tender instead of making it feel cheesy.

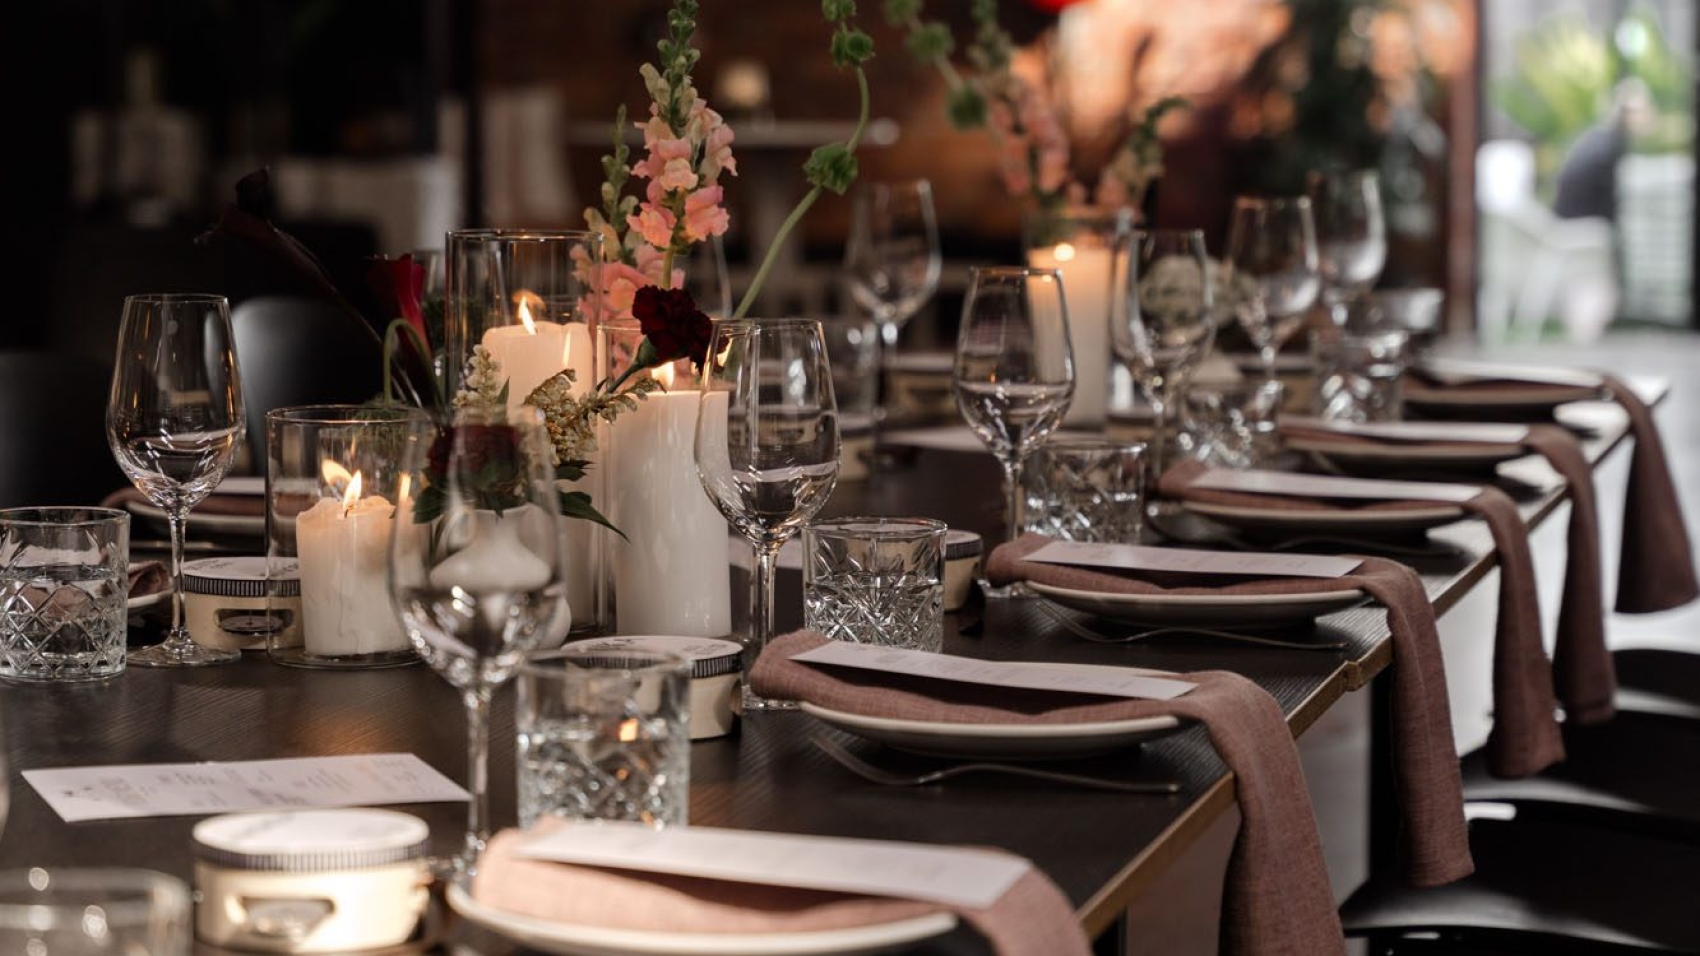
Edit the opening to breathe, not rush

A great cinematic opening does not cram 20 different clips into 30 seconds. It leaves empty space, quiet pauses, that let the emotion of the moment sink in for anyone watching.

Choose music that feels like a memory, not a wedding cliché

Skip the overused, overly grand orchestral tracks that everyone has heard in a hundred other wedding videos. Dig for soft, understated instrumental tracks that feel like the quiet background hum of a lazy Melbourne weekend. A gentle piano line with a little bit of soft static texture, or a slow, quiet acoustic guitar track that does not demand all the attention, lets the visuals carry most of the emotion. Mute the music entirely for the first two seconds of the opening, and leave in the soft, natural ambient sound of the location: distant waves crashing on the beach, a magpie calling from a nearby tree, the faint rustle of leaves in the wind. That tiny choice will make the whole sequence feel far more immersive than any perfectly polished, all-music opening.

Color grade for timeless warmth, not fleeting trends

Avoid the super saturated, high-contrast looks that were popular a couple of years ago and already feel dated. Instead, pull down the brightness of pure white areas a little, add soft, muted cream tones to the highlights, and keep the shadows soft and deep, not crushed to pure black. For clips shot near the ocean, you can tint the distant sky a very faint, soft grey-blue instead of a bright, saturated cyan. This kind of grading does not scream “trendy edit”, it feels like a frame pulled from a beloved old film that you will still love looking back on 10 years from now. Throw in a very subtle layer of fine film grain across the whole opening sequence, just enough that you can barely notice it unless you look closely. It breaks up the perfectly smooth digital look, and adds that soft, tangible texture that makes the footage feel like something real you can almost reach out and touch.

wedding photography melbourne

Delivery of raw format original photos of wedding photography in Melbourne

Melbourne Wedding Photography RAW Files – Why Getting Your Original Files Matters More Than You Think

Most couples in Melbourne do not even ask for their RAW files. They get the edited album, they love it, and they never think about what is sitting on the photographer’s hard drive. That is a mistake. A big one. The RAW files are your wedding. Not the edited version. The actual, unprocessed, untouched capture of the day. Every photon that hit the sensor. Every detail the camera saw. All of it. And it should be yours.

wedding photography melbourne

Getting RAW files delivered is not about editing them yourself. Most couples will never open them. But having them gives you options. Freedom. Control over your own memories. And in a city like Melbourne where the light changes every fifteen minutes, those files hold information that no JPEG can ever recover.

What RAW Files Actually Are and Why They Matter

A JPEG is a finished image. The camera has already decided what the exposure should be, what the white balance should be, what the contrast should look like. It compressed all that data into a small file and threw away the rest. A RAW file is the opposite. It is everything the sensor captured. Every stop of dynamic range. Every shade of color. Every detail in the shadows and highlights.

Think of it this way. A JPEG is a photocopy of a painting. A RAW file is the original canvas. You can do completely different things with a RAW file that you simply cannot do with a JPEG. Push exposure by three stops and the image still looks clean. Change the white balance from warm to cool and the colors stay natural. Recover shadows that look completely black in the JPEG. That is the power of RAW.

The Melbourne Light Problem That RAW Solves

Melbourne is brutal on cameras. The light shifts constantly. You can be shooting in direct sun at noon and then five minutes later a cloud rolls in and everything goes flat. A JPEG locked in at noon exposure will look terrible in that cloud. The shadows will be crushed. The highlights will be blown. There is nothing you can do.

A RAW file captures the full dynamic range of that moment. When the cloud hits, the RAW file still has all the shadow detail and all the highlight detail. You can pull it back in post. You can save a photo that would have been ruined in JPEG. For a Melbourne wedding where the weather can change four times in an hour, this is not a luxury. It is a necessity.

What You Should Expect When a Photographer Delivers RAW Files

Not all photographers handle RAW delivery the same way. Some give you everything. Some give you a curated selection. Some charge extra. Some include it by default. Knowing what to expect saves you from surprises and bad experiences.

Full Delivery vs. Curated Selection

The best practice is full delivery. Every single frame the photographer shot. Not just the good ones. Not just the ones they think you will like. All of them. The reason is simple. You do not know what you want until you see it.

A photographer might skip a frame because the groom blinked. But you might love that frame because the bride was laughing. A photographer might discard a shot because the exposure was off by half a stop. But in RAW, that half stop is nothing. You can fix it. If you only get the curated selection, you lose all those moments forever.

Full delivery also means you get the behind-the-scenes shots. The getting-ready photos. The empty venue before guests arrived. The details. The rings on the table. The shoes by the door. These are the frames that make an album feel complete, and they are usually the first things photographers cut when curating.

How Many Files Should You Get

A typical Melbourne wedding shoot generates between eight hundred and two thousand RAW files depending on the length of the day and the photographer’s style. That sounds like a lot. It is. But storage is cheap. A hard drive that holds all of it costs less than a nice dinner.

Do not let a photographer tell you they will only deliver five hundred files because that is “enough.” It is enough for them. It is not enough for you. You paid for the whole day. You should get the whole day.

Why Some Photographers Refuse to Deliver RAW Files

This is the part nobody talks about. Some photographers in Melbourne will not give you RAW files. They will say the edited JPEGs are good enough. They will say RAW files are too big. They will say you do not know how to use them. All of that is nonsense.

The real reason is control. If you have the RAW files, you can take them to any editor. Any lab. Any printer. You do not need them anymore. And some photographers do not want to lose that leverage.

The Red Flag to Watch For

If a photographer says they do not deliver RAW files, ask them why. If the answer is vague or defensive, that is a red flag. If the answer is that they include RAW delivery as standard, that is a green flag. Make this part of your conversation before you book. Not after.

Couples who find out after the wedding that they did not get RAW files are stuck. They cannot go back and reshoot. They cannot recover detail that was never captured. They are locked into whatever edit the photographer gave them, forever.

How to Store and Organize Your RAW Files

Getting the files is only half the battle. If you do not store them properly, they are useless. Hard drives fail. Cloud services change their terms. Phones get lost. You need a system.

The Three-Copy Rule

Keep three copies of your RAW files in three different locations. One on an external hard drive at home. One on a second external hard drive stored somewhere else, a friend’s house, a safety deposit box. One in the cloud. Google Drive, Dropbox, whatever you trust. Do not rely on one method. Hard drives die. Cloud services get hacked. You need redundancy.

Label everything clearly. Wedding date. Photographer name. Folder structure by session. Getting ready, ceremony, couple portraits, reception. Do this the day you receive the files. Not next week. Not next month. The day. Because you will forget.

Do Not Edit the RAW Files Yourself Unless You Know What You Are Doing

RAW files are powerful. They are also unforgiving if you do not know what you are doing. A bad edit on a RAW file can look worse than a good JPEG. If you want to edit them yourself, learn the basics first. White balance. Exposure. Color grading. That is it. Start there.

Most couples are better off taking their RAW files to a professional editor who specializes in wedding photography. They will know how to pull the best out of the files without destroying them. And they will do it faster than you will figure it out on YouTube at two in the morning.

What You Can Do With RAW Files That You Cannot Do With JPEGs

The practical benefits go beyond just having a backup. RAW files unlock editing possibilities that change the entire look of your photos.

Recovering Blown Highlights and Crushed Shadows

Melbourne weddings have extreme contrast. Bright sun on white dresses. Deep shadows under trees. A JPEG will clip the highlights on the dress or crush the shadows under the tree. In a RAW file, you can pull back both. The dress detail comes back. The shadow detail comes back. The photo looks balanced instead of broken.

This alone is worth having the RAW files. A single recovered highlight can save a once-in-a-lifetime shot that would have been trash in JPEG.

Changing the White Balance Without Quality Loss

White balance is locked in a JPEG. Change it and the colors shift unnaturally. In a RAW file, you can slide the white balance from warm to cool and the colors stay clean and natural. This is huge for Melbourne where the light changes color constantly throughout the day. A shot taken at noon under blue sky can be warmed up to look like golden hour. Not perfectly, but close enough that it works.

Printing Large Without Losing Quality

If you ever want to print your wedding photos large, RAW files are the only way to go. A JPEG at 300 DPI will look soft and pixelated when printed bigger than 16 by 20 inches. A RAW file printed at the same size will look sharp and detailed. For a large canvas print over the fireplace, you need RAW. There is no substitute.

The Legal Side of RAW File Ownership

In Australia, the law is clear on this. If you paid for a wedding photography service, the images belong to you. That includes the RAW files. A photographer cannot withhold them. They cannot charge extra for them. They cannot claim copyright over images they shot for you on your wedding day.

If a photographer tries to tell you otherwise, they are wrong. And they are trying to take something that is yours.

What to Put in Your Contract

Make sure your photography contract explicitly states that all RAW files will be delivered. Not “available upon request.” Not “for an additional fee.” Delivered. Included. As part of the package. Put it in writing. Both parties sign it. No ambiguity.

If the photographer pushes back on this clause, find someone who does not. There are plenty of Melbourne photographers who include RAW delivery as standard. They exist. They are easy to find. And they are the ones who respect your ownership of your own wedding.

The Emotional Reason RAW Files Matter

Forget the technical stuff for a second. RAW files are your wedding day. Not a version of it. Not an interpretation of it. The actual thing that happened. Every moment, captured exactly as the camera saw it, with all the information intact.

Ten years from now, you might want to re-edit a photo. Maybe you want it warmer. Maybe you want it cooler. Maybe you want to crop it differently. Maybe you want to print it on something your kids made in school. You can do all of that with RAW files. You cannot do any of it with a JPEG.

That is what RAW delivery really means. It means your wedding is not locked in someone else’s edit forever. It means you own it. Completely. And in a city like Melbourne where the light is always changing, owning the original capture is the only way to make sure your memories stay exactly as they were, no matter how much time passes.

71576 - Slaven & Vesna - Preview-48

Melbourne Wedding Photography Retouching Techniques for Natural Color Adjustment

Melbourne Wedding Photo Retouching – Natural Color Grading Techniques That Actually Work

There is a fine line between a retouched wedding photo and an over-edited one. Most couples in Melbourne have seen both. The first kind makes you feel something. The second kind makes you squint. Natural color grading is not about doing less. It is about doing the right things in the right order so the final image still looks like the day it was shot.

wedding photography melbourne

Melbourne light is tricky. It shifts from warm gold in the afternoon to steel blue in winter to harsh white in summer. A retouching workflow that works in Sydney will fall apart here. You need techniques built for Melbourne’s unpredictable skies, moody overcast days, and that signature golden hour that hits different depending on which suburb you are standing in.

Why Natural Grading Beats Heavy Filters Every Time

The trend a few years back was to slap a heavy filter on everything and call it a style. That is over. Clients in Melbourne now want photos that look like their actual wedding day, just better. Skin should look like skin. The sky should look like the sky they remember. The dress should still be the color they chose.

Natural grading respects the original capture. It fixes what needs fixing without rewriting the whole image. And here is the thing most people do not realize. A well-graded natural photo ages better than a heavily filtered one. Open that album in twenty years and the natural edit will still feel right. The filtered one will look dated before the ink dries.

The Difference Between Correction and Manipulation

Correction is adjusting exposure so the bride’s face is not washed out. Manipulation is changing her skin from warm to cool just because a preset told you to. Correction is removing a stray wire from the background. Manipulation is replacing the entire sky because the original was cloudy.

The best Melbourne wedding photographers and retouchers understand this boundary. They use color grading to enhance mood, not to fabricate one. If the day was moody and grey, the edit should feel moody and grey, just cleaner. If the day was bright and warm, the edit should glow, not turn orange.

The Step-by-Step Workflow for Natural Melbourne Wedding Grading

Do not open Photoshop and start painting. That is how you end up with plastic skin and teal shadows. Follow a structured workflow and the results will be consistent every single time.

Start in Camera Raw or Lightroom – Do Not Skip This

The foundation of any natural edit happens before you ever touch Photoshop. Open the RAW file in Camera Raw or Lightroom and set your white balance first. Melbourne’s mixed lighting — sun plus cloud plus bounce from buildings — means auto white balance will fail you every time. Set it manually based on the skin tones, not the background.

Then adjust exposure, highlights, and shadows to get a balanced image. Pull back highlights so the wedding dress retains detail. Lift the shadows just enough to see the groom’s face without making the image look flat. Do your color grading here too. Push the temperature slightly warm for autumn shoots. Pull it slightly cool for winter shoots. Keep saturation low. You are building a neutral base, not a finished image.

Export a TIFF, not a JPEG. You need every bit of data for what comes next.

Skin Toning – The Part That Makes or Breaks the Photo

Skin is where most retouching goes wrong. The instinct is to smooth everything out. Resist that. Real skin has texture. Pores, fine lines, slight unevenness — that is what makes a photo look alive.

Use frequency separation or the高低频 technique to smooth tone without destroying texture. The high frequency layer holds all the detail. The low frequency layer holds all the color and tone. Work on the low frequency layer to even out skin tone, then paint back detail on the high frequency layer where you need it. This gives you smooth skin that still looks like skin.

For Melbourne’s tricky light, skin often picks up color casts from the environment. A winter shoot near the Yarra will throw blue onto faces. A summer shoot in the Royal Botanic Gardens will push green. Use the color mixer or HSL sliders to neutralize these casts. Reduce blue in the shadows if the photo feels too cool. Add a touch of warmth to the midtones if the skin looks sallow. But never overcorrect. A slight cast is better than skin that looks painted.

Color Grading With Curves – Not Presets

Presets are a starting point, not a destination. If you use a preset, dial it back to about fifty percent and then adjust from there. The real power comes from curves.

Open the curves adjustment layer and work on each channel separately. In the red channel, lift the bottom of the curve slightly to add warmth to the shadows. In the blue channel, push the top of the curve down a little to cool the highlights. This creates a subtle warm-to-cool split tone that mimics how film renders color. It is the single most effective natural grading technique in wedding photography.

For Melbourne’s overcast days, push the blue channel up in the midtones to bring back some of that moody atmosphere. For golden hour shots, keep the warm tones dominant and let the shadows stay slightly cool. The contrast between warm and cool is what gives the image depth without looking processed.

Handling Melbourne’s Specific Lighting Challenges

Every city has its own lighting personality. Melbourne’s is defined by rapid changes, heavy cloud cover, and that low-angle winter sun that creates long shadows and deep contrast. Your grading technique needs to account for all of it.

Overcast Days – Embrace the Soft Light

Most photographers treat overcast days as a problem. They are not. Overcast light is the most flattering natural light for skin. It wraps around faces evenly. It does not create harsh shadows under the eyes or nose. The trick is to not over-brighten the image in post.

Keep the mood soft. Do not crank up clarity or contrast. Let the image breathe. If the sky is grey, let it stay grey. A blue sky in an overcast photo looks fake and clients notice immediately. Instead, use the grey to your advantage. Desaturate the background slightly so the couple pops. Drop the background luminance just enough to separate subject from environment. That is all you need.

Golden Hour – Protect the Warmth Without Going Orange

Melbourne’s golden hour in summer can be brutally bright. The sun sits low and the light turns everything amber. The mistake is to cool the entire image to compensate. That kills the mood.

Instead, protect the highlights. Use the highlight slider in Lightroom to pull back any blown-out areas on the dress or skin. Let the warm tones live in the midtones and shadows. Add a slight orange shift to the highlights if needed, but keep it subtle. The goal is to preserve that golden feeling without making the bride look like she is standing inside a tanning bed.

For winter golden hour, the light is already softer and more directional. Use this to your advantage. Let the shadows stay deep. Do not lift them too much. The contrast between the warm light and cool shadows is what makes winter Melbourne wedding photos look cinematic. Resist the urge to flatten it.

Rainy Day Shoots – The Secret Weapon

Rain is not the enemy of good wedding photos. Wet surfaces reflect light. Colors get deeper. The whole scene looks richer. But rain also creates color casts and dullness that need to be handled carefully.

In post, boost saturation slightly — not across the board, but selectively. Greens in the garden shots, reds in the flower details, the warm tones of skin. Use HSL to target specific colors rather than a global saturation slider. Add a touch of clarity to bring back detail that the rain softened. And if there is visible breath in the cold air, do not remove it. That is atmosphere. That is emotion. That is what makes the photo feel real.

Final Touches That Separate Good From Great

The heavy lifting is done. Now it is about the small details that most people skip.

Dodge and Burn for Dimension

Before you flatten the image with a global contrast adjustment, use dodge and burn to sculpt light manually. Lighten the areas where light naturally hits — forehead, cheekbones, the bridge of the nose. Darken the areas that should be in shadow — under the jaw, the sides of the face, the hollows of the collarbone.

This technique, borrowed from Renaissance painting, gives the image three-dimensional depth that no slider can replicate. It takes time. It takes patience. But it is the difference between a photo that looks retouched and one that looks painted.

Grain – The Final Secret

Add a small amount of grain at the very end. Not the heavy film grain of a vintage preset. Just enough to unify the image and give it texture. Grain hides minor imperfections in the skin. It ties the color grading together. And it gives the photo a tactile quality that digital files often lack.

For Melbourne wedding photos, a fine grain at about fifteen to twenty percent opacity works best. It is subtle enough that nobody notices it consciously, but the image feels complete. It feels like a photograph, not a render.

Sharpen Selectively, Not Globally

Global sharpening destroys skin texture and creates halos around edges. Sharpen selectively. Use a high-pass filter set to a low radius for skin areas. Use a higher radius for the dress, the rings, the architecture in the background. This way the bride’s face stays soft and natural while the details that need to pop actually pop.

The dress fabric, the lace, the bouquet — these are the elements that benefit from sharpness. The skin does not. Know the difference and apply sharpness accordingly. That is what natural grading really means. Knowing what to touch and what to leave alone.