WUU00482

Wedding photography composition along the Great Ocean Road in Melbourne

Stunning Wedding Photography Composition Ideas Along Melbourne’s Great Ocean Road

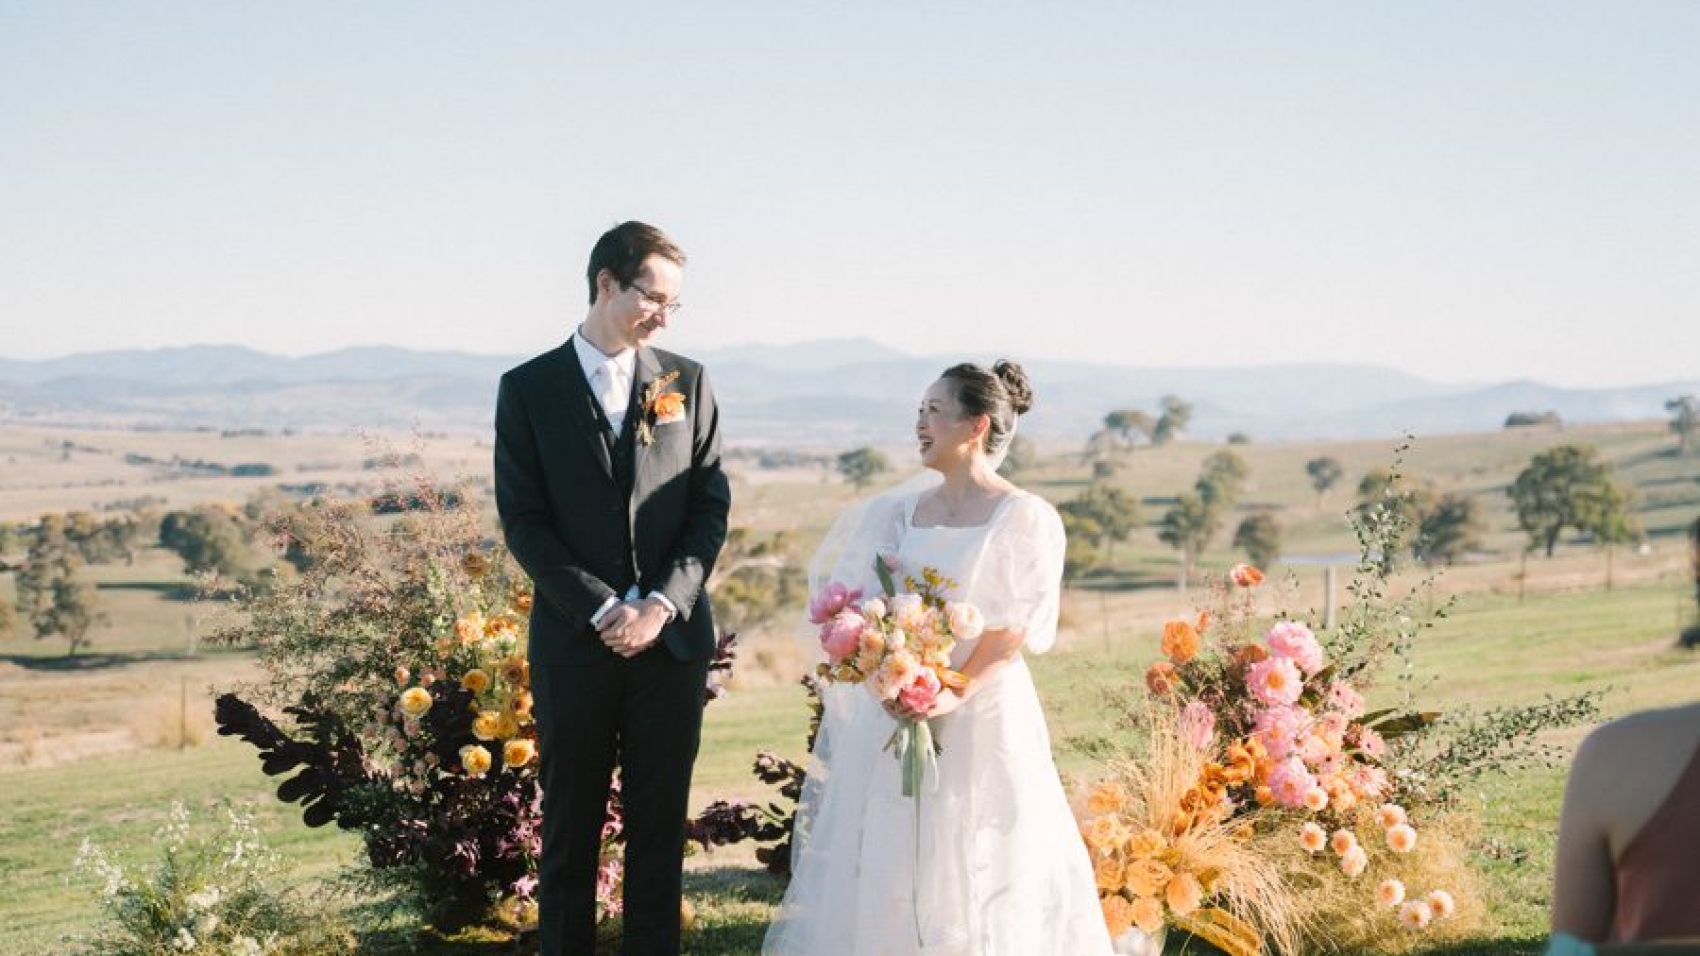
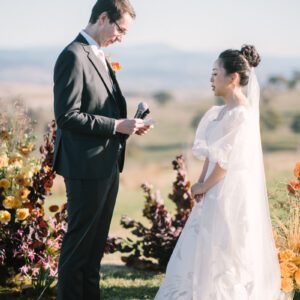
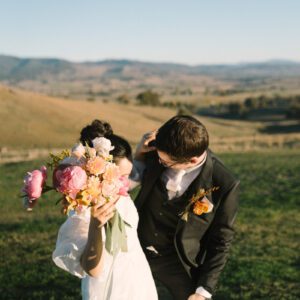
Melbourne’s Great Ocean Road, with its dramatic cliffs, turquoise waters, and rugged coastline, offers a breathtaking backdrop for wedding photography. Whether you’re capturing intimate moments or grand landscapes, these composition techniques will help you create timeless images that highlight both the couple and the natural beauty of the area.

wedding photography melbourne

Dramatic Cliffside Poses

The towering cliffs along the Great Ocean Road, such as those near Loch Ard Gorge or the Twelve Apostles, provide a powerful setting for wedding portraits. Position the couple near the edge (safely!) to emphasize the vastness of the ocean below. Use the cliff’s jagged lines to frame the subjects, drawing the viewer’s eye toward the couple while showcasing the scale of the landscape.

Tips for Natural Posing:

Encourage the couple to interact naturally—holding hands, sharing a laugh, or gazing out at the horizon. Avoid stiff, overly posed shots by letting them move freely. For added drama, capture them mid-stride or with wind tousling their hair, adding movement to the composition.

Time of Day Matters:

Shoot during golden hour, just after sunrise or before sunset, when the soft light enhances the cliffs’ textures and casts a warm glow on the couple. The low angle of the sun also creates long shadows, adding depth to the image.

Oceanfront Silhouettes

The Great Ocean Road’s beaches, like Apollo Bay or Johanna Beach, offer endless opportunities for silhouette photography. Position the couple with their backs to the sun during sunset, letting the bright sky behind them create a striking contrast against their darkened figures. This technique works especially well when the couple is embracing or dancing, adding emotion to the scene.

Playing with Reflections:

If the tide is low, look for wet sand or shallow pools to reflect the couple’s silhouette. This doubles the visual impact and creates a symmetrical composition. For a creative twist, ask the couple to kick up sand or water droplets, capturing the motion in mid-air against the colorful sky.

Weather as a Tool:

Overcast days can soften harsh shadows, making silhouettes more subtle and moody. Use a slightly underexposed setting to ensure the couple remains dark while retaining detail in the sky.

Coastal Pathways and Bridges

The winding pathways and rustic bridges that dot the Great Ocean Road, such as the one near Gibson Steps or the London Bridge arch, add a sense of journey to wedding photos. Frame the couple walking hand-in-hand along a path, using the leading lines to guide the viewer’s eye toward the horizon or a distant landmark.

Incorporating Natural Elements:

Use nearby elements like wildflowers, driftwood, or rock formations to add texture and color to the foreground. For example, position the couple beside a cluster of bright banksias or have them lean against a weathered fence post for a rustic touch.

Dynamic Perspectives:

Experiment with different angles—shoot from a low vantage point to emphasize the pathway’s length, or capture the couple from above as they stroll across a bridge. Varying your perspective keeps the images fresh and engaging.

Rainforest Romance

Parts of the Great Ocean Road, like the Great Otway National Park, are lush with rainforest and ferns. These settings are perfect for soft, intimate shots. Position the couple beneath a canopy of trees or beside a moss-covered boulder, using the greenery to frame them naturally.

Using Dappled Light:

The filtered sunlight that breaks through the forest canopy creates a magical, ethereal effect. Look for spots where light streams in patches, illuminating the couple’s faces or hair while leaving the background in shadow. This technique adds depth and a dreamy quality to the photos.

Adding Props Thoughtfully:

A simple bouquet of native flowers or a woven blanket draped over a rock can enhance the rainforest theme without feeling forced. Keep props minimal to let the natural surroundings shine.

By exploring these composition ideas, you’ll create wedding photos that capture the romance of the couple while celebrating the wild, untamed beauty of Melbourne’s Great Ocean Road. Each location offers unique opportunities—from cliffside drama to rainforest serenity—ensuring your images are as unforgettable as the journey itself.

WUU00428

The shooting Angle of Flinders Station in Melbourne

Iconic Photography Spots at Melbourne’s Flinders Street Station

Flinders Street Station, a Victorian-era architectural masterpiece, serves as Melbourne’s transportation hub and cultural symbol. Its iconic yellow facade, green copper domes, and historic clock towers make it a magnet for photographers. Here are prime angles to capture its essence:

wedding photography melbourne

Full Frontal Grandeur

For a sweeping view of the station’s iconic facade, position yourself across the street at the intersection of Flinders and Swanston Streets. This vantage point, often bustling with trams and pedestrians, frames the station’s arched entrances, clock towers, and intricate stonework. Shoot during golden hour to highlight the warm hues of the building against a softening sky. The symmetry of the composition, with trams passing beneath the clocks, creates a dynamic urban tableau.

Pro Tip:

Use a wide-angle lens to emphasize the station’s scale. If shooting at night, leverage long exposures to blur moving trams into streaks of light, contrasting with the station’s illuminated details.

Clock Tower Close-Ups

The station’s clock towers, installed in 1916 and restored during a 2015–2017 renovation, are architectural focal points. To isolate these details, move to the side of the station along Flinders Street. Capture the towers rising above modern buildings, their weathered faces telling stories of a century of service. For a unique perspective, wait for a tram to pass in the foreground, adding depth and movement to the shot.

Nighttime Magic:

The clocks take on a mystical quality after dark. Use a tripod and low ISO settings to photograph the towers under artificial light, with reflections shimmering on the Yarra River nearby. This angle transforms the station into a beacon of history amidst the city’s glow.

Yarra River Reflections

For a serene, artistic take, head to the Evan Walker Bridge, which spans the Yarra River adjacent to the station. From here, photograph the station’s green domes and clock towers framed by the bridge’s geometric steelwork. The river’s surface often mirrors the station’s lights, creating a doubled image that blurs the line between reality and reflection.

Creative Techniques:

Experiment with polarizing filters to reduce glare on the water, or shoot during blue hour—the period just after sunset—for a moody, cyan-toned scene. Including a passing boat or pedestrian can inject life into the composition without distracting from the architectural subject.

Side Street Surprises

Explore the alleys and side streets around the station for unexpected angles. Elizabeth Street, running parallel to Flinders, offers a head-on view of the clock towers, while Degraves Street—a laneway lined with cafés and street art—provides a lively foreground. Position yourself at the end of Degraves to photograph the station’s dome peeking above colorful umbrellas and bustling diners.

Local Insight:

The area around Flinders Street Station is a microcosm of Melbourne’s culture. Incorporating elements like street performers, vintage trams, or graffiti-covered walls can add narrative depth to your shots, showcasing the station not just as a landmark, but as a living part of the city’s identity.

By exploring these angles, you’ll capture Flinders Street Station’s blend of historic grandeur and modern urban energy, creating images that resonate with both locals and travelers.

wedding photography melbourne

Wedding photography tips at Carlton Garden in Melbourne

Mastering Wedding Photography in Melbourne’s Carlton Gardens: A Guide to Timeless Shots

Carlton Gardens, a UNESCO World Heritage Site nestled in Melbourne’s urban heart, offers a blend of Victorian grandeur and lush natural beauty. Its iconic Royal Exhibition Building, serene lakes, and symmetrical tree-lined avenues make it a top choice for couples seeking romantic, story-driven wedding imagery. To capture its magic, photographers must balance technical precision with creative spontaneity. Here’s how to elevate your shots in this historic landscape.

wedding photography melbourne
PixCake

Leverage the Garden’s Architectural Backdrops

The Royal Exhibition Building’s domed structure and intricate facades provide a dramatic contrast to soft, natural elements. Position couples near the building’s grand staircase or under its arched colonnades during golden hour for silhouettes framed by warm sunlight. For dynamic compositions, use the building’s symmetry as a guide—place the couple off-center to add depth, or capture reflections in nearby puddles after rain.

During midday, seek shade under the building’s porticos to avoid harsh shadows. Alternatively, use the fountain adjacent to the structure as a focal point, incorporating its cascading water into candid moments of laughter or shared glances. The interplay of stone and water creates a timeless, elegant atmosphere.

Embrace the Gardens’ Natural Elements

Carlton Gardens’ 26 hectares of greenery offer endless opportunities for organic storytelling. The avenues of mature elm trees create natural tunnels of light, perfect for leading lines that draw the eye toward the couple. Encourage them to walk hand-in-hand down these paths, capturing motion blur for a dreamy effect.

In spring, the gardens burst with blooming flowers, while autumn’s golden foliage adds warmth to portraits. Use macro lenses to highlight delicate petals or dew drops on leaves, weaving these details into the broader narrative. For a playful twist, incorporate props like vintage bicycles or parasols, blending whimsy with the garden’s classic charm.

Timing and Lighting Strategies

Early mornings offer soft, diffused light ideal for intimate portraits, while late afternoons cast a golden glow over the landscape. Avoid midday sun, which can create harsh contrasts; instead, use reflectors or diffusers to balance exposure. On overcast days, embrace the moodier tones, focusing on emotional close-ups rather than expansive vistas.

Capture Candid Moments Amidst the Scenery

The gardens’ tranquil ambiance encourages genuine interactions. Position the couple near the ornamental lake, capturing stolen kisses as ducks glide by, or photograph them sharing a quiet moment on a bench beneath a canopy of leaves. These unscripted shots often become the most cherished memories.

For group photos, use the garden’s open lawns to arrange the bridal party in relaxed formations. Incorporate movement by asking them to toss confetti or dance, freezing the joy mid-air. During receptions, wander the gardens with a second shooter to document guests exploring the grounds, creating a candid album of shared laughter and exploration.

Navigating Challenges in Outdoor Shoots

Weather can be unpredictable, so always have a backup plan. Umbrellas double as props and protection, while transparent canopies add a romantic touch to rainy-day shots. In winter, keep spare batteries warm to prevent drainage, and use the crisp air to your advantage—steam from breath or bundled-up attire can add texture to images.

For high-traffic periods, arrive early to secure prime spots near the fountain or building. Communicate with garden staff to respect any photography restrictions, ensuring a smooth session.

Final Thoughts: Crafting a Narrative Through Scenery

Carlton Gardens’ beauty lies in its ability to adapt to any vision, whether grand or understated. By blending its architectural marvels with natural serenity, photographers can craft albums that feel both timeless and deeply personal. The key is to observe, adapt, and let the garden’s spirit guide the lens—transforming each click into a chapter of love’s enduring story.

wedding photography melbourne

Progress control of wedding photography in Melbourne

Managing Wedding Photography Timelines in Melbourne: A Strategic Approach

Wedding photography in Melbourne demands precision, adaptability, and clear communication to ensure every moment is captured without delays. From coordinating with vendors to adjusting to unpredictable weather, effective timeline management is critical. Here’s how to structure your workflow for seamless execution.

wedding photography melbourne

Creating a Detailed Pre-Event Schedule

A well-planned timeline starts days before the wedding, aligning with the couple’s vision and logistical needs.

Initial Consultation and Itinerary Drafting

Begin by discussing the couple’s priorities, such as must-have shots, family groupings, and cultural traditions. Use this information to draft a preliminary timeline that includes key milestones:

  • Getting-Ready Coverage: Allocate time for hair, makeup, and candid moments in both locations.
  • Ceremony Timing: Confirm start and end times, accounting for religious or cultural rituals.
  • Portrait Sessions: Schedule blocks for formal portraits, bridal party photos, and couple shots, ensuring ample time for creativity.
  • Reception Flow: Map out speeches, dances, cake cutting, and other events to avoid missing critical moments.

Venue Scouting and Lighting Analysis

Visit the ceremony and reception venues ahead of time to assess lighting conditions and spatial constraints:

  • Natural Light Patterns: Note the direction and intensity of sunlight during key hours, especially for outdoor ceremonies or portraits.
  • Indoor Lighting Challenges: Identify areas with harsh fluorescent lighting or low ambient light, planning for supplemental gear like flashes or LED panels.
  • Backup Plans: Prepare for inclement weather by scouting indoor alternatives or tent setups for outdoor events.

Day-Of Coordination and Flexibility

On the wedding day, adaptability is key. Unforeseen circumstances—like traffic delays or last-minute schedule changes—require quick thinking to keep the timeline on track.

Streamlining Transitions Between Locations

Minimize downtime by optimizing travel routes and loading equipment efficiently:

  • Transportation Logistics: Coordinate with drivers or rideshare services to ensure punctual arrival at each venue.
  • Equipment Prep: Pack gear in labeled bags for easy access during transitions, prioritizing lenses, batteries, and memory cards.
  • Buffer Time: Build 15–20-minute buffers between segments to accommodate delays without stressing the schedule.

Real-Time Adjustments for Lighting and Crowds

Monitor environmental factors and crowd dynamics to maintain shot quality:

  • Golden Hour Timing: If planning sunset portraits, track the exact time of sunset and adjust the itinerary to maximize soft, warm light.
  • Crowd Management: Guide family members and guests during group photos to keep sessions organized and efficient.
  • Noise Control: For video recordings, position microphones strategically to avoid background chatter during vows or speeches.

Post-Wedding Workflow Optimization

After the event, efficient post-production processes ensure timely delivery of final images without compromising quality.

Organized File Management and Backup

Protect your work by implementing a systematic approach to storing and editing photos:

  • Immediate Backups: Transfer files to multiple external drives or cloud storage upon returning from the wedding.
  • Culling Strategy: Quickly sort through images, marking favorites and discarding duplicates to streamline editing.
  • Edit Consistency: Use presets or action sets to maintain a cohesive aesthetic across all photos, reducing time spent on individual adjustments.

Client Communication and Delivery Timelines

Set clear expectations for when couples can expect their photos or videos:

  • Sneak Peeks: Share a handful of edited images within 48 hours to keep clients excited and engaged.
  • Final Gallery Deadlines: Provide a realistic timeframe for delivering the complete gallery, typically 4–6 weeks post-wedding.
  • Feedback Loops: Encourage clients to review and request minor edits promptly to avoid last-minute revisions.

Learning and Improving for Future Shoots

Reflect on each wedding to refine your approach for future events:

  • Post-Event Debrief: Note what worked well and what could be improved, such as timing adjustments or gear upgrades.
  • Client Surveys: Gather feedback to understand their experience and identify areas for growth.
  • Industry Trends: Stay updated on new techniques or tools that could enhance efficiency, such as AI-assisted culling software or faster editing workflows.

By prioritizing preparation, adaptability, and post-event organization, Melbourne wedding photographers can deliver exceptional results while maintaining stress-free timelines. This structured approach ensures every couple receives a beautiful, timeless collection of memories.

80883-Wu-1097

The debugging process of wedding photography equipment in Melbourne

Melbourne Wedding Photography Equipment Setup and Adjustment Guide

Preparing for a wedding shoot in Melbourne requires meticulous attention to equipment setup and adjustment. From ensuring stable footage to capturing natural lighting, every detail contributes to creating timeless memories. Below is a step-by-step guide to optimizing your gear for wedding photography and videography.

wedding photography melbourne

Pre-Shoot Equipment Checklist

Before arriving at the venue, verify that all devices are fully functional and properly configured. This minimizes delays and ensures seamless operation during critical moments.

Camera and Lens Configuration

  • Battery and Storage: Charge all batteries and carry spares. Insert high-capacity memory cards formatted to avoid errors during recording.
  • Lens Selection: Pack a versatile lens combination, such as a wide-angle zoom for capturing group shots and dynamic environments, and a telephoto prime for intimate close-ups. Ensure lenses are clean and free of dust or smudges.
  • Sensor Cleaning: Use a blower brush to remove debris from the camera sensor, preventing spots or blemishes in photos.

Stabilization Systems

  • Tripod Setup: For static shots, such as ceremony coverage or posed portraits, use a sturdy tripod with adjustable legs. Test its stability on uneven surfaces to avoid wobbling.
  • Gimbal or Steadicam: When shooting handheld or moving sequences, enable electronic image stabilization (EIS) or mechanical stabilization systems. Adjust balance settings to suit the camera’s weight distribution.
  • External Monitor: Connect a portable monitor to check framing and focus accuracy, especially in bright outdoor conditions where the camera’s LCD may be hard to see.

Lighting and Exposure Adjustments

Wedding venues often transition between indoor and outdoor settings, requiring flexible lighting solutions to maintain consistent image quality.

Natural Light Optimization

  • White Balance Calibration: Switch to manual white balance mode and adjust settings based on the dominant light source (e.g., daylight, tungsten, or fluorescent). Use a gray card for precise calibration.
  • Exposure Triangle: Balance aperture, shutter speed, and ISO to achieve optimal exposure. For outdoor ceremonies, prioritize a fast shutter speed (1/500s or higher) to freeze motion, while indoor receptions may require wider apertures (f/2.8–f/4) to compensate for lower light.
  • Dynamic Range Management: Enable HDR mode if available to retain details in high-contrast scenes, such as brides in white gowns against dark backgrounds.

Artificial Lighting Techniques

  • Continuous LED Lights: Position portable LED panels to fill shadows or highlight key subjects. Use diffusers to soften harsh light and create a flattering glow.
  • Flash Synchronization: When using off-camera flashes, sync them with the camera’s shutter speed to avoid black bands in photos. Test TTL (Through-The-Lens) metering for automatic exposure adjustments.
  • Reflectors and Bounce Cards: Redirect natural light onto subjects’ faces using white or silver reflectors. For indoor shoots, bounce flash off ceilings or walls to mimic ambient lighting.

Audio and Recording Setup

Clear audio is essential for wedding videos, especially during vows, speeches, and interviews. Proper microphone placement and noise reduction techniques enhance clarity.

Microphone Configuration

  • Lavalier Mics: Clip wireless lavalier microphones onto the groom’s lapel and bride’s bouquet for discreet, high-quality audio. Test signal strength and battery levels before the ceremony.
  • Shotgun Mics: Mount shotgun microphones on cameras or boom poles to capture directional sound, such as the officiant’s voice during the ceremony. Position them close to the sound source while avoiding visual obstruction.
  • External Recorders: Use portable audio recorders with XLR inputs for backup tracks. Sync audio with video during post-production using timecode or clapperboards.

Wind and Background Noise Reduction

  • Windscreens: Attach foam windscreens to microphones to minimize wind interference during outdoor shoots. For extreme conditions, use furry “deadcat” covers.
  • Ambient Noise Monitoring: Wear headphones to monitor audio levels in real-time. Adjust gain settings to prevent clipping or distortion, especially in noisy environments like receptions.

Final System Integration and Testing

Before the wedding begins, conduct a full system test to ensure all components work harmoniously. This step prevents technical glitches during critical moments.

Multi-Camera Synchronization

  • Timecode Integration: If using multiple cameras, enable timecode synchronization to align footage during editing. This is crucial for seamless cuts between angles.
  • Framing Consistency: Check that all cameras share similar framing styles (e.g., headroom, eye-level perspectives) to maintain visual coherence across shots.

Backup and Redundancy

  • Dual Memory Cards: Configure cameras to record simultaneously to two memory cards, safeguarding against data loss due to corruption or accidental formatting.
  • Secondary Gear: Pack backup batteries, lenses, and cables in a separate bag. Label equipment clearly to avoid confusion during quick changes.

Real-World Simulation

  • Dry Run: Rehearse key sequences, such as the processional or first dance, to test equipment performance under pressure. Adjust settings as needed based on lighting changes or movement patterns.

By following this guide, Melbourne wedding photographers and videographers can ensure their equipment is optimized for any scenario, from sunlit outdoor ceremonies to dimly lit reception halls. Attention to detail during setup translates to flawless execution on the big day.

wedding photography melbourne

The pre-makeup trial process for wedding photography in Melbourne

Melbourne Wedding Photography Pre-Shoot Makeup Trial Process: A Step-by-Step Guide

For couples planning a wedding in Melbourne, a makeup trial is a critical step in ensuring the bride (and sometimes the groom) looks flawless on camera. This process helps refine the makeup style, test product longevity, and build confidence before the big day. Here’s how to navigate the pre-shoot makeup trial for Melbourne wedding photography.

wedding photography melbourne

Setting Up the Makeup Trial Appointment

The first step is scheduling a trial with a professional makeup artist who understands wedding photography’s unique demands. Timing and preparation are key to a productive session.

Choosing the Right Makeup Artist

  • Portfolio Review: Look for artists whose work aligns with your vision, whether it’s natural glow, bold colors, or vintage glamour. Check their social media or website for photos of past clients in similar lighting conditions (e.g., outdoor ceremonies, indoor receptions).
  • Availability and Location: Ensure the artist is available on your trial date and can travel to your preferred location (e.g., your home, a salon, or the photography studio). Proximity reduces stress on the trial day.
  • Communication Style: Reach out via email or phone to gauge their responsiveness. A makeup artist who asks detailed questions about your skin type, allergies, and preferred styles is more likely to deliver personalized results.

Pro Tip: Ask if the artist has experience working with wedding photographers, as they’ll understand how to balance makeup for both close-up shots and full-body portraits.

Pre-Trial Preparation Checklist

  • Skin Care Routine: Follow your regular skincare regimen leading up to the trial to ensure your skin is in its natural state. Avoid trying new products 2–3 days before to prevent breakouts or irritation.
  • Inspiration Photos: Collect images of makeup styles you love, noting specific elements like lip color, eye shadow intensity, or contouring. Share these with the artist during the trial.
  • Hair Accessories: If you plan to wear a veil, headpiece, or hairpins, bring them to the trial. The artist can adjust makeup to complement these accessories (e.g., avoiding heavy blush near a high ponytail).

Real-World Example: A bride brought a lace veil to her trial, prompting the makeup artist to soften her eye makeup to avoid clashing with the intricate details.

Trial Day Timeline and Logistics

  • Start Early: Schedule the trial at least 3–4 hours before any evening plans to allow time for adjustments without rushing.
  • Lighting Test: If possible, conduct the trial in natural light similar to your wedding venue (e.g., a bright room for an outdoor ceremony or dimmer lighting for an evening reception).
  • Photography Snapshot: Take a few test photos with your phone or camera to see how the makeup translates on camera. Adjust shades or intensity if needed.

Case Study: A couple tested makeup in a dimly lit room, only to realize later that the foundation appeared too pale in daylight photos. Now, they request trials in natural light.

During the Makeup Trial: Collaboration and Adjustments

The trial is a collaborative process where the bride and artist refine the look together. Open communication ensures the final style matches expectations.

Building the Base: Foundation and Concealer

  • Skin Tone Matching: The artist should test foundation shades on your jawline or neck to find the closest match. Avoid overly matte or dewy finishes unless they suit your skin type.
  • Coverage Level: Discuss whether you prefer light, medium, or full coverage. For photography, medium coverage often balances flaws and natural texture.
  • Concealer Placement: Focus on under-eye darkness, blemishes, or redness. The artist may use color-correcting primers (e.g., peach for dark circles) before applying concealer.

Pro Tip: Ask the artist to apply foundation with a brush first, then blend with a damp sponge for a seamless finish.

Eye Makeup: Defining Features for Camera

  • Eye Shape Enhancement: The artist will tailor techniques to your eye shape (e.g., hooded, round, almond). For photography, slightly bolder liner or shadow can prevent eyes from looking washed out.
  • Lash Options: Decide between natural lashes, individual extensions, or strip lashes. Test how they feel and look in photos, as heavy lashes can sometimes overshadow eye makeup.
  • Brow Grooming: Well-defined brows frame the face. The artist may fill sparse areas with pencil or powder, ensuring symmetry and a natural arch.

Real-World Example: A bride with hooded eyes opted for a winged liner that lifted her eyes in photos, a technique she hadn’t considered before the trial.

Lip Color and Final Touches

  • Longevity Testing: Choose lip products that last through eating and drinking. Matte formulas or lip stains often perform better than glossy finishes, which can fade or transfer.
  • Blush and Highlighter: Soft blush adds warmth, while highlighter on cheekbones and the Cupid’s bow catches light beautifully in photos. Avoid overly shimmery products for a polished look.
  • Setting Spray: A lightweight setting spray helps lock in makeup, especially important for long wedding days. The artist may use a dewy or matte formula based on your preference.

Case Study: A bride’s lipstick smudged during her trial kiss test with her partner, leading them to switch to a transfer-proof formula for the wedding.

Post-Trial Follow-Up: Ensuring Perfection for the Wedding Day

After the trial, a few final steps help solidify plans and address any concerns before the wedding.

Documenting the Makeup Look

  • Photo Documentation: Take clear, well-lit photos of your makeup from multiple angles (front, side, close-up). Share these with the artist and your photographer to ensure consistency on the wedding day.
  • Product List: Ask the artist to list all products used, including shades and brands. This helps replicate the look if you need touch-ups or want to purchase items for your kit.
  • Adjustments Notes: Jot down any changes you’d like (e.g., “less blush,” “bolder lip”) to discuss with the artist before the wedding.

Pro Tip: Create a shared digital folder (e.g., Google Drive) to store photos, product lists, and notes for easy access.

Confirming Details with the Makeup Artist

  • Final Schedule: Confirm the artist’s arrival time on the wedding day, allowing buffer time for unexpected delays (e.g., traffic, hair styling running late).
  • Backup Plans: Discuss contingencies if the artist falls ill or encounters an emergency. Some artists work with a network of colleagues who can step in if needed.
  • Payment and Contracts: Review payment terms (e.g., deposit, final balance) and sign a contract outlining services, timelines, and cancellation policies.

Real-World Example: A bride’s makeup artist had a family emergency, but because they’d discussed backups, a trusted colleague stepped in seamlessly.

Skin Care Leading Up to the Wedding

  • Consistent Routine: Stick to your skincare regimen to maintain a healthy complexion. Avoid drastic changes (e.g., new facials, aggressive exfoliation) 1–2 weeks before the wedding.
  • Hydration and Diet: Drink plenty of water and eat balanced meals to keep skin looking fresh. Limit alcohol and salty foods, which can cause puffiness.
  • Stress Management: High stress can trigger breakouts or dull skin. Practice relaxation techniques like meditation, yoga, or walks to stay calm.

Case Study: A bride incorporated daily face masks into her routine two weeks before her wedding, resulting in a radiant complexion that needed minimal foundation.

By approaching the makeup trial with preparation, collaboration, and follow-up, Melbourne couples can ensure their wedding day look is both camera-ready and true to their style. Clear communication and attention to detail turn a simple trial into a confidence-boosting experience.

80883-Wu-285

The collaboration process of a wedding photography team in Melbourne

Streamlining Teamwork for Melbourne Wedding Photography: A Collaborative Workflow Guide

Capturing a couple’s special day in Melbourne requires more than just technical skill—it demands seamless coordination among photographers, assistants, stylists, and clients. A well-defined team workflow ensures every moment is documented beautifully while minimizing stress. Here’s how to structure collaboration for a flawless Melbourne wedding photoshoot.

wedding photography melbourne

Pre-Shoot Preparation: Setting the Foundation for Success

The groundwork for a smooth photoshoot begins long before the wedding day. Clear communication and organized planning prevent misunderstandings and ensure everyone understands their roles.

Client Consultations and Vision Alignment

  • Detailed Questionnaires: Send clients a comprehensive questionnaire to gather preferences on locations, styles, and must-have shots. Ask about cultural traditions or family dynamics that might influence the shoot.
  • Mood Boards and Inspiration: Create shared Pinterest boards or digital galleries to align the team’s vision. Include examples of lighting, poses, and compositions that match the couple’s aesthetic.
  • Location Scouting Reports: If the team hasn’t visited the venue, assign someone to scout in advance. Note lighting conditions, crowd patterns, and logistical challenges (e.g., parking, permits).

Real-World Example: A photography team used a shared Google Drive folder to store client questionnaires, mood boards, and location photos, ensuring everyone accessed the same information.

Equipment and Logistics Checklist

  • Gear Allocation: Assign specific cameras, lenses, and lighting equipment to each team member. For example, one photographer might handle wide-angle shots while another focuses on details.
  • Backup Plans: Prepare for weather changes or equipment failures by packing extras (e.g., batteries, memory cards, reflectors) and identifying indoor alternatives for outdoor shoots.
  • Transportation Coordination: If the team is splitting up to cover multiple locations, confirm transportation arrangements (e.g., car rentals, rideshares) and share contact details.

Pro Tip: Use a checklist app like Trello or Asana to track equipment readiness and assign tasks like charging batteries or packing reflectors.

Role Clarity and Communication Channels

  • Defined Responsibilities: Clearly outline each team member’s role (e.g., lead photographer, second shooter, assistant, stylist) to avoid overlap or gaps. For instance, the assistant might manage props while the stylist adjusts the bride’s veil.
  • Real-Time Updates: Establish a communication method for the shoot day, such as a group chat or walkie-talkies. Use this to share location changes, lighting adjustments, or client requests.
  • Emergency Contacts: Compile a list of vendor contacts (e.g., florists, venues) and share it with the team in case of last-minute issues like delayed deliveries or venue changes.

Case Study: A team avoided a crisis by using a group chat to quickly relay that a bride’s bouquet was stuck in traffic, allowing the stylist to improvise with venue flowers.

Shoot Day Execution: Synchronizing for Efficiency

On the wedding day, timing and adaptability are key. A structured yet flexible approach ensures the team captures all essential moments without disrupting the couple’s flow.

Timeline Management and Pacing

  • Buffer Zones: Build 10–15-minute buffers between scheduled segments (e.g., getting ready, ceremony, portraits) to account for delays like traffic or hair touch-ups.
  • Priority Shots List: Create a ranked list of must-have photos (e.g., family portraits, first look) and tackle them early in the day when energy levels are high.
  • Signal Systems: Use discreet cues (e.g., a hand gesture or whispered keyword) to coordinate transitions between poses or locations without alarming the couple.

Example: A team used a “quiet signal” (a tap on the shoulder) to prompt the bride to turn slightly during portraits, avoiding verbal interruptions.

Lighting and Composition Coordination

  • Natural Light Tracking: Assign one team member to monitor sunlight direction and quality, especially for outdoor shoots. Use apps like Sun Surveyor to predict golden hour timing.
  • Artificial Light Setup: For indoor or low-light scenes, pre-position flashes or continuous lights to minimize setup time. Test angles beforehand to ensure flattering results.
  • Shared Frame Awareness: Ensure photographers avoid crossing paths or blocking each other’s shots. For example, one might shoot from a low angle while another captures overhead views.

Pro Tip: Use wireless triggers to sync flashes across multiple cameras, ensuring consistent lighting even when photographers are spread out.

Client Interaction and Comfort

  • Calming Presence: Designate a team member (often the lead photographer or assistant) to engage with the couple, offering reassurance and humor to ease nerves.
  • Pose Direction Balance: Provide clear but gentle guidance on poses to avoid stiffness. Use phrases like “Try leaning your shoulder toward him” instead of rigid instructions.
  • Hydration and Breaks: Schedule short water breaks, especially during outdoor shoots in warm weather. Keep snacks on hand to maintain energy levels.

Case Study: A team kept a bride hydrated during a summer beach shoot by handing her a water bottle between poses, preventing fatigue and ensuring natural expressions.

Post-Shoot Collaboration: Refining and Delivering Results

The work doesn’t end after the last shot. Post-production collaboration ensures the final images meet the couple’s expectations while maintaining the team’s creative standards.

Image Culling and Organization

  • Initial Sorting: The lead photographer typically culls images first, selecting the best shots from each segment (e.g., ceremony, portraits). Use software like Lightroom’s “Star Rating” system to flag favorites.
  • Second Opinion Review: Have a second team member (e.g., the second shooter) review the cull to catch any missed gems or technical issues (e.g., blurry shots, closed eyes).
  • Client Preview Selection: Curate a smaller set of images (50–100) for the couple’s preview gallery, ensuring diversity in poses, locations, and emotions.

Real-World Example: A team used a shared Lightroom catalog to collaborate on culling, with each member adding stars to their top picks before finalizing the selection.

Editing Consistency and Style Alignment

  • Style Guides: Develop a preset or editing style guide (e.g., color tones, contrast levels) to apply uniformly across all images. Share this guide with editors or assistants.
  • Batch Processing: Use Lightroom’s batch editing tools to apply base adjustments (e.g., exposure, white balance) to entire folders before fine-tuning individual photos.
  • Quality Checks: Assign someone to review edited images for consistency, checking for issues like uneven skin tones or mismatched lighting in group shots.

Pro Tip: Create a “master preset” that captures your signature style, then tweak it slightly for different lighting conditions (e.g., bright daylight vs. indoor tungsten).

Client Delivery and Feedback Loops

  • Secure Galleries: Use cloud-based platforms like Pixieset or ShootProof to deliver final images, ensuring clients can download high-resolution files and share links with family.
  • Feedback Requests: Include a brief survey asking clients about their favorite shots and areas for improvement. Use this data to refine future workflows.
  • Follow-Up Communication: Send a thank-you note or small gift (e.g., a printed photo) to strengthen the relationship and encourage referrals.

Case Study: A team increased client satisfaction by adding a “favorite photo” feature to their gallery, allowing couples to tag images they loved for easy album creation.

By prioritizing preparation, synchronization, and post-shoot refinement, Melbourne wedding photography teams can deliver stunning, stress-free results. Clear communication, adaptability, and a focus on the couple’s experience turn technical expertise into timeless memories.

80883-Wu-1029

Time allocation for multi-scene wedding photography in Melbourne

Crafting the Perfect Melbourne Wedding Photography Timeline: Balancing Multiple Scenes with Ease

Planning a wedding photoshoot in Melbourne means embracing its diverse landscapes—from coastal vistas to urban landmarks and lush gardens. Each location offers unique lighting, crowds, and logistical challenges, making time management essential. A well-structured timeline ensures you capture every moment without rushing or feeling overwhelmed. Here’s how to allocate time across Melbourne’s most popular wedding photography scenes.

wedding photography melbourne

Urban Landmarks: Capturing Melbourne’s Iconic Backdrops

Melbourne’s cityscape, with its blend of historic architecture and modern design, provides a dramatic setting for wedding portraits. Popular spots like Flinders Street Station, Hosier Lane, and the Royal Exhibition Building demand strategic planning to avoid crowds and maximize natural light.

Morning Sessions for Golden Hour Magic

  • Early Start: Begin shooting at sunrise (around 6:30–7:00 AM in summer) to avoid tourists and harsh midday sunlight. Golden hour’s soft, warm tones enhance skin and create flattering shadows.
  • Priority Locations: Focus on high-traffic areas first. For example, start at Flinders Street Station’s arches, then move to Federation Square’s geometric patterns before crowds arrive.
  • Quick Transitions: Urban shoots often involve walking between spots. Allocate 10–15 minutes per location, including travel time, to keep the schedule flexible.

Real-World Example: A couple shot their first look at dawn near the Melbourne Skydeck, using the empty streets for candid walking shots before heading to Hosier Lane for vibrant street-art portraits.

Midday Adjustments for Harsh Light

  • Shaded Areas: If shooting later, seek covered spots like the State Library of Victoria’s domed reading room or the Block Arcade’s mosaic floors. These locations offer diffused light and rich textures.
  • Creative Angles: Use buildings to block direct sunlight. For instance, position subjects in doorways or under awnings to avoid squinting or harsh shadows on faces.
  • Short Bursts: Limit midday outdoor shoots to 20–30 minutes, then transition indoors or to shaded parks to prevent fatigue and overheating.

Pro Tip: Check weather apps for cloud cover predictions. Overcast skies can soften light naturally, allowing longer sessions without harsh contrasts.

Coastal and Beach Scenes: Embracing Melbourne’s Waterfront Charm

Beaches like St Kilda, Brighton, and Williamstown offer romantic settings with endless horizons and dynamic waves. However, wind, tides, and changing light require careful timing.

Sunrise Shoots for Calm Waters and Soft Light

  • Tide Timing: Research low tide schedules to access rocky shorelines or tidal pools for unique compositions. Low tide often reveals textures like sand patterns or seaweed.
  • Wind Management: Mornings are typically calmer, reducing hair and dress disruptions. Use hairspray or pins for the bridal party and anchor props with weights.
  • Golden Hour Reflections: Capture the sunrise’s glow on wet sand or water for mirror-like reflections. Position subjects facing east to avoid backlighting issues.

Case Study: A couple shot their beach portraits at sunrise near Elwood Beach, using the empty shoreline for dramatic silhouettes against a pastel sky.

Sunset Sessions for Dramatic Skies

  • Blue Hour Bonus: Stay 15–20 minutes after sunset to capture “blue hour,” when the sky turns deep indigo and city lights begin to twinkle. This adds depth to coastal cityscapes.
  • Tide Awareness: High tide can shrink usable space, so arrive early to scout safe, photogenic areas. Avoid cliffs or slippery rocks during rough surf.
  • Wind Strategies: If gusts pick up, use flowing veils or dresses to create movement. Alternatively, shelter behind dunes or rocks for calmer shots.

Pro Tip: Bring a portable step stool or ladder to elevate the camera for over-the-water shots during high tide, ensuring subjects stay dry.

Gardens and Parks: Leveraging Melbourne’s Natural Beauty

Melbourne’s gardens, such as the Royal Botanic Gardens, Fitzroy Gardens, and Carlton Gardens, offer lush foliage, floral displays, and serene ponds. These spots are ideal for romantic, timeless portraits but require planning around light and crowds.

Mid-Morning to Early Afternoon for Even Light

  • Canopy Cover: Prioritize shaded pathways or tree-lined areas to avoid direct sunlight. The Royal Botic Gardens’ Fern Gully or Fitzroy Gardens’ conservatory provide diffused light year-round.
  • Floral Peaks: Time shoots to coincide with seasonal blooms (e.g., spring tulips at Carlton Gardens or autumn leaves at Treasury Gardens). Check garden calendars for peak dates.
  • Crowd Avoidance: Weekdays are quieter than weekends. If shooting on a Saturday, arrive early (by 9:00 AM) to secure popular spots like the Botanic Gardens’ lake or the Shrine of Remembrance steps.

Example: A couple captured their portraits in the Royal Botanic Gardens’ rose garden during a weekday morning, enjoying private access to blooming beds without other visitors.

Late Afternoon for Warm, Golden Tones

  • Backlighting Opportunities: Position subjects with the sun behind them to create a halo effect around hair or dresses. Use reflectors to bounce light onto faces and avoid silhouettes.
  • Long Shadows: Leverage the low sun for artistic compositions, such as capturing shadows stretching across grass or pathways. This adds depth to flat garden scenes.
  • Sunset Transitions: If staying until dusk, move to open areas like parks or meadows to capture the sun’s final rays. The changing colors can turn ordinary greenery into a vibrant backdrop.

Pro Tip: Bring bug spray for garden shoots, especially in summer. Mosquitoes and flies can disrupt flow, so apply repellent before starting.

Combining Scenes: Seamless Transitions Between Locations

Many couples opt for multi-scene shoots to showcase Melbourne’s diversity. To keep the day stress-free, prioritize logistics and flexibility.

Grouping Locations by Proximity

  • Cluster Shoots: Pair nearby scenes to minimize travel time. For example, shoot urban landmarks (e.g., Hosier Lane) in the morning, then head to the Yarra River for midday waterfront shots, and finish at a nearby garden.
  • Buffer Time: Add 15–20 minutes between locations to account for traffic, parking, or unexpected delays. This prevents rushing and allows for spontaneous detours.
  • Transportation Plans: Use private cars or rideshares for efficiency, especially if moving between distant areas like the city and beaches. Public transit can be unreliable for time-sensitive shoots.

Case Study: A couple combined a city shoot (Flinders Street Station) with a beach session (St Kilda) by booking a car service, allowing them to transition smoothly without waiting for trains.

Adapting to Light and Energy Levels

  • Energy-Based Scheduling: Place physically demanding locations (e.g., hiking trails or rocky beaches) earlier in the day when everyone is fresh. Save calmer spots (like gardens) for later.
  • Light-Driven Adjustments: If a location loses light faster than expected (e.g., a shaded garden at 3:00 PM), swap it with a sunnier spot or reschedule for the next day if possible.
  • Flexible Mindset: Embrace changes—if a park is crowded, improvise with nearby streets or alleys. The goal is to capture authentic moments, not perfect backdrops.

Pro Tip: Share your timeline with the bridal party and photographer in advance. This ensures everyone knows the plan and can voice concerns about timing or comfort.

By tailoring your timeline to Melbourne’s unique scenes and lighting conditions, you’ll create a wedding album that tells a story as vibrant and diverse as the city itself. Open communication with your photographer and a willingness to adapt will turn potential challenges into opportunities for creativity.

80883-Wu-1097

Emergency plan formulation for wedding photography in Melbourne

Crafting a Melbourne Wedding Photography Emergency Plan: Staying Prepared for the Unexpected

Planning a wedding photography session in Melbourne’s dynamic environment—whether it’s a coastal shoot at St Kilda Beach or an urban backdrop in the CBD—requires foresight. Weather shifts, equipment malfunctions, or sudden schedule changes can disrupt even the most detailed plans. A well-structured emergency plan ensures your photographer adapts quickly, keeping your memories intact. Here’s how to prepare for common challenges without compromising creativity or quality.

wedding photography melbourne

Weather-Related Disruptions

Melbourne’s reputation for “four seasons in one day” means weather can change rapidly. From sudden rain to intense sunlight, photographers must adjust techniques and locations to suit conditions.

Rainy Day Strategies

  • Indoor Backup Locations: Identify nearby covered venues (e.g., historic libraries, art galleries, or cafes) that allow photography. Scout these spots during your initial location walkthrough.
  • Waterproof Gear: Ensure your photographer uses weather-sealed camera bodies and lenses. Portable canopies or umbrellas can shield equipment during outdoor shots.
  • Creative Rain Shots: Embrace the weather by capturing reflective puddles, misty backgrounds, or romantic moments under shared umbrellas. These often become favorite images.

Real-World Example: A couple’s beach ceremony faced unexpected rain. Their photographer moved them to a nearby pier, using the overcast sky to create moody, dramatic portraits that stood out in their album.

Extreme Heat or Cold Adjustments

  • Timing Shifts: Schedule outdoor shoots during cooler mornings or evenings in summer, or midday in winter to maximize natural light and comfort.
  • Hydration and Breaks: For hot days, plan short sessions with water breaks. In cold weather, layer clothing and use hand warmers to keep fingers nimble for equipment handling.
  • Sun Protection: Use diffusers or reflectors to soften harsh sunlight. For snowy or bright conditions, adjust camera settings to avoid overexposure.

Pro Tip: If shooting in extreme temperatures, ask your photographer about their experience handling such conditions. They may recommend specific lenses or filters to optimize results.

Windy Conditions Management

  • Secure Equipment: Use sandbags or weighted stands to prevent tripods from toppling. Anchor lightweight props (e.g., signs or flowers) with tape or weights.
  • Hair and Clothing Tips: Advise the bridal party to use strong-hold hairspray or pins. Flowy dresses can be weighted with subtle fabric tabs to avoid constant readjustments.
  • Dynamic Posing: Leverage wind for artistic shots—e.g., capturing veil movement or hair blowing in the breeze—while keeping subjects grounded against gusts.

Case Study: During a windy rooftop shoot, a photographer used the breeze to create a flowing veil effect, resulting in a viral social media post for their portfolio.

Equipment and Technical Failures

Even with regular maintenance, cameras, lenses, or lighting gear can fail unexpectedly. A backup plan minimizes downtime and ensures continuity.

Backup Camera Bodies and Lenses

  • Redundancy Systems: Professional photographers typically carry a second camera body and multiple lenses (e.g., a wide-angle for group shots and a portrait lens for close-ups).
  • Memory Card Strategy: Use multiple memory cards, swapping them frequently to avoid data loss if one fails. Label cards by session segment (e.g., “ceremony,” “portraits”) for organization.
  • Battery Management: Pack fully charged spare batteries and portable chargers. Cold weather drains batteries faster, so keep extras in inner pockets for warmth.

Example: A photographer’s primary camera malfunctioned mid-shoot. Their backup body, already loaded with the same settings, allowed them to resume within minutes without missing key moments.

Lighting and Power Issues

  • Natural Light Alternatives: If external flashes or strobes fail, rely on window light or golden-hour sunlight. Reposition subjects to maximize available illumination.
  • Battery-Powered Lights: For off-camera lighting, use rechargeable LED panels or speedlights with fresh batteries. Test these before the shoot to confirm compatibility.
  • Generator or Power Bank: For extended outdoor sessions, a small generator or high-capacity power bank can keep equipment running during blackouts or remote locations.

Pro Tip: Discuss lighting contingencies with your photographer during pre-wedding consultations. They may recommend specific times of day to reduce reliance on artificial sources.

Data Security and Recovery

  • Cloud Backups: Use apps that automatically upload photos to cloud storage during breaks. This protects against lost or corrupted memory cards.
  • Manual Transfers: Periodically transfer images to a laptop or external hard drive, especially during multi-day events. Label folders by date and location for easy retrieval.
  • Recovery Software: Ensure your photographer has tools like PhotoRec or EaseUS to recover accidentally deleted files. Test these tools beforehand to confirm effectiveness.

Real-World Example: A memory card corrupted during a wedding reception. The photographer’s cloud backup system had already synced 90% of the images, allowing them to deliver the collection on time.

Schedule and Logistical Hiccups

Traffic delays, venue changes, or last-minute adjustments can throw off timelines. Flexibility and clear communication are key to staying on track.

Traffic and Transportation Delays

  • Buffer Time: Build extra time into your itinerary for travel between locations. For example, allocate 45 minutes for a 20-minute drive to account for peak-hour congestion.
  • Alternative Routes: Use navigation apps with real-time traffic updates (e.g., Google Maps or Waze) to reroute quickly. Identify backup paths during location scouting.
  • Local Contacts: Keep contact details for venue managers or event coordinators on hand. They can provide updates on road closures or parking restrictions.

Pro Tip: If shooting in remote areas, arrange transportation (e.g., a private car or rideshare) to avoid relying on public transit, which may be unreliable.

Venue or Permission Changes

  • Permits and Paperwork: Confirm all photography permits are valid and stored digitally or in print. Some Melbourne venues require advance approval for commercial shoots.
  • Contingency Venues: Have a list of nearby alternative spots that match your aesthetic (e.g., a park if a garden closes unexpectedly). Scout these during pre-wedding visits.
  • Quick Negotiation Skills: If a venue denies access last-minute, your photographer can propose compromises—e.g., shooting from a public sidewalk outside the property.

Case Study: A historic mansion closed due to a private event. The photographer quickly moved the couple to a nearby laneway, using brick textures and wrought-iron details for an urban-chic album.

Health or Personal Emergencies

  • Assistant Photographers: Hire a second shooter or assistant who can take over if the primary photographer falls ill. Clarify their role in the contract (e.g., capturing candid moments vs. posed shots).
  • First-Aid Kits: Pack a basic kit with bandages, pain relievers, and allergy medication for minor injuries or headaches during long shoots.
  • Emergency Contacts: Share your photographer’s contact details with your wedding planner or a trusted guest. They can step in if communication is needed during a crisis.

Example: A photographer developed a migraine during a sunset shoot. Their assistant, who had been capturing behind-the-scenes footage, seamlessly transitioned to primary shooter, ensuring no moments were missed.

By addressing these scenarios proactively, you’ll reduce stress and ensure your Melbourne wedding photography stays on course, rain or shine. Open dialogue with your photographer about their emergency protocols—and your own preferences—creates a partnership built on trust and adaptability.

IMG_8210

The delivery process of Melbourne wedding photography works

Understanding the Melbourne Wedding Photography Delivery Process: From Shoot to Final Images

After capturing your special moments in Melbourne’s iconic locations—from the vibrant streets of Fitzroy to the serene shores of Brighton Beach—the next step is receiving your final wedding photography collection. The delivery process varies among photographers, but a clear, transparent workflow ensures you know what to expect. Here’s a breakdown of typical stages, timelines, and considerations to help you navigate this phase smoothly.

wedding photography melbourne

Initial Post-Shoot Steps

Once your photoshoot wraps up, photographers begin organizing and backing up files to prevent loss. This stage sets the foundation for editing and delivery.

File Organization and Backup

  • Sorting Images: Photographers review raw footage, selecting the best shots based on composition, lighting, and emotion. Duplicates or blurry images are discarded.
  • Multiple Backup Copies: Files are saved on external hard drives and cloud storage to safeguard against accidental deletion or hardware failure.
  • Client Communication: Many photographers send a quick email or message confirming that files are secure and editing will begin shortly.

Key Consideration: Ask your photographer about their backup protocol during initial consultations to ensure peace of mind.

Culling and Initial Selection

  • Narrowing Down: From hundreds of shots, photographers curate a smaller collection (often 50–100 images per hour of shooting) that tell a cohesive story.
  • Focus on Quality: Blurred backgrounds, closed eyes, or awkward poses are removed, leaving only polished, flattering photos.
  • Client Input: Some photographers share a “first draft” gallery, allowing couples to flag favorites or request additional edits before finalizing.

Pro Tip: If your contract includes a set number of delivered images, clarify whether this refers to the initial cull or the final edited collection.

Editing and Enhancement

Editing transforms raw photos into vibrant, cohesive artworks that reflect your style and the mood of the day.

Color Correction and Exposure Adjustments

  • Balancing Tones: Photographers tweak brightness, contrast, and saturation to ensure skin tones look natural and backgrounds aren’t overexposed.
  • Consistent Style: Whether you prefer bright and airy or moody and dramatic, edits align with your agreed-upon aesthetic.
  • Batch Processing: Similar shots (e.g., group photos) are edited together to maintain uniformity across the collection.

Case Study: A couple who wanted a vintage feel worked with their photographer to apply sepia tones and soft vignettes to select images, creating a timeless look.

Retouching and Detail Refinement

  • Blemish Removal: Minor skin imperfections, stray hairs, or wrinkles in clothing are gently edited out while preserving natural textures.
  • Distraction Removal: Background elements like trash cans or photobombing strangers are erased if they detract from the scene.
  • Creative Enhancements: Some photographers add subtle effects, like sun flares or bokeh, to elevate artistic shots.

Example: A bride noticed a loose thread on her dress in a close-up portrait. Her photographer retouched it during editing, ensuring the image was flawless.

Final Review and Approval

  • Photographer’s Check: Before sharing with you, the photographer reviews the entire collection for consistency, technical errors, and emotional impact.
  • Client Preview: Many offer a private online gallery where you can view, download, or request minor tweaks (e.g., brightening a dark image).
  • Revision Limits: Contracts often specify a limited number of free revisions to manage workflow expectations.

Key Consideration: Provide clear feedback during reviews—e.g., “These portraits feel too cool-toned; could you warm them up?”—to guide edits efficiently.

Delivery Methods and Formats

Once editing is complete, photographers deliver files through secure, user-friendly platforms tailored to your needs.

Digital Download Galleries

  • Online Platforms: Photographers use services like Pixieset, SmugMug, or custom websites to host high-resolution images in a password-protected gallery.
  • Download Options: Galleries typically allow bulk downloads or individual image saves in formats like JPEG (for sharing) and RAW (for advanced editing).
  • Mobile Accessibility: Many platforms are optimized for smartphones, letting you view or share photos on the go.

Pro Tip: Download images promptly to avoid gallery expiration dates, which vary by photographer (often 30–90 days).

USB Drives or Physical Copies

  • Tangible Keepsakes: Some photographers provide USB drives with edited files, often packaged in custom cases or boxes for a luxe feel.
  • Print-Ready Files: If you plan to order prints, ask for files formatted for specific sizes (e.g., 8×10 inches) to avoid cropping issues.
  • Shipping Timelines: Physical deliveries may take 1–2 weeks, depending on your location and the photographer’s schedule.

Example: A couple received a wooden USB drive engraved with their wedding date, which they displayed as a memento alongside their albums.

Print and Album Options

  • Professional Printing: Many photographers partner with labs to offer high-quality prints, canvases, or metal prints at additional cost.
  • Custom Albums: Leather-bound or linen albums with lay-flat pages are popular for showcasing curated selections of your favorite shots.
  • Design Collaboration: You may work with the photographer to arrange photos in the album, choosing layouts and cover materials.

Key Consideration: If prints or albums are important to you, discuss timelines upfront—custom products often take 4–6 weeks to produce.

Post-Delivery Support

Even after receiving your files, photographers may offer assistance to ensure you’re satisfied with the final product.

Technical Assistance

  • File Formats: If you’re unsure how to open RAW files or resize images for social media, your photographer can provide guidance.
  • Printing Help: They may recommend local printers or online services that match the quality of their lab partners.
  • Archiving Tips: Advice on storing digital files (e.g., external hard drives vs. cloud storage) helps preserve memories long-term.

Pro Tip: Create multiple backups of your files—one on your computer, one on an external drive, and one in the cloud—to prevent loss.

Sharing and Usage Rights

  • Social Media Guidelines: Some photographers grant unlimited personal use but restrict commercial or competitive sharing (e.g., entering contests without permission).
  • Vendor Credits: If you post photos online, tagging your photographer or using their preferred hashtags helps them grow their business.
  • Second Shooter Policies: If multiple photographers worked your event, clarify who owns the rights to specific images.

Example: A couple shared their wedding photos on Instagram, tagging their photographer and using their branded hashtag, which led to inquiries from future clients.

Future Inquiries

  • Anniversary Sessions: Some photographers offer discounted rates for return clients wanting updated portraits or anniversary shoots.
  • Referral Programs: If you loved their work, ask about referral bonuses—many offer discounts or free prints for recommending friends.
  • Feedback Requests: Photographers may ask for reviews or testimonials to improve their services and attract new clients.

Final Check: Save all correspondence with your photographer, including contracts, delivery timelines, and edit requests, for reference for future needs.

By understanding each stage of the delivery process, you’ll feel confident and excited as you await your Melbourne wedding photography collection. Clear communication, realistic timelines, and post-delivery support ensure your memories are preserved beautifully and stress-free.