z&d-sp-0014

Intermission arrangements for wedding photo shoots in Melbourne

Navigating Mid-Session Breaks During Your Melbourne Wedding Photoshoot: Tips for Comfort and Creativity

A Melbourne wedding photoshoot often spans several hours, especially if it includes multiple locations or outdoor settings. Mid-session breaks aren’t just about resting—they’re opportunities to refresh, recharge, and ensure everyone stays comfortable and focused. Whether you’re shooting in the city’s laneways, along the Yarra River, or at a coastal spot, strategic pauses can elevate the experience. Here’s how to handle breaks smoothly.

wedding photography melbourne

Timing Breaks Strategically

Breaks should align with the shoot’s flow, energy levels, and Melbourne’s unpredictable weather.

Natural Transition Points

  • After Location Changes: If you’re moving from a bustling CBD spot to a quieter park, use travel time as a break. This avoids downtime at the shoot location.
  • Mid-Morning or Mid-Afternoon: Schedule a 15–20-minute pause around 10:30 AM or 3:00 PM, when energy might dip. This aligns with typical meal times or natural lulls.
  • Before Sunset Shots: If your session ends with golden-hour portraits, take a break an hour earlier to rest before the final, high-energy segment.

Key Consideration: Communicate break timing with your photographer in advance. They can plan shots around these pauses to maintain momentum.

Weather-Driven Adjustments

  • Rain or Heat: If Melbourne’s weather turns extreme, shorten outdoor segments and use breaks to move to shaded areas or indoor backups.
  • Wind Interruptions: Strong gusts can make posing difficult. Pause to adjust hair, clothing, or props, then resume when conditions improve.

Pro Tip: Use a weather app to track real-time conditions and adjust breaks dynamically. For example, if rain is expected to stop in 10 minutes, wait it out instead of relocating.

Refreshing During Pauses

Breaks are ideal for addressing physical comfort and mental focus, ensuring you look and feel your best.

Hydration and Snacks

  • Water Bottles: Stay hydrated, especially in summer. Bring reusable bottles to reduce waste and keep drinks cold with ice packs.
  • Light Snacks: Pack energy-boosting options like nuts, dried fruit, or granola bars. Avoid heavy meals that might cause sluggishness.
  • Shared Refreshments: If your photographer or assistant is present, offer them snacks too—a thoughtful gesture that fosters teamwork.

Case Study: One couple kept a small cooler with chilled water and cut-up fruit, which they shared with their photographer. This kept everyone hydrated and energized through a five-hour shoot.

Touch-Ups and Wardrobe Adjustments

  • Beauty Fixes: Use breaks to reapply lipstick, blot shine, or fix smudged makeup. Carry a compact mirror for quick checks.
  • Clothing Checks: Ensure outfits stay pristine—tuck in loose straps, straighten hemlines, or fix wrinkles caused by sitting or moving.
  • Shoe Changes: If footwear is uncomfortable, swap heels for flats during breaks (keep a pair in your bag).

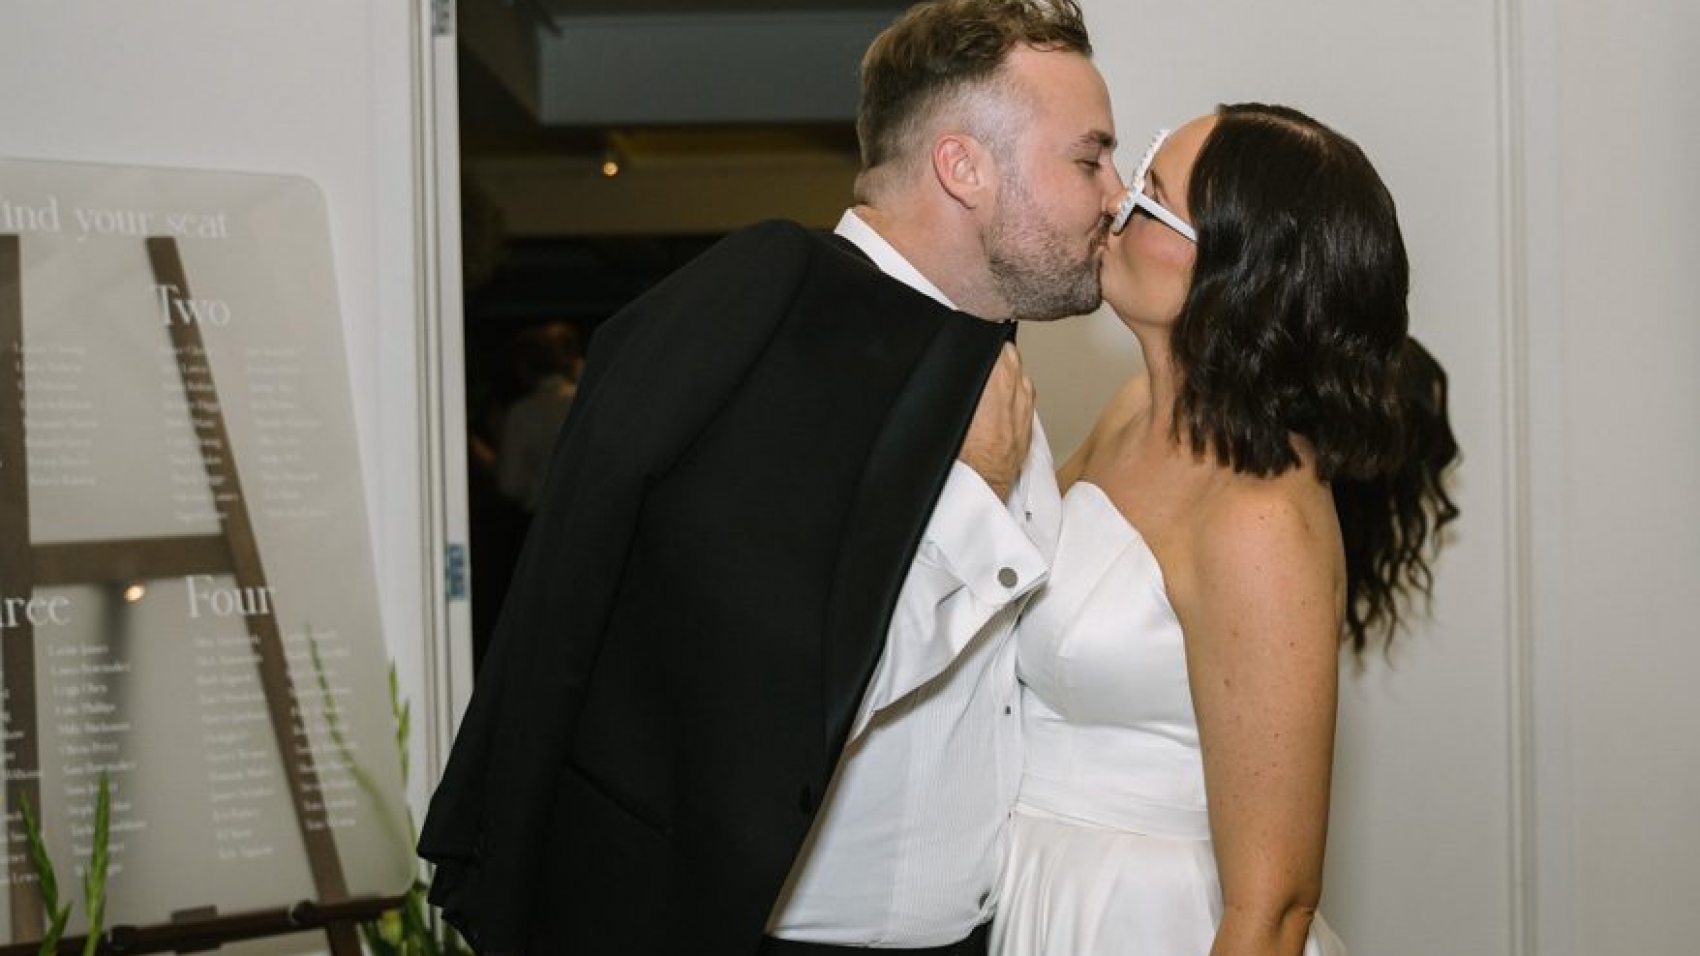
Example: A bride noticed her dress’s train was dragging on the ground during a break. She used the time to pin it up, avoiding tripping hazards in later shots.

Mental Reset Moments

  • Deep Breathing: Spend a few minutes practicing mindfulness or deep breathing to ease nerves, especially if posing feels awkward.
  • Playful Interaction: Use breaks to joke with your partner or photographer. Lighthearted moments often translate into natural, candid photos.
  • View Scenery: If shooting in a scenic spot like the Royal Botanic Gardens, take a moment to appreciate the surroundings—it can reignite enthusiasm.

Pro Tip: Avoid scrolling through social media during breaks, as it can drain mental energy. Instead, focus on being present with your partner.

Communicating With Your Photographer

Clear dialogue during breaks ensures everyone stays on the same page and avoids misunderstandings.

Sharing Feedback

  • Pose Preferences: If certain poses feel uncomfortable, mention it during a break. Your photographer can suggest alternatives that flatter you.
  • Shot Adjustments: Request more shots of a specific angle or location if you’re unhappy with earlier results. Breaks are ideal for recalibrating.
  • Pacing Concerns: If the session feels rushed or slow, discuss adjusting the timeline. Flexibility is key to a stress-free experience.

Key Consideration: Be honest but constructive. For example, say, “I’d love more shots with the city skyline in the background,” instead of criticizing previous photos.

Confirming Next Steps

  • Location Transitions: Use breaks to confirm the next spot, especially if moving between distant areas like St Kilda and the Docklands.
  • Equipment Needs: If your photographer needs to recharge batteries or swap lenses, coordinate timing during pauses.
  • Backup Plans: Revisit weather or logistical contingencies (e.g., “If it rains, we’ll head to that café we scouted earlier”).

Example: A couple used a break to realize they’d forgotten a prop at their car. They quickly retrieved it, avoiding delays later.

Building Rapport

  • Check-Ins: Ask your photographer how they’re holding up—they might need a break too. Mutual care fosters collaboration.
  • Share Ideas: Use downtime to brainstorm creative shots you haven’t discussed yet, like a spontaneous dip in the Yarra (if safe and permitted).
  • Celebrate Milestones: If you’ve completed a challenging segment (like climbing a hill for a view), acknowledge it with a high-five or quick celebration.

Final Check: Before resuming, confirm everyone is ready—physically, mentally, and creatively.

By planning breaks thoughtfully, you’ll transform pauses into opportunities to refresh, refine, and reconnect. Whether you’re navigating Melbourne’s unpredictable weather or simply needing a moment to breathe, these strategies ensure your wedding photoshoot remains enjoyable and productive from start to finish.

z&d-sp-0059

Get ready for the outdoor wedding shoot in Melbourne

Preparing for Your Melbourne Outdoor Wedding Photoshoot: Essential Steps for a Smooth Experience

An outdoor wedding photoshoot in Melbourne offers stunning backdrops, from coastal vistas to urban landscapes. However, unpredictable weather and logistical challenges can disrupt your plans if you’re unprepared. To ensure your session runs seamlessly, focus on practical preparations that address comfort, timing, and creativity. Here’s how to get ready for a memorable day.

wedding photography melbourne

Packing the Right Essentials

Outdoor shoots require thoughtful packing to handle Melbourne’s variable climate and ensure you look your best throughout the session.

Clothing and Accessories

  • Layered Outfits: Melbourne’s weather can shift quickly. Bring lightweight jackets, shawls, or cardigans to stay warm during chilly breezes without compromising style.
  • Comfortable Footwear: Opt for shoes that blend style and practicality. Wedges or low heels work better on uneven terrain (like grass or sand) than stilettos.
  • Backup Attire: Pack a spare outfit or accessories in case of unexpected spills, tears, or sudden rain.

Key Consideration: If your shoot includes multiple locations, choose outfits that transition easily—for example, a dress that looks elegant in a park and chic by the waterfront.

Beauty and Grooming

  • Touch-Up Kit: Include blotting papers, lipstick, powder, and hairspray to manage shine or flyaways between shots.
  • Sun Protection: Apply waterproof sunscreen before the shoot and carry a travel-sized bottle for reapplication, especially if you’ll be in direct sunlight.
  • Hydration and Snacks: Stay energized with water bottles and light snacks like nuts or fruit to avoid fatigue during long sessions.

Pro Tip: Avoid trying new skincare or hair products the day before your shoot to prevent irritation or unexpected reactions.

Timing and Location Logistics

Melbourne’s lighting and crowds vary by time of day and location, so plan strategically to maximize your photos’ quality.

Golden Hour Scheduling

  • Early Morning or Late Afternoon: These periods offer soft, flattering light that minimizes harsh shadows. Discuss timing with your photographer to align with their creative vision.
  • Seasonal Adjustments: In winter, golden hour may occur earlier; in summer, it lasts longer. Use a sun calculator app to track exact times for your shoot date.

Scouting Locations in Advance

  • Visit Sites Beforehand: Walk through your chosen locations to identify ideal spots for portraits, group shots, and creative angles.
  • Check Permits: Some Melbourne parks or private venues require photography permits. Confirm requirements with local councils or property managers.
  • Traffic and Parking: Plan routes to avoid peak-hour congestion, especially if shooting in busy areas like St Kilda or the CBD.

Case Study: One couple scheduled their shoot at a popular beach but arrived early to secure parking and scout less-crowded areas for intimate portraits.

Contingency Plans for Weather

  • Rain Backup: Choose an indoor venue (like a café or studio) as a fallback if rain is forecast. Share this plan with your photographer in advance.
  • Wind Management: Bring hair clips or ties to keep locks in place during breezy conditions. Avoid lightweight fabrics that may billow unflatteringly.
  • Extreme Heat: If shooting in summer, schedule breaks in shaded areas and carry portable fans or cooling towels.

Pro Tip: Embrace Melbourne’s weather as part of your story—rain can add drama, while wind can create dynamic, movement-filled shots.

Collaborating With Your Photographer

Clear communication with your photographer ensures your vision aligns with their approach, leading to photos that feel authentic and intentional.

Sharing Your Inspiration

  • Mood Boards: Create a Pinterest board or folder with images that reflect your preferred style, color palettes, and poses.
  • Storytelling Elements: Discuss meaningful details to incorporate, like a prop (e.g., a vintage car or heirloom jewelry) or a location with sentimental value.
  • Shot List: Prioritize “must-have” photos (e.g., a sunset silhouette or a candid laugh) to guide the session’s flow.

Understanding Their Process

  • Posing Guidance: Ask how your photographer directs couples—some prefer structured poses, while others encourage natural interaction.
  • Equipment Needs: Confirm if they’ll bring additional gear (like reflectors or drones) for creative shots and whether you need to provide anything (e.g., power outlets for charging).
  • Editing Style: Clarify their approach to retouching (e.g., natural skin tones vs. artistic filters) to ensure alignment with your expectations.

Example: A couple who wanted candid, documentary-style photos communicated this to their photographer, who then focused on capturing unscripted moments during their beach shoot.

Building Rapport Before the Shoot

  • Pre-Session Meeting: Schedule a video call or in-person chat to discuss logistics, share ideas, and ease nerves.
  • Trust Their Expertise: While it’s okay to voice preferences, remain open to their suggestions—they know how to work with Melbourne’s lighting and landscapes.
  • Relax and Have Fun: A stressed couple shows in photos. Treat the session as an adventure, and let your photographer capture genuine joy.

Final Check: Exchange contact details with your photographer and confirm their arrival time, especially if shooting at multiple locations.

By following these steps, you’ll arrive at your Melbourne outdoor wedding photoshoot prepared, confident, and ready to create timeless images. With the right essentials, timing, and collaboration, your photos will reflect the beauty of your love—and the unique charm of Melbourne’s landscapes.

DSC02092

The confirmation process of a wedding photography contract in Melbourne

Finalizing Your Melbourne Wedding Photography Contract: A Clear, Step-by-Step Process

Signing a wedding photography contract is a critical step in securing your Melbourne wedding memories. This document outlines expectations, protects both parties, and ensures your vision is brought to life. To avoid misunderstandings, approach the confirmation process methodically. Here’s how to navigate each stage with confidence.

wedding photography melbourne

Reviewing the Initial Draft Thoroughly

Before agreeing to terms, read the contract carefully from start to finish. Pay attention to sections that define:

Scope of Services

  • Coverage Hours: Confirm the number of hours included and whether overtime is allowed (and how it’s billed).
  • Deliverables: Check what’s promised—e.g., number of edited photos, format (digital files, prints, or albums), and turnaround time.
  • Additional Services: Note if extras like second shooters, engagement sessions, or travel fees are included or require separate fees.

Key Consideration: If any service is vague, ask for clarification. For example, “edited photos” could mean basic color correction or advanced retouching—define this upfront.

Logistical Details

  • Date and Venue: Verify the contract lists your correct wedding date and venue address.
  • Backup Plans: Ensure there’s a clause addressing what happens if the photographer is ill or unable to shoot (e.g., a replacement with similar style).
  • Weather Contingencies: For outdoor shoots, confirm protocols for rescheduling due to rain or extreme weather.

Pro Tip: If your venue has specific rules (e.g., photography restrictions during ceremonies), share these with the photographer to avoid conflicts.

Clarifying Legal and Financial Terms

Contracts exist to protect both you and the photographer, so understand every clause before signing.

Payment Structure

  • Deposit Requirements: Check the amount needed to secure your date and whether it’s refundable under certain conditions.
  • Final Payment Deadline: Note when the remaining balance is due (e.g., 30 days before the wedding or on the day).
  • Late Fees: Confirm if penalties apply for missed payments and how they’re calculated.

Cancellation and Rescheduling Policies

  • Client-Initiated Changes: Understand fees or penalties for postponing or canceling your wedding.
  • Photographer-Initiated Changes: Review terms if the photographer needs to reschedule (e.g., due to double-booking or emergencies).

Case Study: One couple avoided stress by discussing cancellation policies upfront. When their venue closed unexpectedly, they rescheduled with minimal hassle because their contract included a flexible rebooking clause.

Discussing Creative and Editorial Control

Your photos should reflect your style, so clarify how much input you’ll have during the process.

Editing and Retouching

  • Style Preferences: Share your vision for edits (e.g., “We prefer warm tones” or “Keep skin textures natural”).
  • Approval Process: Ask if you’ll review a selection of edits before final delivery or if the photographer has full creative control.
  • Revisions: Confirm how many rounds of edits are included and what constitutes an “extra revision” (and its cost).

Usage Rights

  • Personal Use: Ensure you can print, share, and post photos freely on social media or with family.
  • Commercial Use: If you plan to use images for business purposes (e.g., a joint venture), clarify whether this requires additional permissions.

Pro Tip: If you’re uncomfortable with the photographer using your images for promotional purposes, request a clause that limits or prohibits this.

Finalizing and Signing the Agreement

Once all terms are clear and agreed upon, proceed with signing.

Double-Checking Details

  • Names and Contact Information: Verify spelling and accuracy of both parties’ details.
  • Signatures: Ensure all required signatures (yours, your partner’s, and the photographer’s) are present.
  • Date: Confirm the signing date is recorded correctly.

Keeping Records

  • Copies for Both Parties: Request a digital or physical copy of the signed contract for your records.
  • Email Confirmation: Ask the photographer to send a confirmation email summarizing key terms (e.g., date, deliverables, payment schedule).

Final Check: Store the contract in a safe place (e.g., a shared folder with your partner) and reference it if questions arise later, such as payment deadlines or edit requests.

By following these steps, you’ll finalize your Melbourne wedding photography contract with clarity and confidence. A well-drafted agreement ensures your day is captured exactly as you envision it—without unexpected surprises.

wedding photography melbourne

Steps for exploring the demand for wedding photography in Melbourne

Uncovering Your Wedding Photography Needs in Melbourne: A Step-by-Step Guide

Your wedding photos are more than just images—they’re a timeless record of your love story. To ensure your Melbourne wedding photography captures every meaningful detail, start by digging deep into your preferences, priorities, and practical requirements. This guide walks you through the process of identifying what truly matters to you, helping you communicate effectively with photographers and create a vision that feels authentic.

wedding photography melbourne

Reflecting on Your Personal Style and Vision

Before meeting photographers, take time to understand what resonates with you aesthetically. Browse wedding galleries online, save inspiration from platforms like Instagram or Pinterest, and note recurring themes. Ask yourself:

  • Do you prefer candid, unscripted moments or structured, posed portraits?
  • Are you drawn to bright, vibrant colors or soft, muted tones?
  • Do you want your photos to feel timeless or trendy?

Key Consideration: Your style doesn’t have to fit into one category. Many couples blend elements—like mixing documentary-style ceremony shots with creative portraits during golden hour.

Identifying Emotional Priorities

Think beyond aesthetics to the emotions you want your photos to evoke. For example:

  • If family bonds are central to your story, you might prioritize group shots that capture genuine laughter or tears.
  • If your relationship thrives on adventure, you may want images that reflect spontaneity, like exploring Melbourne’s laneways or coastal spots.

Pro Tip: Share these insights with photographers during consultations. A skilled artist will tailor their approach to highlight what matters most to you.

Assessing Logistical and Practical Needs

Photography involves more than creativity—it requires planning. Consider these logistical factors to avoid surprises:

Venue and Timing Constraints

  • Indoor vs. Outdoor: Does your venue have ample natural light, or will you need a photographer experienced in low-light settings?
  • Timeline Flexibility: If your ceremony runs late, will your photographer stay longer (and how does that affect deliverables)?
  • Weather Backup Plans: For outdoor shoots, discuss alternatives like covered locations or indoor portrait sessions if rain is forecast.

Case Study: One couple planned an outdoor ceremony at a Melbourne park but included a nearby indoor venue in their contract as a weather backup. Their photographer adjusted the timeline seamlessly when rain threatened, ensuring no moments were missed.

Technical and Creative Support

  • Second Shooter: Do you want multiple angles of key moments (e.g., the bride walking down the aisle and the groom’s reaction)?
  • Equipment Needs: If you’re hosting a large guest list, ask if the photographer brings additional lighting or lenses to handle crowd shots.
  • Post-Production Style: Clarify how much editing you expect—from basic color correction to advanced retouching of blemishes or backgrounds.

Pro Tip: Be honest about your comfort level with technical jargon. A good photographer will explain options in layman’s terms.

Aligning With Your Partner’s Expectations

Wedding planning is a partnership, so involve your significant other in the photography discussion. Schedule a quiet moment to:

Comparing Notes on Preferences

  • Share inspiration images and note similarities or differences in your tastes.
  • Discuss “must-have” shots (e.g., a portrait with grandparents) versus “nice-to-haves” (e.g., artistic shots of your shoes).
  • Agree on a budget range for photography services, even if it’s flexible.

Resolving Potential Conflicts

If one of you prioritizes candid shots while the other wants traditional portraits, look for photographers who excel in both styles. Many artists blend approaches, offering a mix of documentary and posed imagery.

Example: A couple who disagreed on portrait styles compromised by booking a photographer known for “creative candid” work—capturing natural interactions during portraits while incorporating unique angles and lighting.

Communicating Clearly With Photographers

Once you’ve defined your needs, articulate them clearly during consultations. Use specific language to avoid misunderstandings:

  • Instead of saying, “We want natural photos,” say, “We’d like images that feel unposed, like we’re not even aware of the camera.”
  • If you’re concerned about skin tones, mention, “We want portraits where our skin looks authentic, not overly smoothed or airbrushed.”

Asking Targeted Questions

  • “How do you handle couples who have different photography preferences?”
  • “Can you share examples of weddings with similar logistical challenges to ours?”
  • “What’s your process for incorporating our feedback during editing?”

Final Check: After meetings, jot down notes about each photographer’s style, responsiveness, and ability to address your concerns. This helps compare options later.

By following these steps, you’ll clarify your wedding photography needs and find a Melbourne photographer who aligns with your vision. The result? Photos that feel as unique and genuine as your love story.

wedding photography melbourne

The pre-appointment process for wedding photography in Melbourne

Navigating the Pre-Booking Process for Wedding Photography in Melbourne

Securing a wedding photographer in Melbourne involves more than just picking a date—it’s about aligning schedules, discussing expectations, and ensuring your vision matches their style. Whether you’re planning an intimate elopement or a grand celebration, understanding the early steps of the booking process helps set the foundation for a seamless experience. Here’s how to approach it with clarity and confidence.

wedding photography melbourne

Researching and Shortlisting Photographers

Start by exploring photographers whose work resonates with your aesthetic. Look for portfolios that showcase a range of wedding styles, from candid documentary shots to elegant posed portraits. Pay attention to how they capture emotions, lighting, and details like venue decor or attire.

Key Consideration: Focus on consistency. A photographer whose images consistently reflect a cohesive style is more likely to deliver results that align with your expectations. For example, if you love soft, natural lighting, prioritize artists who excel in outdoor or golden-hour shoots.

Identifying Availability and Key Dates

Once you’ve narrowed down your list, check their availability for your wedding date. Many photographers book months in advance, especially during peak seasons (spring and summer in Melbourne). Reach out early to confirm they’re free and inquire about their booking cutoff dates.

Pro Tip: If your date is flexible, ask about alternative options. Some photographers offer discounts for off-peak days or last-minute bookings, though this varies by artist.

Initial Contact and Communication

When you’re ready to connect, send a detailed inquiry via email or their website’s contact form. Include:

  • Your wedding date and venue location
  • A brief description of your vision (e.g., “We want a mix of candid moments and creative portraits”)
  • Any specific requests, like second shooters or extended coverage

Asking the Right Questions

During your first conversation, clarify logistics to avoid surprises later:

  • Coverage Hours: How many hours are included in their standard package? Can you add more if needed?
  • Backup Plans: What happens if they’re ill or unable to shoot on your date? Do they have a network of colleagues to step in?
  • Delivery Timeline: How long will it take to receive your edited photos?

Case Study: One couple learned their photographer had a policy of bringing a backup camera and lens to every shoot after asking about equipment failures. This reassured them their day wouldn’t be compromised by technical issues.

Reviewing Contracts and Agreements

Before signing anything, read the contract carefully. Ensure it outlines:

  • Deliverables (e.g., number of edited photos, format of files)
  • Payment schedules and cancellation policies
  • Usage rights (e.g., whether you can print or share images freely)

Clarifying Ambiguities

If any terms are unclear, ask for clarification. For example:

  • “Does ‘edited photos’ mean basic color correction or full retouching?”
  • “Are travel fees included if our venue is outside Melbourne?”

Pro Tip: Don’t rush this step. A well-drafted contract protects both you and the photographer, so take time to understand every clause.

Finalizing the Booking

Once you’re comfortable with the terms, confirm your booking by paying a deposit (usually a percentage of the total fee). Most photographers require this to secure your date. After payment, request a written confirmation that includes:

  • Your wedding date and venue
  • Agreed-upon services and hours
  • Contact information for both parties

Final Check: Save all correspondence, including emails and receipts, in a dedicated folder. This makes it easy to reference details later, like payment deadlines or style preferences.

By approaching the pre-booking process methodically, you’ll build a strong foundation with your photographer. Clear communication and attention to detail ensure your wedding day is captured exactly as you envision it—without the stress of last-minute surprises.

DSC08822

Post-production communication for wedding photography in Melbourne

Effective Communication for Post-Production Editing in Melbourne Wedding Photography

The post-production phase of wedding photography is where raw moments transform into polished memories. Clear communication with your photographer during this stage ensures your final images align with your vision while maintaining the authenticity of your day. Whether you’re adjusting lighting, refining skin tones, or enhancing details, here’s how to navigate the editing process with confidence.

wedding photography melbourne

Setting Clear Expectations Before Editing Begins

Before your photographer starts retouching, discuss your preferences openly. Share examples of styles you love—whether it’s soft, natural tones or bold, vibrant colors—and explain what resonates with you. For instance, if you prefer a timeless look, mention that you’d like to avoid overly trendy filters or heavy editing that could date the photos.

Key Consideration: Be specific about your priorities. If you’re concerned about blemishes or distractions in the background, highlight these areas early. Conversely, if you want to preserve natural textures like skin or fabric, make that clear to prevent over-editing.

Providing Detailed Feedback on Draft Edits

Once you receive a batch of edited images, review them carefully and offer constructive feedback. Instead of vague comments like “make it brighter,” describe what you’d like to see. For example:

  • “The colors in the ceremony photos feel a bit muted—could we warm up the tones to match the sunset lighting?”
  • “The group shot has a distracting shadow on the wall—can we soften that without losing the scene’s depth?”

Addressing Common Editing Concerns

  • Skin Retouching: If you’re uncomfortable with heavy airbrushing, ask for a “natural” approach that minimizes imperfections while keeping skin texture intact.
  • Background Distractions: Point out specific elements you’d like removed or toned down, like a stray object or harsh lighting.
  • Color Balance: If certain images look too cool or warm, request adjustments to match the mood of the scene (e.g., a cozy indoor reception vs. a bright outdoor ceremony).

Pro Tip: Use timestamps or image numbers when referencing specific photos to avoid confusion. For example, “In image 12, the bride’s veil appears slightly overexposed—could we balance the highlights?”

Collaborating on Final Adjustments

Editing is rarely a one-and-done process. After your initial feedback, your photographer may share a revised set of images. Use this opportunity to fine-tune details:

  • Consistency Across Albums: Ensure images from the same event segment (e.g., all reception photos) have a cohesive look in terms of brightness, contrast, and color.
  • Emotional Tone: If a photo feels flat, ask if adjusting the shadows or vibrancy could enhance its mood. For example, a dimly lit dance floor shot might benefit from subtle boosts to warmth and contrast.
  • Cropping and Composition: Suggest alternative crops if you feel an image could focus better on a subject or tell a stronger story.

Case Study: One couple noticed that their outdoor portrait series had inconsistent green tones due to varying lighting conditions. By sharing screenshots of their favorite shots and explaining they wanted a “unified earthy palette,” the photographer adjusted the hues to create harmony across the sequence.

Respecting the Photographer’s Expertise

While your input is invaluable, trust your photographer’s judgment on technical matters. They understand how editing choices impact the longevity and quality of your images. For example, excessive sharpening can make photos look artificial over time, while over-saturating colors may fade unevenly in prints.

Final Check: Before finalizing, review images on multiple devices (e.g., a phone, tablet, and computer) to ensure they look consistent across screens. Pay attention to details like skin tones, background elements, and overall balance.

Your wedding photos are a collaboration between your photographer’s skill and your unique vision. By communicating openly and thoughtfully during post-production, you’ll create a collection that feels both polished and true to your day’s magic.

DSC09201

A Guide to the Selection Process of wedding photos in Melbourne

Melbourne Wedding Photography Selection Guide: A Step-by-Step Process to Preserve Your Special Moments

Choosing the right images from your wedding photography collection is more than just picking favorites—it’s about curating a visual narrative that reflects the emotion, authenticity, and unique story of your day. Whether you’re working with a Melbourne-based photographer or reviewing proofs online, this guide will help you navigate the selection process with confidence.

wedding photography melbourne

Understanding Your Photography Style and Vision

Before diving into the selection, revisit the style you discussed with your photographer. Did you prioritize candid moments, posed portraits, or a mix of both? For example, if you opted for a documentary-style approach, focus on images that capture unscripted interactions, like laughter during speeches or quiet moments between partners. If your photographer specializes in romantic storytelling, look for sequences that showcase the progression of your day—from getting ready to the first dance.

Key Consideration: Authenticity matters. Avoid selecting images solely based on technical perfection; prioritize those that evoke genuine emotion. A slightly imperfect photo with a heartfelt expression often outshines a flawless but sterile shot.

Organizing Your Selection Process

Sorting through hundreds of images can feel overwhelming. Break it down into manageable steps:

1. First Pass: Eliminate the Obvious “No’s”

Start by removing duplicates, blurry shots, or images where eyes are closed. This step narrows your pool to the strongest candidates. For instance, if your photographer captured multiple angles of the same moment, keep the one that best conveys the scene’s energy.

2. Categorize by Event Segment

Divide your images into sections like “Getting Ready,” “Ceremony,” “Portraits,” and “Reception.” This helps ensure you’re selecting a balanced representation of your day. For example, if you notice most of your favorites are from the reception, revisit the ceremony photos to check if you’re missing key moments like the vows or ring exchange.

Pro Tip: Use digital tools or sticky notes to tag images by category. This makes it easier to spot gaps in your selection.

3. Prioritize Storytelling Sequences

Your wedding album should flow like a story. Choose images that connect visually and emotionally. For example, a series showing the bride’s dress being fastened, followed by her walk down the aisle, and finally her first look at the groom creates a cohesive narrative. Similarly, group reception photos by activity—speeches, cake cutting, and dancing—to maintain rhythm.

Example: If your photographer captured the groom’s reaction as the bride entered, pair it with a wide shot of the aisle and a close-up of the bride’s bouquet. This trio tells a richer story than three similar angles of the same moment.

Collaborating with Your Photographer

Your photographer’s expertise is invaluable during selection. Many professionals offer guidance based on their understanding of your style and the day’s flow. Don’t hesitate to ask questions like:

  • “Which images do you think best represent our vision?”
  • “Are there any shots we’re missing that would complete the story?”
  • “How would you arrange these for an album?”

Case Study: One couple worked with their photographer to identify overlooked gems, like a candid shot of the bride’s father adjusting her veil. Initially dismissed as “just another getting-ready photo,” it became a cherished addition for its emotional depth.

Finalizing Your Selection

After narrowing down your choices, take a break before reviewing them again with fresh eyes. This helps avoid decision fatigue and ensures you’re satisfied with your picks. If you’re creating an album, consider the layout—alternate between close-ups and wide shots, and balance color tones for visual harmony.

Final Check: Ensure your selection includes:

  • Key moments (vows, first kiss, first dance)
  • Candid interactions (friends laughing, family embracing)
  • Detail shots (rings, flowers, venue decor)
  • Portraits that highlight your personalities

Your wedding photos are more than decorations—they’re heirlooms that will transport you back to your day for decades. By approaching the selection process thoughtfully, you’ll create a collection that feels as timeless as your love.

DSC08988

The order of group shooting for wedding photography in Melbourne

Melbourne Wedding Photography Group Shooting Sequence Guide

Organizing a wedding photo shoot in Melbourne’s diverse locations—from urban streets to coastal landscapes—requires a strategic sequence to maximize natural light, minimize downtime, and capture every key moment. A well-planned shooting order ensures the couple, wedding party, and family members stay engaged while moving efficiently between settings. This guide outlines a step-by-step approach to grouping shots, adapting to Melbourne’s weather, and prioritizing must-have photos.

wedding photography melbourne

Starting with the Couple’s Intimate Portraits

Begin the day by focusing on the newlyweds alone, as their energy and enthusiasm are highest early in the session. This allows for creative, uninterrupted time to experiment with poses, lighting, and locations without the pressure of coordinating larger groups.

Golden Hour Priority: Schedule the couple’s portraits during the first or last hour of daylight for soft, flattering light. In Melbourne, this could mean shooting at sunrise near the Yarra River or at sunset along St Kilda Beach. Use this time for close-ups, walking shots, and romantic poses that highlight their connection.

Location Strategy: Start with a iconic Melbourne backdrop, such as a graffiti-covered laneway or a historic building, then transition to a quieter spot like a park or garden for more intimate, natural-light shots. This variety ensures a mix of urban edge and timeless elegance in the final gallery.

Key Tip: If the couple is wearing multiple outfits, schedule the most formal attire first while they’re fresh, then switch to casual looks for later shots.

Moving to the Wedding Party and Bridal Party

After capturing the couple’s solo portraits, shift focus to the bridal party and groomsmen. These groups are often energetic and playful, making them ideal for dynamic, high-energy shots that showcase personalities.

Group Size Management: Divide larger parties into smaller subgroups (e.g., bridesmaids only, groomsmen only, or mixed groups) to streamline posing and reduce chaos. Start with formal, posed photos in a structured setting, such as in front of a grand staircase or a textured wall, then move to casual arrangements like walking down a street or gathered around a vintage car.

Location Adaptation: Use the same venue or nearby areas to avoid traveling long distances. For example, if the couple’s portraits were taken in a park, position the wedding party around a fountain or under a tree for natural framing. Incorporate Melbourne’s unique elements, like tram tracks or street art, to add local flavor.

Engagement Trick: Keep the mood light by asking the party to share funny stories about the couple or play a quick game (e.g., “Who knows the bride/groom best?”) to generate genuine laughter and interactions.

Capturing Family Formals Efficiently

Family formals are essential but can become time-consuming if not organized properly. Prioritize these shots after the wedding party to maintain momentum while ensuring all key combinations are covered.

Pre-Shoot Planning: Request a list of must-have family groupings (e.g., immediate family, extended relatives, step-parents) from the couple beforehand. Arrange groupings by size, starting with the largest (e.g., both sides of the family together) and working down to smaller pairs or trios.

Location Simplicity: Choose a flat, well-lit area with minimal distractions, such as a clean wall, a bench, or a grassy field. Avoid busy backgrounds that compete for attention. Use a reflector or off-camera flash to fill in shadows if shooting in harsh sunlight or shade.

Efficiency Hack: Assign a family member or friend to help organize groups, calling out names and ensuring everyone is ready before the camera clicks. This keeps the process moving smoothly and reduces stress for the couple.

Incorporating Creative and Candid Shots

Once formal groupings are complete, allocate time for candid, documentary-style photos that capture the day’s spontaneous moments. These shots often become favorites, as they reflect the couple’s true emotions and interactions.

Observation Over Direction: Step back and let the day unfold naturally, photographing details like the bride adjusting her veil, the groom laughing with friends, or the couple stealing a quiet moment together. Use a telephoto lens to shoot from a distance without interrupting the flow.

Location Flexibility: If the main venue has multiple interesting spots (e.g., a rooftop, a courtyard, or a staircase), wander through these areas with the couple, capturing them in unplanned poses or conversations. Melbourne’s eclectic architecture provides endless opportunities for creative framing.

Lighting Awareness: Keep an eye on changing light conditions, especially if shooting outdoors. Move to shaded areas during midday or use diffusers to soften harsh sunlight. For evening shots, embrace twilight hues or use artificial lighting (e.g., fairy lights, lanterns) for a romantic ambiance.

Final Sunset or Nighttime Shots for Drama

Wrap up the shoot with a final session during blue hour or nighttime to add dramatic, mood-filled images to the collection. These shots often stand out for their unique lighting and atmosphere.

Twilight Timing: Schedule this segment 30 minutes before sunset for a mix of natural and artificial light. Position the couple against the skyline or near water for reflections, using a tripod and long exposure to capture light trails or city glow.

Nighttime Creativity: If shooting after dark, use portable LED panels, string lights, or sparklers to illuminate the couple. Experiment with silhouettes, backlighting, or bokeh effects by shooting near streetlights or neon signs. Melbourne’s laneways or docklands offer perfect settings for these shots.

Safety First: Ensure the couple and team are visible if shooting in dimly lit or crowded areas. Use glow sticks or reflective gear to avoid accidents, and stick to well-lit paths or familiar locations.

By following this structured yet flexible sequence, photographers can navigate Melbourne’s dynamic environments while keeping the couple and their guests relaxed and engaged. Thoughtful grouping and timing ensure every moment—from intimate portraits to lively group shots—is captured with beauty and authenticity.

DSC09215-Enhanced-NR

Melbourne wedding photography pose guidance process

Melbourne Wedding Photography Pose Guidance Workflow

Capturing authentic, flattering wedding photos in Melbourne’s diverse settings—from urban streets to coastal vistas—requires thoughtful pose guidance. The right poses highlight the couple’s connection, complement their surroundings, and ensure they feel comfortable in front of the camera. This guide outlines a step-by-step workflow for directing poses, adapting to different locations, and encouraging natural interactions.

wedding photography melbourne

Building Comfort and Connection Before Shooting

The foundation of great poses starts long before the camera clicks. Begin by creating a relaxed atmosphere through casual conversation. Ask the couple about their relationship milestones, shared hobbies, or favorite memories to build rapport. This helps them feel at ease and encourages genuine smiles and laughter during the shoot.

For shy or awkward clients, start with simple, low-pressure poses. Have them stand side by side, holding hands or linking arms, while facing the camera. Use prompts like, “Pretend you’re sharing a secret” or “Whisper something funny in each other’s ears” to spark natural interactions. Gradually introduce movement, such as walking slowly toward the camera or spinning gently, to loosen stiffness and add dynamism.

Tip for Nervous Couples: Suggest they bring a prop like a bouquet, a vintage camera, or a handwritten love note to hold, giving them something to focus on beyond the camera.

Adapting Poses to Melbourne’s Iconic Locations

Melbourne’s unique backdrops—from graffiti-covered laneways to sandy beaches—demand poses that harmonize with the environment. In urban settings, lean into the city’s edgy vibe by having the couple sit on steps, lean against brick walls, or peek around corners. Use architectural lines to frame them, such as positioning them beneath an archway or beside a row of colorful doors.

For coastal shoots, embrace the beach’s casual energy. Have the couple walk barefoot along the shoreline, holding hands or dipping their toes in the water. Incorporate movement by asking them to toss sand into the air or playfully chase each other. If shooting near cliffs or rocky outcrops, use elevation to create dramatic angles, such as having one partner stand above the other or sit on a ledge while the other leans in close.

Natural Light Strategy: In outdoor settings, position the couple to face the light source (e.g., the sun during golden hour) to highlight their faces and create a warm glow. Use reflectors or diffusers to soften harsh shadows if needed.

Dynamic Poses for Movement and Storytelling

Static poses can feel stiff, so incorporate movement to add life to photos. Start with simple actions like having the couple walk toward the camera at a slow pace, holding hands or with arms around each other’s waists. Capture mid-stride shots to convey a sense of journey or adventure, especially in open spaces like parks or bridges.

For playful energy, direct the couple to interact spontaneously. Suggest actions like twirling, dipping, or lifting each other (if physically comfortable). Use prompts like, “Pretend you’re dancing at your reception” or “Act like you’re trying to steal a kiss without getting caught.” These cues encourage laughter and organic moments that feel authentic.

Creative Angle Tip: Shoot from low angles to emphasize height differences or from above for a bird’s-eye view of the couple lying on the grass or sand.

Intimate Poses for Emotional Depth

Close-up shots that capture the couple’s connection require subtle, intentional posing. Have them sit or stand close enough that their shoulders or hips touch, creating a sense of unity. Direct one partner to rest their head on the other’s shoulder or chest, while the other gazes softly at them or the horizon.

For forehead-to-forehead poses, ask the couple to close their eyes and take a deep breath, fostering a moment of quiet intimacy. Use gentle prompts like, “Think about your favorite memory together” or “Imagine it’s just the two of you in this moment” to deepen their emotional expression.

Hand Placement Guidance: Avoid stiff or awkward hand positions by suggesting natural gestures, such as one partner running their fingers through the other’s hair, holding a bouquet, or gently touching their face.

Group Poses for Wedding Parties and Families

When photographing larger groups, organization is key to avoiding chaos. Start by arranging family members or bridesmaids/groomsmen in staggered rows, with taller individuals at the back and shorter ones in front. Use props like chairs or benches to create levels, ensuring everyone is visible in the frame.

For casual group shots, direct the couple to stand in the center while others gather around them in a loose semicircle. Encourage interactions like hugging, high-fiving, or linking arms to create a lively, connected氛围. Use prompts like, “Cheer for the newlyweds!” or “Everyone pretend to steal the bride’s bouquet” to generate spontaneous reactions.

Focus Tip: When shooting groups, use a wide aperture (e.g., f/2.8 or f/4) to keep the couple in sharp focus while slightly blurring the background, drawing attention to the main subjects.

Final Checks for Flattering Angles and Lighting

Before wrapping up, review poses to ensure they flatter the couple’s features and work with the lighting. Check for double chins by having them tilt their chins slightly downward or extend their necks forward. Adjust the couple’s body orientation to minimize unflattering shadows, such as turning them 45 degrees from the light source if shooting in harsh sunlight.

Encourage the couple to shift their weight onto one leg or cross their ankles to create a more relaxed, natural stance. For seated poses, have them sit at the edge of a chair or step to avoid slouching, and angle their bodies toward the camera for a slimming effect.

Lighting Reminder: If shooting indoors, position the couple near windows for natural fill light, or use a reflector to bounce light onto their faces if the room is dimly lit.

By following this workflow, photographers can guide couples through poses that feel authentic, flattering, and tailored to Melbourne’s unique settings. Thoughtful direction transforms awkward moments into timeless memories, ensuring every photo tells a story of love and connection.

DSC09206

Steps for adjusting the lighting for wedding photography in Melbourne

Melbourne Wedding Photography Lighting Adjustment Guide

Mastering lighting for wedding photography in Melbourne’s diverse settings—from sunlit beaches to dimly lit venues—requires adaptability and technical precision. Proper lighting enhances mood, highlights details, and ensures the couple looks their best in every shot. This guide breaks down step-by-step adjustments for common lighting scenarios, helping photographers achieve professional results without relying on specific equipment brands or budget constraints.

wedding photography melbourne

Natural Light Optimization for Outdoor Shoots

Melbourne’s unpredictable weather demands flexibility when working with natural light. Start by assessing the time of day and weather conditions. For midday shoots under harsh sunlight, position the couple in shaded areas like under trees or near buildings with overhangs. Use a reflector to bounce soft light onto their faces, reducing shadows and creating a balanced look.

During golden hour—the hour before sunset—take advantage of warm, directional light. Face the couple toward the sun to capture golden highlights in their hair and a natural glow on their skin. If the sun is too intense, use a diffuser to soften its intensity while maintaining warmth. For backlit shots, adjust exposure settings to prevent silhouettes, or embrace the dramatic effect by framing the couple against the sun with a wide aperture for bokeh.

Tip for Cloudy Days: Overcast skies act as a natural diffuser, providing even lighting. Use this to your advantage by shooting wide-angle shots of the couple in open spaces, ensuring their faces are well-lit without harsh contrasts.

Indoor Venue Lighting Adjustments

Indoor venues like banquet halls, churches, or studios often have mixed lighting sources, including overhead fluorescents, chandeliers, or colored uplighting. Start by turning off all automatic settings on your camera to maintain control over exposure and white balance. Use a gray card or white balance tool to calibrate colors accurately, especially in venues with tungsten or LED lighting that casts warm or cool tones.

For dimly lit spaces, increase ISO settings gradually to capture ambient light without introducing excessive noise. Pair this with a wide aperture (e.g., f/1.8 or f/2.8) to let in more light and create a shallow depth of field, isolating the couple from the background. If flash is necessary, bounce it off ceilings or walls to diffuse harsh direct light, or use a flash diffuser for softer results.

Venue-Specific Strategy: In venues with large windows, position the couple near the light source during the day for natural fill light. At night, use window reflections or city lights outside as creative backdrops, adjusting shutter speed to capture motion blur if desired.

Mixed Lighting Scenarios: Balancing Natural and Artificial Sources

Combining natural and artificial light—such as shooting indoors near windows during daylight or using flash outdoors at dusk—requires careful balancing. Start by setting your white balance to “daylight” or “auto” as a baseline, then fine-tune using custom settings if colors appear off. For example, if window light is cool and indoor tungsten light is warm, adjust white balance to neutralize extremes or embrace the contrast for artistic effect.

When using flash outdoors, sync it with ambient light to avoid overpowering natural tones. Set flash power to a low output (e.g., 1/16 or 1/32) and use high-speed sync if shooting in bright conditions to maintain a natural look. For indoor-outdoor transitions, carry a portable LED panel or continuous light to supplement natural light during cloudy spells or in shaded areas.

Creative Technique: Use gels on flashes or LEDs to match artificial light with ambient tones. For instance, a blue gel can mimic twilight skies, while an orange gel can warm up cool indoor lighting.

Low-Light and Nighttime Shooting Techniques

Melbourne’s evening scenes—from waterfront promenades to rooftop bars—offer romantic backdrops but pose challenges for lighting. In low-light conditions, prioritize stability by using a tripod to avoid camera shake. Switch to manual mode and adjust shutter speed, aperture, and ISO to capture enough light without sacrificing image quality.

For nighttime portraits, use a combination of ambient light and supplemental sources. Position the couple near streetlights, neon signs, or lampposts for natural fill light, then use a flash or LED panel to highlight their faces. Experiment with long exposures to capture light trails from passing cars or ferries, adding dynamic elements to the composition.

Safety Note: When shooting in dark or crowded areas, ensure the couple remains visible to the team and avoid obstructing pathways for others.

Dynamic Lighting for Creative Portraits

To add drama or whimsy to wedding portraits, manipulate light creatively. Use a prism or crystal to refract light onto the couple’s faces, creating rainbow-like patterns or lens flares. For bokeh effects, shoot with a wide aperture and position the couple near light sources like fairy lights, candles, or city lights.

In studio-style setups, experiment with backlighting by placing a light source behind the couple to outline their silhouette. Combine this with a front-facing light at a lower intensity to reveal facial details without losing the ethereal glow. Use colored gels or LED strips to cast hues like gold, pink, or blue for mood-specific shots.

Tip for Movement: If the couple is dancing or walking, use rear-curtain sync flash to freeze their motion while capturing light trails behind them, adding energy to the image.

By mastering these lighting adjustments, photographers can adapt to Melbourne’s ever-changing environments, ensuring every wedding photo tells a story with clarity, emotion, and artistic flair. Whether shooting under bright skies or starlit nights, thoughtful lighting techniques transform ordinary moments into extraordinary memories.