81909-Wu-1468

Time arrangement for the preparation stage before wedding photography in Melbourne

Melbourne Wedding Photography Pre-Shoot Checklist: Timing and Tasks for a Flawless Day

Preparing for a wedding photoshoot in Melbourne requires meticulous planning to ensure every detail aligns with the couple’s vision and the city’s unpredictable weather. From logistical coordination to creative brainstorming, here’s how to structure the weeks and days leading up to the shoot for a seamless experience.

wedding photography melbourne

Two Months Prior: Finalizing Logistics and Creative Direction

At this stage, focus on securing essential elements and refining the artistic approach.

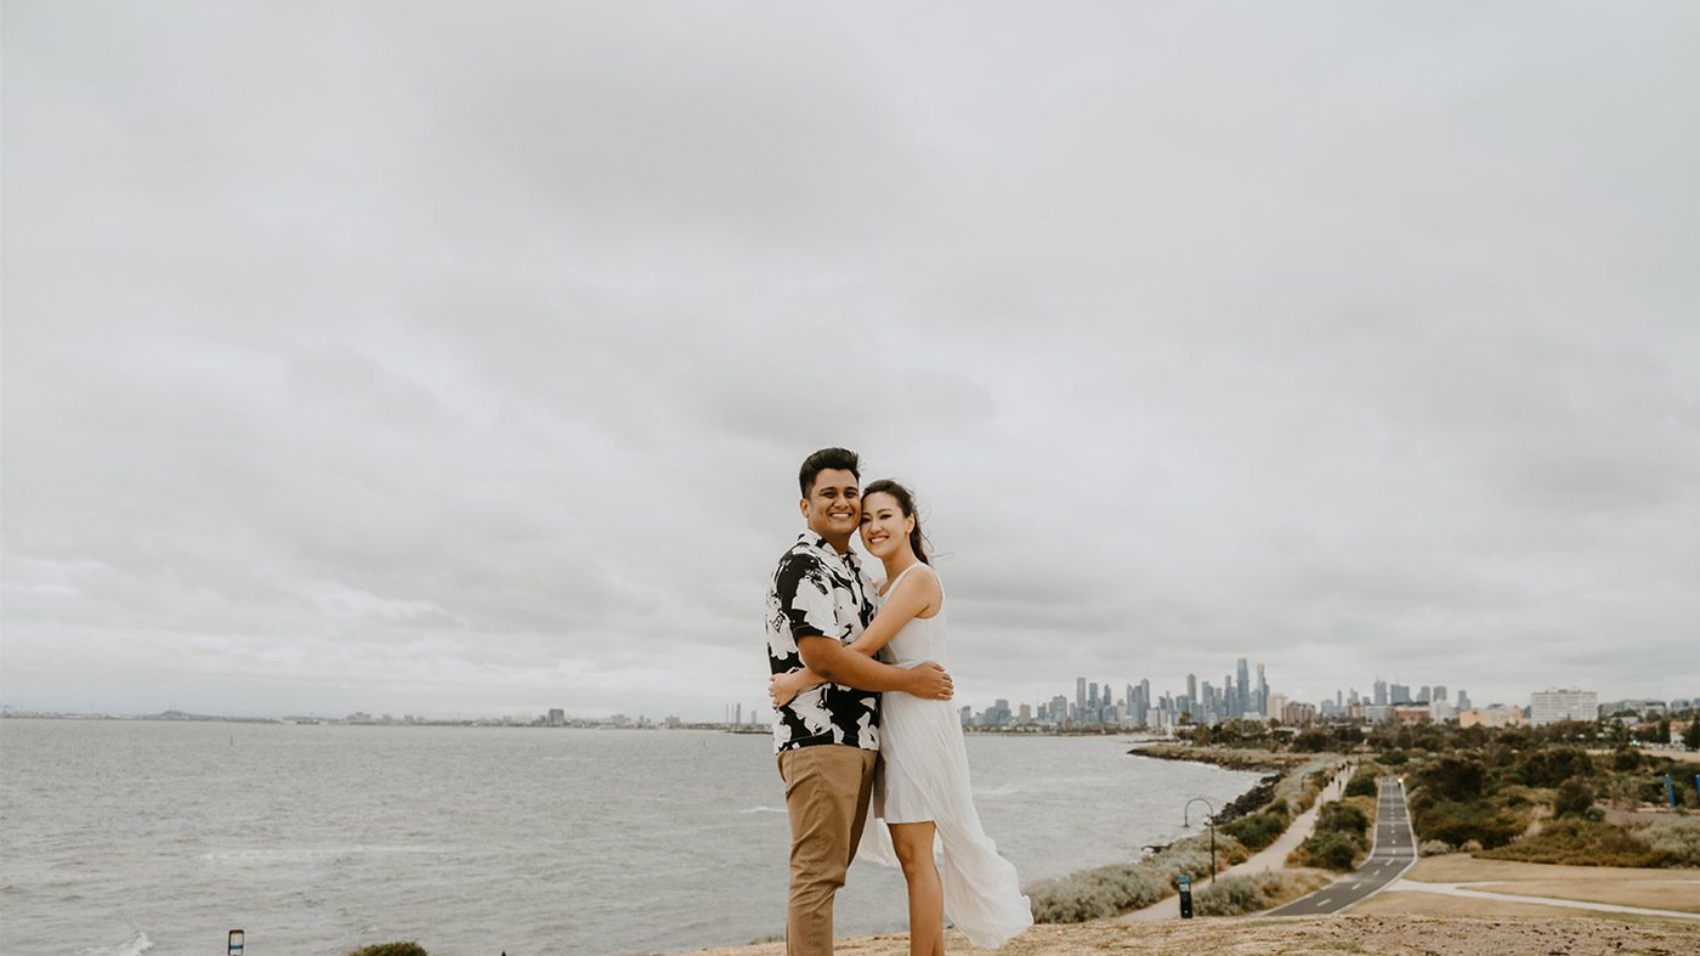
  • Location Scouting: Research Melbourne’s diverse settings, from coastal vistas like St Kilda Beach to historic landmarks such as Parliament House. Visit potential sites at different times of day to assess lighting, crowd levels, and accessibility.
  • Permits and Permissions: Check if locations require permits (e.g., Royal Botanic Gardens or Brighton Beach’s bathing boxes). Apply early to avoid delays.
  • Mood Board Creation: Collaborate with the couple to build a visual inspiration board. Include color palettes, poses, and themes (e.g., “urban romance” or “nature-inspired”). This ensures alignment on aesthetic goals.

Weather Backup: Identify indoor venues with natural light, such as Melbourne Museum’s atrium or Carlton Gardens’ conservatory, for rainy-day alternatives.

One Month Prior: Wardrobe, Accessories, and Timeline Refinement

With the location locked in, shift attention to wardrobe coordination and scheduling.

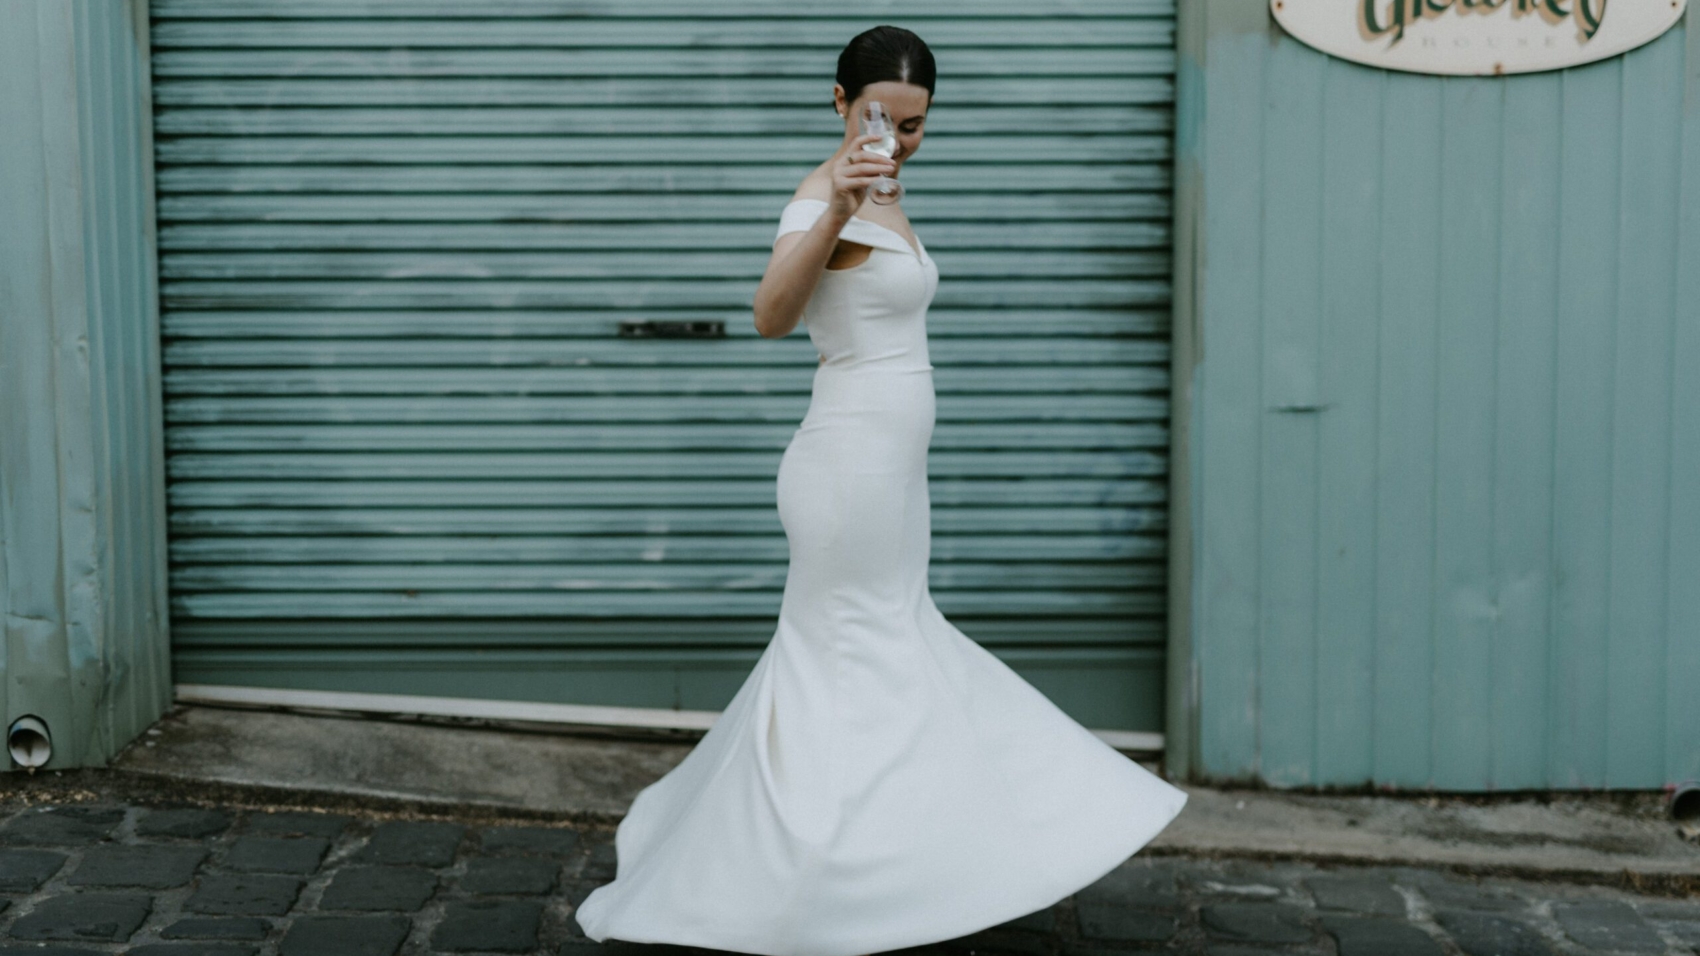
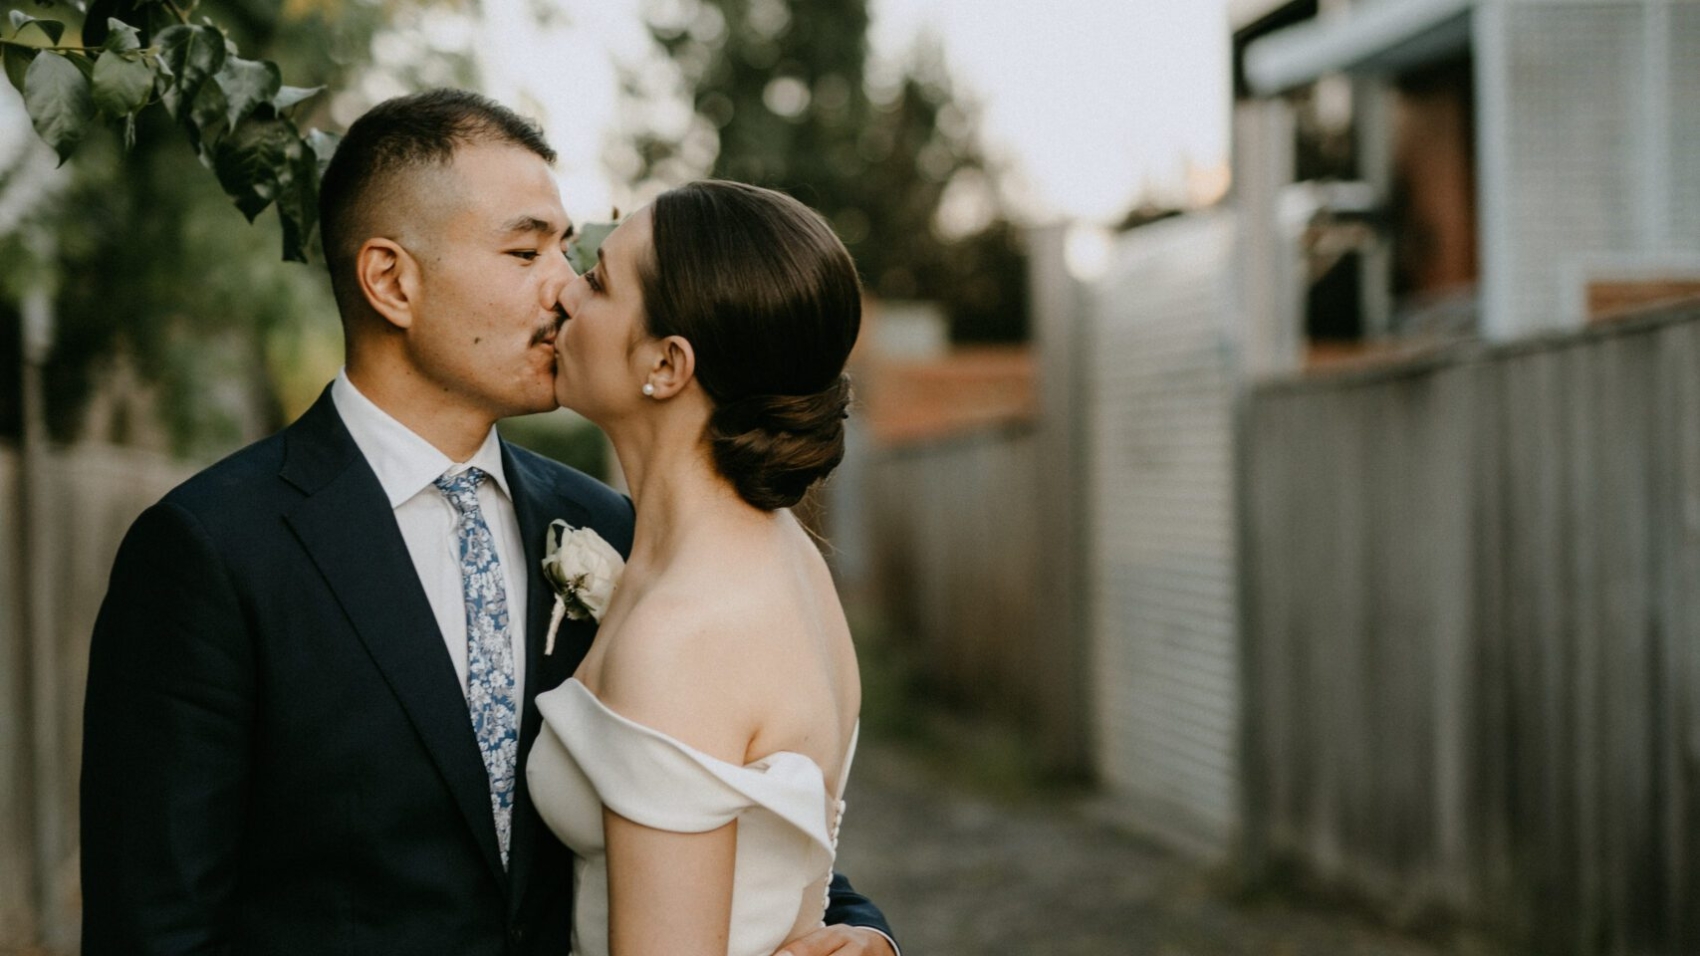
  • Outfit Selection: Advise the couple to choose outfits that complement the setting. For coastal shoots, flowing fabrics work well; for urban scenes, structured silhouettes add contrast. Encourage trying on outfits a week prior to check fit and comfort.
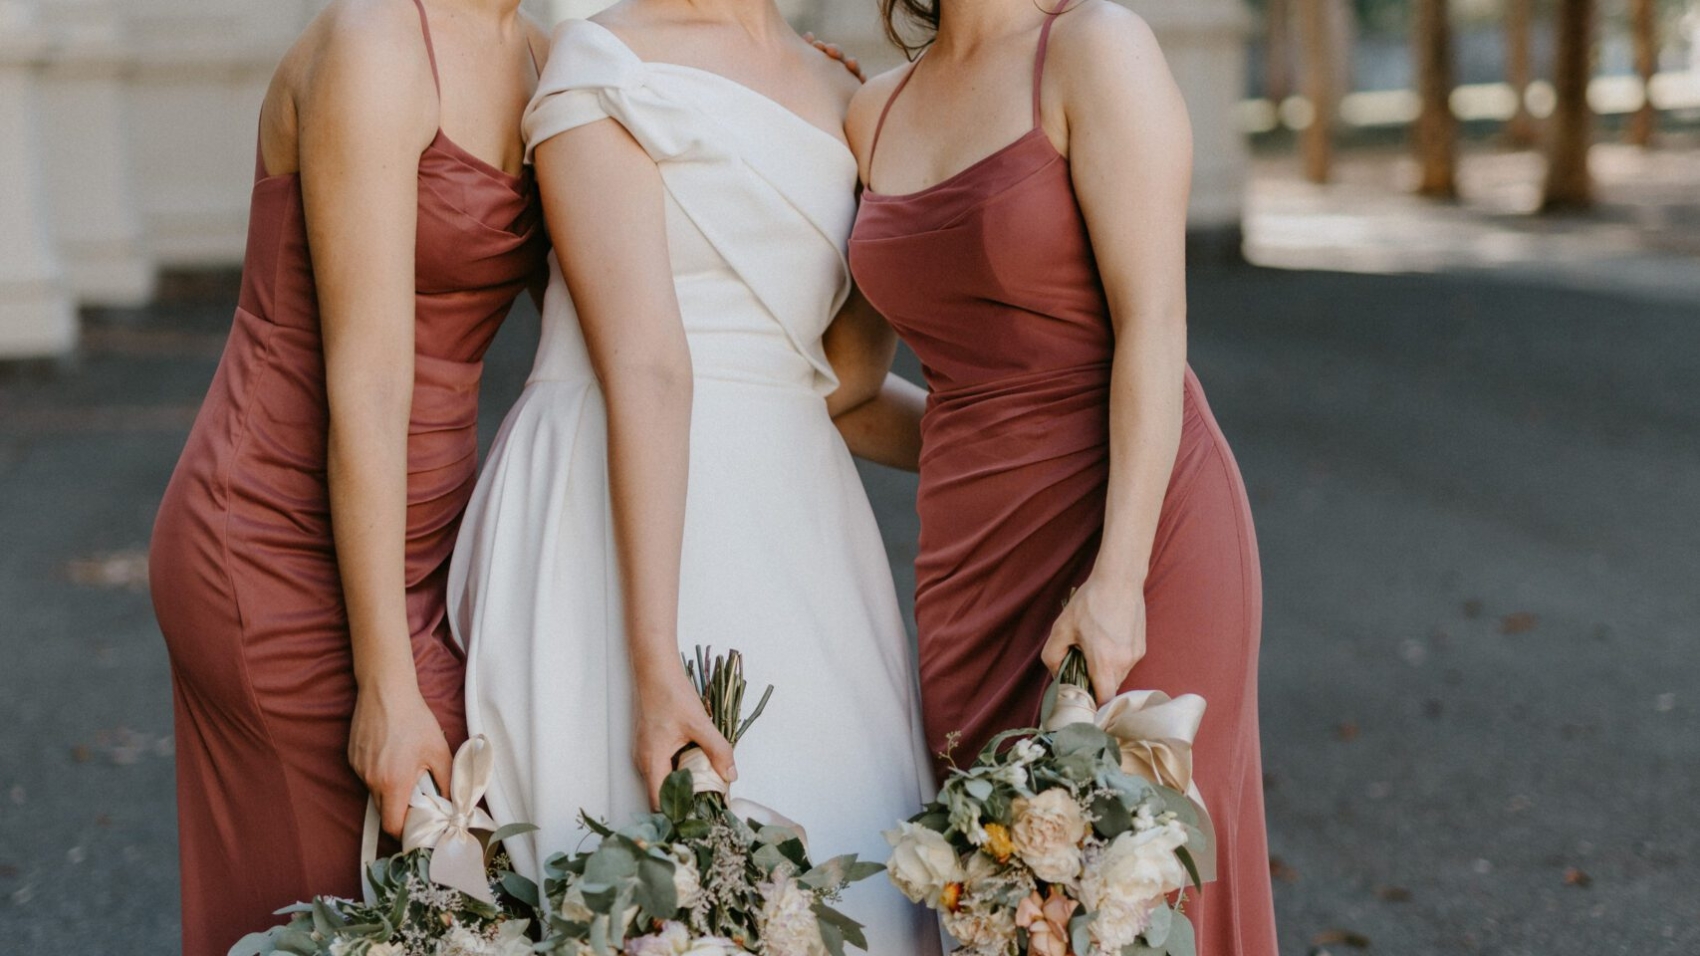
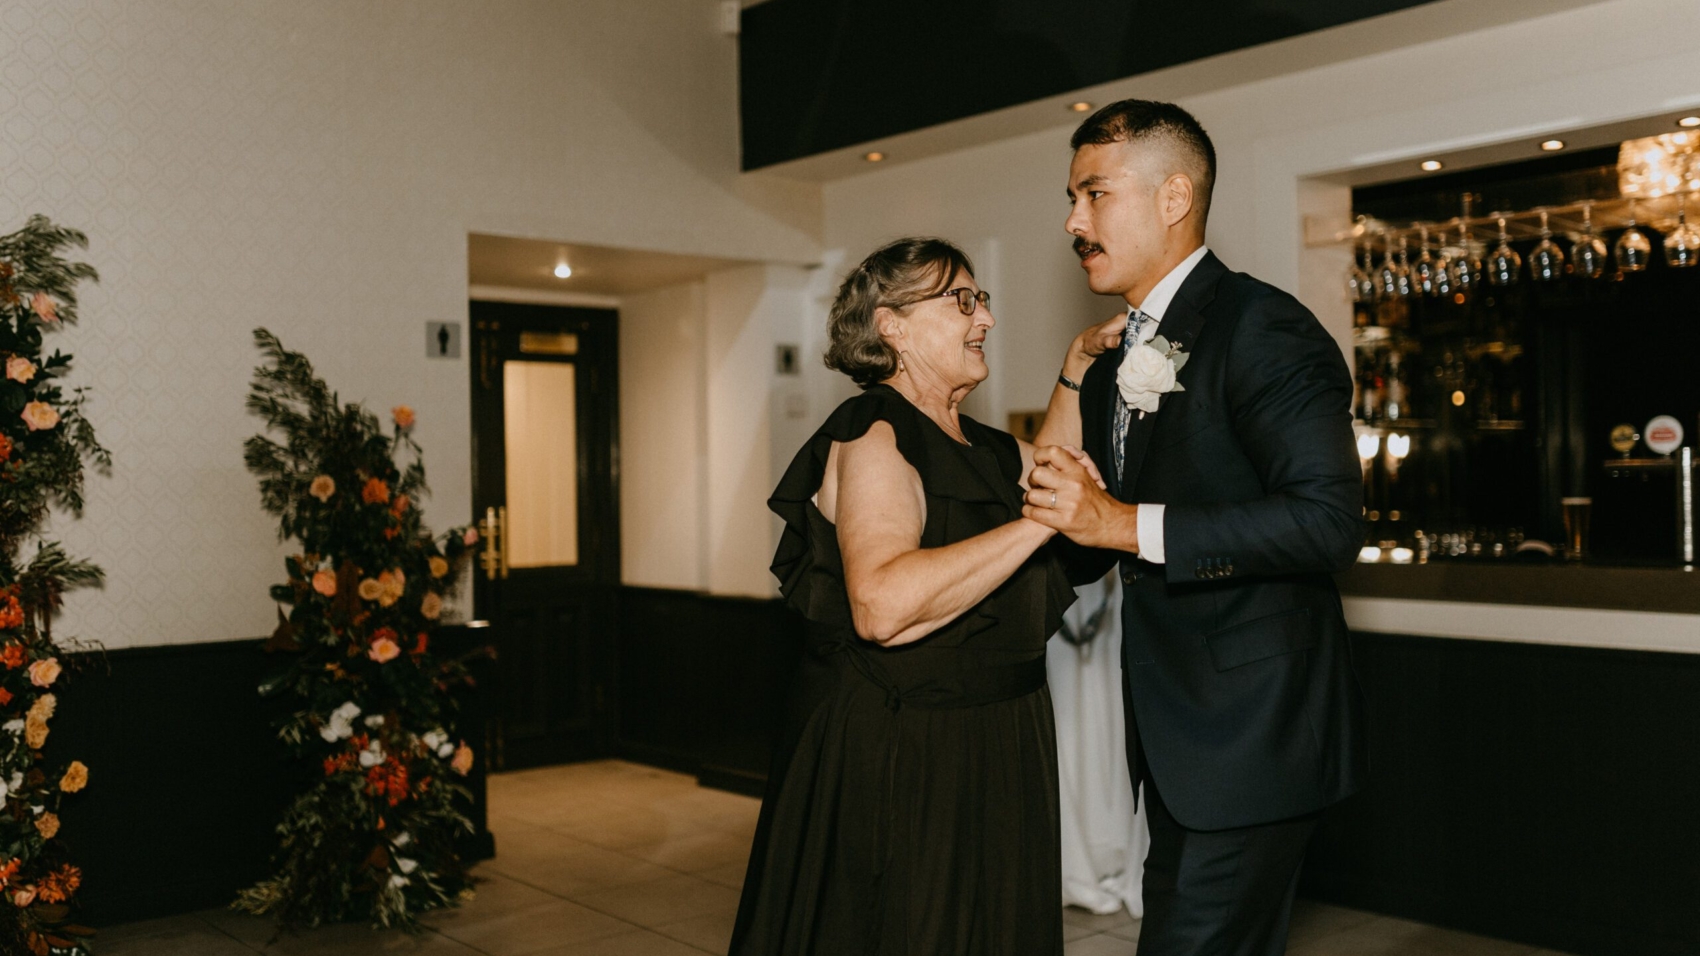
  • Accessory Coordination: Discuss props like veils, bouquets, or heirloom items (e.g., grandparent’s watch) that add personal flair. Coordinate colors to avoid clashing with backgrounds.
  • Day-Of Timeline Draft: Create a rough schedule, allocating time for travel, hair/makeup, and shoots. Factor in Melbourne’s traffic by adding buffer periods between locations (e.g., 15 minutes extra for CBD-to-Yarra Valley trips).

Communication: Share the draft timeline with vendors (florists, stylists) and the wedding party to ensure everyone is informed.

Two Weeks Prior: Final Checks and Weather Monitoring

As the shoot nears, prioritize flexibility and contingency planning.

  • Weather Tracking: Use Melbourne-specific forecasts (e.g., BOM or Weatherzone) to monitor conditions. If rain is predicted, adjust outdoor segments to morning or evening slots when light is softer.
  • Equipment Test: If the photographer is self-sufficient, verify cameras, lenses, and lighting gear. For couples hiring professionals, confirm equipment is in working order and backup gear is available.
  • Emergency Kit Prep: Pack essentials like safety pins, bobby pins, tissue, and a portable steamer for last-minute outfit fixes. Include snacks and water to keep energy levels high.

Venue Walkthrough: Revisit key locations with the photographer to finalize shot lists and identify shaded areas for midday shoots.

One Week Prior: Confirmations and Last-Minute Adjustments

The final week is about tying up loose ends and ensuring all parties are prepared.

  • Vendor Confirmations: Reach out to hair/makeup artists, florists, and transportation services to confirm arrival times. Share the updated timeline with all vendors.
  • Final Fittings: Schedule a quick try-on session for the couple to ensure outfits fit perfectly. Address any alterations needed for dresses, suits, or shoes.
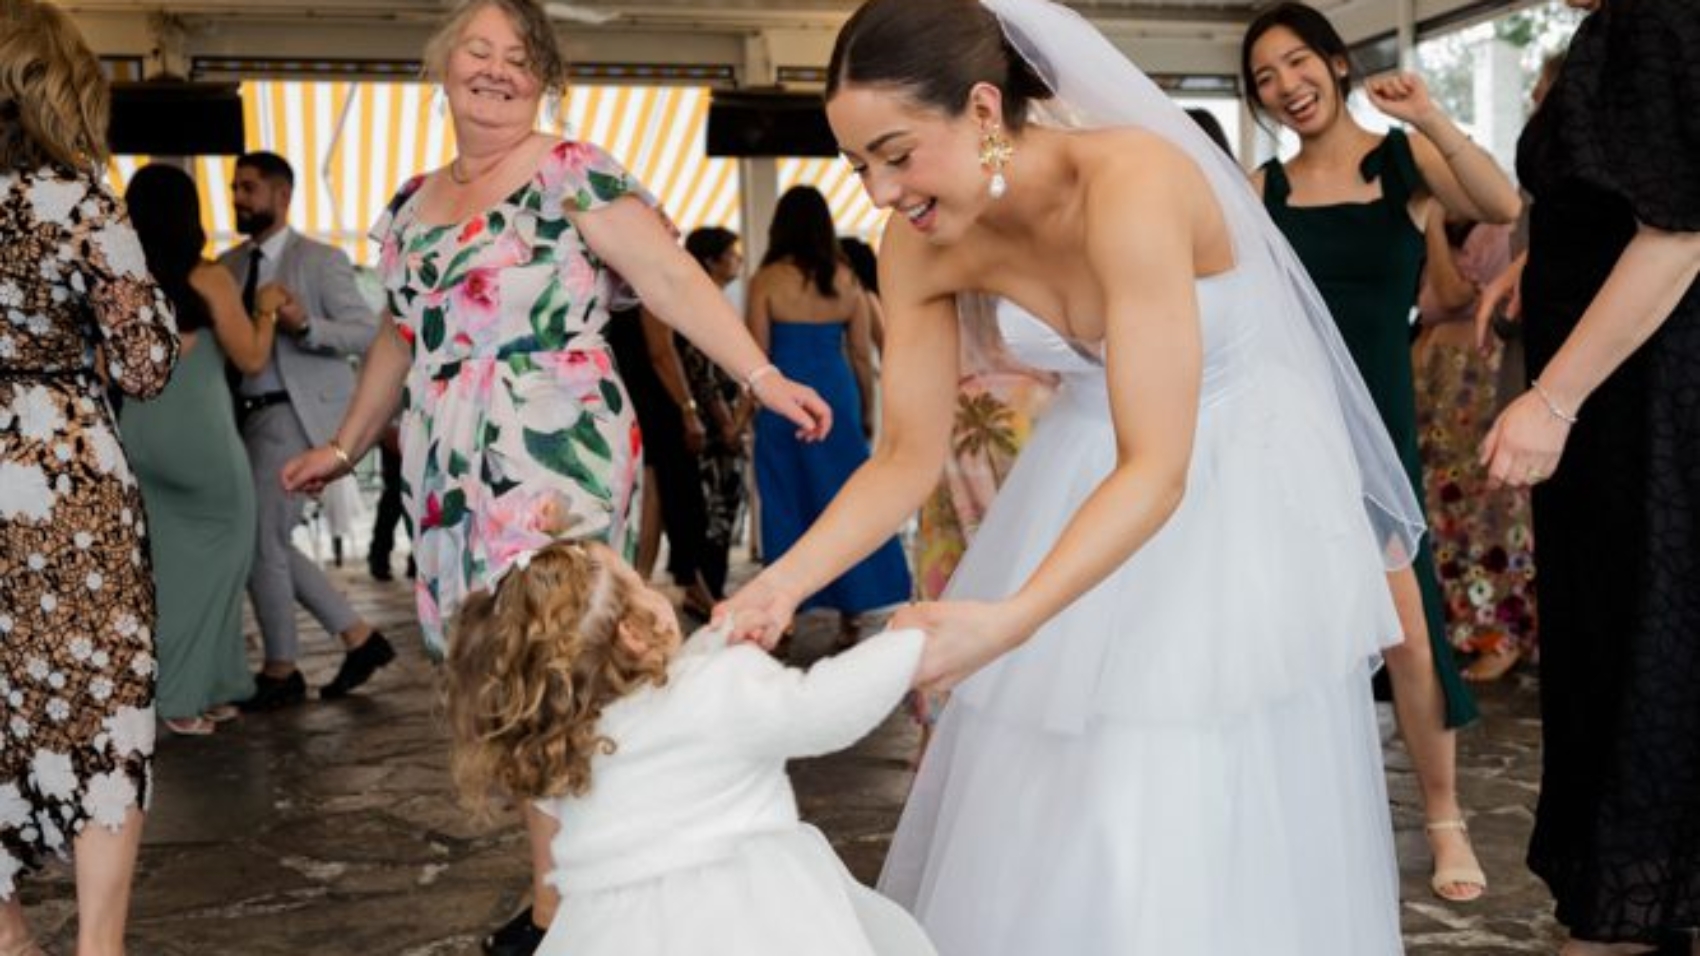
  • Guest Coordination: If including family or bridal party in shots, assign a point person to gather everyone on time. Provide clear instructions on attire and meeting points.

Photographer Briefing: Share a list of “must-have” shots (e.g., parent-child portraits, ring details) and prioritize them in case time runs short.

Day Before the Shoot: Relaxation and Preparation

The eve of the photoshoot should focus on rest and minor logistical checks.

  • Skin and Hair Prep: Advise the couple to hydrate, avoid tan lines, and get a good night’s sleep. For hair, recommend washing it the night before to reduce frizz.
  • Packing Checklist: Verify all items are packed, including outfits, accessories, touch-up makeup, and the emergency kit. Charge camera batteries and clear memory cards.
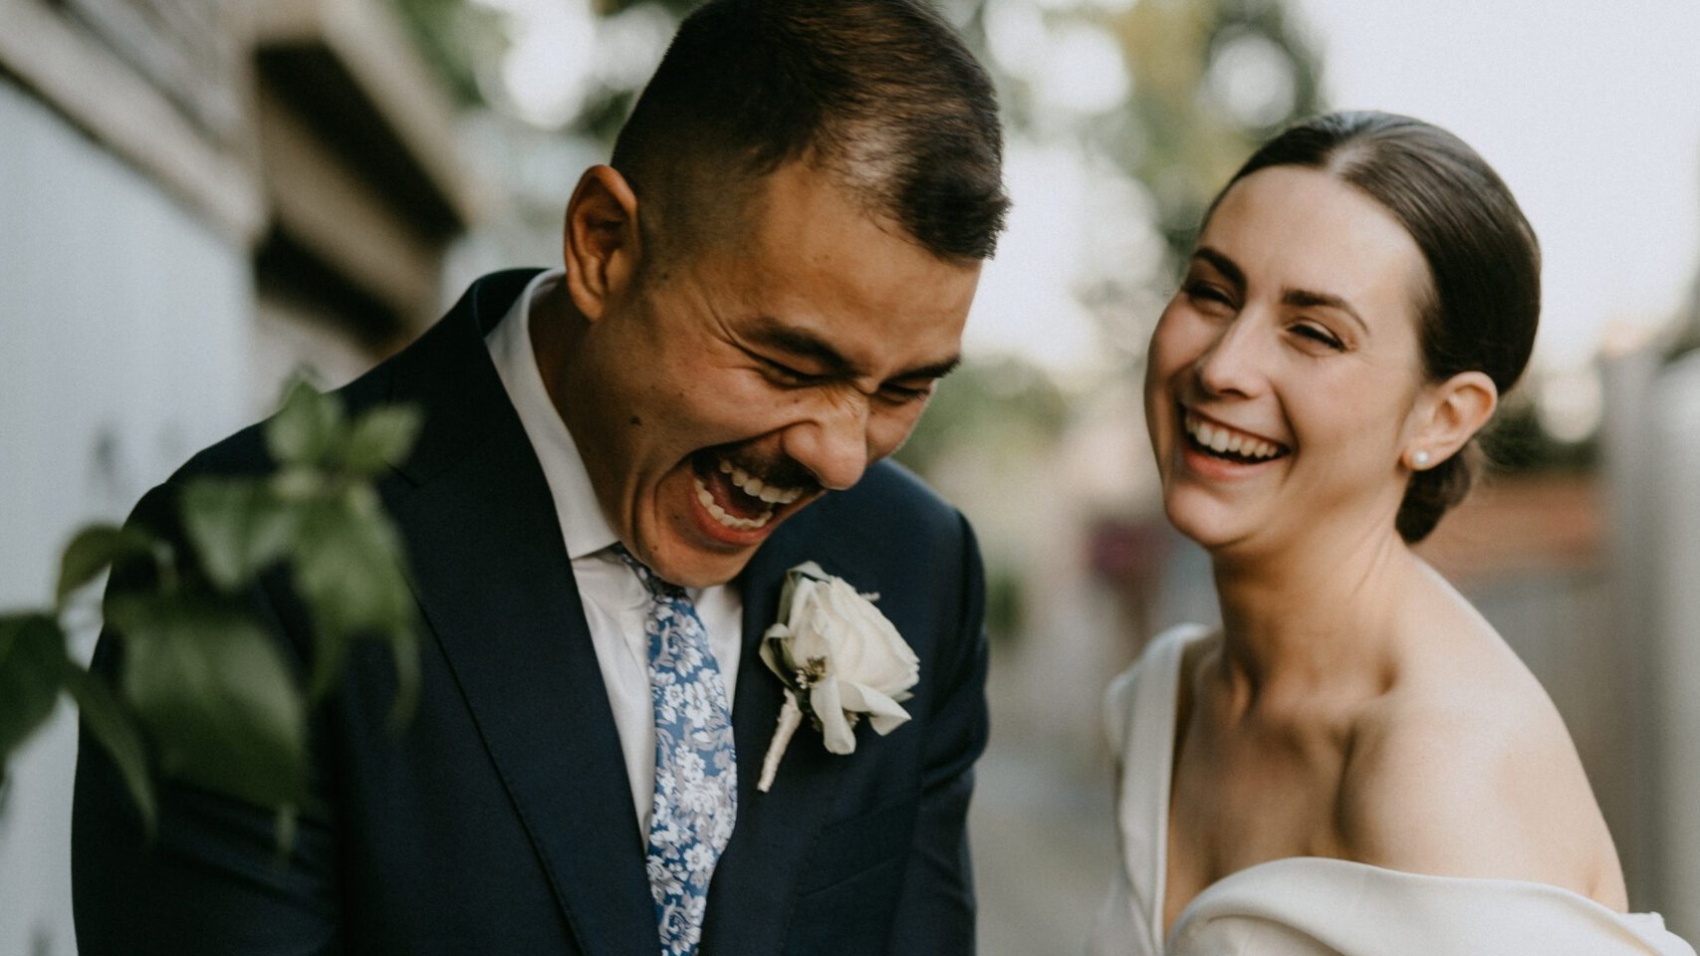
  • Mental Preparation: Encourage the couple to discuss their comfort levels with posing. Remind them to enjoy the moment and trust the photographer’s guidance.

Transport Test: If renting a car, do a quick drive to the first location to gauge travel time and parking availability.

By breaking down tasks into manageable phases and prioritizing communication, couples can minimize stress and maximize creativity on their wedding photoshoot day. Melbourne’s dynamic environment demands adaptability, but thorough preparation ensures every fleeting moment is captured beautifully.

81909-Wu-1393

The blooming period schedule for cherry blossom wedding photos in Melbourne during spring

Melbourne Spring Cherry Blossom Wedding Photography: Timing Guide for a Dreamy Shoot

Melbourne’s spring transforms the city into a floral paradise, with cherry blossoms stealing the spotlight for their ephemeral beauty. The brief blooming window—often just two weeks—demands precise planning to capture these ethereal moments. Here’s how to align your wedding photography schedule with nature’s fleeting artistry.

wedding photography melbourne

Peak Bloom Periods: When to Capture the Magic

Cherry blossoms in Melbourne typically peak between late September and early October, though exact timing varies annually due to weather fluctuations. The iconic CherryHill Orchards in the Yarra Valley hosts an annual Cherry Blossom Festival from mid-September to early October, offering a concentrated burst of pink and white blooms.

  • Early Bloomers: Some varieties, like the wild mountain cherry, may start flowering in early September. Scout locations like Banksia Park or Alowyn Gardens for early-season shots.
  • Prime Window: Late September to early October is ideal for most cultivated varieties. The festival at CherryHill coincides with this period, featuring over 2,000 cherry trees in full bloom.
  • Late Bloomers: A few trees may linger into mid-October, especially in sheltered areas like Monsalvat or Malvern East’s Darling Road.

Pro Tip: Check CherryHill’s social media or local gardening forums for real-time updates. A sudden heatwave or cold snap can shorten the blooming period by days.

Lighting Strategies: Maximizing Golden Hour Glow

Melbourne’s spring sunlight is softer than summer’s, but timing remains critical for flattering portraits.

  • Morning Sessions: Arrive at sunrise (around 6:30 AM in late September) to photograph blossoms against a golden backdrop. The low angle of the sun creates a delicate balance of light and shadow, perfect for highlighting intricate petal details.
  • Afternoon Transitions: As the sun rises, move to shaded areas like under cherry tree canopies or near historic buildings (e.g., Parliament House). Diffused light reduces harsh contrasts on faces and dresses.
  • Evening Magic: Stay until dusk (around 7:00 PM in early October) for a romantic “blue hour” effect. Pair twilight shots with city lights in the background, such as from Brighton Beach’s colorful bathing boxes.

Weather Considerations: Overcast days soften light evenly, ideal for group shots. If rain is forecast, use clear umbrellas to add whimsy or retreat to covered venues like Carlton Gardens’ conservatory.

Logistical Coordination: Navigating Crowds and Locations

Cherry blossom hotspots draw crowds, especially during festivals. Plan strategically to avoid delays.

  • Early Arrival: Reach CherryHill Orchards by 8:00 AM to secure parking and quiet spots before the 10:00 AM rush. Weekdays are less crowded than weekends.
  • Alternate Venues: If CherryHill is packed, consider Werribee Mansion’s gardens or Dandenong Ranges’ Alfred Nicolas Memorial Gardens, which offer secluded cherry groves.
  • Transport Tips: Use private vehicles to travel between sites like St Kilda and Yarra Valley. Public transport may add unexpected delays during peak bloom.

Backup Plan: Have a list of indoor venues with large windows, such as Melbourne Museum’s atrium, to shoot if weather turns gloomy.

Cultural Touches: Incorporating Local Flavors

Enhance your photoshoot with Melbourne’s unique offerings.

  • Festival Activities: At CherryHill, capture moments with cherry-themed treats like cider or ice cream. A couple sharing a cone under a blossom tree adds a playful, local touch.
  • Historic Contrasts: Pair cherry blossoms with Melbourne’s colonial architecture. Photograph the bride near St Patrick’s Cathedral or the groom leaning against Hosier Lane’s graffiti walls for a blend of old and new.
  • Natural Framing: Use blossom branches to frame shots of the couple at Flinders Street Station or Docklands’ modern piers, creating depth and context.

Seasonal Synergy: Combine cherry blossoms with other spring flowers like tulips at Tesselaar Tulip Farm or lavender at Red Hill Lavender Farm for a multi-floral backdrop.

By aligning your schedule with bloom cycles, lighting conditions, and local culture, you can transform Melbourne’s spring into a visually cohesive narrative. Flexibility, early planning, and creativity are key to immortalizing these transient moments.

81909-Wu-1743

The prime time schedule for wedding photography in Melbourne within one day

Maximizing Your Melbourne Wedding Photography Day: Timing Strategies for Golden Hour Magic

Melbourne’s dynamic weather and ever-changing light conditions demand strategic planning to capture stunning wedding photos. The city’s “golden hours”—the periods shortly after sunrise and before sunset—offer soft, flattering light that enhances skin tones and creates dreamy backgrounds. However, coordinating these windows with ceremony times, travel between locations, and group shots requires precision. Here’s how to structure your day for photographic excellence.

wedding photography melbourne

Morning Golden Hour: Soft Light for Intimate Moments

Melbourne’s sunrise golden hour typically lasts from 30 minutes before to 30 minutes after the sun breaks the horizon. This timeframe is ideal for intimate portraits, detail shots of the dress or suit, and quiet moments between the couple.

  • Start Early: Schedule your first photoshoot 45 minutes before sunrise to allow time for setup and adjustments. Early mornings also avoid crowds at popular locations like St Kilda Beach or the Royal Botanic Gardens.
  • Focus on Details: Use this period to photograph rings, bouquets, and accessories. The low angle of the sun casts gentle shadows, adding depth without harsh contrasts.
  • Couple Portraits: Plan 15–20 minutes for posed shots with the couple. The calm morning light minimizes squinting and creates a romantic atmosphere.

Midday Challenges and Creative Solutions

Between 10 AM and 3 PM, Melbourne’s sunlight becomes harsh, casting strong shadows and creating overexposure risks. Instead of forcing outdoor shots, pivot to indoor or shaded locations.

  • Indoor Venues: Utilize the venue’s architecture, such as stained-glass windows in historic churches or modern interiors in urban lofts. Natural light filtering through large windows can mimic golden hour qualities.
  • Shaded Areas: Seek out tree-lined streets in Fitzroy or undercover markets like Queen Victoria Market. Diffused light reduces blemishes and keeps colors vibrant.
  • Group Photos: Schedule family and bridal party shots during this time. Shade ensures everyone’s facial features are evenly lit, avoiding awkward shadows.

Afternoon Transition: Preparing for Evening Magic

As the sun begins its descent, the light softens again, creating a second golden hour. This period is perfect for grand outdoor scenes and dynamic couple shots.

  • Location Scouting: Identify spots with unobstructed views of the horizon, such as Brighton Beach’s colorful bathing boxes or the Melbourne Skydeck. Arrive 30 minutes before sunset to set up.
  • Dynamic Poses: Use the warm, directional light for dramatic silhouettes or backlit portraits. Encourage movement, like walking hand-in-hand, to add energy to the frame.
  • Blue Hour Opportunity: After sunset, the sky transitions to a deep blue known as “blue hour.” Capture moody cityscapes or twilight portraits with artificial lights for contrast.

Weather Adaptability: Working Around Melbourne’s Climate

Melbourne’s notorious “four seasons in one day” weather requires flexibility. Cloudy skies, sudden rain, or wind can disrupt plans, but they also offer unique photographic opportunities.

  • Overcast Days: Diffused light from clouds eliminates harsh shadows, making it ideal for group shots and detail photography. Embrace moody tones by shooting in grayscale or adjusting white balance for cooler tones.
  • Rainy Scenes: Use clear umbrellas or waterproof gear to capture reflective puddles and romantic drizzle. Indoor venues with large windows can still benefit from soft, natural light.
  • Wind Management: Secure veils and loose fabrics with clips. Position the couple facing away from strong gusts to avoid disheveled hair. Use faster shutter speeds to freeze motion.

Logistical Coordination: Timing Between Locations

Travel time between Melbourne’s iconic spots—such as moving from the CBD to the Yarra Valley—can eat into your golden hours. Plan routes efficiently to maximize shooting time.

  • Buffer Periods: Allow 15–20 minutes between locations for traffic delays or last-minute adjustments. Use this buffer to capture candid moments in transit, like the couple laughing in the car.
  • Car Lighting: If traveling during midday, use the vehicle’s interior light for quick detail shots of rings or invitations. Roll down windows for natural light portraits during stops.
  • Driver Communication: Coordinate with your photographer and driver to ensure timely arrivals. Share the day’s itinerary with all parties to avoid confusion.

Final Touches: Wrapping Up the Day

As the evening golden hour fades, prioritize shots that require minimal setup. Night photography in Melbourne’s illuminated laneways or against the city skyline can add a cinematic finish.

  • Night Portraits: Use off-camera flashes or string lights to create bokeh effects. Position the couple near streetlamps or neon signs for a vibrant backdrop.
  • Farewell Shots: Capture the couple’s exit with sparklers or glow sticks. Long exposures can turn moving lights into artistic trails.
  • Backup Plan: If weather worsens, pivot to indoor venues with dramatic lighting, such as art galleries or industrial warehouses.

By aligning your schedule with Melbourne’s natural light cycles and weather patterns, you can transform a single day into a visually cohesive story. Flexibility, preparation, and creativity are key to overcoming the city’s unpredictable conditions and capturing timeless memories.

81909-Wu-1738

The schedule for taking sunset wedding photos at Melbourne Beach

Melbourne Beach Sunset Wedding Photography: Timing Guide for Golden Hour Magic

Melbourne’s coastal stretches offer dramatic backdrops for sunset wedding photography, with shifting tides, soft light, and moody skies. Capturing these moments requires precision timing, awareness of seasonal light patterns, and adaptability to coastal weather. This guide breaks down the essentials for planning a flawless beach sunset shoot.

wedding photography melbourne

Understanding Melbourne’s Sunset Timeline

Melbourne’s latitude and seasonal tilt dictate how quickly daylight fades. The “golden hour”—the period shortly after sunrise or before sunset—varies in duration and intensity across seasons.

Seasonal Sunset Variations:

  • Summer (December–February): Sunset occurs between 8:30 PM and 9:00 PM. Golden hour stretches for 45–60 minutes, with warm, golden tones.
  • Autumn (March–May): Sunset shifts to 6:30 PM–7:30 PM. Light softens earlier, offering pastel hues ideal for romantic portraits.
  • Winter (June–August): Sunset falls as early as 5:00 PM. Golden hour is brief (20–30 minutes), but the low sun angle creates long shadows and dramatic contrasts.
  • Spring (September–November): Sunset returns to 7:00 PM–8:00 PM. Light balances warmth and clarity, perfect for vibrant yet natural shots.

Practical Tips:

  • Use apps like Sun Surveyor or The Photographer’s Ephemeris to track sun angles and exact sunset times for your chosen date.
  • Arrive at the beach 90 minutes before sunset to scout locations, set up gear, and account for travel delays.
  • Communicate timing with your photographer in advance. Discuss backup plans if clouds obscure the sun.

Choosing the Right Beach for Sunset Shoots

Melbourne’s beaches vary in accessibility, crowd levels, and landscape features. Selecting a location that aligns with your aesthetic and logistical needs is key.

Popular Coastal Spots:

  • Brighton Beach: Known for its colorful bathing boxes, this spot offers playful frames. Shoot during low tide to include the boxes and wet sand reflections.
  • St Kilda Beach: The pier and promenade provide urban contrasts. Time your shoot to capture the sun dipping behind the city skyline.
  • Mornington Peninsula Beaches (Sorrento, Portsea): These quieter stretches offer rugged cliffs and unobstructed horizons. Ideal for couples seeking seclusion.
  • Half Moon Bay (Black Rock): The historic Fort Black Rock adds texture. Use the fort’s arches or grassy dunes for varied compositions.

Lighting and Composition Considerations:

  • Position subjects with the sun behind them for silhouettes or backlighting. Use reflectors to bounce light onto faces if shooting into the sun.
  • Tides impact accessibility. High tide may shrink the beach, while low tide reveals tidal pools or sandbars for creative framing.
  • Wind direction matters. Onshore breezes can tousle hair or dresses; offshore winds keep hairstyles intact but may chill exposed skin.

Practical Tips:

  • Check tidal charts for your shoot date. Aim for low tide if you want expansive sand or tidal pools.
  • Weekday shoots reduce crowds at popular spots like Brighton Beach.
  • Bring a portable steamer for quick dress touch-ups if sand or wind wrinkles fabric.

Navigating Coastal Weather Challenges

Melbourne’s beaches are notorious for unpredictable weather. Sudden winds, clouds, or rain can disrupt plans, but flexibility turns these obstacles into creative opportunities.

Wind Management:

  • Coastal gusts are strongest in the afternoon. Secure veils, hats, or lightweight dresses with hidden clips or weights.
  • Use wind to your advantage: Capture flowing fabrics, tossed hair, or playful moments like kissing in the breeze.
  • If wind is extreme, pivot to sheltered areas like dunes or behind rocks.

Cloud Cover Strategies:

  • Partial clouds diffuse sunlight, creating soft, even lighting. Use this for flattering portraits without harsh shadows.
  • Overcast skies may dull sunset colors, but they offer moody, dramatic tones. Embrace the atmosphere with darker edits or monochrome frames.
  • If clouds threaten to block the sun entirely, reschedule for a clearer day or focus on indoor segments (e.g., nearby cafes, parks).

Rain and Storm Preparedness:

  • Summer storms roll in quickly. Monitor radar apps and have a backup plan (e.g., nearby pavilion, car).
  • Light rain can add romance. Use transparent umbrellas or embrace the drizzle for candid, intimate shots.
  • Protect gear with waterproof covers. Keep towels handy to dry lenses or equipment between shots.

Practical Tips:

  • Dress in layers. Even in summer, coastal breezes can feel chilly after sunset.
  • Pack non-slip shoes for wet sand or rocky shorelines.
  • Communicate weather contingencies with your photographer. Agree on a threshold (e.g., heavy rain, strong winds) to postpone or reschedule.

By aligning your shoot with Melbourne’s sunset rhythms, coastal tides, and weather patterns, you’ll transform fleeting moments into timeless art. Whether chasing the summer’s late glow or winter’s crisp twilight, preparation and adaptability ensure your beach sunset photos shine.

81909-Wu-1752

The best season and time arrangement for wedding photography in Melbourne

Melbourne Wedding Photography: Seasonal Guide for Stunning Portraits

Melbourne’s reverse seasons and diverse landscapes offer unique opportunities for wedding photography year-round. From golden-hour beaches to misty autumn forests, understanding seasonal nuances helps couples align their vision with the city’s natural rhythms. This guide breaks down the best times to shoot, highlighting climate patterns, lighting conditions, and practical considerations for each season.

wedding photography melbourne

Spring (September–November): Blossoms and Soft Light

Spring transforms Melbourne into a pastel paradise, with cherry blossoms, tulips, and wisteria dominating parks and gardens. This season suits couples seeking romantic, nature-driven imagery.

Floral Hotspots:

  • The Royal Botanic Gardens bursts with color in mid-October, offering frames of pink and white blooms. Arrive early to avoid crowds.
  • Carlton Gardens’梧桐 (Chinese parasol trees) turn vibrant yellow, creating golden canopies for overhead shots.
  • University of Melbourne’s campus mixes historic architecture with spring blossoms, though some areas may be under construction.

Lighting and Weather:

  • Days are mild (15–25°C), with overcast skies providing diffused, flattering light. Golden hour lasts longer, stretching from 5 PM to 7 PM.
  • Rain is frequent but brief. Pack transparent umbrellas for creative rainy-day shots or reschedule indoor segments if needed.

Practical Tips:

  • Book garden venues early, as spring is peak season for local weddings.
  • Pollen allergies? Opt for manicured areas like Fitzroy Gardens instead of wildflower fields.
  • Layer clothing for fluctuating temperatures. Morning shoots may require shawls, while afternoon sun calls for breathable fabrics.

Autumn (March–May): Warm Tones and Crisp Air

Autumn paints Melbourne in amber, crimson, and gold, offering a cinematic palette for timeless photography. This season is ideal for couples craving rich colors and cooler temperatures.

Foliage Favorites:

  • Victoria Barracks’枫叶 (maple trees) turn fiery red, contrasting with colonial architecture. The grounds are less crowded than central parks.
  • Brighton Beach’s bathing boxes gain a rustic charm when surrounded by fallen leaves. Shoot during low tide for unobstructed views.
  • Dandenong Ranges’ forests offer dense canopies of orange and yellow, perfect for moody, forest-themed portraits.

Lighting and Weather:

  • Days are mild (15–22°C), with golden-hour light lasting until 6 PM. Overcast skies soften shadows, ideal for close-ups.
  • Evenings cool rapidly. Bring wraps or blazers for twilight shots near waterfronts like St Kilda Pier.

Practical Tips:

  • Autumn winds can disrupt lightweight veils. Secure hairstyles with texturizing spray and bobby pins.
  • Leaf litter on paths may cause slipping. Wear sturdy shoes and clear debris before posing.
  • Weekday shoots minimize crowds at popular spots like Brighton Beach.

Summer (December–February): Sun-Drenched Energy and Coastal Vibes

Summer’s long days and azure skies suit couples seeking vibrant, lively imagery. This season excels for beach and outdoor city shoots.

Beach and Waterfront Scenes:

  • Mornington Peninsula’s vineyards display burnt-orange vines, perfect for rustic-themed shoots. Pair with a bottle of local sparkling wine for props.
  • Port Phillip Bay’s calm waters allow for underwater or floating-dress shots. Hire a local guide for safety.
  • Yarra River’s reflections create mirror-like effects during sunset. Use polarizing filters to reduce glare.

Lighting and Weather:

  • Sunlight is intense. Schedule indoor segments (e.g., cafes, galleries) for midday, saving golden hour for outdoor shots.
  • Temperatures often exceed 30°C. Stay hydrated and apply SPF 50+ every two hours.

Practical Tips:

  • Summer storms roll in quickly. Monitor weather apps and have a backup indoor venue (e.g., Royal Exhibition Building).
  • For beach shoots, avoid high tide times. Check tidal charts to maximize shoreline space.
  • Lightweight fabrics (chiffon, organza) prevent overheating. Opt for breathable undergarments to avoid sweat marks.

Winter (June–August): Intimate Warmth and Urban Elegance

Winter’s cool tones and cozy vibes cater to couples seeking intimate, story-driven photography. This season excels for indoor and architectural shoots.

Indoor and Urban Gems:

  • Hosier Lane’s graffiti walls provide bold backdrops for edgy, modern portraits. Shoot in the morning to avoid crowds.
  • State Library of Victoria’s domed reading room offers grandeur for formal shots. Book permits in advance.
  • Coffee shops like Proud Mary serve as warm, aromatic backdrops. Order lattes for prop interaction.

Lighting and Weather:

  • Days are short, with sunset around 5 PM. Start shoots by mid-afternoon to maximize natural light.
  • Temperatures range from 6–14°C. Layer thermals under dresses and suits. Faux-fur stoles add texture without bulk.

Practical Tips:

  • Winter rain is frequent. Use clear vinyl raincoats over dresses to stay dry while photographing.
  • For snow-themed shoots, travel to Mount Dandenong’s higher elevations. Check weather forecasts for rare snowfall.
  • Indoor venues may require additional lighting. Bring portable LED panels for soft, even illumination.

By aligning shoot schedules with Melbourne’s seasonal strengths, couples can leverage the city’s ever-changing landscapes. Whether chasing autumn’s gold or summer’s sparkle, thoughtful planning ensures each frame tells a story as unique as the love it captures.

81909-Wu-1761

The best season and time arrangement for wedding photography in Melbourne

Melbourne Wedding Photography: Seasonal Planning Guide for Optimal Results

Melbourne’s reverse seasons and dynamic climate demand strategic timing for wedding photography. Understanding seasonal nuances ensures couples capture the city’s beauty while maintaining comfort. This guide breaks down the best times to shoot, highlighting natural elements, lighting conditions, and practical considerations.

wedding photography melbourne

Spring (September–November): Romantic Blooms and Golden Light

Melbourne’s spring transforms parks and gardens into vibrant tapestries of color. This season is ideal for couples seeking romantic, nature-driven backdrops.

Floral Abundance:

  • The Royal Botanic Gardens and University of Melbourne campus burst with cherry blossoms, tulips, and wisteria. These blooms create soft, dreamy frames for portraits.
  • Carlton Gardens’ jacaranda trees drop purple petals, adding whimsy to couple shots. Arrive early to avoid crowds during peak bloom (mid-October).

Lighting and Weather:

  • Spring days offer gentle, diffused sunlight, reducing harsh shadows. Overcast skies are common, providing even lighting for skin tones.
  • Temperatures range from 12°C to 22°C. Layer clothing for flexibility during outdoor shoots, as mornings can be chilly.

Practical Tips:

  • Book garden venues early, as spring is popular for engagements and local weddings.
  • If allergies are a concern, avoid high-pollen areas like native bushlands. Opt for manicured gardens instead.
  • Spring showers are frequent. Pack transparent umbrellas for rainy-day creativity, or reschedule indoor segments if needed.

Autumn (March–May): Warm Tones and Crisp Air

Autumn paints Melbourne in amber, crimson, and gold, offering a cinematic palette for timeless photography.

Foliage Hotspots:

  • Victoria Barracks’ maple trees turn fiery red, contrasting with historic architecture. The grounds are less crowded than central parks.
  • Fitzroy Gardens’ oak and elm trees shed golden leaves, creating natural carpets for walking shots.
  • Mornington Peninsula’s vineyards display burnt-orange vines, perfect for rustic-themed shoots.

Lighting and Weather:

  • Autumn sunlight is softer, with golden-hour light lasting longer. Shoot between 3 PM and 6 PM for warm, flattering tones.
  • Daytime temperatures hover around 15°C to 20°C, but evenings cool rapidly. Bring shawls or blazers for twilight portraits.

Practical Tips:

  • Autumn winds can disrupt lightweight veils or dresses. Use hairpins and texturizing spray to secure hairstyles.
  • Leaf litter on paths may cause slipping. Wear sturdy shoes and clear debris before posing.
  • Weekday shoots minimize crowds at popular spots like Brighton Beach’s bathing boxes.

Summer (December–February): Sun-Kissed Energy and Coastal Vibes

Summer’s long days and azure skies suit couples craving vibrant, lively imagery.

Beach and Waterfront Scenes:

  • St Kilda Beach’s sandy shores and pier offer iconic backdrops. Time shoots for early morning to avoid midday glare.
  • Port Phillip Bay’s calm waters allow for underwater or floating-dress shots. Hire a local guide for safety.
  • Yarra River’s reflections create mirror-like effects during sunset. Use polarizing filters to reduce glare.

Lighting and Weather:

  • Summer sunlight is intense. Schedule indoor segments (e.g., cafes, galleries) for midday, saving golden hour for outdoor shots.
  • Temperatures often exceed 30°C. Stay hydrated and apply SPF 50+ every two hours.

Practical Tips:

  • Summer storms roll in quickly. Monitor weather apps and have a backup indoor venue (e.g., Royal Exhibition Building).
  • For beach shoots, avoid high tide times. Check tidal charts to maximize shoreline space.
  • Lightweight fabrics (chiffon, organza) prevent overheating. Opt for breathable undergarments to avoid sweat marks.

Winter (June–August): Intimate Warmth and Urban Elegance

Winter’s cool tones and cozy vibes cater to couples seeking intimate, story-driven photography.

Indoor and Architectural Shoots:

  • Melbourne’s laneways (Hosier Lane, Degraves Street) provide moody, urban settings. Use fairy lights or neon signs for pops of color.
  • State Library of Victoria’s domed reading room offers grandeur for formal portraits. Book permits in advance.
  • Coffee shops like Seven Seeds or Proud Mary serve as warm, aromatic backdrops. Order lattes for prop interaction.

Lighting and Weather:

  • Winter days are short, with sunset around 5 PM. Start shoots by mid-afternoon to maximize natural light.
  • Temperatures range from 6°C to 14°C. Layer thermals under dresses and suits. Faux-fur stoles add texture without bulk.

Practical Tips:

  • Winter rain is frequent. Use clear vinyl raincoats over dresses to stay dry while photographing.
  • For snow-themed shoots, travel to Mount Dandenong’s higher elevations. Check weather forecasts for rare snowfall.
  • Indoor venues may require additional lighting. Bring portable LED panels for soft, even illumination.

By aligning shoot schedules with Melbourne’s seasonal strengths, couples can leverage the city’s ever-changing landscapes. Whether chasing autumn’s gold or summer’s sparkle, thoughtful planning ensures each frame tells a story as unique as the love it captures.

wedding photography melbourne

Safety precautions for Accessory matching in Melbourne wedding photography

Melbourne Wedding Photography: Safety Considerations for Accessory Pairing

Your Melbourne wedding accessories should complement your look while ensuring comfort and security throughout the day. From coastal ceremonies to urban receptions, the city’s varied environments demand practical choices. Here’s how to balance style and safety during your photoshoot.

wedding photography melbourne

Headpieces and Hair Accessories: Stability in Melbourne’s Climate

Melbourne’s unpredictable weather—sudden gusts near the bay or humidity in garden venues—can disrupt delicate headpieces. Prioritizing secure attachments prevents mid-shoot mishaps.

Wind-Resistant Designs:

  • Opt for headbands or combs with gripped bases instead of loose pins. Tightly woven floral crowns or beaded bands stay put better than scattered flowers.
  • If wearing a veil, choose a shorter length (fingertip or chapel) for outdoor shoots. Longer veils risk tangling in wind or getting caught on branches.
  • For beach ceremonies, avoid lightweight fabrics like tulle, which flutter uncontrollably. Heavier lace or silk veils anchor more easily.

Hair Preparation Tips:

  • Ask your stylist to use texturizing spray or bobby pins with rubber grips to reinforce updos. Slicked-back styles may slip in humidity.
  • Carry extra pins and hairspray for touch-ups, especially after moving between indoor and outdoor locations.
  • Test your headpiece during a trial run. Shake your head gently to check for movement before the wedding day.

Allergy and Comfort Checks:

  • Avoid metallic accessories that may irritate sensitive skin. Opt for hypoallergenic materials like silk or coated metals.
  • If wearing a tiara or heavy headpiece, limit wear time to key photo sessions to prevent headaches.
  • For outdoor shoots in summer, choose breathable fabrics to avoid overheating under layers of hair and accessories.

Jewelry and Body Adornments: Preventing Loss or Damage

Jewelry often holds sentimental value, making its safety crucial. Melbourne’s active photo itineraries—walking through parks, dancing at receptions—require secure placement.

Necklace and Earring Security:

  • Use lockable clasps on necklaces to prevent them from slipping off during movement. Double-check fastenings before each outfit change.
  • For drop earrings, choose styles with screw-back or rubber stoppers to avoid losing stones. Avoid overly long earrings that may snag on clothing.
  • If wearing a statement necklace, ensure it doesn’t clash with your dress’s neckline. High necklines pair better with delicate pendants, while strapless gowns suit bolder pieces.

Ring and Bracelet Safety:

  • Remove loose rings during hand-heavy activities (e.g., holding bouquets for extended periods) to prevent bending or scratching.
  • Bracelets with charms or dangling elements should be snug to avoid catching on dress sleeves or furniture.
  • Store spare jewelry in a labeled pouch, not loose in bags, to prevent misplacement during quick changes.

Cultural and Symbolic Considerations:

  • If incorporating heirloom pieces, discuss preservation with your photographer. Avoid exposing delicate antiques to moisture or direct sunlight.
  • For religious symbols, ensure they’re positioned visibly but comfortably (e.g., a cross necklace tucked under a collar for ease).
  • Communicate with your partner about matching accessories to avoid clashing metals or styles in couple shots.

Footwear and Lower-Body Accessories: Mobility and Balance

Melbourne’s uneven terrain—cobblestone lanes, sandy beaches, or grassy parks—demands practical footwear. Comfort directly impacts your ability to pose confidently.

Shoe Selection for Varied Surfaces:

  • Avoid stiletto heels on soft ground (e.g., beach sand or garden soil). Opt for wedge heels or block heels for better stability.
  • For urban shoots, consider foldable flats to change into after formal portraits. Carry them in a waterproof bag for sudden weather changes.
  • Test shoes on similar surfaces to your venue. Walk up stairs, pivot, and stand for 10+ minutes to gauge comfort.

Ankle and Leg Accessory Safety:

  • Ankle bracelets should fit snugly without digging into skin. Loose chains may slip off during dancing or walking.
  • If wearing thigh-high stockings or garters, use non-slip silicone bands to prevent them from rolling down.
  • For outdoor shoots, avoid delicate lace socks that may tear on rough ground. Opt for seamless nylon or breathable cotton.

Emergency Preparedness:

  • Pack blister pads, moleskin, or adhesive tape for shoe-related discomfort. Apply before soreness develops.
  • Bring a spare pair of shoes in case of breakage or extreme discomfort. Flat sandals work well for casual receptions.
  • If wearing open-toed shoes, apply sunscreen to feet to prevent sunburn during outdoor sessions.

Dress and Shoe Coordination:

  • Ensure hemlines accommodate shoe height. Too-short dresses may ride up when sitting, while overly long hems can trip you.
  • Practice walking in your shoes with your dress to adjust stride length and posture.
  • For rainy days, carry waterproof shoe covers or opt for rubber-soled shoes to avoid slipping on wet pavement.

By prioritizing security and comfort, your accessories will enhance your wedding photos without causing stress. Melbourne’s dynamic settings reward couples who adapt thoughtfully, ensuring every detail—from headpieces to footwear—contributes to a seamless, joyful celebration.

71407_Farm_Vigano_SELECTION_0055

Post-processing requirements and precautions for wedding photography in Melbourne

Melbourne Wedding Photography: Key Considerations for Post-Production Editing Requests

The post-production phase of your Melbourne wedding photography is where raw images transform into timeless keepsakes. Clear communication with your photographer about editing preferences ensures the final results align with your vision while maintaining natural authenticity. Here’s how to navigate this process effectively.

wedding photography melbourne

Defining Your Aesthetic Preferences

Editing styles vary widely, from soft and airy to moody and dramatic. Melbourne’s diverse landscapes—coastal sunsets, urban skylines, or lush gardens—influence how colors and lighting should be enhanced. Start by identifying what resonates with you.

Color Grading and Tone Adjustments:

  • Decide if you prefer warm, golden-hour hues or cooler, blue-toned shadows. Melbourne’s overcast days often yield muted tones that can be adjusted to feel brighter or more cinematic.
  • Communicate whether you want vibrant greens in park settings or desaturated neutrals for a timeless look.
  • Avoid over-saturating skin tones, which can appear unnatural. Aim for balanced warmth that complements your complexion.

Lighting and Contrast Enhancements:

  • Highlight specific areas (e.g., a bride’s veil or a groom’s suit) to draw attention without losing detail in shadows.
  • For beach photos, consider softening harsh sunlight to prevent blown-out highlights while preserving the ocean’s texture.
  • Urban shots benefit from adjusted contrast to emphasize architectural lines without creating overly stark shadows.

Texture and Detail Preservation:

  • Retain natural textures in outfits (lace, fabric folds) and backgrounds (brick walls, foliage) to avoid a “plastic” finish.
  • If shooting in windy conditions, ask to smooth hair gently rather than erase movement entirely, which can look artificial.
  • For group photos, ensure individual faces remain sharp even when blurring busy backgrounds.

Addressing Common Editing Requests

Couples often have specific concerns about their appearance or the environment. Handling these requests thoughtfully ensures the final images feel polished yet genuine.

Skin and Blemish Corrections:

  • Request subtle smoothing of temporary flaws (acne, redness) while preserving natural skin texture.
  • Avoid heavy airbrushing that erases freckles, moles, or wrinkles, as these details contribute to authenticity.
  • For under-eye circles, ask for light brightening rather than complete removal to maintain a natural look.

Body and Posture Adjustments:

  • If a pose feels awkward, request minor tweaks to posture (e.g., straightening a slouched shoulder) without altering body proportions.
  • Clothing adjustments (fixing wrinkles, adjusting hemlines) should look seamless, not like the outfit was digitally altered.
  • Refrain from requesting extreme slimming or resizing, which can distort the image’s realism.

Environmental Modifications:

  • Remove distracting elements (e.g., trash bins, photobombing strangers) only if they detract from the composition.
  • For cloudy skies, consider adding subtle sun rays or blue tones to enhance mood without overpowering the scene.
  • If wind ruins a shot, ask to recreate the pose digitally rather than pasting in a different background, which rarely looks convincing.

Cultural and Personal Sensitivity:

  • Respect requests to modify religious symbols, tattoos, or cultural attire only if the couple explicitly asks.
  • If family members request edits (e.g., softening wrinkles), prioritize their comfort while maintaining consistency across the album.

Managing Timelines and Communication

Post-production delays often stem from unclear feedback or excessive rounds of revisions. Streamline the process with these strategies.

Initial Review Guidelines:

  • Request a batch of 10–15 edited images first to assess the photographer’s interpretation of your style.
  • Use descriptive language (e.g., “brighten the background without losing the rose garden’s details”) instead of vague terms like “make it pop.”
  • Prioritize edits for key photos (ceremony, couple portraits) before minor shots to ensure critical moments meet expectations.

Feedback Structure:

  • Organize comments by image number and specific issue (e.g., “Image 12: Adjust the contrast on the groom’s face”).
  • Avoid subjective phrases like “I don’t like it” and instead explain what feels off (e.g., “The sky looks too orange compared to the rest of the scene”).
  • Limit revisions to 2–3 rounds to prevent diminishing returns on quality.

Technical Considerations:

  • Ask for high-resolution files in both color and black-and-white (if desired) to accommodate different display needs.
  • Specify file formats (JPEG for web, TIFF for prints) to ensure compatibility with albums or framing services.
  • If sharing images online, request optimized versions for social media without compromising print quality.

Deadline Management:

  • Set realistic timelines (e.g., 4–6 weeks for full edits) and communicate urgent needs (e.g., holiday cards) upfront.
  • Factor in Melbourne’s peak wedding seasons (spring and autumn), when photographers may have longer turnarounds.
  • If delays occur, ask for periodic progress updates rather than frequent follow-ups, which can slow down the workflow.

By approaching post-production with clarity and respect, you’ll receive images that honor your day’s emotions and Melbourne’s unique charm. Trust your photographer’s expertise while advocating for adjustments that align with your aesthetic, ensuring the final album feels both timeless and true to your experience.

81909-Wu-911

Preparations for adjusting the schedule on the day of the wedding photography shoot in Melbourne

Melbourne Wedding Photography: Day-Of Schedule Adjustments for Optimal Results

Your wedding photography day in Melbourne demands careful energy management to ensure you look and feel your best. From early morning preparations to golden-hour sunsets, structuring your schedule around photography milestones helps maintain focus and reduces stress. Here’s how to align your routine with the demands of a full-day shoot.

wedding photography melbourne

Morning Routine: Prioritizing Calm and Preparation

The first hours of your wedding day set the tone for photography. A relaxed morning ensures fresh skin, bright eyes, and a composed mindset. Melbourne’s unpredictable weather—from foggy coastal mornings to crisp urban dawns—requires flexibility.

Wake-Up Time Strategy:

  • Aim to rise 3–4 hours before your ceremony or first photo session. This buffer allows time for grooming, hydration, and unexpected delays.
  • If shooting sunrise photos (common in locations like Brighton Beach), adjust wake-up times to account for travel and setup.

Skin and Appearance Prep:

  • Apply a lightweight moisturizer and sunscreen immediately after waking. Let it absorb fully before makeup application.
  • Use cold eye compresses or chilled tea bags to reduce morning puffiness, especially if you’ve had limited sleep.
  • Avoid heavy breakfasts; opt for protein-rich foods like eggs or yogurt to sustain energy without causing bloating.

Handling Melbourne’s Weather Variables:

  • Check the forecast the night before. If rain is predicted, pack waterproof jackets or umbrellas for outdoor shots.
  • On windy days, secure hair accessories and carry bobby pins for quick adjustments.

Midday Management: Balancing Energy and Efficiency

Midday photography often involves formal portraits, group shots, or urban explorations. Pacing yourself prevents fatigue, which can show in photos as drooping eyelids or slouched posture.

Structured Breaks:

  • Schedule 15–20-minute rest periods between sessions. Use this time to hydrate, snack, and cool down in shaded areas.
  • If traveling between locations (e.g., from a chapel to the Royal Botanic Gardens), use transit time to recharge quietly.

Nutrition and Hydration:

  • Carry a reusable water bottle to stay hydrated, especially during outdoor shoots in summer.
  • Eat small, frequent meals like nuts, fruit, or sandwiches to maintain blood sugar levels without feeling sluggish.
  • Avoid caffeine overloads; one coffee or tea is sufficient to stay alert without jitters.

Posture and Expression Maintenance:

  • Practice “micro-breaks” during shoots: gently roll shoulders, stretch neck muscles, or blink slowly to reset facial tension.
  • Use breathwork (inhale for 4 counts, exhale for 6) to calm nerves before critical shots like couple portraits.

Adapting to Light Changes:

  • Melbourne’s midday sun can be harsh. Seek shaded areas (under trees or archways) for softer lighting in formal photos.
  • If shooting in direct sunlight, tilt faces slightly downward to avoid squinting.

Evening Transition: Sustaining Radiance for Golden Hour

The final hours of photography—often during golden hour—demand peak energy and glow. Fatigue at this stage can lead to forced smiles or stiff movements.

Pre-Golden Hour Refresh:

  • Use a blotting sheet or powder to manage oil buildup on the T-zone.
  • Reapply lip color and touch up under-eye concealer to combat tiredness.
  • Carry a small fan or mister for quick cool-downs if temperatures rise.

Energy-Boosting Tactics:

  • Consume a light, energizing snack like dark chocolate or a banana 30 minutes before golden hour.
  • Stay hydrated with electrolyte-infused water (without added sugar) to prevent cramps from prolonged standing.
  • Engage in light movement (shoulder rolls, ankle circles) to keep blood flowing during static poses.

Handling Late-Day Challenges:

  • If shooting into the evening, bring layerable clothing (scarves, shawls) to stay warm as temperatures drop.
  • Use breath mints or gum to freshen breath after hours of talking and laughing.

Final Checks Before Wrapping Up:

  • Verify hair and makeup integrity. Tuck loose strands and reapply setting spray if needed.
  • Ensure clothing (buttons, zippers, hemlines) remains intact after hours of movement.

Post-Shoot Recovery for Long-Term Comfort

After the camera stops clicking, prioritize physical recovery to avoid next-day soreness or exhaustion.

Immediate Post-Shoot Care:

  • Change into comfortable clothing and shoes to relieve pressure points.
  • Apply a soothing facial mist or aloe vera gel to calm skin irritated by makeup or sun exposure.
  • Elevate feet if standing for extended periods to reduce swelling.

Nighttime Routine Adjustments:

  • Take a warm bath with Epsom salts to relax muscles. Avoid hot water, which can inflame sun-exposed skin.
  • Use a gentle, fragrance-free moisturizer to replenish hydration lost during the day.
  • Prioritize 7–8 hours of sleep to aid physical and mental recovery.

Next-Day Preparedness:

  • If traveling or attending post-wedding events, pack comfortable shoes and loose clothing.
  • Stay hydrated and eat nutrient-dense meals to replenish energy stores.

By structuring your day around photography demands, you’ll maintain a polished appearance and genuine enthusiasm throughout the shoot. Flexibility and self-care are key—Melbourne’s dynamic settings reward couples who adapt with grace.

wedding photography melbourne

Preparations for pose practice for newlyweds in Melbourne wedding photography

Melbourne Wedding Photography: Essential Pose Practice Tips for Couples

Your Melbourne wedding photos should capture natural chemistry and effortless elegance. Practicing poses beforehand helps you feel confident and relaxed during the shoot, especially in iconic locations like St Kilda Beach or the Yarra River. Here’s how to prepare without relying on rigid instructions or artificial stiffness.

wedding photography melbourne

Understanding Body Language for Authentic Poses

Natural poses stem from genuine interaction. Focus on creating connection rather than memorizing static positions. Melbourne’s dynamic backdrops demand fluidity, so prioritize movements that feel organic.

Key Principles:

  • Angle Awareness: Stand at a slight angle to the camera to avoid flat, unflattering shots. Practice turning your hips and shoulders to create depth.
  • Weight Distribution: Shift your weight onto one leg for a relaxed stance. Avoid locking knees, which can look tense.
  • Head Tilt: Gentle tilts of the head or chin can soften facial expressions. Experiment with slight leans toward your partner for intimacy.

Partner Dynamics:

  • Eye Contact: Alternate between looking at the camera and your partner. Soft gazes or shared smiles convey romance.
  • Touch: Practice subtle gestures like holding hands, resting foreheads together, or brushing hair away from faces.
  • Movement: Walk slowly, sway gently, or spin lightly to add dynamic energy. Sync steps to avoid awkward disconnections.

Melbourne-Specific Tips:

  • Use windy locations (like Brighton Beach) to your advantage. Let hair flow naturally and embrace playful, candid moments.
  • For urban shoots, lean against textured walls or sit on stairs for a mix of casual and structured poses.

Practicing in Front of a Mirror or Camera

Rehearsing poses at home builds muscle memory and reduces on-site anxiety. Use a smartphone or mirror to refine angles and expressions.

Mirror Exercises:

  • Stand sideways to check profile views. Adjust shoulder placement to avoid slouching.
  • Smile naturally, then relax. Notice which expressions feel most genuine.
  • Practice walking hand-in-hand. Ensure strides are synchronized and steps are light.

Camera Drills:

  • Set up a timer and take photos from multiple angles (full body, close-up, over-the-shoulder).
  • Review shots to identify awkward hand placements or stiff postures.
  • Experiment with poses in different lighting (near windows for soft light, under lamps for warmth).

Common Pitfalls to Avoid:

  • Stiff Arms: Keep elbows slightly bent to avoid rigid lines.
  • Forced Smiles: Think of happy memories instead of “posing” for a genuine expression.
  • Overcrowding: Leave space between bodies for a balanced composition.

Incorporating Melbourne’s Landscapes into Poses

The city’s diverse settings—from lush gardens to modern skyscrapers—offer unique opportunities. Tailor poses to complement each location.

Beach and Coastal Poses:

  • Walk barefoot along the shoreline, holding hands or dipping toes in the water.
  • Sit on rocks or driftwood with legs crossed, using the ocean as a backdrop.
  • Embrace windy moments by laughing or shielding eyes from the sun.

Urban and Architectural Poses:
-an against graffiti walls or historic buildings for contrast.

  • Use staircases for layered compositions (one partner standing, the other sitting).
  • Frame shots through arches or windows to add depth.

Park and Garden Poses:

  • Sit on grass with legs tucked to the side, using flowers or trees as natural frames.
  • Walk through pathways, holding umbrellas or bouquets for movement.
  • Lie on blankets with heads close together, looking upward for a dreamy effect.

Weather Adaptations:

  • On sunny days, use hats or sunglasses for playful props.
  • During overcast weather, focus on moody, intimate close-ups.
  • If rain is forecast, practice holding umbrellas or sharing jackets for cozy shots.

Building Confidence Through Rehearsal

Confidence stems from familiarity. Dedicate time to practice poses with your partner, focusing on comfort and chemistry.

Partner Rehearsal Tips:

  • Set aside 20–30 minutes daily to practice poses. Use music to create a relaxed atmosphere.
  • Take turns leading poses. One partner can suggest movements while the other responds.
  • Use prompts like “pretend we’re dancing” or “imagine we’re laughing at a joke” to spark spontaneity.

Mental Preparation:

  • Visualize successful shots. Picture yourselves laughing in a park or walking hand-in-hand on the beach.
  • Remind yourselves that imperfections add character. A slightly messy hairdo or windblown dress can enhance authenticity.
  • Trust your photographer’s guidance. They’ll direct you into flattering angles without sacrificing naturalness.

Final Checks Before the Shoot:

  • Wear comfortable shoes for standing and moving. Bring flats if heels are part of your outfit.
  • Practice poses in your wedding attire to adjust for dress length or suit mobility.
  • Pack tissues and blotting papers to manage sweat or oily skin during warm Melbourne days.

By integrating these tips, you’ll approach your Melbourne wedding photography session with ease and joy. The goal is to capture love stories, not perfect poses—so prioritize connection over precision.