WUU02194

Key points for pose guidance for indoor studio wedding photography in Melbourne

Melbourne Studio Wedding Photography Posing Guide: Essential Tips for Timeless Portraits

Studio photography in Melbourne offers a controlled environment to capture intimate, elegant wedding portraits. Unlike outdoor shoots, indoor settings allow couples to focus on expression and connection without distractions. However, mastering poses that feel natural yet polished requires understanding body language, lighting, and emotional storytelling. Below are key techniques to elevate studio posing for Melbourne’s diverse couples.

wedding photography melbourne

Creating Natural Connection Through Body Language

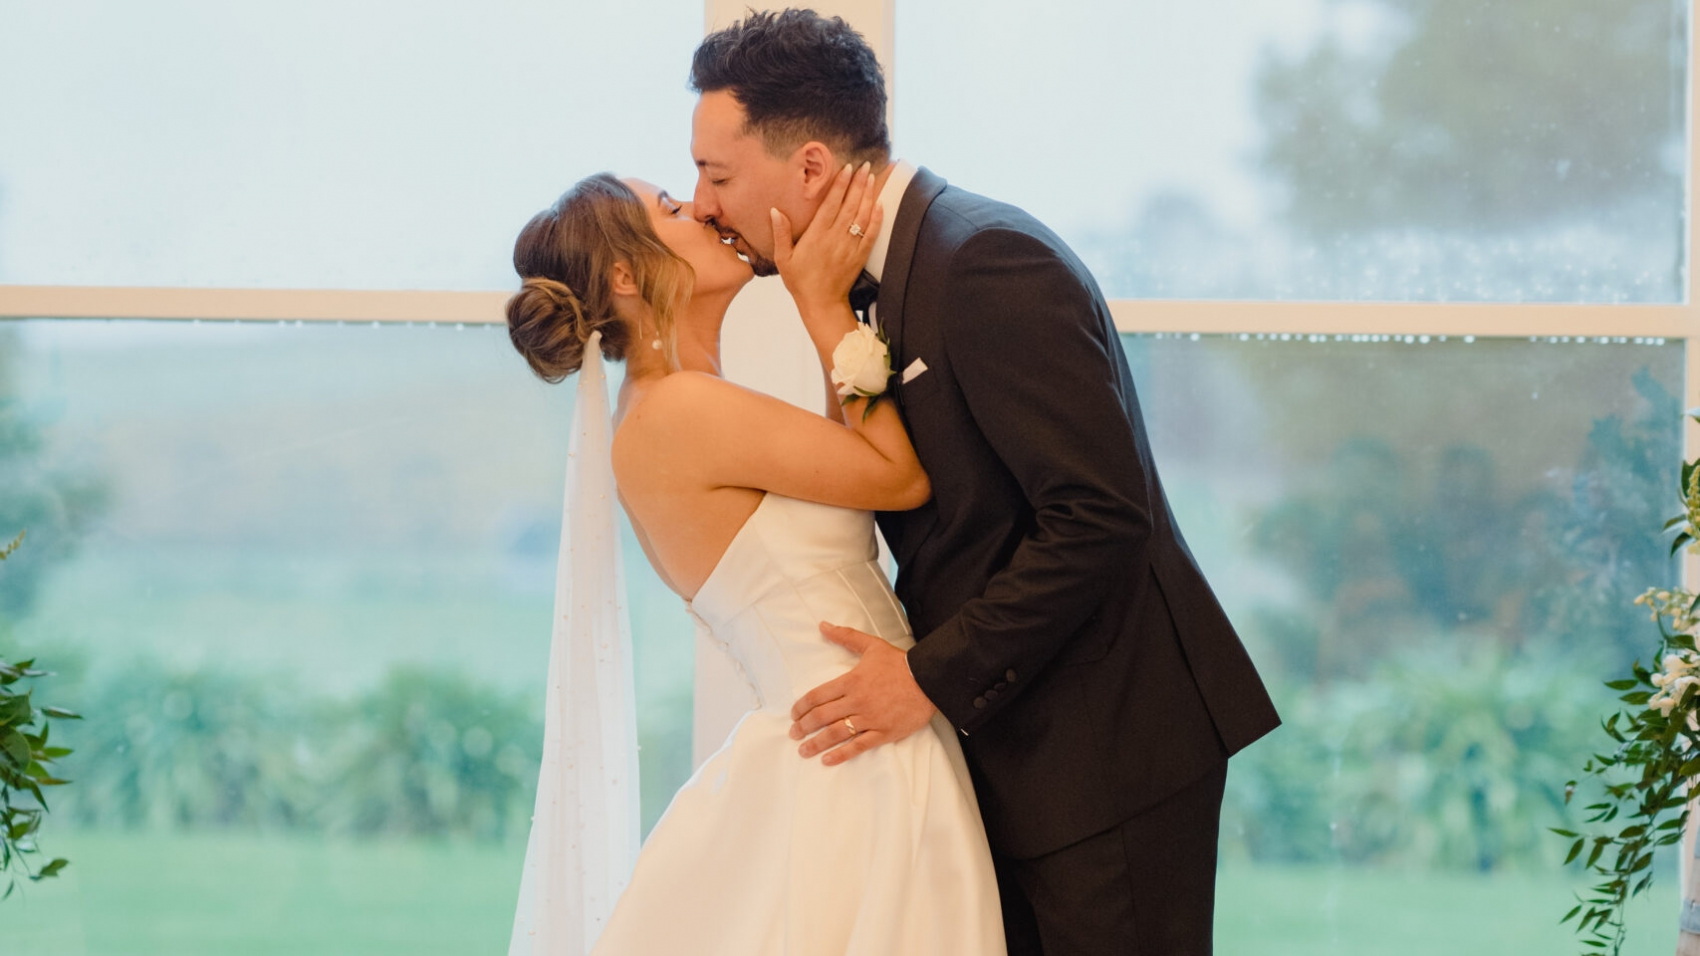
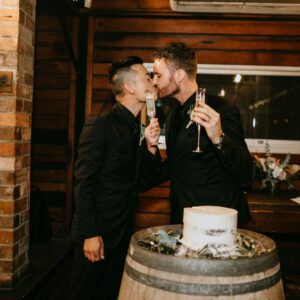
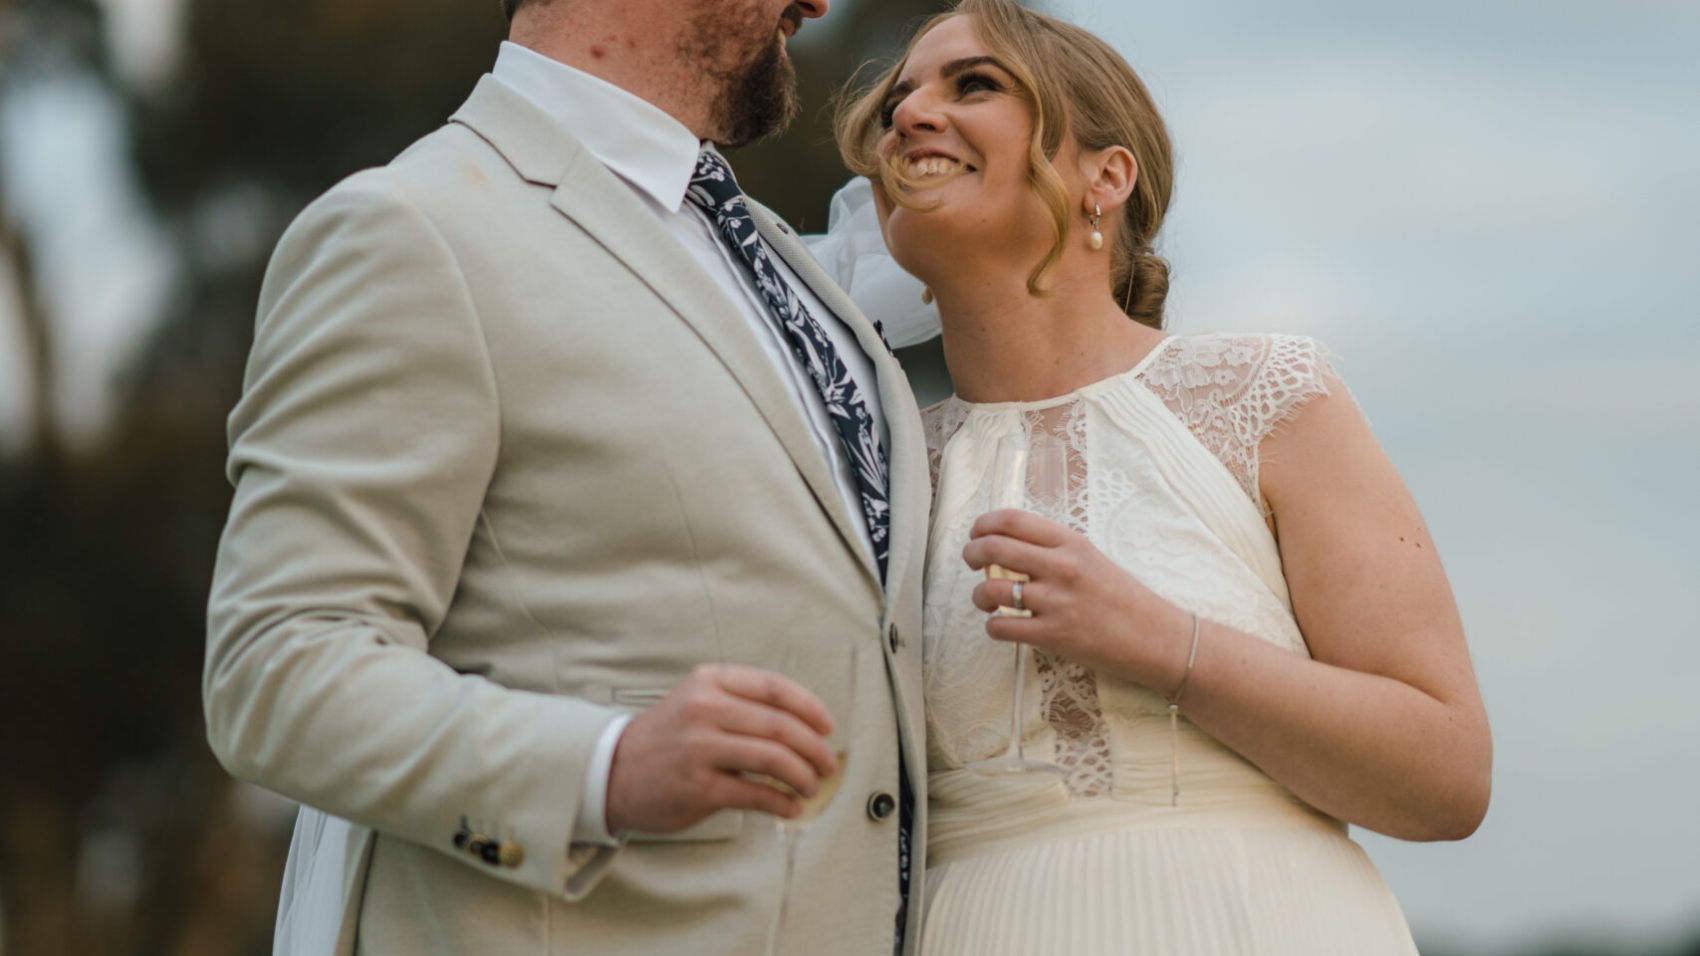
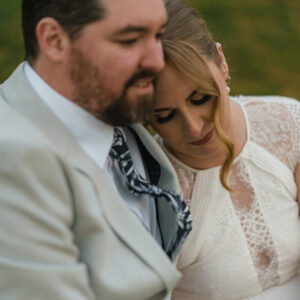
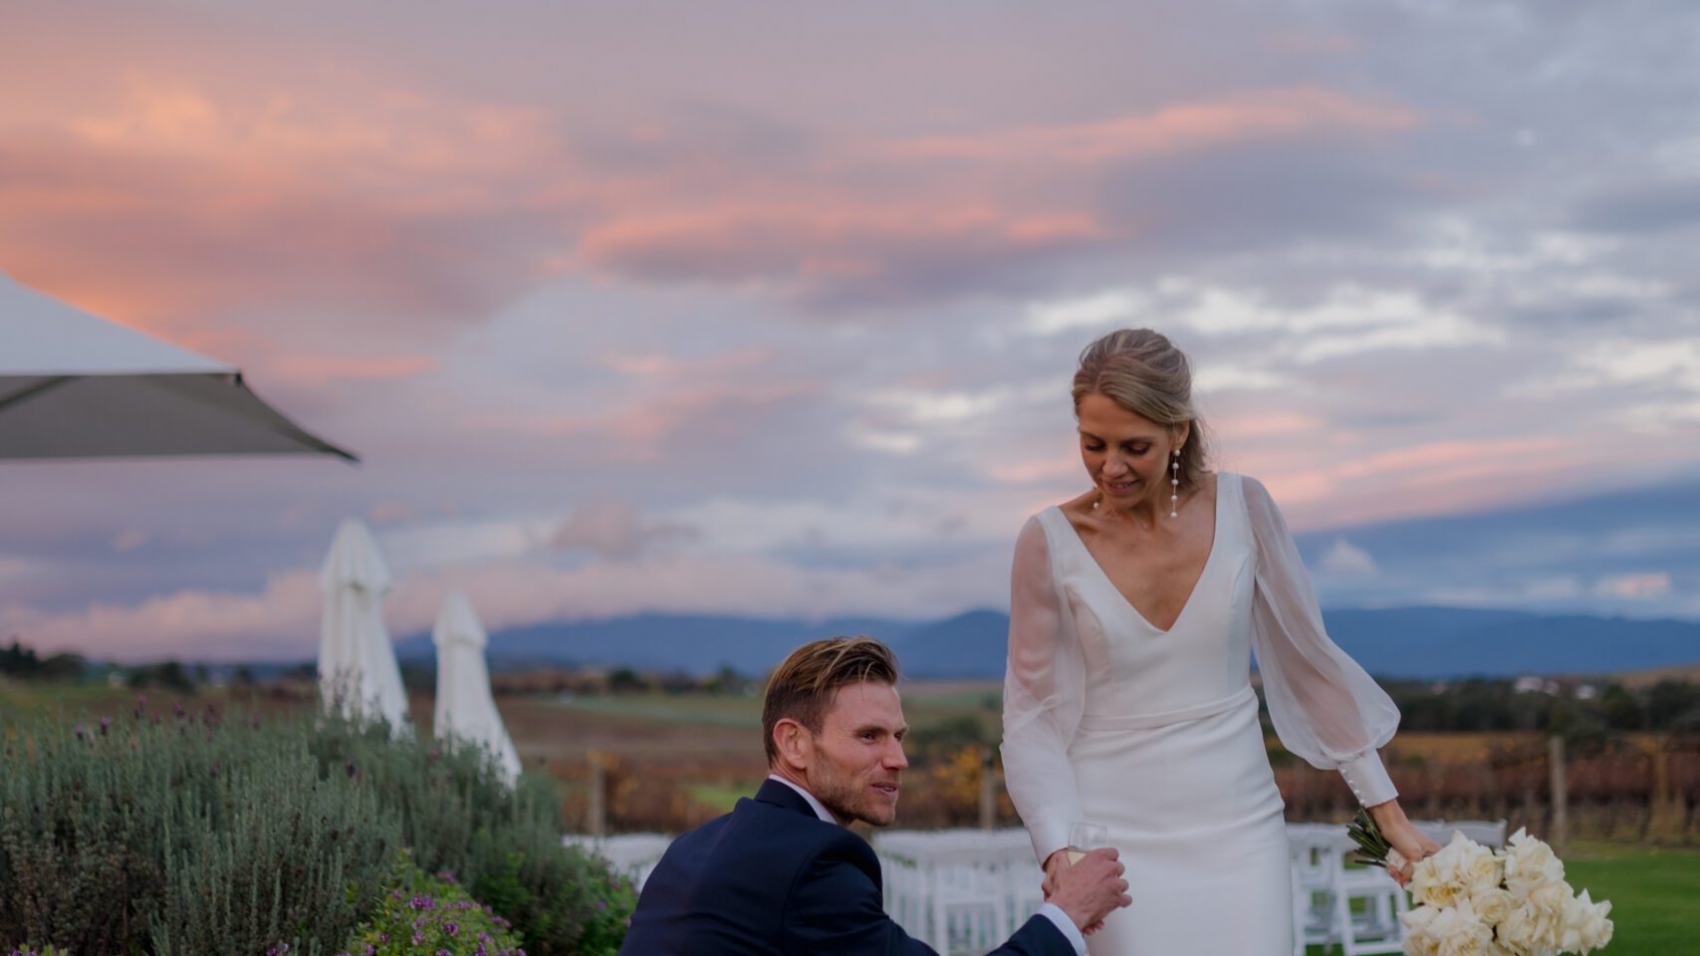
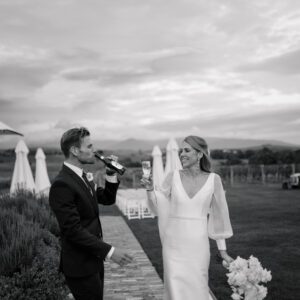
The foundation of compelling studio poses lies in authentic interaction between partners. Encourage couples to maintain subtle physical contact, such as holding hands, resting foreheads together, or linking arms. These gestures convey intimacy without appearing stiff. For example, a bride leaning her head on the groom’s shoulder while he wraps an arm around her waist creates a relaxed, loving dynamic.

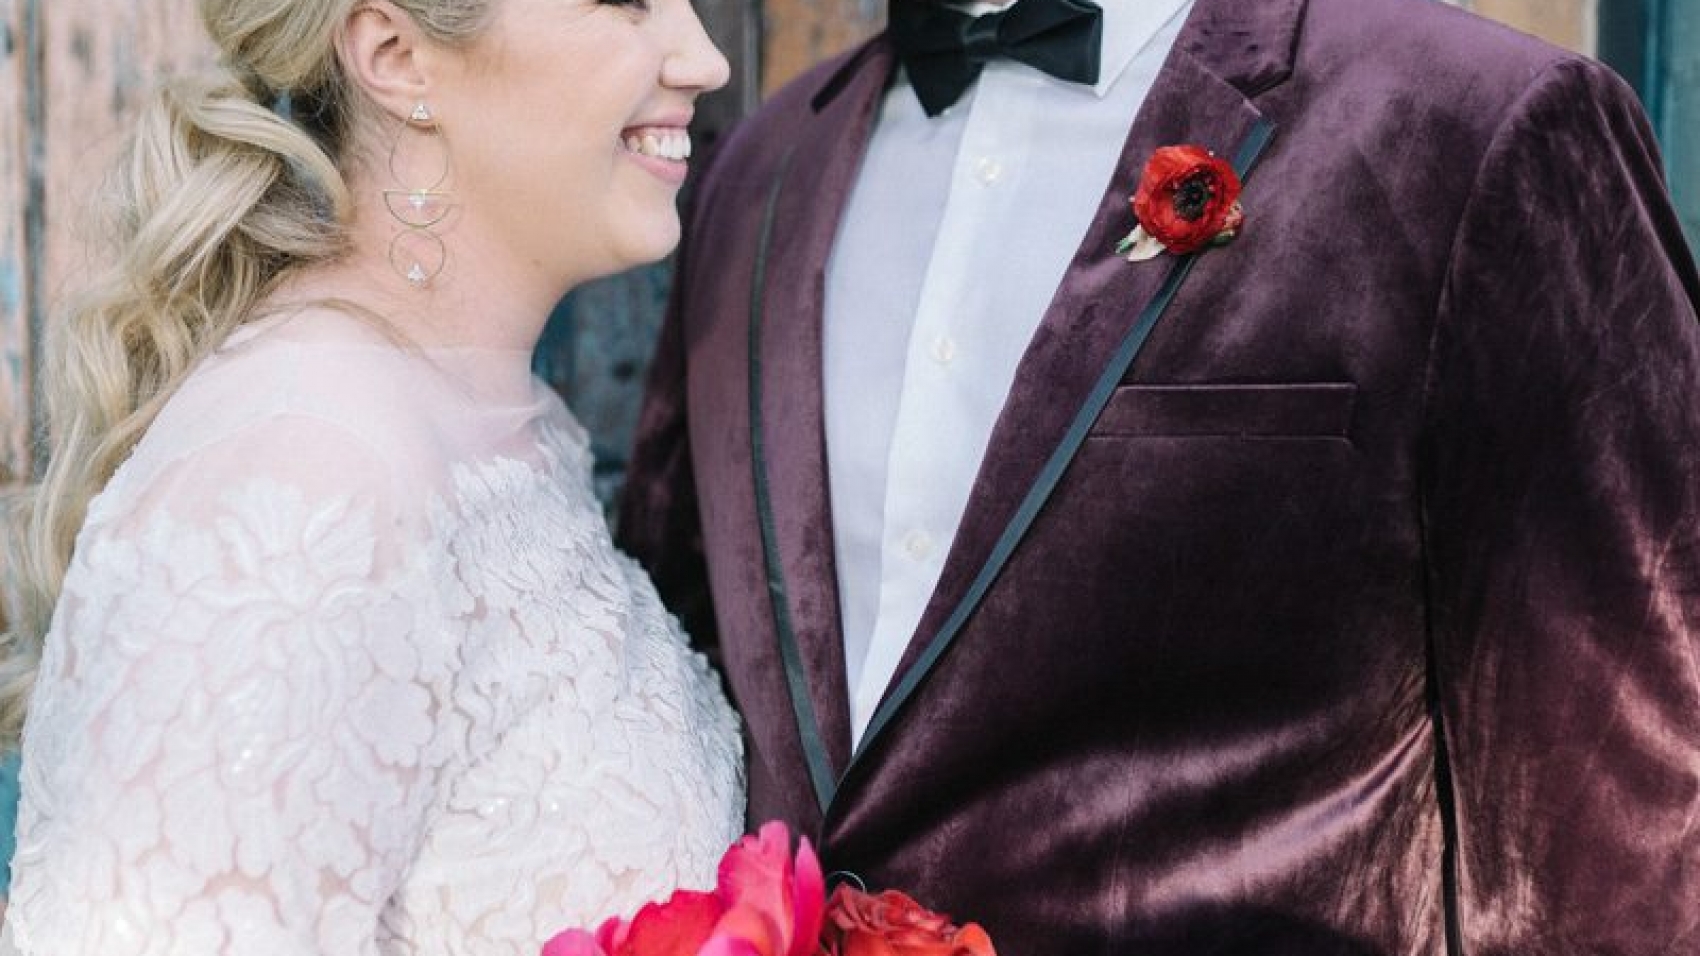
Eye contact is equally critical. Directing couples to gaze into each other’s eyes fosters genuine emotion, but vary the intensity to avoid monotony. A soft, smiling look works for romantic shots, while a deeper, focused stare adds drama. If the couple feels self-conscious, suggest they focus on a specific feature of their partner, like the groom’s eyes or the bride’s smile, to make the connection feel more organic.

Angle and posture adjustments can also enhance connection. Positioning the couple at a slight diagonal to the camera, rather than facing it directly, creates depth and prevents flat, unflattering compositions. Have the taller partner stand slightly behind the shorter one, with their body turned toward the camera, to maintain balance and visual interest.

Playing with Light and Shadow for Dynamic Poses

Melbourne’s studio lighting setups—whether natural light from large windows or artificial sources like softboxes—offer opportunities to sculpt poses with contrast. Use light to highlight facial features and create mood. For instance, positioning the couple near a window with sheer curtains can cast a delicate, diffused glow, ideal for soft, romantic shots.

Shadows add drama when used intentionally. Place the couple so that one side of their face is illuminated while the other falls into shadow, emphasizing bone structure and emotion. A bride tilting her head slightly toward the light while the groom gazes into her eyes can create a striking interplay of light and dark.

Backlighting techniques also work well in studios. Positioning the couple with a light source behind them, such as a studio strobe, can create a halo effect around their silhouette. This approach is particularly effective for dramatic, high-contrast portraits. Encourage the couple to embrace or hold hands in front of their bodies to add texture and prevent the pose from feeling too static.

Incorporating Movement to Add Authenticity

Static poses risk appearing staged, but subtle movement can inject life into studio portraits. Start with gentle actions, like the bride adjusting her veil or the groom brushing a strand of hair from her face. These small gestures feel spontaneous and highlight the couple’s comfort with each other.

For more dynamic shots, guide the couple through slow, controlled movements. A walk-and-pause sequence, where they take a few steps toward the camera and pause to smile or laugh, can yield natural, candid frames. Alternatively, have them spin slightly in place, capturing the flow of fabrics and the joy in their expressions.

Dancing poses also work well in studios. Even without music, couples can mimic a slow dance, with the groom holding the bride’s waist and her placing a hand on his shoulder. This pose encourages fluid movement and genuine smiles, especially when photographers capture mid-laugh or a tender glance.

Using Props and Furniture to Enhance Poses

Melbourne’s studios often feature versatile props and furniture, from vintage sofas to minimalist stools. These elements provide support and context, making poses feel more natural. A bride sitting on the edge of a couch with her legs crossed, while the groom kneels beside her, creates a relaxed, conversational vibe.

Chairs and stools are particularly useful for varying heights and angles. Have the bride sit backward on a chair, resting her arms on the back, while the groom stands behind her with his hands on her shoulders. This pose elongates her neck and adds a playful, flirtatious energy. For taller couples, a step stool can help balance heights without forcing awkward postures.

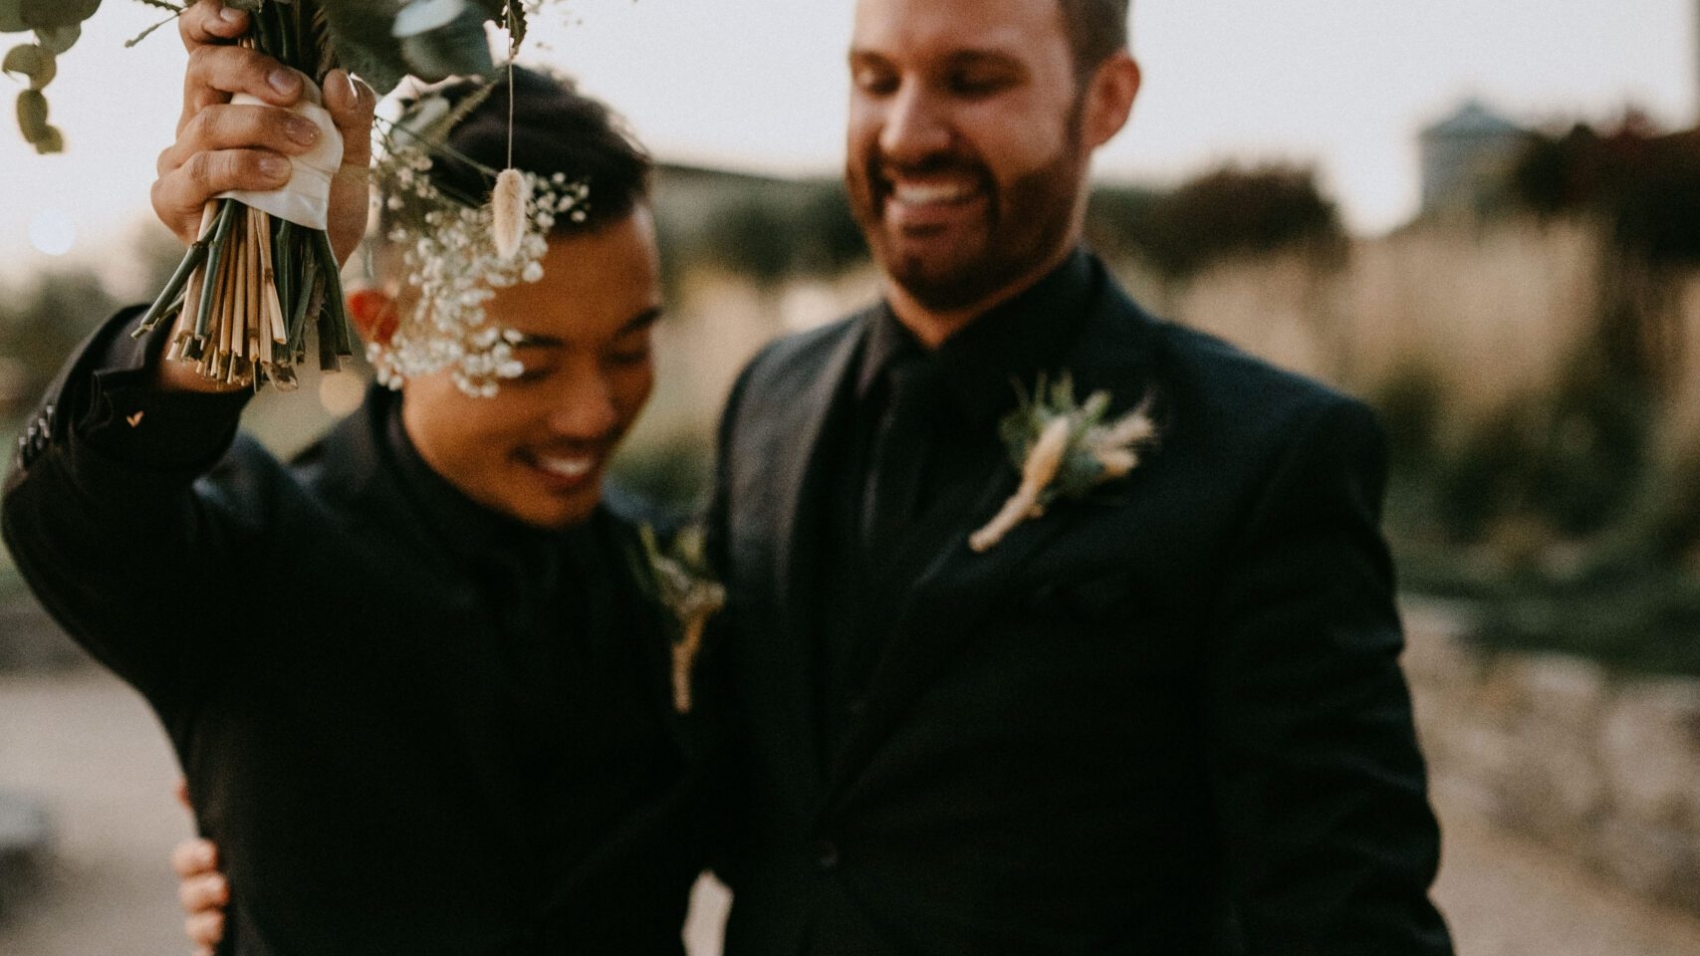
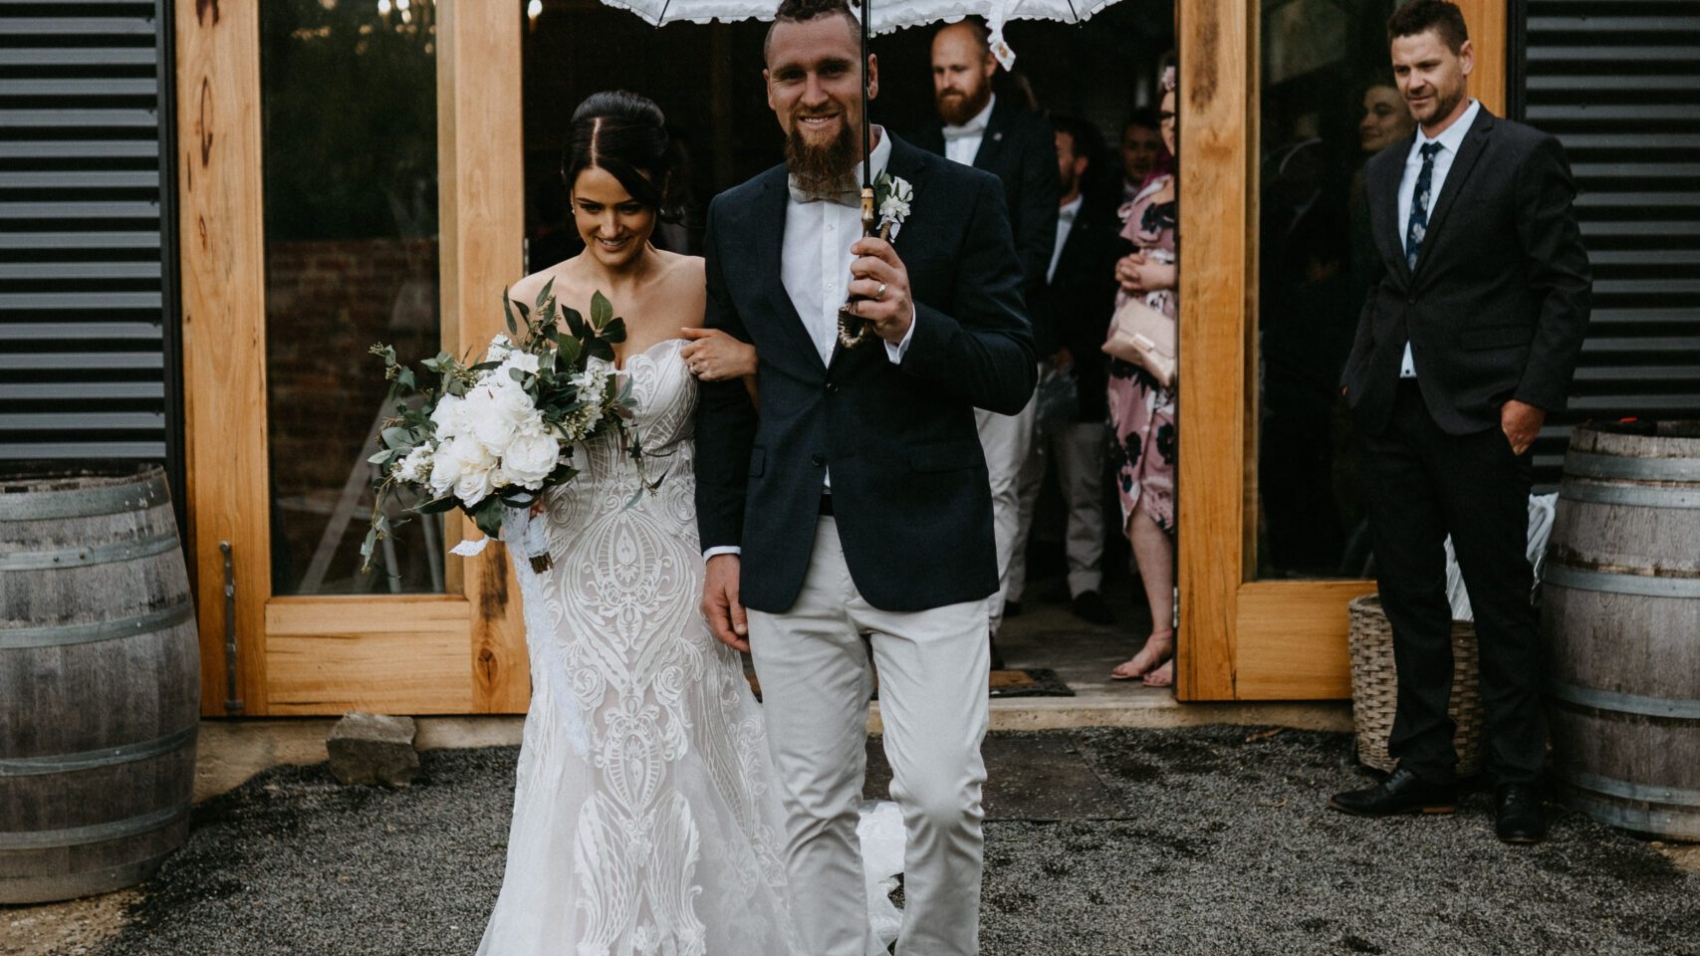
Props like bouquets, hats, or signage also add personality. Encourage the bride to hold her bouquet at waist level, angled slightly away from her body, to avoid covering her dress. The groom can hold his jacket or a pocket square, adding a touch of sophistication. These details ground the poses in the wedding’s theme while keeping hands occupied naturally.

Guiding Individual Poses for Flattering Angles

While couple poses are central to wedding photography, individual shots deserve equal attention. For the bride, guide her to turn her body slightly to the side, with her shoulders down and chin tilted forward to elongate her neck. A hand on the hip or gently touching her hair adds grace without stiffness.

The groom benefits from a relaxed stance, with weight shifted to one leg and his hands in pockets or loosely by his sides. Avoid having him stand straight on, as this can appear rigid. Instead, suggest he lean against a wall or prop his elbow on a nearby surface for a casual, confident look.

Facial expressions are key in individual poses. Encourage the bride to smile softly with her eyes, avoiding a forced grin. The groom can adopt a subtle smirk or a thoughtful gaze, depending on his personality. Capturing a mix of serious and playful expressions ensures a versatile gallery.

By focusing on connection, light, movement, and context, Melbourne studio photographers can guide couples into poses that feel authentic and visually striking. The goal is to create portraits that reflect the couple’s unique bond while leveraging the studio’s controlled environment to its fullest potential.

WUU02764

The efficiency of outdoor scene switching for wedding photography in Melbourne has been improved

Streamlining Outdoor Scene Transitions for Melbourne Wedding Photography: Enhancing Efficiency Without Sacrificing Creativity

Melbourne’s diverse landscapes—from coastal cliffs to urban laneways—offer endless possibilities for outdoor wedding photography. However, switching between scenes efficiently is crucial to maximize shooting time, especially during the city’s notoriously unpredictable weather. Below are strategies to optimize transitions, ensuring couples capture every desired shot without unnecessary delays.

Pre-Shoot Planning: Mapping Locations and Logistics

Thorough pre-shoot planning is the foundation of seamless scene transitions. Begin by scouting Melbourne’s outdoor venues in advance, identifying key spots within walking distance or a short drive. For example, a ceremony at Fitzroy Gardens could transition to a portrait session in nearby Treasury Gardens, minimizing travel time. Use digital mapping tools to visualize routes and estimate walking times between locations, accounting for Melbourne’s hilly terrain or crowded streets during peak hours.

Create a prioritized shot list that groups similar scenes together. If a couple desires both urban and natural backdrops, schedule cityscape shots in the morning when light is soft, then move to parks or beaches in the late afternoon for golden-hour portraits. Communicate this timeline clearly with the couple and any assistants, ensuring everyone understands the flow and reduces on-site decision-making.

Lightweight Gear Organization: Minimizing Setup Time

Efficient gear management is critical for quick scene changes. Invest in a modular camera bag system that allows photographers to access lenses, filters, and lighting equipment rapidly. For example, keep a dedicated pouch for prime lenses used in outdoor portraits, separate from zoom lenses for dynamic shots. Labeling gear compartments or using color-coded straps can further speed up retrieval.

When shooting in Melbourne’s variable weather, prepare for sudden changes by packing waterproof covers for cameras and quick-dry cloths for lenses. If transitioning from a sunny beach to a shaded forest, adjust camera settings (such as ISO and aperture) in advance to avoid missed shots during reconfiguration. Assign an assistant to handle gear swaps, freeing the photographer to focus on composition and directing the couple.

Transportation Strategies: Navigating Melbourne’s Terrain

Melbourne’s sprawling layout demands smart transportation choices. For venues spread across suburbs like St Kilda and Brighton, consider renting a compact vehicle with ample trunk space for gear. Alternatively, use public transport for central locations like the CBD or Docklands, but account for potential delays during peak commutes.

For back-to-back shoots in the same neighborhood, such as moving from a café in Degraves Street to a nearby alleyway for street-art portraits, opt for walking or cycling. This approach not only saves time but also adds a spontaneous, local flavor to the images. If driving is unavoidable, park in centralized locations and use trolleys or rolling cases to transport gear short distances.

Wardrobe and Prop Coordination: Reducing Downtime

Smooth wardrobe and prop transitions prevent lulls during scene changes. Encourage couples to pack outfits in labeled garment bags, grouping items by location (e.g., beach attire in one bag, urban outfits in another). For props like bouquets, hats, or signage, use sturdy containers that can be carried easily between spots.

If the couple plans multiple outfit changes, schedule them strategically. For instance, a gown swap could occur during a midday break when light is harsh, allowing time for adjustments while avoiding suboptimal shooting conditions. Assign a bridesmaid or family member to manage wardrobe changes, ensuring the couple remains focused on posing and emotion.

Time-Saving Posing Techniques: Maximizing Shooting Efficiency

Efficient posing reduces the need for repeated takes, freeing up time for scene transitions. Begin with group shots to capture formal portraits early in the session, then move to couple-focused poses that require less coordination. Use natural landmarks in Melbourne’s outdoor settings—such as leaning against a historic tram or sitting on Yarra River steps—to create relaxed, authentic poses without extensive direction.

Incorporate movement to add variety quickly. A simple walk-and-talk sequence through a laneway or along the beach can yield multiple usable frames in minutes. For static poses, use a “pose, shoot, adjust” rhythm: take a few shots, tweak the couple’s positioning slightly, and repeat. This method ensures a steady flow of images while minimizing downtime.

Contingency Plans: Adapting to Melbourne’s Weather

Melbourne’s weather can disrupt even the best-laid plans, making contingency strategies essential. Monitor forecasts closely and identify backup indoor locations near primary outdoor spots. For example, if rain threatens a beach shoot, pivot to a nearby café with large windows or a heritage building with verandas.

Communicate weather-related changes promptly with the couple, explaining how adjustments will maintain the session’s flow. Use rain as an opportunity for creative shots, such as capturing reflections in puddles or using umbrellas as props. If extreme weather forces a complete relocation, prioritize scenes that align with the couple’s vision while respecting time constraints.

By integrating these strategies, Melbourne wedding photographers can navigate outdoor scene transitions with precision, ensuring couples receive a diverse, high-quality gallery without unnecessary delays. The key lies in balancing preparation with adaptability, turning logistical challenges into opportunities for unique, memorable imagery.

wedding photography melbourne

Color matching suggestions for interior clothing in Melbourne wedding photography

Melbourne Wedding Photography Indoor Attire Color Coordination: Crafting Timeless Elegance

Indoor wedding photography in Melbourne thrives on harmonious color palettes that reflect the city’s blend of modern sophistication and natural charm. Whether shooting in loft-style venues or heritage-listed spaces, the right attire color combinations can elevate portraits, ensuring couples radiate confidence and cohesion. Below are nuanced strategies to master indoor color coordination without relying on rigid rules.

wedding photography melbourne

Neutral Foundations: Timeless Sophistication for Indoor Settings

Neutral tones form the backbone of indoor wedding attire, offering versatility that complements Melbourne’s eclectic interior styles. Ivory, champagne, and soft beige gowns create a luminous base, especially when paired with natural light streaming through large windows—a common feature in Melbourne’s converted warehouses or art galleries. For grooms, charcoal, taupe, or slate suits provide a polished contrast without overwhelming the scene.

Layering neutrals adds depth: a bride might pair an ivory lace gown with a cashmere shawl in a muted oatmeal hue, while the groom could incorporate a textured tie in a similar earthy tone. This approach ensures the focus remains on the couple’s expressions and body language, rather than distracting color clashes. In venues with exposed brick or timber floors, neutral attire harmonizes with the raw textures, creating a balanced, organic aesthetic.

Bold Accents: Adding Personality to Indoor Portraits

While neutrals dominate, strategic pops of color inject personality and narrative into indoor shots. Melbourne’s creative subcultures inspire couples to experiment with bold hues that reflect their shared interests or cultural heritage. For instance, a deep burgundy sash on a bride’s gown or a groomsmen’s tie in emerald green can symbolize passion and growth, especially when set against minimalist backgrounds like white walls or concrete floors.

When incorporating bold colors, limit them to one or two elements per outfit to avoid visual overload. A bride might choose a statement necklace in cobalt blue, while the groom wears a pocket square in the same shade, creating a subtle yet cohesive link. In venues with industrial features, such as metal beams or pendant lighting, these accents can mirror the space’s modernity, tying the couple’s style to the environment.

Monochromatic Schemes: Creating Visual Harmony

Monochromatic color palettes—where both partners wear varying shades of the same hue—create a striking, unified look ideal for indoor photography. For example, a bride in a dusty rose gown paired with a groom in a blush-toned suit exudes romance and softness, particularly in venues with pastel-colored decor or floral installations. This approach works seamlessly in Melbourne’s boutique hotels or garden-inspired ballrooms, where the environment’s color scheme can guide the couple’s choices.

To prevent monotony, vary textures and tones within the same color family. A satin bridesmaid’s dress in slate gray can contrast beautifully with a groom’s tweed suit in charcoal, adding dimension without breaking the monochromatic theme. This technique also simplifies group coordination, as attendants can choose shades that flatters their skin tone while staying within the palette.

Complementary Contrasts: Balancing Light and Dark

Pairing light and dark tones creates dynamic contrasts that draw attention to the couple’s features. A bride in a stark white gown against a groom’s black tuxedo is a classic choice, but modern twists—like a bride in a creamy off-white dress with a groom in navy blue—add depth and sophistication. This strategy works particularly well in Melbourne’s contemporary venues, where clean lines and open spaces highlight the interplay of light and shadow.

For a softer contrast, consider pairing a bride in a blush pink gown with a groom in a muted olive green suit. These hues, found naturally in Melbourne’s parks and gardens, create a grounded, earthy feel. When photographing in venues with large mirrors or reflective surfaces, complementary colors enhance symmetry and balance, making the couple appear both connected and distinct.

Texture and Tone: Elevating Colors Through Fabric Choices

The texture of fabrics influences how colors appear in indoor lighting. Matte finishes, like linen or raw silk, absorb light and create a subdued effect, ideal for muted palettes. Conversely, satin or velvet reflects light, making bold colors pop. A bride in a deep burgundy velvet gown will photograph differently in a dimly lit, candlelit room versus a brightly lit studio with white walls.

To adapt to Melbourne’s varied indoor lighting, couples can mix textures within their outfits. A groom might pair a wool suit with a silk tie, while the bride layers a lace overlay on a satin underdress. This interplay of textures ensures colors remain vibrant or subdued as needed, depending on the venue’s ambiance.

By thoughtfully combining neutrals, bold accents, monochromatic schemes, and complementary contrasts, couples can create indoor wedding attire that feels both timeless and uniquely their own. Melbourne’s diverse venues provide the perfect canvas to experiment with color, ensuring every photograph tells a story of love, style, and harmony.

Melbourne|wedding|photo|Cumulus|Inc|Evermore|-166

Weather adaptation strategies for outdoor wedding photography in Melbourne

Melbourne Wedding Photography Outdoor Weather Adaptation Strategies: Capturing Love in Every Climate

Melbourne’s unpredictable weather, characterized by sudden rain showers, chilly winds, and dramatic sunset shifts, poses unique challenges for outdoor wedding photography. However, with strategic planning and creative adaptability, couples can transform these variables into storytelling elements that elevate their images. Below are actionable strategies to navigate Melbourne’s climate while maintaining artistic integrity.

wedding photography melbourne

Lighting Optimization for Variable Conditions

Melbourne’s weather often shifts between overcast skies and brief bursts of sunlight, requiring photographers to master dynamic lighting techniques. On cloudy days, diffuse light reduces harsh shadows, creating a soft, flattering glow ideal for portraits. Position couples near reflective surfaces like wet pavement or glass windows to amplify ambient light, ensuring skin tones remain natural. For sudden sun breaks, use natural diffusers such as tree canopies or translucent umbrellas to prevent overexposure while maintaining a warm, golden-hour effect.

When shooting during Melbourne’s notorious “four seasons in one day” transitions, prioritize flexibility. For example, if rain interrupts a sunset session, pivot to indoor locations with large windows to capture the interplay of natural and artificial light. Alternatively, embrace the rain’s reflective properties by photographing couples in puddles, using the sky’s reflection to create symmetry and depth.

Rainy Day Romance: Embracing the Elements

Rain is not a barrier but an opportunity to craft intimate, narrative-driven images. Short, manageable showers allow for creative risk-taking, such as capturing raindrops on lenses for a dreamy bokeh effect or using clear umbrellas as props to frame couples in a protective embrace. For heavier rain, seek shelter under architectural features like arched colonnades or verandas, where dripping eaves and wet stone add texture to compositions.

Incorporate movement to convey emotion: photograph couples walking hand-in-hand through rain-soaked streets, or capture the moment a gust of wind lifts a veil. If the rain coincides with twilight, leverage streetlights or neon signs to create moody, cinematic backdrops. For a whimsical touch, use colorful umbrellas or rain boots as playful accents, adding personality to the scene.

Wind Management: Turning Breezes into Drama

Melbourne’s coastal winds, particularly in locations like St Kilda or Brighton Beach, can challenge even the most structured hairstyles and gowns. To mitigate this, advise couples to choose lightweight fabrics for veils and dresses, or secure layers with subtle clips. For intentional wind-swept shots, position the couple facing away from the breeze, allowing their hair and clothing to flow naturally behind them, creating a sense of movement and freedom.

Use wind as a compositional tool: frame couples against blowing leaves or drifting clouds to emphasize scale and atmosphere. If gusts become disruptive, pivot to sheltered areas like gardens with hedgerows or urban alleys, where structures break the wind while maintaining an outdoor aesthetic.

Cold Weather Comfort: Balancing Style and Warmth

Melbourne’s winters, though mild compared to other regions, can feel chilly, especially during extended outdoor sessions. Prioritize couple comfort by scheduling shorter, high-impact shoots during the warmest part of the day, typically mid-afternoon. Encourage layering with thermal undergarments or faux-fur stoles that complement the wedding attire without compromising style.

Incorporate warmth into the narrative: photograph couples sharing a blanket or sipping hot beverages from thermoses, using these moments to capture genuine interaction. For snow-dusted landscapes (rare but possible in Melbourne’s outer suburbs), leverage the monochrome palette for minimalist compositions, focusing on the couple’s silhouettes against a white backdrop.

Sun Protection for Bright Days: Avoiding Harsh Contrasts

Melbourne’s summer sun can create high-contrast scenes with deep shadows and blown-out highlights. To counter this, schedule shoots during the “golden hours” shortly after sunrise or before sunset, when the light is softer and warmer. If midday sun is unavoidable, seek shade under trees or canopies, using the dappled light to add pattern and texture to images.

For beach or open-field shoots, use reflectors to bounce light onto the couple’s faces, balancing exposure. Alternatively, position them with the sun behind them for a radiant halo effect, ensuring their faces remain well-lit with fill flash or reflectors.

By adapting to Melbourne’s weather with these strategies, couples can transform climatic challenges into opportunities for authentic, visually striking storytelling. Each element—rain, wind, cold, or sun—becomes a character in their love story, ensuring their wedding photos are as unique as their journey together.

DSC03791

Interior prop placement tips for wedding photography in Melbourne

Melbourne Wedding Photography Indoor Prop Arrangement Techniques: Elevating Your Romantic Narrative

Creating a visually compelling indoor wedding photography setup in Melbourne requires more than just selecting beautiful props—it’s about crafting a story through intentional placement, texture contrasts, and emotional resonance. Below, we explore techniques to transform ordinary spaces into timeless backdrops for your love story.

wedding photography melbourne

Layering Textures for Depth and Dimension

Indoor scenes often lack natural depth, making texture layering essential. Combine smooth surfaces like satin drapes or polished mirrors with rough elements such as exposed brick walls, woven baskets, or weathered wooden crates. For example, placing a vintage lace tablecloth beneath a modern glass vase filled with wildflowers creates a juxtaposition of old and new, adding narrative weight to the scene.

Incorporate tactile diversity by introducing metallic accents—think antique candle holders or copper-framed mirrors—alongside soft fabrics like velvet cushions or tulle ribbons. This interplay of materials not only enhances visual interest but also guides the viewer’s eye across the frame, ensuring every detail contributes to the overall mood.

Dynamic Lighting to Amplify Emotion

Lighting is the silent storyteller in indoor photography. Use directional lighting to sculpt faces and highlight key props. For instance, positioning a softbox at a 45-degree angle to the couple can create flattering shadows that emphasize their expressions while casting gentle glows on nearby props like floral arrangements or handwritten vows displayed on aged parchment.

Experiment with colored gels or LED strips to infuse scenes with subtle hues. Warm amber tones evoke nostalgia, perfect for vintage-themed shoots, while cool blues suit minimalist, modern aesthetics. During nighttime sessions, string fairy lights across ceilings or wrap them around staircase railings to mimic starry skies, adding a dreamy quality to portraits.

Strategic Prop Placement to Guide Focus

Avoid clutter by arranging props in clusters of three to five items, varying heights and shapes for balance. Place larger objects like oversized picture frames or potted plants at the back of the scene to anchor the composition, then layer smaller items—such as vintage cameras, handwritten love letters, or delicate china—in the foreground to draw attention.

For couples’ portraits, use props to create natural interactions. A shared activity, like writing in a guestbook or sipping champagne from mismatched glasses, encourages genuine smiles and relaxed postures. Even everyday items like a stack of books or a quilted throw can become meaningful when placed thoughtfully, symbolizing shared interests or cozy moments together.

Incorporating Local Melbourne Elements for Authenticity

Melbourne’s eclectic culture offers unique opportunities to personalize your setup. Integrate local flora like eucalyptus branches or banksia flowers into bouquets or centerpieces, reflecting the city’s natural beauty. Repurpose vintage suitcases or typewriters from Melbourne’s thrift markets as props, adding a touch of nostalgia that resonates with the couple’s journey.

For urban-inspired shoots, use architectural elements like arched windows or wrought-iron balconies as backdrops, framing the couple against Melbourne’s iconic skyline. Even indoor venues with industrial features—such as exposed pipes or concrete floors—can be softened with lush greenery or flowing fabrics, blending rugged charm with romantic elegance.

Final Touches: The Power of Personalization

Infuse scenes with personal significance by incorporating heirlooms or symbols of the couple’s relationship. A grandmother’s brooch pinned to the bride’s bouquet, a handkerchief embroidered with their wedding date, or a map highlighting their first meeting spot transforms generic props into cherished keepsakes.

By combining these techniques—layering textures, manipulating light, arranging props thoughtfully, and incorporating local flair—you can create indoor wedding photography setups in Melbourne that are as unique as the couples themselves. Each element becomes a brushstroke in a larger portrait of love, ensuring every image tells a story worth remembering.

DSC03645

Methods for utilizing outdoor light in Melbourne wedding photography

Mastering Natural Light for Melbourne Wedding Photography Outdoor Shoots

Melbourne’s ever-changing weather and diverse landscapes demand a nuanced understanding of natural light. From golden-hour glows to overcast diffusions, mastering light manipulation ensures timeless, emotion-driven imagery. Below are key strategies for leveraging Melbourne’s unique lighting conditions.

wedding photography melbourne

Golden Hour Magic: Timing Your Session for Ethereal Results

The hour after sunrise and before sunset bathes Melbourne in a warm, directional glow, ideal for romantic portraits. In coastal areas like Brighton Beach, the low-angle sun casts elongated shadows, adding depth to colorful bathing boxes and sandy dunes. For urban settings, St Kilda Pier’s wooden planks and lighthouse silhouettes become dramatic backdrops when lit from the side.

To maximize this window:

  • Schedule sessions 30 minutes before sunset for softer contrasts.
  • Position couples facing the light source to highlight facial features while avoiding harsh shadows.
  • Use reflectors to bounce light onto darker areas, such as under chins or behind hair.

In winter, Melbourne’s shorter days mean adjusting timelines—prioritize late-afternoon shoots to capture the fleeting golden hour.

Overcast Elegance: Embracing Soft, Even Illumination

Cloudy skies transform Melbourne’s parks and gardens into natural diffusers, eliminating harsh shadows and reducing the need for artificial lighting. The Royal Botanic Gardens’ lush foliage and tranquil lakes appear vibrant yet balanced under this lighting, perfect for intimate close-ups.

Key techniques for overcast conditions:

  • Opt for lighter-colored outfits to prevent subjects from blending into muted backgrounds.
  • Use a fill flash or reflector to add subtle highlights to faces, ensuring they don’t appear flat.
  • Explore moody compositions by framing couples against darker foliage or architecture, such as the Melbourne Museum’s modernist facade.

Overcast days also allow for midday shoots without the risk of squinting or overexposure, offering flexibility in scheduling.

Backlighting Brilliance: Creating Drama with Silhouettes and Halos

Backlighting—where the primary light source is behind the subject—adds artistic flair to outdoor shoots. At Half Moon Bay, positioning couples with the ocean and sunset behind them creates striking silhouettes or glowing hair effects. Similarly, urban venues like Flinders Street Station’s arched windows can serve as dramatic backdrops when lit from behind.

To achieve this:

  • Meter for the subject’s face, exposing correctly while allowing the background to overexpose slightly for a dreamy effect.
  • Use a lens hood to prevent lens flare, or embrace it creatively by positioning the sun partially obscured by foliage or architecture.
  • For added definition, combine backlighting with a reflector or fill flash to illuminate facial details.

In windy conditions, such as along the Yarra River, backlighting can emphasize movement in flowing dresses or veils, adding dynamism to static poses.

Dynamic Weather Adaptations: Making the Most of Melbourne’s Climate

Melbourne’s infamous “four seasons in one day” requires adaptability. Sudden cloud cover can soften harsh midday sun, while brief sunbreaks offer opportunities for quick, high-contrast shots. For example, a rain shower at the Melbourne Zoo’s rainforest exhibit can create reflective surfaces, enhancing the lush greenery’s vibrancy.

Practical adjustments include:

  • Carrying portable diffusers or umbrellas to manage unexpected sunlight.
  • Scouting locations with natural windbreaks, like the Melbourne Cricket Ground’s covered walkways, to stabilize hair and fabric.
  • Using rain as a creative tool—capturing couples under shared umbrellas or reflecting cityscapes in puddles for a unique perspective.

By staying flexible, photographers can turn unpredictable weather into a storytelling asset, adding authenticity to the narrative.

Final Thoughts
Melbourne’s outdoor wedding photography thrives on understanding and manipulating natural light. Whether harnessing the golden hour’s warmth, embracing overcast softness, or crafting drama with backlighting, each approach requires technical precision and artistic vision. By adapting to the city’s dynamic climate and leveraging its iconic landscapes, photographers can create images that resonate with emotion and timeless elegance.

wedding photography melbourne

Principles for interior background matching in Melbourne wedding photography

Melbourne Wedding Photography Indoor Backdrop Styling Principles: Creating Timeless Elegance

Melbourne’s diverse interior spaces—from heritage-listed ballrooms to minimalist studios—offer endless possibilities for wedding photography backdrops. The key to achieving memorable images lies in harmonizing textures, lighting, and personal themes. Below are principles to guide couples in selecting and styling indoor settings that reflect their unique love story.

wedding photography melbourne

Classic Elegance: Timeless Textures and Neutral Palettes

For couples drawn to sophistication, spaces with neutral color schemes and luxurious textures provide a versatile canvas. Venues like the Melbourne Town Hall or The Langham’s Grand Ballroom feature marble floors, ornate moldings, and chandeliers that exude refinement. These elements work seamlessly with both traditional and modern attire, allowing the couple’s outfits to take center stage.

Pairing soft, muted tones—such as ivory, champagne, or blush—with metallic accents (gold, silver, or rose gold) creates a balanced aesthetic. For example, a bride in a lace gown might stand against a textured stone wall, while the groom’s navy suit complements the venue’s gold detailing. Incorporating vintage furniture, like a tufted velvet sofa or an antique mirror, adds depth without overwhelming the scene.

Lighting plays a pivotal role in classic settings. Natural light streaming through large windows, as seen in venues like The Arts Centre Melbourne, softens features and highlights intricate details. When shooting later in the day, consider using candlelight or fairy lights to create a warm, intimate ambiance.

Modern Minimalism: Clean Lines and Bold Contrasts

Couples seeking a contemporary look often opt for spaces with geometric shapes and monochromatic palettes. Studios with exposed brick, concrete floors, or industrial ceilings—such as those found in Collingwood’s converted warehouses—offer a blank slate for creative expression. These venues thrive on simplicity, allowing bold accessories or vibrant bouquets to pop against neutral backgrounds.

To avoid monotony, introduce textural contrasts. A sleek white wall can be enhanced with a textured rug or a metallic sculpture. Similarly, pairing a minimalist backdrop with a statement piece—like a dramatic floral installation or a neon sign with the couple’s initials—adds personality without clutter.

Lighting in modern spaces should emphasize structure. Directional spotlights can highlight architectural features, while colored gels might infuse energy into the scene. For a softer approach, sheer curtains diffuse harsh light, creating a dreamy effect perfect for romantic portraits.

Cultural Heritage: Blending Tradition with Personal Touches

Melbourne’s multicultural identity is reflected in venues like The Chinese Museum or The Greek Orthodox Cathedral, which offer rich cultural backdrops. When incorporating heritage elements, balance authenticity with personalization. For instance, a couple with Italian roots might pose in a venue with Tuscan-inspired décor, using a family heirloom—such as a lace veil or vintage jewelry—to bridge the past and present.

Color symbolism is crucial in cultural settings. Red and gold dominate Chinese weddings, symbolizing luck and prosperity, while white and silver are preferred in Western traditions. Work with your photographer to ensure the backdrop’s hues complement rather than compete with your attire.

Accessories can deepen the narrative. A Moroccan-themed shoot might include intricately patterned rugs or brass lanterns, while a Scandinavian-inspired space could feature minimalist wood furniture and hygge-style lighting. The goal is to create a scene that feels both intentional and organic.

Personalized Themes: Telling Your Story Through Décor

Beyond aesthetics, indoor backdrops should reflect the couple’s shared interests or journey. A music-loving pair might choose a venue with a grand piano or vinyl record displays, while bookworms could opt for a library-inspired setting with floor-to-ceiling shelves. These thematic elements transform generic spaces into meaningful stages.

Sentimental props add layers to the narrative. Displaying photographs from your relationship, letters exchanged over time, or mementos from shared travels creates a visual timeline. Even small details—like a custom neon sign with your wedding date or a quilt made by family members—can anchor the images in emotion.

Collaborate with your photographer to ensure cohesion. A professional can suggest ways to integrate themes without overwhelming the frame, such as using a single prop as a focal point or scattering subtle nods throughout the scene.

Lighting and Composition: Enhancing Mood and Depth

Regardless of the backdrop, lighting and composition dictate the photograph’s emotional tone. Soft, diffused light works best for romantic shots, minimizing harsh shadows and highlighting skin tones. Venues with large skylights or north-facing windows, like The National Gallery of Victoria, naturally provide this effect.

For dramatic portraits, experiment with backlighting or silhouettes. Positioning the couple near a window or using artificial light to create a rim effect adds depth and mystery. In smaller studios, reflectors or off-camera flashes can mimic natural light, ensuring consistency across shots.

Composition should guide the viewer’s eye. Use leading lines—such as staircases, arches, or furniture arrangements—to draw attention to the couple. Framing techniques, like shooting through a doorway or using foliage, add context and intrigue.

By thoughtfully combining aesthetics, culture, and personal touches, couples can craft indoor wedding photography that resonates long after the ceremony. Melbourne’s eclectic venues provide the perfect stage to tell your story—one frame at a time.

80883-Wu-1097

Criteria for choosing outdoor locations for wedding photography in Melbourne

Melbourne Wedding Photography Outdoor Venue Selection Criteria: A Guide to Scenic Backdrops

Melbourne, renowned for its blend of Victorian-era architecture and modern urban landscapes, offers a diverse range of outdoor venues for wedding photography. From historic landmarks to natural wonders, each location provides unique visual elements that can elevate your wedding album. Below are key considerations for selecting the perfect backdrop for your special day.

wedding photography melbourne

Architectural Grandeur: Timeless Elegance in Urban Settings

Melbourne’s cityscape is dotted with iconic buildings that serve as dramatic settings for wedding portraits. The St. Patrick’s Cathedral, with its Gothic spires and intricate stone carvings, creates a solemn yet romantic atmosphere, especially during golden hour when sunlight filters through stained-glass windows. Nearby, the Parliament House exudes neoclassical charm, its grand columns and manicured gardens offering a regal frame for couples. For a fusion of old and new, the Eureka Skydeck 88 provides panoramic views of the city skyline, ideal for capturing sweeping vistas at sunset.

Urban alleys like Hosier Lane and Croft Alley cater to those seeking artistic flair. These ever-changing涂鸦 (graffiti) corridors feature vibrant murals that transform with each season, ensuring no two photo sessions are alike. The dynamic colors and abstract patterns contrast beautifully with formal attire, adding a contemporary edge to traditional wedding photography.

Coastal & Natural Landscapes: Serenity by the Sea

Melbourne’s coastline stretches along Port Phillip Bay, offering serene beaches and rugged cliffs for outdoor shoots. Brighton Beach, famous for its colorful bathing boxes, provides a playful, Instagram-worthy setting. The wooden huts, painted in pastel hues, create a whimsical backdrop for candid moments. For a more dramatic scene, Half Moon Bay’s rocky shoreline and tidal pools offer moody textures, particularly during low tide when tidal formations are exposed.

Further afield, the Mornington Peninsula boasts landscapes ranging from rolling vineyards to secluded coves. The London Bridge rock formation and Cape Schanck Lighthouse are popular choices for couples seeking isolation and natural beauty. The peninsula’s microclimates also allow for seasonal variations—spring wildflowers, autumn foliage, or winter mist—each adding a distinct mood to photographs.

Historic & Cultural Sites: Storytelling Through Heritage

Melbourne’s rich history is preserved in landmarks that double as storytelling tools. The Royal Exhibition Building, a UNESCO World Heritage Site, combines neoclassical and Renaissance Revival styles, its vast halls and domed ceiling ideal for grand, formal portraits. Similarly, the State Library Victoria’s grand reading room, with its mosaic floors and towering bookshelves, offers an intellectual yet romantic ambiance.

For a touch of whimsy, the Palais Theatre in St Kilda provides a vintage cinema aesthetic. Its Art Deco façade and ornate interiors, recently restored to their former glory, evoke a sense of old-world glamour. Couples can pose under its marquee or inside the auditorium, where chandeliers and balconies create a theatrical setting.

Practical Considerations: Lighting, Accessibility, and Permits

While aesthetics are paramount, logistical factors cannot be overlooked. Lighting plays a critical role—coastal venues like St Kilda Pier benefit from soft, diffused light at dawn, while urban sites like Flinders Street Station shine under artificial glow at night. Accessibility is another concern; venues like the Yarra Valley’s wineries require travel but reward with secluded vineyards, whereas city-center locations like Federation Square offer convenience for guests.

Lastly, permits may be necessary for certain venues, especially those with historical or cultural significance. The Victoria Barracks, for instance, restricts photography during office hours, while national parks like the Great Ocean Road require booking slots to avoid crowds. Researching regulations in advance ensures a smooth shoot without interruptions.

By balancing visual appeal with practicality, couples can curate a wedding photography experience that captures Melbourne’s essence—a city where history, nature, and modernity coexist harmoniously. Whether framed by colonial architecture or coastal waves, each venue tells a story as unique as the love it celebrates.

DSC03869

Preparations for weather inquiry and backup plans for wedding photography in Melbourne

Weather Contingency Planning for Melbourne Wedding Photography

Melbourne’s reputation for “four seasons in one day” demands flexible planning for wedding photography. Sudden rain, wind, or extreme temperatures can disrupt outdoor shoots, but with the right backup strategies, couples can ensure their photos remain stunning regardless of the weather. Below are actionable steps to prepare for unpredictable conditions.

wedding photography melbourne

Monitoring Melbourne’s Dynamic Weather Patterns

Utilizing Reliable Forecasting Tools
Start checking weather forecasts 7–10 days before your wedding date, focusing on platforms that offer hourly updates. Melbourne’s Bureau of Meteorology (BOM) provides detailed reports on precipitation chances, wind speeds, and temperature fluctuations. Pay attention to morning forecasts, as conditions can shift rapidly by afternoon. For coastal shoots near St Kilda or Brighton, check tide times and wave heights if beach photography is planned.

Identifying High-Risk Weather Windows
Certain times of year in Melbourne are more prone to instability. Late autumn and early spring often bring unpredictable showers, while summer can feature sudden thunderstorms. If your wedding falls during these periods, assume rain is possible and prioritize backup venues. Winter weddings may face colder temperatures, requiring plans for indoor warmth between outdoor shots.

Setting Alert Thresholds for Decisions
Define clear criteria for when to activate your backup plan. For example, if there’s a 60% chance of rain two days before the shoot, begin moving indoor setups. If wind speeds exceed 30 km/h, avoid open locations like the Royal Botanic Gardens, where flying hair or dresses could ruin photos. Communicate these thresholds with your photographer and wedding planner to ensure quick adjustments.

Indoor Venue Alternatives for Rain or Extreme Heat

Scouting Nearby Covered Locations
Research indoor venues within a 15-minute drive of your original outdoor site. Historic buildings like the Royal Exhibition Building or modern spaces in the Melbourne CBD offer architectural backdrops that mimic outdoor elegance. For intimate shoots, consider cafes with large windows for natural light or art galleries with neutral walls. Ensure these venues allow photography and have enough space for your group.

Adapting Styling for Indoor Lighting
Indoor settings often have softer, diffused light compared to outdoor sunlight. Adjust your makeup and clothing choices accordingly—matte finishes work better under artificial lighting, while glossy lips or shimmering fabrics may appear overly reflective. If shooting near windows, position yourself to avoid harsh shadows. Bring portable reflectors or diffusers to balance light if the venue’s fixtures are too dim or bright.

Creating a Seamless Transition Plan
Develop a timeline that accounts for moving between indoor and outdoor locations. For example, start with indoor portraits if rain is expected in the morning, then reassess for outdoor shots later if skies clear. Share this plan with your photographer, hair and makeup team, and wedding party to minimize confusion. Label backup locations on your itinerary and assign someone to monitor weather updates during the shoot.

Protective Gear and Clothing Adjustments for Inclement Weather

Waterproofing Essentials for Rain
If rain is likely, pack clear umbrellas for the couple and wedding party. Choose ones with a matte finish to avoid glare in photos. For the bride, consider a waterproof hairspray to tame frizz and keep updos intact. Have microfiber towels on hand to dry off quickly between shots. If the ground is muddy, bring old shoes or boot covers to protect formal footwear during walks between locations.

Layering Strategies for Cold or Windy Conditions
Melbourne’s winter and spring days can turn chilly, especially near the coast. The groom might wear a thermal undershirt beneath his suit, while the bride could opt for a faux-fur stole or silk shawl. For windy shoots, secure veils with extra bobby pins and use texturizing spray to prevent hair from flying out of place. If temperatures drop unexpectedly, have hand warmers or blankets available during breaks.

Sun Protection for Bright, Sunny Days
On clear days, the Australian sun can be intense. The bride should apply broad-spectrum sunscreen to exposed skin (neck, shoulders) before makeup to avoid sunburn. Both partners can wear UV-protective sunglasses during transit between shots, removing them only for formal photos. For midday shoots, seek shaded areas like tree canopies in Fitzroy Gardens or under awnings in Degraves Street to reduce squinting and harsh shadows.

Communication and Flexibility During Weather Disruptions

Establishing a Clear Chain of Command
Designate one person (e.g., the wedding planner or best man) to monitor weather updates and relay decisions to the group. This avoids conflicting instructions and ensures everyone stays informed. Provide this contact with a list of backup venues, phone numbers, and a timeline for when to pivot plans. Use group messaging apps to share real-time updates without disrupting the shoot.

Building Buffer Time into the Schedule
Factor in extra time for weather-related delays, such as moving equipment indoors or drying off after rain. If your original shoot was planned for three hours, allocate four to accommodate pauses. This flexibility reduces stress and allows for creative adjustments—like using rain puddles for reflective shots or capturing candid moments under umbrellas.

Maintaining a Positive Attitude
Unpredictable weather can test patience, but embracing the conditions often leads to unique photos. Rain creates soft, romantic lighting, while wind adds movement to dresses and veils. Share inspiration photos with your photographer that showcase weather-related creativity, such as foggy morning shots in the Dandenong Ranges or golden-hour portraits in Carlton Gardens. A calm, adaptable mindset ensures the day remains enjoyable regardless of the forecast.

By preparing for Melbourne’s weather quirks, couples can turn potential disruptions into opportunities for memorable, one-of-a-kind wedding photos. Thoughtful planning and open communication with your team ensure your special day runs smoothly, no matter what the sky decides.

wedding photography melbourne

Preparations for pre-trimming hairstyles for newlyweds in Melbourne wedding photography

Pre-Wedding Hairstyle Preparation for Melbourne Couples

Your wedding hairstyle frames your face in photos and complements your overall look, making it essential to plan ahead. Melbourne’s diverse weather—from coastal winds to urban humidity—can affect how your hair behaves. Below are practical steps to ensure your hairstyle stays flawless throughout your wedding photography session.

wedding photography melbourne

Timing Your Haircut for Optimal Length and Texture

Balancing Growth and Shape
Schedule your final haircut 2–3 weeks before the wedding. This allows enough time for your hair to settle into its natural texture while maintaining a clean, polished shape. If you’re growing out layers or a fringe, consult your stylist to trim split ends without sacrificing length. For example, a blunt bob might need a slight softening at the ends to avoid a boxy appearance in photos.

Adjusting for Hair Type
Curly or wavy hair tends to shrink as it dries, so your stylist should cut it when damp to gauge the final length accurately. Straight hair, however, can be cut dry for precision. If you plan to wear extensions, ensure your natural hair is the same length as the extensions to avoid uneven layers. Discuss with your stylist how to blend layers seamlessly for a natural look.

Accounting for Weather-Related Changes
Melbourne’s humidity can cause frizz, while dry winds might lead to static. If you’re shooting outdoors at venues like St Kilda Beach or the Royal Botanic Gardens, ask your stylist to recommend a cut that minimizes these issues. A layered cut with lightweight products can reduce bulk in humid conditions, while a sleek, blunt style may fare better in dry weather.

Communicating with Your Stylist About Wedding Day Goals

Sharing Your Vision and Inspiration
Bring photos or mood boards to your stylist to illustrate the style you want—whether it’s a romantic updo, loose waves, or a vintage-inspired look. Explain how the hairstyle should complement your dress (e.g., a low bun for a high-necked gown or voluminous curls for a strapless design). If you’re unsure, ask your stylist to suggest options based on your face shape and hair texture.

Discussing Practicality for All-Day Wear
Your hairstyle must withstand hours of movement, dancing, and potentially multiple outfit changes. For example, an intricate braid might loosen over time, while a simple ponytail could shift during head turns. Work with your stylist to create a style that balances aesthetics and durability. Consider adding hidden bobby pins or texturizing spray for extra hold.

Addressing Hair Accessories and Veils
If you plan to wear a veil, headpiece, or hairpins, ensure your cut accommodates them. A veil might require a smooth base with no bumps, while a floral crown could benefit from textured layers. Practice wearing the accessories during your trial run to check for comfort and security. Your stylist can adjust the cut to prevent accessories from slipping or looking bulky.

Preparing Your Hair for Styling Success

Deep Conditioning Treatments
Start a weekly deep-conditioning routine 4–6 weeks before the wedding to strengthen and hydrate your hair. Look for products with ingredients like keratin or argan oil to repair damage from coloring or heat styling. Avoid overusing protein treatments, which can make hair brittle if applied too frequently. For coarse or curly hair, a leave-in conditioner can help define curls without weighing them down.

Color Touch-Ups and Tone Adjustments
If you’re coloring your hair, schedule your last appointment 1–2 weeks before the wedding. This allows time for the color to settle and any brassiness to fade. For highlights, ask your colorist to use a toner for a natural, sun-kissed effect. If you’re covering grays, ensure the root touch-up blends seamlessly with the rest of your hair. Bring a photo of your desired shade to avoid miscommunication.

Managing Hair Growth Between Appointments
If your hair grows quickly, discuss maintenance options with your stylist. For example, a dry shampoo can absorb oil at the roots between washes, while a root concealer spray can temporarily mask regrowth. Avoid drastic changes to your haircut or color close to the wedding date, as adjustments may not have time to settle. Stick to minor trims or gloss treatments for shine.

Testing Your Hairstyle in Real-World Conditions

Simulating Wedding Day Activities
Wear your trial hairstyle for a full day to see how it holds up during movement, humidity, and wind. Take a walk outdoors, dance in your living room, or mimic posing for photos. Note any areas that loosen or flatten, and share feedback with your stylist. For outdoor shoots in places like the Yarra Valley, test how your hair reacts to sunlight and breeze.

Adjusting for Hair Accessories
If your trial hairstyle includes accessories, practice removing and reattaching them to ensure they stay secure. A clip-on hairpiece might shift during hugs or kisses, while a comb veil could pull at delicate updos. Use bobby pins or hairspray to reinforce weak spots. For long hair, consider a low ponytail or braid to keep strands contained under a veil.

Photographing Your Trial Run
Take photos of your trial hairstyle from multiple angles (front, back, sides) to evaluate how it looks on camera. Check for flyaways, uneven sections, or visible pins. Natural light is best for assessing color and texture, so step outside or use a window. Share these photos with your stylist to refine the look before the wedding day.

By following these steps, Melbourne couples can ensure their hairstyles look polished and photograph beautifully, regardless of weather or activity. Thoughtful preparation allows you to focus on enjoying your day while your hair stays picture-perfect from the first shot to the last.