wedding photography melbourne

Melbourne sunny wedding photography with clear and transparent lighting effects

Bright Beginnings: Melbourne Sunlit Wedding Photography for Luminous, Airy Imagery

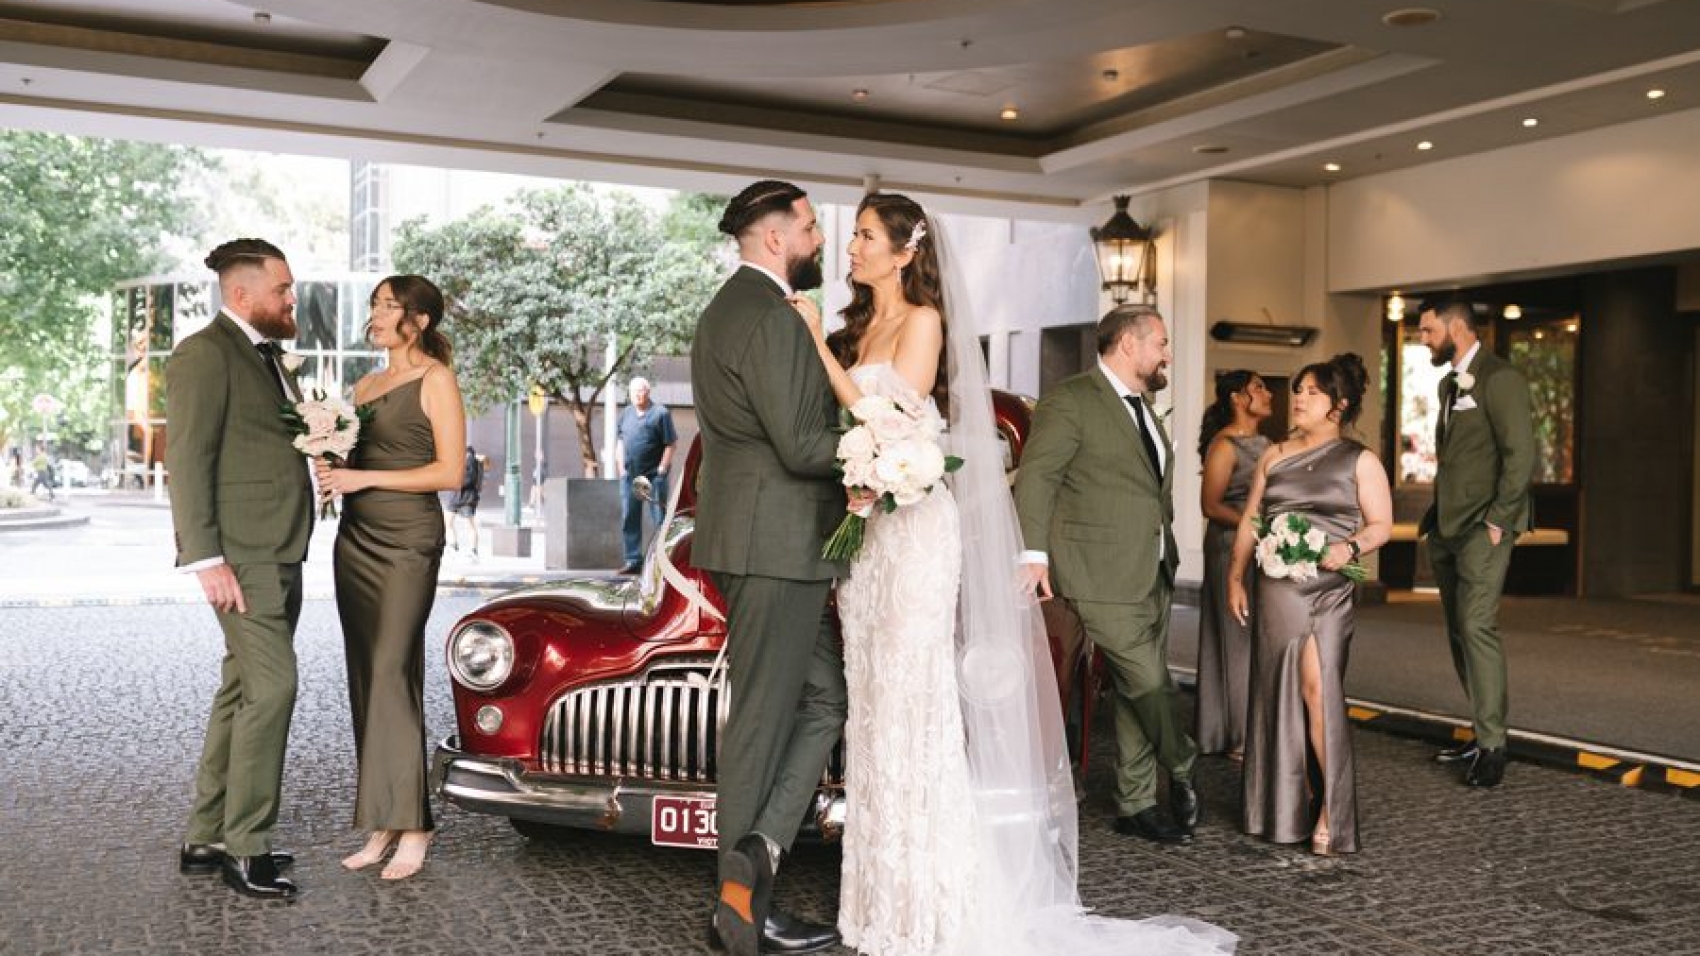
Melbourne’s sunny days are a gift to wedding photographers, offering crisp light, vivid colors, and a sense of joy that translates beautifully into images. When the sun shines, the city’s architecture, gardens, and coastlines come alive with sharp contrasts and glowing highlights, creating the perfect backdrop for timeless, light-filled photos. Here’s how to harness Melbourne’s sunlight to craft wedding galleries that feel bright, authentic, and effortlessly romantic.

wedding photography melbourne

Mastering Golden Hour: The Sun’s Most Flattering Light

Golden hour—the period shortly after sunrise or before sunset—bathes everything in a warm, golden glow that flatters skin tones and adds a magical quality to images. In Melbourne, this light is particularly soft during summer mornings, when the sun rises early and casts long, gentle shadows. Schedule portrait sessions during these times to capture the couple in a halo of sunlight, with highlights dancing off their hair and clothing.

For sunset shoots, position the couple facing the sun to create a radiant backlight, then use a reflector or fill flash to balance exposure on their faces. If shooting into the sun, experiment with silhouettes or flare effects by allowing sunlight to stream directly into the lens. This technique works especially well for wide-angle shots of the couple standing against a blazing sky, emphasizing the grandeur of the moment.

Using Natural Light to Define Shapes and Textures

Sunny days highlight every detail, from the intricate lace on a wedding dress to the rough texture of stone walls. Use this to your advantage by choosing locations with varied surfaces—think cobblestone streets, wooden piers, or leafy gardens—to add depth and interest to compositions. Position the couple near these elements, letting sunlight accentuate their contours while creating a play of light and shadow on their forms.

For portraits, seek out open shade, such as under a tree or beside a building, to avoid harsh midday sunlight. This diffused light softens features while maintaining the vibrancy of colors, making it ideal for close-ups of the couple’s expressions or delicate details like rings or flowers. If shooting in direct sun, use a scrim or diffuser to soften the light, or ask the couple to turn slightly to the side to minimize unflattering shadows.

Creating Dynamic Compositions with Shadows and Highlights

Sunlight is a natural storyteller, casting shadows that add drama and movement to images. Look for patterns created by window frames, railings, or foliage, and use them to frame the couple or lead the eye toward them. For example, shoot through a wrought-iron gate to create a lattice of shadows across the bride’s dress, or position the couple beneath a pergola where dappled light falls in soft patches.

Experiment with high-contrast shots by placing the couple in areas of deep shadow next to brightly lit spaces. This technique works well in urban settings, where alleys or doorways create striking juxtapositions of light and dark. Use a spot metering mode to expose for the couple’s faces, allowing the background to fall into dramatic shadow or blow out into pure white for a minimalist effect.

Capturing Candid Moments in Natural Light

The spontaneity of sunny days lends itself to candid photography, as couples feel more relaxed and playful in the warmth. Encourage them to interact naturally—walking hand-in-hand, sharing a laugh, or stealing a kiss—while you capture the moment from a distance. Use a telephoto lens to stay unobtrusive, or a wide-angle lens to include the environment and convey a sense of place.

For action shots, like the bride tossing her bouquet or the couple dancing, use a fast shutter speed (1/1000s or higher) to freeze motion without blur. If the sun is low in the sky, position yourself so it backlight the subjects, creating a rim of light that separates them from the background. This adds a sense of energy and movement to images, making them feel alive and immediate.

Enhancing Colors with Sunlight and Post-Processing

Sunny days bring out the truest colors, from the azure of the sky to the emerald of gardens. To preserve this vibrancy, shoot in RAW format and adjust white balance to neutralize any unwanted warmth or coolness. In post-processing, boost saturation slightly to make greens and blues pop, but avoid oversaturating—natural-looking colors feel more timeless and authentic.

Use contrast and clarity sliders to enhance textures without making the image look harsh. For example, slightly increase clarity to bring out the details in a bride’s dress or the grooves in a stone wall, then reduce highlights to prevent the sky from becoming too bright. If shooting in harsh midday light, recover shadows in editing to reveal details hidden in dark areas, creating a balanced, well-exposed final image.

Final Touches: Adding Personal Elements to Sunlit Shots

Even in bright conditions, personal details can make wedding photos feel unique and meaningful. Incorporate items like a handwritten sign, a family heirloom, or a shared hobby into the shoot to add context and warmth. For example, photograph the couple reading their vows in a sunlit garden, or capture the groom adjusting the bride’s veil while holding a lucky charm from his childhood.

These moments, though small, resonate deeply and make the images feel authentic and heartfelt. Use sunlight to highlight these details—let it catch the edge of a lace handkerchief or illuminate the pages of a love letter—to create a connection between the couple and the viewer.

By embracing Melbourne’s sunny days and using light, shadow, and color to tell a story, photographers can create wedding galleries that feel bright, joyful, and unforgettable. The key lies in seeing sunlight not just as illumination, but as a tool for crafting images that capture the essence of love in its purest, most radiant form.

wedding photography melbourne

Melbourne cloudy-day wedding photography with soft focus and atmospheric effect shooting

Embracing the Gloom: Melbourne Overcast Wedding Photography for Soft, Romantic Imagery

Melbourne’s overcast skies, often dismissed as gloomy, hold a unique charm for wedding photographers seeking to create images with a dreamy, ethereal quality. The diffused light of cloudy days eliminates harsh shadows, wraps subjects in a gentle glow, and transforms ordinary scenes into moody, romantic landscapes. Here’s how to craft wedding photos that thrive in the softness of Melbourne’s cloud cover, focusing on emotion, texture, and atmosphere.

wedding photography melbourne

The Magic of Diffused Light: Why Overcast Skies Work

On cloudy days, sunlight scatters through the atmosphere, creating even, flattering illumination that suits every skin tone and facial feature. Unlike sunny conditions, which force photographers to chase shadows or wait for golden hour, overcast light remains consistent throughout the day, offering flexibility in timing and location. This consistency is ideal for capturing candid moments, as couples can move freely without squinting or battling unflattering contrasts.

The lack of direct sunlight also enhances colors, making them appear richer and more saturated. Greens in parks or gardens look deeper, while neutral tones like stone or concrete take on a muted elegance. Use this to your advantage by choosing locations with varied textures—moss-covered walls, gravel paths, or weathered wooden fences—to add depth to compositions without overwhelming the couple.

Creating Depth with Foreground and Background Elements

Overcast skies provide a blank canvas, allowing foreground and background details to shine without competing with bright sunlight. Incorporate natural elements like falling leaves, wilted flowers, or mist rising from ponds to add a sense of season and movement. For urban shoots, use architectural features like arched doorways, wrought-iron gates, or rain-streaked windows to frame the couple, creating layers that draw the eye inward.

Experiment with depth of field by shooting with a wide aperture (f/1.8 to f/2.8) to blur distractions in the background while keeping the couple sharp. This technique works particularly well in busy areas like markets or street corners, where a soft, out-of-focus backdrop emphasizes intimacy. For a more artistic approach, position the couple near reflective surfaces like puddles or glass buildings to capture double exposures of their forms against the cloudy sky.

Soft Focus Techniques for a Timeless, Romantic Look

Achieving a柔焦 (soft focus) effect doesn’t require special lenses or filters—simple adjustments to shooting style and post-processing can create the same dreamy quality. Start by shooting with a shallow depth of field, as mentioned above, to naturally blur edges. Then, during editing, slightly reduce clarity or add a subtle grain to mimic the look of vintage film. Avoid overdoing it; the goal is to enhance the mood, not obscure details.

Another method is to use a diffusion filter or a piece of sheer fabric (like tulle or gauze) held in front of the lens. This scatters light, creating a gentle halo around the couple and softening harsh lines. For a hands-free approach, breathe on the lens or use a spray bottle to mist it lightly before taking the shot—the water droplets act as natural diffusers, adding a magical, impermanent quality to images.

Working with Rain and Mist for Atmospheric Shots

Melbourne’s overcast weather often brings light rain or mist, both of which can elevate wedding photos from ordinary to extraordinary. Raindrops clinging to flowers, umbrellas, or the couple’s hair add texture and movement, while mist creates a sense of mystery by obscuring distant objects. Embrace these elements by choosing locations with natural shelter—a covered porch, a glass greenhouse, or a tree-lined path—to keep gear dry while still capturing the mood.

For rain-specific shots, use a fast shutter speed (1/500s or higher) to freeze droplets in mid-air, or a slower speed (1/60s or lower) to blur them into streaks for a dynamic effect. Position the couple beneath a shared umbrella, letting the rain create a private, cocoon-like atmosphere, or have them kick up puddles for playful, spontaneous moments. If mist rolls in, shoot wide-angle shots of the couple walking through it, using the haze to simplify the background and focus attention on their forms.

Enhancing Mood Through Color Grading and Editing

Post-processing plays a crucial role in shaping the final look of overcast wedding photos. Start by adjusting white balance to counteract the cool tones of cloudy skies—a slight warming filter can add coziness without looking artificial. Then, tweak contrast and saturation to enhance the natural richness of colors while keeping the overall palette muted and harmonious.

For a vintage or film-inspired aesthetic, reduce blacks and shadows slightly to create a flat, matte look, then add a subtle vignette to draw the eye toward the center of the frame. If shooting in RAW, experiment with split toning to introduce warm hues (like peach or gold) into highlights and cool tones (like teal or gray) into shadows, creating a balanced, cinematic feel. Always keep edits subtle; the goal is to amplify the existing mood, not overpower it.

Final Touches: Incorporating Personal Details

Even in overcast conditions, personal touches can make wedding photos feel unique and meaningful. Encourage the couple to bring items like a handwritten vow book, a family heirloom, or a shared blanket to include in shots. These details add warmth and context, turning generic scenes into stories filled with significance.

For example, photograph the bride adjusting her veil while holding a locket passed down from her grandmother, or capture the groom’s hand resting on the couple’s dog’s head during a portrait session. These moments, though small, resonate deeply and make the images feel authentic and heartfelt.

By embracing Melbourne’s overcast skies and using them as a tool rather than a hindrance, photographers can create wedding galleries filled with softness, emotion, and timeless romance. The key lies in seeing beauty in the gloom and using light, texture, and mood to tell a story that feels both intimate and universal.

DSC02958

Melbourne Sunrise Wedding Photography – Capturing the Coastal Sunrise Light

Dawn’s Embrace: Melbourne Beach Sunrise Wedding Photography Guide

Melbourne’s coastline at sunrise is a canvas of soft pastels and golden light, offering couples a breathtaking setting for wedding photography that feels both ethereal and timeless. From the first blush of dawn along the sandy shores to the way sunlight dances on gentle waves, the early morning hours transform beaches into romantic landscapes perfect for capturing love stories. Here’s how to craft images that harness the magic of sunrise while keeping the focus on the couple’s connection.

wedding photography melbourne

Timing the Perfect Sunrise Shoot

Melbourne’s sunrise times vary throughout the year, but early mornings—often just before 6 AM in summer and closer to 7:30 AM in winter—provide the best light for photography. Arrive at least 30 minutes before the sun peaks above the horizon to capture the pre-dawn glow, a period when the sky transitions from deep indigo to warm coral and pink. This time, known as the “blue hour,” offers a serene, diffused light ideal for intimate portraits and wide-angle shots of the beach.

As the sun rises, the light becomes more directional, casting long shadows and creating a golden hour effect that lasts roughly 45 minutes. Use this time to position the couple with the sun behind them for a radiant backlight or to the side for a balance of warmth and detail. Check local weather forecasts for cloud cover—a mix of clouds and clear sky can add drama to the sky’s colors, while overcast conditions create a softer, more muted palette.

Composing with the Elements of dawn

The beach at sunrise is alive with natural textures and movement, from the gentle curl of waves to the scatter of seashells along the shore. Incorporate these elements into compositions to add depth and context. For example, frame the couple between two rock formations or have them stand at the water’s edge, letting waves lap at their feet for a dynamic, lively feel. Use a wide-angle lens to capture the vastness of the ocean and sky, emphasizing the couple’s place within this grand setting.

Look for patterns in the sand, such as tidal pools or footprints leading toward the horizon, to create leading lines that draw the eye toward the couple. Include details like a bride’s flowing veil caught in the breeze or a groom’s hand holding a single bloom to add personal touches. For a dreamy effect, shoot through translucent materials like a sheer veil or a piece of tulle held between the camera and the couple, diffusing the light and softening edges.

Capturing candid moments in the soft morning light

While posed portraits are essential, candid shots often become the heart of a wedding gallery. Encourage the couple to walk hand-in-hand along the shore, pause to share a laugh, or steal a kiss as the first rays of sunlight hit their faces. These unscripted interactions feel genuine and evoke the joy of the moment. To capture them, stay mobile and anticipate movement—keep your camera settings ready with a fast shutter speed to freeze action without blur.

Use a telephoto lens to shoot from a distance, allowing the couple to relax and act naturally. For variety, switch to a close-up lens to focus on details like intertwined fingers, a strand of hair sticking to lipstick, or the way sunlight glints off a ring. Don’t be afraid to get low to the ground—shooting from a kneeling or lying position can add a unique perspective, making the couple appear larger-than-life against the vast sky.

Working with the tide and terrain

Melbourne’s beaches vary in terrain, from wide, sandy stretches to rocky coves with tidal pools. Research your chosen location beforehand to understand how the tide behaves during sunrise. Low tide reveals more of the shoreline, offering opportunities to photograph the couple standing amidst exposed rock formations or walking through shallow water. High tide, on the other hand, creates a more intimate setting, with waves crashing nearby and fewer distractions in the background.

If shooting near water, protect your gear with waterproof covers or plastic bags, and keep a towel handy to wipe away salt spray. Use a polarizing filter to reduce glare on the water’s surface and enhance the colors of the sky. For creative shots, ask the couple to stand still as a wave approaches, capturing the moment it breaks around their feet—this requires timing and patience but results in dramatic, memorable images.

Enhancing the mood with props and accessories

Props can add personality and warmth to sunrise beach photos without overwhelming the natural setting. Consider incorporating items like a woven picnic blanket for the couple to sit on, a vintage lantern for soft lighting, or a bouquet of local flowers that complement the coastal palette. A shared umbrella or a cozy throw blanket can also symbolize unity while providing practical warmth against the morning chill.

For a playful touch, include elements like a kite soaring in the breeze or a message in a bottle washed ashore. These details tell a story and make the images feel more lived-in. Keep props minimal and natural, ensuring they enhance rather than distract from the couple’s connection.

Final touches: editing for a sunrise glow

Post-processing should amplify the morning’s soft colors without making them look artificial. Adjust white balance to preserve the warmth of the golden hour while keeping skin tones natural. Boost oranges and pinks in the sky to make the sunrise pop, but avoid oversaturating—subtlety is key. Use a matte finish or slight vignette to add a romantic, timeless quality to images.

For portraits, soften skin slightly while retaining texture to keep faces looking authentic. Sharpen details like the bride’s eyelashes or the groom’s suit buttons to add clarity. Curate the gallery to tell a story—start with wide shots of the beach at dawn, transition to medium frames of the couple interacting with the environment, and finish with close-ups of details like a ring resting on a seashell or a single footprint in the sand.

By blending technical skill with a love for the ocean’s early morning beauty, you can turn Melbourne’s beaches into a stage for romance—one where love shines as brightly as the rising sun.

DSC02052

Winter wedding photography in Melbourne featuring warm tones

Winter Warmth in the City: Melbourne Urban Wedding Photography Guide

Melbourne’s winter cityscape offers a unique blend of cozy charm and architectural elegance, making it an ideal backdrop for wedding photography that feels both intimate and sophisticated. From misty mornings along the Yarra River to twilight scenes framed by glowing streetlights, the season’s cooler tones and softer light create opportunities to capture love stories with a warm, inviting glow. Here’s how to craft images that defy the chill and celebrate the magic of winter romance.

wedding photography melbourne

Harnessing Soft Winter Light for Gentle Portraits

Winter sunlight in Melbourne is diffused and low, casting a delicate, even illumination that minimizes harsh shadows. Midday light, though weaker than in summer, is perfect for flattering portraits near reflective surfaces like glass buildings or waterways. Position the couple near large windows or under covered walkways to use natural light as a soft, diffused source that highlights their features without overexposure.

For golden-hour warmth, shoot during the late afternoon when the sun sits lower in the sky. This time of day bathes the city in a honeyed glow, ideal for backlit shots of the couple walking hand-in-hand or sharing a quiet moment beneath a tree stripped of leaves. On overcast days, embrace the cloudy skies for moodier, more dramatic images—use a reflector to add a touch of brightness to faces while keeping the background muted and atmospheric.

Incorporating Urban Elements for Modern Romance

Melbourne’s winter cityscape is a mix of historic landmarks and contemporary design, offering endless inspiration for creative compositions. Use the geometric lines of bridges or the arches of train stations to frame the couple, adding depth and structure to shots. Incorporate seasonal details like bare branches, frosty railings, or steam rising from vents to hint at the time of year without overwhelming the scene.

For a playful twist, include elements of city life—a passing tram, a street performer’s hat, or a couple’s reflections in a puddle—to add energy and context. Position the bride and groom near cozy cafes with warm interior lighting spilling onto the sidewalk, or capture them laughing beneath a canopy of twinkling fairy lights strung across a laneway. These touches ground the images in reality while maintaining a dreamy, romantic tone.

Creating Intimacy in Public Spaces

Winter’s quieter streets and parks provide a sense of seclusion, even in bustling urban areas. Seek out lesser-known corners of the city—a hidden courtyard, a quiet alleyway, or a secluded bench by the river—to create private moments amidst the public backdrop. Encourage the couple to hold hands, share a whisper, or steal a kiss while wrapped in a shared blanket or scarf, using these props to add texture and warmth to the frame.

Use shallow depth of field to blur distractions like passing pedestrians or traffic, keeping the focus on the couple’s connection. For variety, switch to a wide-angle lens to include more of the environment, showing the scale of the city and the couple’s place within it. Don’t shy away from capturing candid interactions—a bride adjusting her veil, a groom brushing snowflakes from her hair, or both laughing at an inside joke—these unscripted moments feel authentic and heartfelt.

Embracing Winter’s Weather for Dramatic Effects

Melbourne’s winter weather can be unpredictable, but with creativity, it becomes a tool for stunning imagery. Light rain adds a reflective sheen to pavements, doubling the visual impact of city lights and creating mirror-like surfaces for portraits. Pack a clear umbrella for the couple to share or use waterproof boots to wade through shallow puddles for artistic reflections.

Foggy mornings soften the city’s edges, turning familiar landmarks into mysterious silhouettes. Use this atmosphere for ethereal shots of the couple walking through a misty park or standing beneath a bridge shrouded in vapor. If snow falls—a rare but magical occurrence—capture the joy of the moment by photographing the couple throwing snowflakes into the air or sharing a quiet embrace against a backdrop of white-dusted rooftops.

Timing Your Shoot for Twilight Magic

Winter’s early sunsets (around 5:30 PM in Melbourne) create a brief but breathtaking window for twilight photography. As the sky transitions from blue to indigo, city lights begin to twinkle, casting a warm glow on streets and buildings. Position the couple near streetlamps or neon signs to use artificial light as a natural spotlight, creating a balance of cool and warm tones in the frame.

For long-exposure shots, use a tripod to capture the blur of passing traffic or the streak of headlights on a bridge, adding movement to otherwise still scenes. Experiment with silhouettes by positioning the couple against a brightly lit window or storefront, letting their outlines stand out against the vibrant backdrop. Always carry spare batteries, as cold temperatures can drain camera gear quickly.

Final Touches: Editing for a Winter Glow

Post-processing should enhance the season’s cozy atmosphere without sacrificing natural tones. Adjust white balance to preserve the warmth of artificial lights while keeping skin tones neutral. Boost blues and cyans in the sky or water to contrast with the golden hues of streetlights or interior lighting, creating a visually appealing balance.

Use a matte finish or subtle grain to add a timeless, film-like quality to images. For portraits, soften skin slightly while retaining texture to keep faces looking natural. Curate the gallery to tell a story—start with wide shots of the city at dusk, transition to medium frames of the couple interacting in public spaces, and finish with close-ups of details like intertwined fingers, a shared latte, or the glint of a ring under a streetlamp.

By blending technical skill with a love for winter’s quiet beauty, you can turn Melbourne’s city streets into a stage for romance—one where love shines brighter than even the coldest day.

wedding photography melbourne

Melbourne Autumn Countryside Wedding Photography with Golden Scenery

Autumn’s Golden Embrace: Melbourne Countryside Wedding Photography Guide

Melbourne’s countryside transforms into a tapestry of amber and gold each autumn, offering couples a picturesque setting for wedding photography. From sprawling vineyards to ancient forests draped in fiery foliage, the season’s warm hues and soft light create a romantic atmosphere perfect for capturing timeless moments. Here’s how to make the most of autumn’s magic while crafting images that feel both authentic and enchanting.

wedding photography melbourne

Leveraging Autumn Light for Warm, Flattering Portraits

Autumn sunlight in Melbourne is softer and more golden than summer’s harsh rays, making it ideal for wedding photography. Mid-morning to early afternoon light filters through trees at a lower angle, casting a gentle glow that enhances skin tones and adds depth to images. Position the couple near open fields or vineyard rows to use the sun’s direction as a natural hair light, creating a subtle halo effect around their heads.

For backlit shots, wait until late afternoon when the sun dips lower, illuminating edges of leaves and casting long shadows. Use a reflector or fill flash to balance exposure on the couple’s faces while preserving the golden backlight. On overcast days, embrace the diffused light for even, muted tones that highlight autumn’s earthy palette without harsh contrasts.

Composing with Nature’s Autumn Palette

The countryside’s autumn landscape is a photographer’s dream, filled with textures and colors that tell a story. Incorporate fallen leaves into compositions by scattering them around the couple’s feet or tossing them into the air for a dynamic, playful effect. Frame shots through archways of branches or use vineyard trellises to create leading lines that draw the eye toward the horizon.

Look for contrasts in color and shape—pair a bride’s white gown with a backdrop of crimson maples or position the couple against a wall of golden wheat. Include natural elements like rustic fences, weathered barns, or stone bridges to add context and a sense of place. For intimate close-ups, focus on details like a groom’s boutonniere made of autumn blooms or a bride’s hands cradling a handful of leaves.

Capturing Candid Moments Amidst the Foliage

While posed portraits are essential, candid shots often become the heart of a wedding gallery. Encourage the couple to wander through orchards, share a laugh under a canopy of orange leaves, or steal a kiss beside a babbling creek. These unscripted interactions feel genuine and evoke the joy of the season. To capture them, stay mobile and anticipate movement—keep your camera settings ready with a fast shutter speed to freeze action without blur.

Use a telephoto lens to shoot from a distance, allowing the couple to relax and act naturally. For variety, switch to a wide-angle lens to include more of the environment in frames, showing the scale of the landscape and the couple’s place within it. Don’t forget to photograph the little things—a strand of hair stuck to lipstick, a leaf tucked into a veil, or the way sunlight dances on a ring—these details add depth and emotion to the story.

Embracing Autumn’s Unpredictable Weather

Autumn weather in Melbourne can shift quickly, from sunny skies to windy gusts or light rain. Instead of resisting these changes, use them to your advantage. Windy days create movement in dresses and hair, adding drama to portraits. Position the couple facing away from the wind to avoid hair covering their faces, or embrace the chaos by capturing a veil billowing behind them like a sail.

Rainy days bring a fresh, dewy quality to the countryside, making colors pop and surfaces glisten. Pack a clear umbrella for the couple to share or use waterproof boots to wade through puddles for reflective shots. If fog rolls in, take advantage of the moody atmosphere for ethereal, soft-focus images. Always carry lens cloths and microfiber towels to keep gear dry and clean.

Timing Your Shoot for Peak Foliage

Autumn’s color display varies depending on location and elevation. Research local parks, forests, or vineyards to find spots where foliage peaks in mid-to-late autumn. Arrive early in the day to avoid crowds and capture the landscape in its quietest, most serene state. Scout locations beforehand to identify the best vantage points, whether it’s a hilltop overlooking a valley of trees or a secluded grove bathed in morning light.

If shooting near sunset, use the golden hour to its fullest by positioning the couple with the sun behind them for a warm, radiant glow. As the light fades, experiment with long exposures to capture the subtle colors of twilight blending with the last hints of autumn gold.

Final Touches: Editing for an Autumnal Vibe

Post-processing should enhance the season’s warmth without overdoing it. Adjust white balance to preserve the golden tones of sunlight, and slightly boost saturation in reds, oranges, and yellows to make foliage pop. Use a matte finish or subtle vignette to add a timeless, romantic quality to images.

For action shots, sharpen details like moving leaves or strands of hair to convey energy. In portraits, soften skin tones slightly while retaining texture to keep faces looking natural. Curate the gallery to tell a story—start with wide shots of the landscape, transition to medium frames of the couple interacting, and finish with close-ups of details like rings nestled in leaves or a single maple seed floating in the air.

By blending technical skill with a love for autumn’s beauty, you can turn Melbourne’s countryside into a golden-hued paradise—one where love blooms as vibrantly as the leaves around it.

wedding photography melbourne

Cool shooting locations by the seaside for summer wedding photos in Melbourne

Summer Breeze by the Bay: Melbourne Beach Wedding Photography Inspiration

Melbourne’s coastal stretches come alive in summer, offering couples a refreshing blend of sun, sand, and sea for their wedding photography. From the golden sands of Brighton Beach to the rugged cliffs of Point Nepean, the city’s shoreline provides endless opportunities to capture love stories against a backdrop of sparkling waves and endless horizons. Here’s how to craft images that feel both breezy and timeless, even in the heat of the season.

wedding photography melbourne

Harnessing Natural Light for a Sun-Kissed Glow

Summer sunlight in Melbourne can be intense, but with the right approach, it becomes a tool for creating radiant, flattering portraits. Early mornings and late afternoons are ideal for soft, golden light that minimizes harsh shadows and highlights natural skin tones. Position the couple facing the sun with their backs to the camera to avoid squinting, or use a reflector to bounce light onto their faces for a gentle, even illumination.

For midday shoots, seek shade under pier structures, palm trees, or beach umbrellas. Diffused light here keeps colors vibrant while preventing overexposure. If shooting in direct sunlight, use a polarizing filter to reduce glare on water and enhance the blues of the sky and ocean. Experiment with backlighting during sunset for dramatic silhouettes or halo effects around the couple’s hair.

Dynamic Composition: Incorporating Coastal Elements

The beach offers a wealth of natural props and textures to elevate your compositions. Use the arc of the shoreline to lead the eye toward the couple, or frame them between rocky outcrops or driftwood for a rustic, organic feel. Incorporate movement by capturing waves crashing against rocks or sand swirling around ankles—these details add energy and a sense of place to the images.

For a romantic touch, include symbolic elements like seashells, starfish, or a single flower tucked into a bouquet. Position the couple near tidal pools or wet sand to create reflective surfaces that double the visual impact of their outfits or the sky above. Don’t shy away from aerial perspectives; climbing a nearby dune or using a drone (where permitted) can reveal sweeping views of the coastline and the couple’s place within it.

Capturing Candid Moments in the Surf and Sand

While posed shots are essential, candid interactions often steal the show. Encourage the couple to wade into the shallow waves, share a laugh while building a sandcastle, or steal a kiss as the tide rolls in. These unscripted moments feel authentic and evoke the joy of the day. To capture them, stay light on your feet and anticipate movement—keep your camera settings ready with a fast shutter speed to freeze action without blur.

Use a telephoto lens to shoot from a distance, allowing the couple to forget the camera’s presence and act naturally. For intimate close-ups, focus on details like intertwined fingers, wet hair clinging to shoulders, or the sparkle of sunlight on a ring. These shots add depth to the gallery and tell a story beyond the traditional portraits.

Staying Cool and Comfortable in the Summer Heat

Shooting on the beach in summer requires planning to keep everyone comfortable. Schedule breaks in the shade and provide water to prevent dehydration. For the couple, suggest lightweight, breathable fabrics that flow in the breeze and avoid heavy layers or stiff materials. A wide-brimmed hat or a sheer veil can add elegance while shielding faces from the sun.

If the heat becomes overwhelming, shift focus to water-based shots. Capture the couple dipping their toes in the ocean, floating on their backs, or even riding a paddleboard together. These images not only stay cool but also add variety to the gallery. Always carry a towel to dry off equipment and a lens hood to block stray sunlight from hitting the glass.

Working with Tides and Timing for Perfect Shots

The ocean’s rhythm plays a crucial role in beach photography. Check tide charts before your shoot to avoid being stranded on rocky outcrops or having your setup swallowed by the sea. Low tide reveals expansive sandbars and tidal pools perfect for walking or posing, while high tide creates dramatic waves for action shots.

Arrive early to scout locations and test compositions as the light changes. The hour before sunset (golden hour) offers the most flattering light, but don’t overlook the magic of “blue hour” just after sunset, when the sky takes on a deep, moody hue. If shooting during a full moon, use a long exposure to capture its glow reflecting on the water, creating a surreal, romantic atmosphere.

Final Touches: Editing for a Coastal Vibe

Post-processing should enhance the beach’s natural beauty without overdoing it. Boost blues and teals in the ocean and sky to reflect the season’s vibrancy, but keep whites neutral to avoid a washed-out look. Use a matte finish or subtle vignette to add a dreamy, timeless quality to images.

For action shots, sharpen details like droplets of water or strands of hair blowing in the wind. In portraits, soften skin tones slightly while preserving texture to maintain a natural feel. Finally, curate the gallery to tell a story—start with wide shots of the coastline, transition to medium frames of the couple interacting, and finish with close-ups of details like rings or waves. This flow ensures viewers feel immersed in the day’s magic, from the first ray of sunlight to the last wave goodbye.

By blending technical know-how with a love for the coast, you can turn Melbourne’s summer beaches into a canvas for love stories that shine as bright as the sun itself.

DSC02144

Melbourne Spring Botanical Garden Wedding Photography – Green Plant Shoot

Springtime Elegance: Capturing Wedding Magic in Melbourne’s Botanic Gardens

Melbourne’s Royal Botanic Gardens transforms into a vibrant paradise each spring, offering couples a lush, natural canvas for wedding photography. With blooming flowers, emerald foliage, and soft sunlight filtering through canopies, this season creates a dreamy atmosphere perfect for timeless portraits. Here’s how to make the most of spring’s beauty while avoiding clichés and crafting images that feel both authentic and enchanting.

wedding photography melbourne

Embracing Nature’s Palette: Color and Texture in Spring

Spring’s arrival brings a symphony of colors to the gardens, from pastel blossoms to rich greens. To highlight this diversity, focus on layering textures—pair delicate petals with bold leaves or incorporate woven baskets or lace details into props. For couples’ portraits, use the gardens’ natural hues as a backdrop. Position them near clusters of wisteria or jacaranda trees, letting the flowers frame their faces or cascade over shoulders.

Light plays a critical role in spring photography. Morning and late afternoon sunlight creates a golden glow that flatters skin tones and adds warmth to images. Avoid harsh midday sun by seeking shaded areas under trees or using diffusers to soften light. If shooting on overcast days, embrace the diffused light for even, flattering exposures that reduce shadows and highlight subtle details like dew on leaves or the softness of a bride’s veil.

Dynamic Composition: Leading Lines and Natural Frames

The Botanic Gardens’ winding paths, arched trellises, and reflective ponds offer endless opportunities for creative composition. Use leading lines—such as a row of blooming tulips or a stone pathway—to draw the viewer’s eye toward the couple. For a romantic touch, frame shots through natural elements like tree branches, fern fronds, or the petals of a rose. This technique adds depth and context, making the garden feel like an extension of the couple’s love story.

Experiment with perspective to add visual interest. Shoot from low angles to emphasize towering trees or capture the vastness of open lawns. Alternatively, climb a gentle hill or use a balcony for aerial views of flowerbeds or the gardens’ iconic lakes. Including architectural elements like the Temple of the Winds or the Palm House can also add a timeless, classical feel to images.

Capturing Candid Moments Amidst the Blooms

While posed portraits are essential, candid shots often become the most cherished memories. Encourage the couple to interact naturally—walking hand-in-hand, sharing a laugh, or stealing a kiss under a blossoming tree. These moments feel authentic and evoke emotion, turning ordinary scenes into extraordinary memories.

To capture these fleeting interactions, stay mobile and anticipate movement. Use a telephoto lens to shoot from a distance without intruding, or position yourself near high-traffic areas like the Rose Garden or Fern Gully to observe genuine interactions. Keep your camera settings ready for quick adjustments, prioritizing a fast shutter speed to freeze motion and a wide aperture to blur distractions in the background.

Working with Spring’s Unpredictable Weather

Spring weather in Melbourne can shift quickly, from sunny skies to sudden showers. Instead of resisting these changes, use them to your advantage. Rainy days create reflective surfaces on ponds or pathways, doubling the visual impact of flowers and foliage. Pack a clear umbrella or waterproof boots to keep the couple comfortable while adding a playful element to shots.

If wind picks up, focus on capturing movement—flowing dresses, swaying branches, or tousled hair can add drama and energy to images. For calm, windless moments, use a fan to create subtle motion in veils or gowns, adding a sense of ethereal beauty. Always carry a lens cloth to wipe away raindrops or pollen, ensuring crisp, clear images in any conditions.

Final Touches: Polishing Your Springtime Gallery

Post-processing should enhance, not overpower, the natural beauty of spring. Adjust colors to reflect the season’s vibrancy—boost greens and pinks slightly while keeping whites neutral to avoid a artificial look. Use dodging and burning to highlight key elements like the couple’s faces or a bouquet’s details without flattening the image.

Finally, present the gallery in a way that tells a story. Start with wide shots of the gardens to establish context, then transition to medium frames showcasing the couple’s interactions, and finish with close-ups of details like rings nestled in flowers or lips curved in a smile. This narrative flow ensures viewers feel immersed in the day’s magic, from the first bloom to the final kiss.

By blending technical skill with artistic vision, you can transform Melbourne’s Botanic Gardens into a springtime wonderland—one where love blooms as brightly as the flowers around it.

wedding photography melbourne

Melbourne Night View Wedding Photography with Starlight Lighting Capture

Capturing Romance Under Melbourne’s Starry Sky: A Guide to Nighttime Wedding Photography

Melbourne’s urban skyline, combined with its natural landscapes, creates a magical backdrop for nighttime wedding photography. Whether you’re aiming for dramatic city lights or the soft glow of the stars, mastering lighting techniques is essential to transform ordinary moments into timeless art. Here’s how to elevate your nighttime wedding shoots with creativity and technical precision.

wedding photography melbourne

Leveraging Natural Light Sources for Ethereal Effects

The interplay of artificial and natural light defines the mood of nighttime wedding photos. Start by scouting locations that offer a balance of both. For instance, Melbourne’s Yarra River provides reflective water surfaces that amplify city lights, while parks like Royal Botanic Gardens offer open skies for star-filled compositions.

To capture the Milky Way or constellations, prioritize locations away from light pollution. Use a sturdy tripod and manual focus set to infinity to ensure sharpness. Adjust your camera settings to a high ISO (1600–3200), a wide aperture (f/2.8–f/4), and a long exposure (10–30 seconds) to gather enough light without introducing noise. For couples posing under the stars, ask them to hold still during the exposure or use a low-power LED light to gently illuminate their faces without overpowering the celestial backdrop.

Artificial Lighting: Creating Drama and Intimacy

When natural light is insufficient, artificial lighting becomes your ally. Start with off-camera flashes or continuous LED panels to sculpt light around the couple. Position lights at a 45-degree angle to mimic natural sunlight, avoiding harsh shadows. For a cinematic look, use colored gels to tint lights warm gold or cool blue, adding depth to urban settings like Federation Square or street art-lined laneways.

During reception shots, balance ambient venue lighting with supplemental sources. Bounce flashes off ceilings or walls to soften harshness, or use diffusers to create a natural glow. For dynamic dance floor images, drag the shutter (slow sync flash) to blend motion blur with a frozen subject, capturing the energy of the moment.

Composition Techniques to Enhance Nighttime Narratives

Nighttime photography thrives on storytelling. Use leading lines—such as bridges, pathways, or neon signs—to guide the viewer’s eye toward the couple. Incorporate silhouettes against bright backgrounds (e.g., the Melbourne Star Observation Wheel) for dramatic contrast. For intimate close-ups, focus on details like intertwined hands or a kiss, using shallow depth of field to blur distracting backgrounds.

Experiment with long exposures to turn moving elements into artistic streaks. For example, capture light trails from passing trams or ferries on the Yarra River while keeping the couple perfectly still. This technique adds a sense of motion and timelessness to the image.

Overcoming Challenges in Low-Light Conditions

Shooting at night presents unique hurdles, from limited visibility to unpredictable weather. Always arrive early to test lighting setups and adjust for changing conditions. Use a light meter or histogram to avoid underexposure, ensuring skin tones remain natural even in dim environments.

For rainy nights, embrace the reflective puddles on streets like Degraves Street to create mirror-like effects. If wind disrupts hair or dresses, shorten exposure times or ask the couple to steady themselves against a wall. Finally, communicate clearly with the couple and wedding party, explaining poses and movements to minimize blur from movement.

Final Thoughts: Blending Technical Mastery with Artistic Vision

Nighttime wedding photography in Melbourne demands a blend of technical skill and creative intuition. By understanding light behavior, experimenting with composition, and adapting to challenges, you can transform dark skies into canvases of romance. Remember, the goal isn’t just to document the event but to craft images that evoke emotion and tell a story—one illuminated by the stars, the city, and the love shared beneath them.

wedding photography melbourne

Melbourne Evening Wedding Photography – Blues Hour Shooting

Melbourne Evening Bridal Photography: Embracing the Magic of Blue Hour

Melbourne, a city that effortlessly combines urban sophistication with natural beauty, offers a truly enchanting setting for evening bridal photography, especially during the captivating blue hour. This brief period after sunset, when the sky takes on a deep, cool – blue hue, creates a unique and romantic atmosphere that can elevate your wedding photos to a whole new level.

wedding photography melbourne

The Enchantment of Blue Hour in Melbourne

A Serene and Dreamy Ambiance

The blue hour in Melbourne brings with it a sense of tranquility and calmness. As the city transitions from the bustling activity of the day to the peaceful stillness of the night, the soft blue light envelops everything, creating a dreamy and almost surreal environment. This ambiance is perfect for capturing the intimate and romantic moments between the bride and groom. The cool tones of the blue hour can evoke feelings of serenity, love, and longing, adding a deeper emotional layer to the photographs.

Flattering Light for All Skin Tones

One of the remarkable advantages of shooting during the blue hour is the flattering light it provides for all skin tones. Unlike the harsh midday sun or the warm, golden light of sunset, the blue – hour light is soft and diffused. It doesn’t create harsh shadows or highlights on the face, but rather evenly illuminates the skin, giving it a smooth and radiant appearance. This makes the couple look their best in the photos, highlighting their natural beauty and enhancing the overall quality of the images.

A Limited – Time Wonder

The blue hour is a relatively short period, typically lasting around 20 – 40 minutes after sunset, depending on the location and time of year. This time – limited nature adds an element of exclusivity and urgency to the photography session. It makes each moment precious and unique, as the light conditions are constantly changing. The couple and the photographer need to work together efficiently to capture the best shots during this magical window of opportunity, creating a sense of anticipation and excitement.

Prime Melbourne Locations for Blue – Hour Bridal Shoots

Federation Square: Urban Elegance

Federation Square is a vibrant and iconic hub in the heart of Melbourne’s central business district. During the blue hour, the square takes on a whole new character. The modern architecture of the buildings, with their geometric shapes and sharp lines, is beautifully illuminated by the soft blue light. The large digital screens and the unique triangular facades create a visually striking backdrop for bridal photos.

The open space of the square allows for various composition options. You can position the couple in the center, framed by the surrounding buildings, or use the steps and pathways to create leading lines that draw the viewer’s eye towards them. The combination of urban elements and the dreamy blue – hour light creates a sophisticated and modern look that is perfect for contemporary bridal photography.

Brighton Beach: Coastal Charm

Brighton Beach is known for its colorful bathing boxes and long stretch of sandy shore. In the evening during the blue hour, the beach offers a serene and romantic setting. The soft blue light reflects off the water, creating a shimmering effect that adds to the magical atmosphere. The bathing boxes, with their bright colors, stand out against the cool – blue sky, providing a unique and picturesque backdrop.

You can have the couple stand near the water’s edge, with the waves gently lapping at their feet, or pose them in front of one of the bathing boxes. The long shadows cast by the low – angle blue – hour light can add depth and dimension to the images, creating a sense of mystery and allure. The combination of the natural beauty of the beach and the charming bathing boxes makes Brighton Beach an ideal location for blue – hour bridal photography.

Carlton Gardens: Natural Tranquility

Carlton Gardens is a peaceful oasis in the midst of the city, featuring lush greenery, beautiful fountains, and historic buildings. During the blue hour, the gardens are bathed in a soft, cool light that enhances their natural beauty. The tall trees and the well – manicured lawns create a serene and idyllic setting for bridal photos.

You can find secluded spots within the gardens, such as under a large tree or near a quiet pond, where the couple can be alone and enjoy the peaceful atmosphere. The blue – hour light filtering through the leaves can create beautiful patterns of light and shadow on the ground and on the couple’s faces, adding an artistic touch to the photographs. The combination of the natural elements and the historic architecture of the gardens provides a timeless and elegant backdrop for blue – hour bridal photography.

Tips for Achieving Stunning Blue – Hour Bridal Photos

Proper Equipment and Settings

To capture the beauty of the blue hour, it’s essential to have the right equipment and settings. A camera with good low – light performance is crucial, as the blue hour can be relatively dark. A wide – aperture lens, such as a 50mm f/1.8 or a 35mm f/1.4, can help you let in more light and create a shallow depth of field, which can isolate the couple from the background and add a sense of intimacy to the photos.

Set your camera to manual mode to have full control over the exposure settings. Start with a low ISO (around 100 – 200) to minimize noise, and adjust the aperture and shutter speed accordingly. Since the light is constantly changing during the blue hour, you may need to frequently check and adjust your settings to ensure proper exposure.

Use of Artificial Light

While the blue – hour light is beautiful on its own, adding a touch of artificial light can enhance the overall look of the photos. A simple off – camera flash or a continuous light source can be used to fill in shadows, highlight the couple’s features, or create interesting lighting effects. For example, you can use a flash with a softbox to create a soft, diffused light that mimics the natural light of the blue hour.

You can also experiment with colored gels on your flash to add a subtle hint of color to the photos, complementing the blue tones of the sky. However, be careful not to overpower the natural blue – hour light with too much artificial light, as the goal is to enhance the existing light conditions, not to replace them.

Capturing Emotions and Interactions

The blue hour is a time for capturing the genuine emotions and interactions between the bride and groom. The peaceful and romantic atmosphere can encourage the couple to relax and be themselves in front of the camera. Instead of focusing solely on posed shots, try to capture candid moments, such as a shared laugh, a gentle touch, or a loving glance.

Engage with the couple during the shoot, make them feel comfortable, and give them gentle prompts to encourage natural interactions. These candid shots will add a sense of authenticity and intimacy to your bridal photo collection, making them truly unique and memorable.

In conclusion, Melbourne’s blue hour offers a magical and romantic setting for bridal photography. By understanding the enchantment of the blue hour, choosing the right locations, and using the proper techniques, you can create stunning and timeless images that the couple will cherish for a lifetime.

DSC01430

Melbourne Evening Wedding Photography – Sunset Shooting of Evening Sky

Melbourne Sunset Bridal Photography: Capturing the Romance of Dusk and Evening Glow

Melbourne, a city renowned for its diverse landscapes and ever – changing skies, offers an unparalleled setting for sunset bridal photography. The transition from day to night during this time of day brings with it a symphony of colors and a soft, golden light that can transform ordinary scenes into extraordinary works of art.

wedding photography melbourne

The Allure of Melbourne’s Sunset Light

A Palette of Warm Hues

As the sun begins its descent towards the horizon in Melbourne, the sky transforms into a canvas painted with a breathtaking array of warm colors. Shades of orange, pink, and purple blend seamlessly, creating a dreamy and romantic atmosphere. This natural light is incredibly flattering for the bride and groom, casting a soft glow on their faces and highlighting the details of their wedding attire. The warm tones of the sunset can also enhance the overall mood of the photographs, evoking feelings of love, warmth, and happiness.

Gentle Shadows and Highlights

Unlike the harsh midday sun, the light during sunset is much softer and more diffused. It creates gentle shadows and highlights that add depth and dimension to the images. For example, the light can accentuate the folds and layers of the bride’s dress, giving it a three – dimensional appearance. It can also highlight the contours of the groom’s face, adding a sense of character and charm. These subtle lighting effects can make the photographs more visually interesting and engaging.

A Time – Limited Magic

One of the most captivating aspects of sunset bridal photography is its time – limited nature. The beautiful colors and light conditions only last for a short period, usually around 30 minutes to an hour before the sun fully sets. This creates a sense of urgency and exclusivity, as each moment is unique and cannot be replicated. It also adds a special significance to the photographs, as they capture a fleeting moment in time that the couple will cherish forever.

Prime Locations in Melbourne for Sunset Bridal Shoots

St. Kilda Beach: Coastal Romance

St. Kilda Beach is a popular choice for sunset bridal photography in Melbourne. The wide expanse of sand, the gentle waves lapping at the shore, and the iconic pier in the background create a picturesque setting. As the sun sets over the bay, the sky turns into a fiery spectacle, reflecting off the water’s surface. The couple can stand hand – in – hand on the beach, with the colorful sky behind them, creating a truly romantic and unforgettable image.

The pier also offers a unique vantage point for photography. You can capture the couple walking along the pier as the sun sets, with the city skyline in the distance. The combination of the natural beauty of the beach and the urban elements of the pier creates a diverse and interesting backdrop for the photographs.

Royal Botanic Gardens: Natural Elegance

The Royal Botanic Gardens in Melbourne provide a serene and elegant setting for sunset bridal photography. The lush greenery, colorful flowers, and tranquil lakes create a peaceful atmosphere that is perfect for capturing intimate moments between the couple. As the sun sets, the light filters through the trees, creating a dappled effect on the ground and the couple’s faces.

You can find many secluded spots within the gardens, such as hidden pathways or quiet corners near the lakes. These areas offer privacy and a sense of seclusion, allowing the couple to relax and be themselves in front of the camera. The natural beauty of the gardens also provides a timeless and classic backdrop that will never go out of style.

Yarra River: Urban Reflections

The Yarra River runs through the heart of Melbourne, offering a unique blend of urban and natural scenery. For sunset bridal photography, the river provides a stunning reflection of the city’s skyline and the colorful sky. The couple can stand on one of the many bridges that cross the river or along the riverbank, with the water and the city lights creating a magical backdrop.

As the sun sets, the city comes alive with lights, adding a touch of glamour and sophistication to the photographs. The combination of the natural beauty of the river and the urban elements of the city creates a dynamic and interesting setting that is sure to make the photographs stand out.

Tips for Maximizing the Sunset Effect in Bridal Photos

Timing is Everything

To capture the best of Melbourne’s sunset, it’s essential to plan your photography session carefully. Check the local sunset times in advance and arrive at the location at least 30 minutes before the scheduled sunset. This will give you enough time to set up your equipment, find the perfect spot, and allow the couple to get comfortable in front of the camera.

During the golden hour (the period just before sunset), the light is at its most flattering. Use this time to take the majority of your posed photographs, as the soft light will enhance the couple’s features and create a beautiful glow. As the sun gets closer to the horizon, the colors in the sky will become more intense, providing an excellent opportunity for more dramatic and artistic shots.

Play with Composition

Composition plays a crucial role in creating visually appealing sunset bridal photographs. Use the rule of thirds to create a balanced and interesting composition. Place the couple off – center, either to the left or right, and use the natural elements of the location, such as trees, rocks, or the horizon line, to frame them.

You can also experiment with different angles and perspectives. Shoot from a low angle to make the couple appear taller and more majestic, or from a high angle to capture a bird’s – eye view of the scene. Incorporating leading lines, such as a pathway or the edge of the beach, can also draw the viewer’s eye towards the couple and create a sense of depth in the photograph.

Capture Candid Moments

While posed photographs are important, don’t forget to capture some candid moments during the sunset bridal photography session. The relaxed and romantic atmosphere of the sunset can encourage the couple to be more natural and spontaneous. These candid shots can often be the most memorable, as they capture the genuine emotions and interactions between the bride and groom.

Encourage the couple to walk along the beach, share a kiss, or simply enjoy each other’s company. Keep your camera ready to capture these fleeting moments, as they can add a sense of authenticity and intimacy to your bridal photo collection.

In conclusion, Melbourne’s sunset provides a magical and romantic setting for bridal photography. By understanding the allure of the sunset light, choosing the right locations, and using some simple techniques to maximize the effect, you can create stunning and timeless images that the couple will treasure for a lifetime.