wedding photography melbourne

Notes on Controlling the duration of wedding photography in Melbourne

Key Considerations for Managing Melbourne Wedding Photography Timelines

Capturing wedding moments in Melbourne’s diverse settings—from urban landmarks to coastal vistas—requires meticulous planning to balance creativity with efficiency. Below are essential strategies to optimize shooting schedules while ensuring high-quality results.

wedding photography melbourne

Understanding Melbourne’s Unique Environmental Factors

Melbourne’s unpredictable weather and seasonal variations directly impact photography timelines.

Weather-Dependent Adjustments

  • Spring/Summer: While midday light is harsh, early mornings (6–9 AM) offer soft, golden-hour illumination ideal for portraits. Afternoon thunderstorms may force rescheduling, so allocate buffer time.
  • Autumn/Winter: Shorter daylight hours (sunset by 5:30 PM in winter) necessitate starting shoots by 10 AM. Layered clothing and portable heaters help manage cold temperatures during outdoor sessions.

Location-Specific Challenges

  • Beach Venues: Tides rise rapidly in Port Phillip Bay, limiting shoreline access. Check tidal charts to schedule shots during low tide.
  • Urban Landmarks: Flinders Street Station or Hosier Lane’s graffiti alleys attract crowds. Weekday mornings (before 10 AM) minimize interruptions from tourists.

Structuring a Realistic Shooting Schedule

A well-paced timeline prevents fatigue and ensures diverse coverage without rushing.

Recommended Session Breakdown

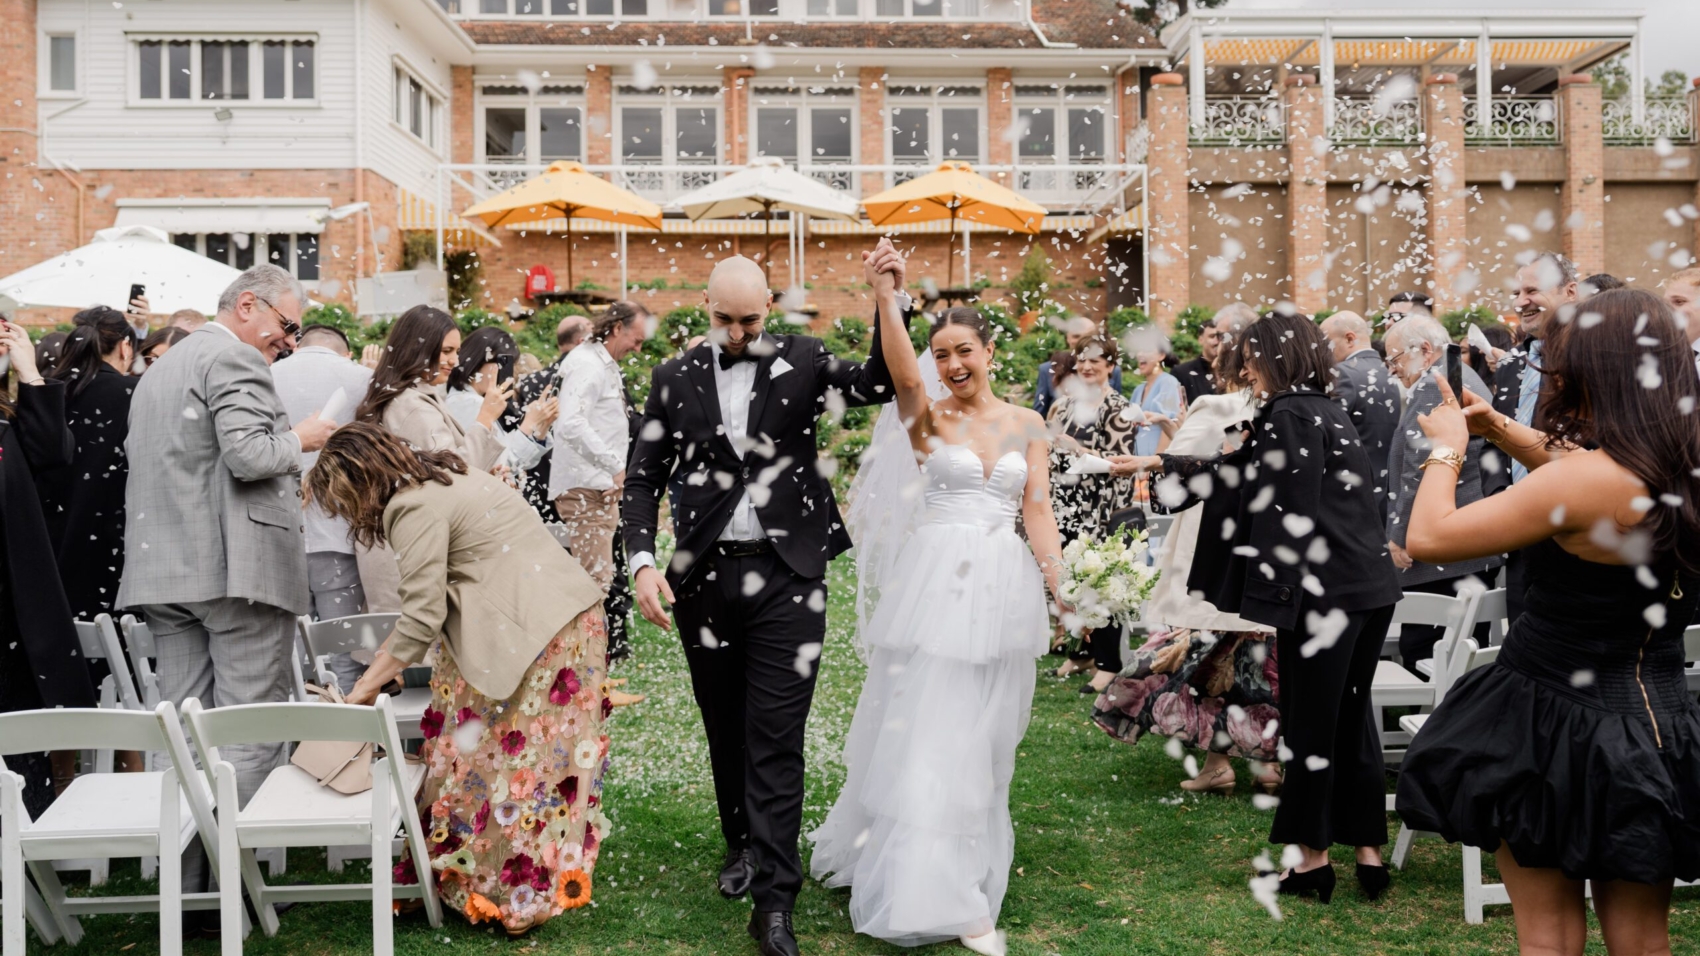
  • 3–4 Outfits: Allocate 1.5–2 hours per outfit, including hair/makeup adjustments. For example, a bridal gown session at Royal Botanic Gardens may take 2 hours, while a casual ensemble at St Kilda Beach requires 1 hour.
  • Multiple Locations: Limit to 2–3 spots within a 10km radius to avoid transit delays. A route like Fitzroy Gardens → Carlton Gardens → Lygon Street allows efficient movement between scenes.
  • Natural Light Windows: Prioritize outdoor shots during the first 3 hours of daylight, reserving indoor studio work for midday or late afternoon.

Time Management Hacks

  • Pre-Shoot Checklists: Confirm gear (lenses, reflectors, batteries) and permits the day before. For example, shooting at Melbourne Cricket Ground requires advance approval for commercial photography.
  • Streamlined Transitions: Use a “base camp” near locations to store belongings and change outfits. A van or nearby café can serve as a hub between shots.
  • Flexible Itineraries: Build 30-minute buffers between segments to accommodate delays. If rain disrupts an outdoor shoot, pivot to covered areas like Block Arcade or Melbourne Museum.

Communication and Collaboration with Vendors

Clear coordination with vendors ensures seamless execution and reduces downtime.

Photographer-Client Alignment

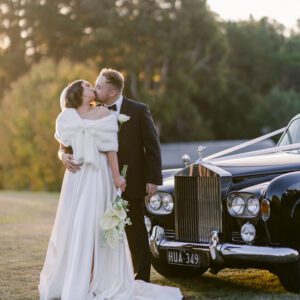
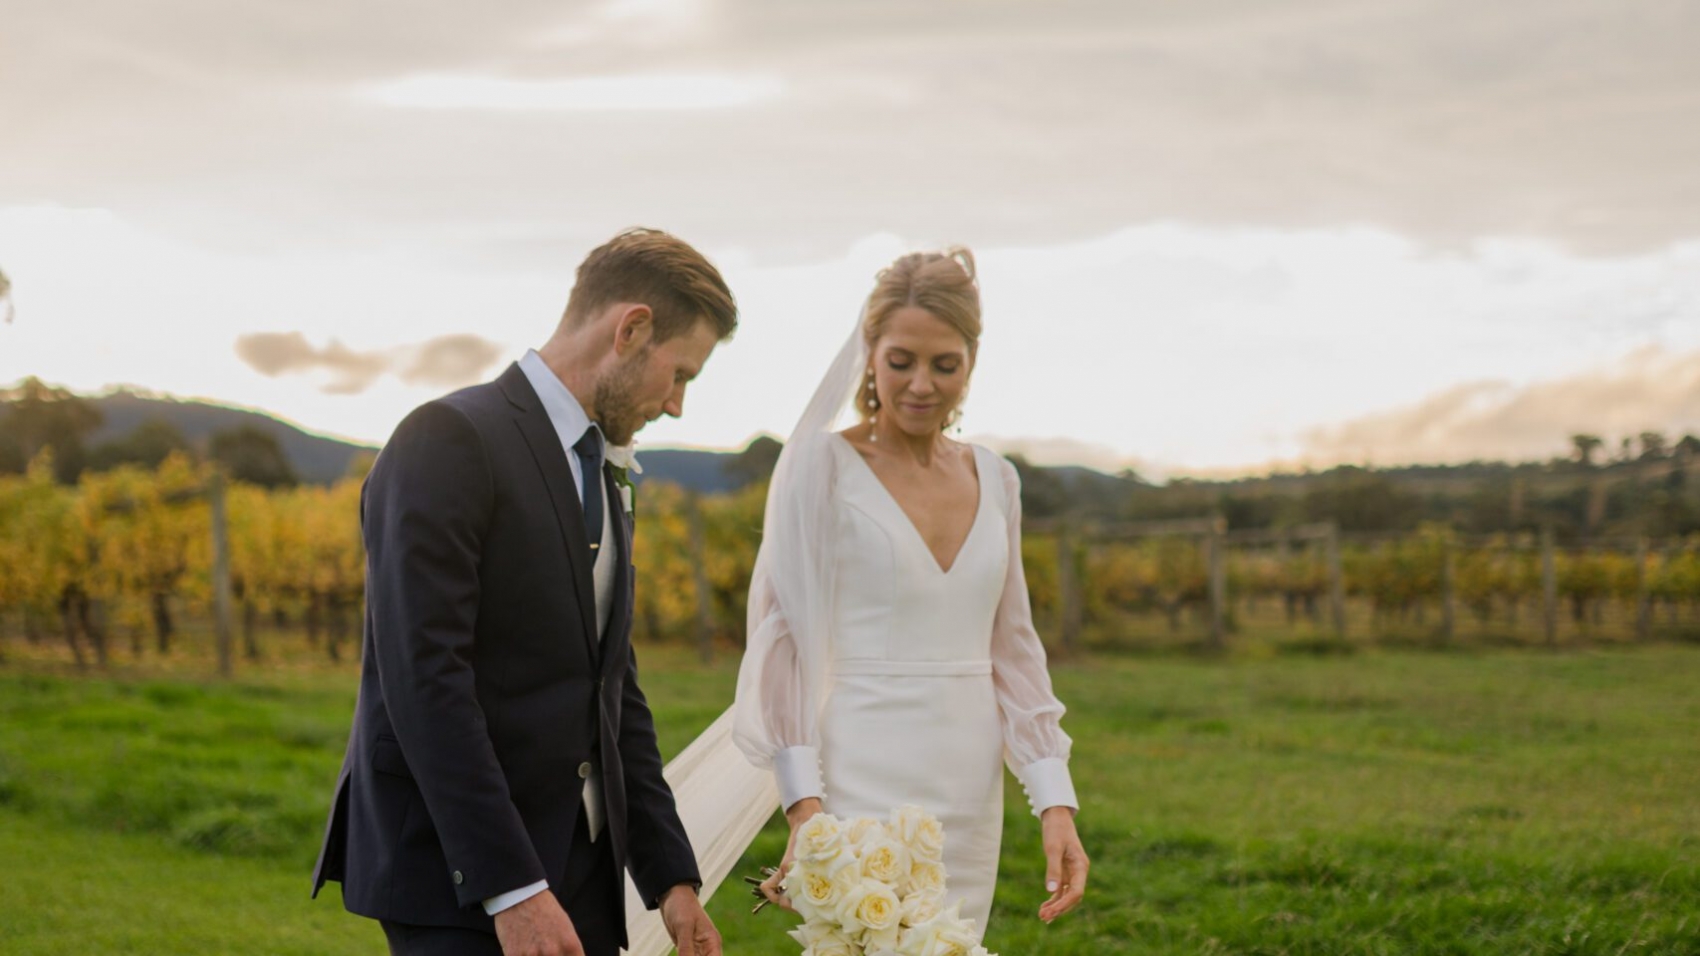
  • Pre-Shoot Consultation: Discuss style preferences (e.g., candid vs. posed) and must-have shots (e.g., sunset silhouettes at Brighton Beach Bathing Boxes). Use mood boards to visualize expectations.
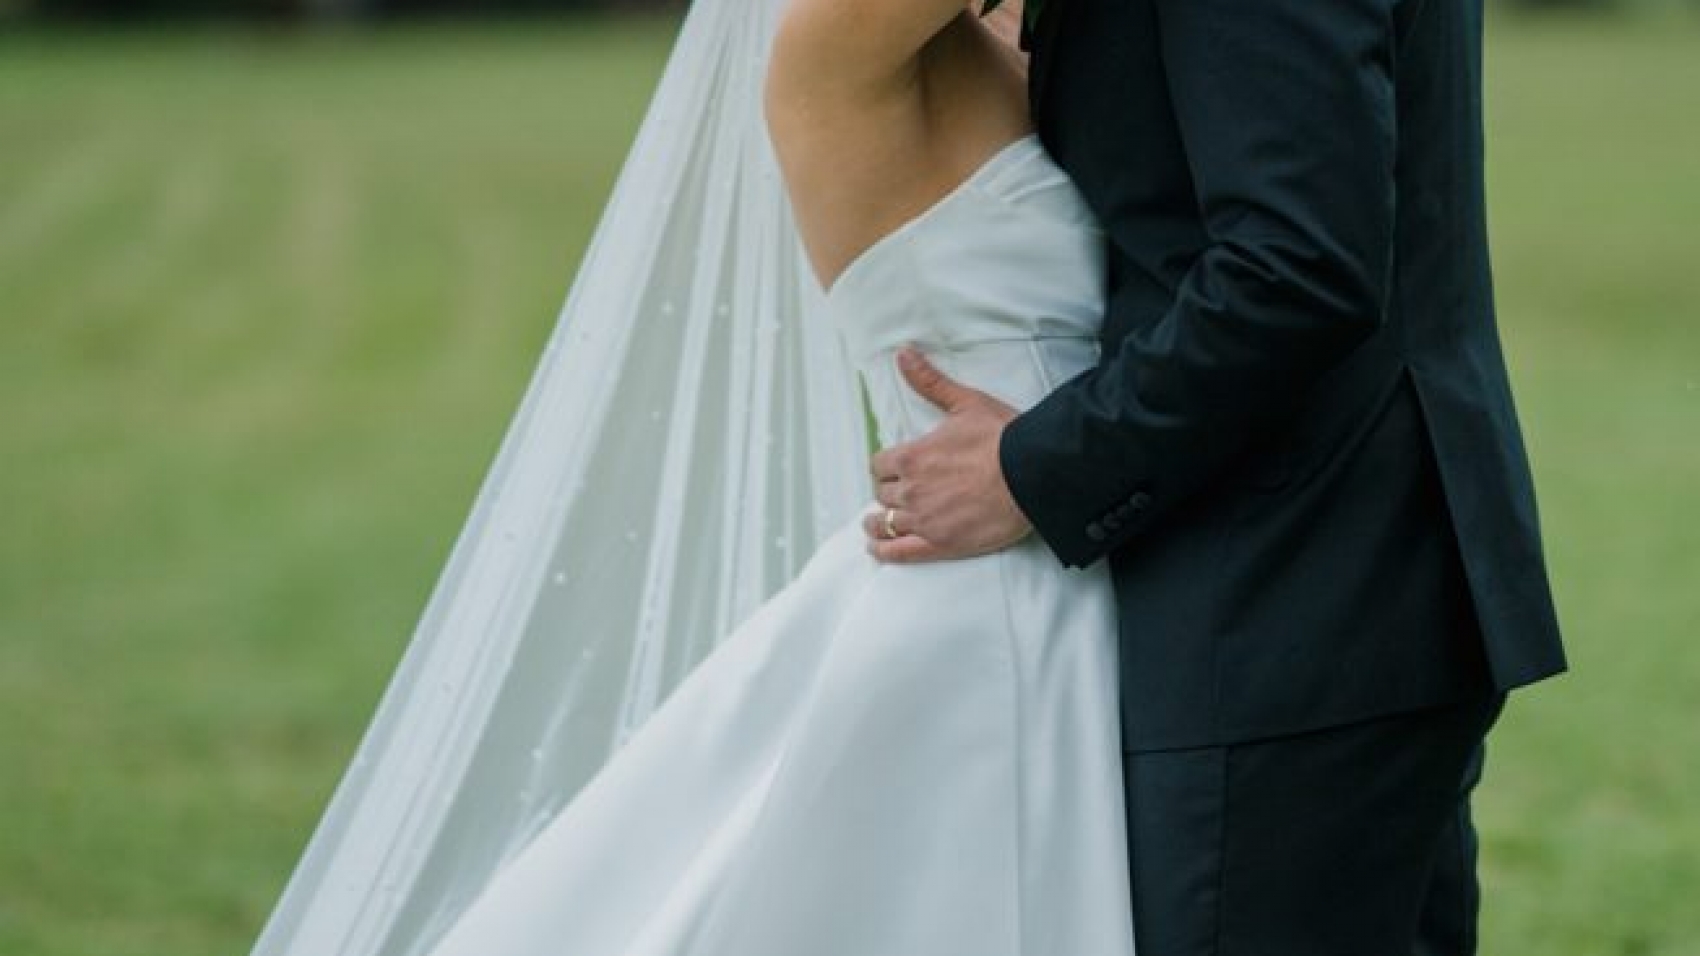
  • Real-Time Feedback: Review images mid-session to adjust poses or lighting. For instance, if a bridal veil appears flat in shots, switch to a wind machine or open windows for dynamic movement.

Vendor Coordination

  • Hair/Makeup Artists: Schedule artists to arrive 1 hour before shooting begins. A trial run ensures styles hold up under Melbourne’s humidity (common in summer).
  • Transportation Teams: For multi-location shoots, hire drivers familiar with Melbourne’s traffic patterns. Avoid peak-hour routes (e.g., CityLink tollway between 4–6 PM).
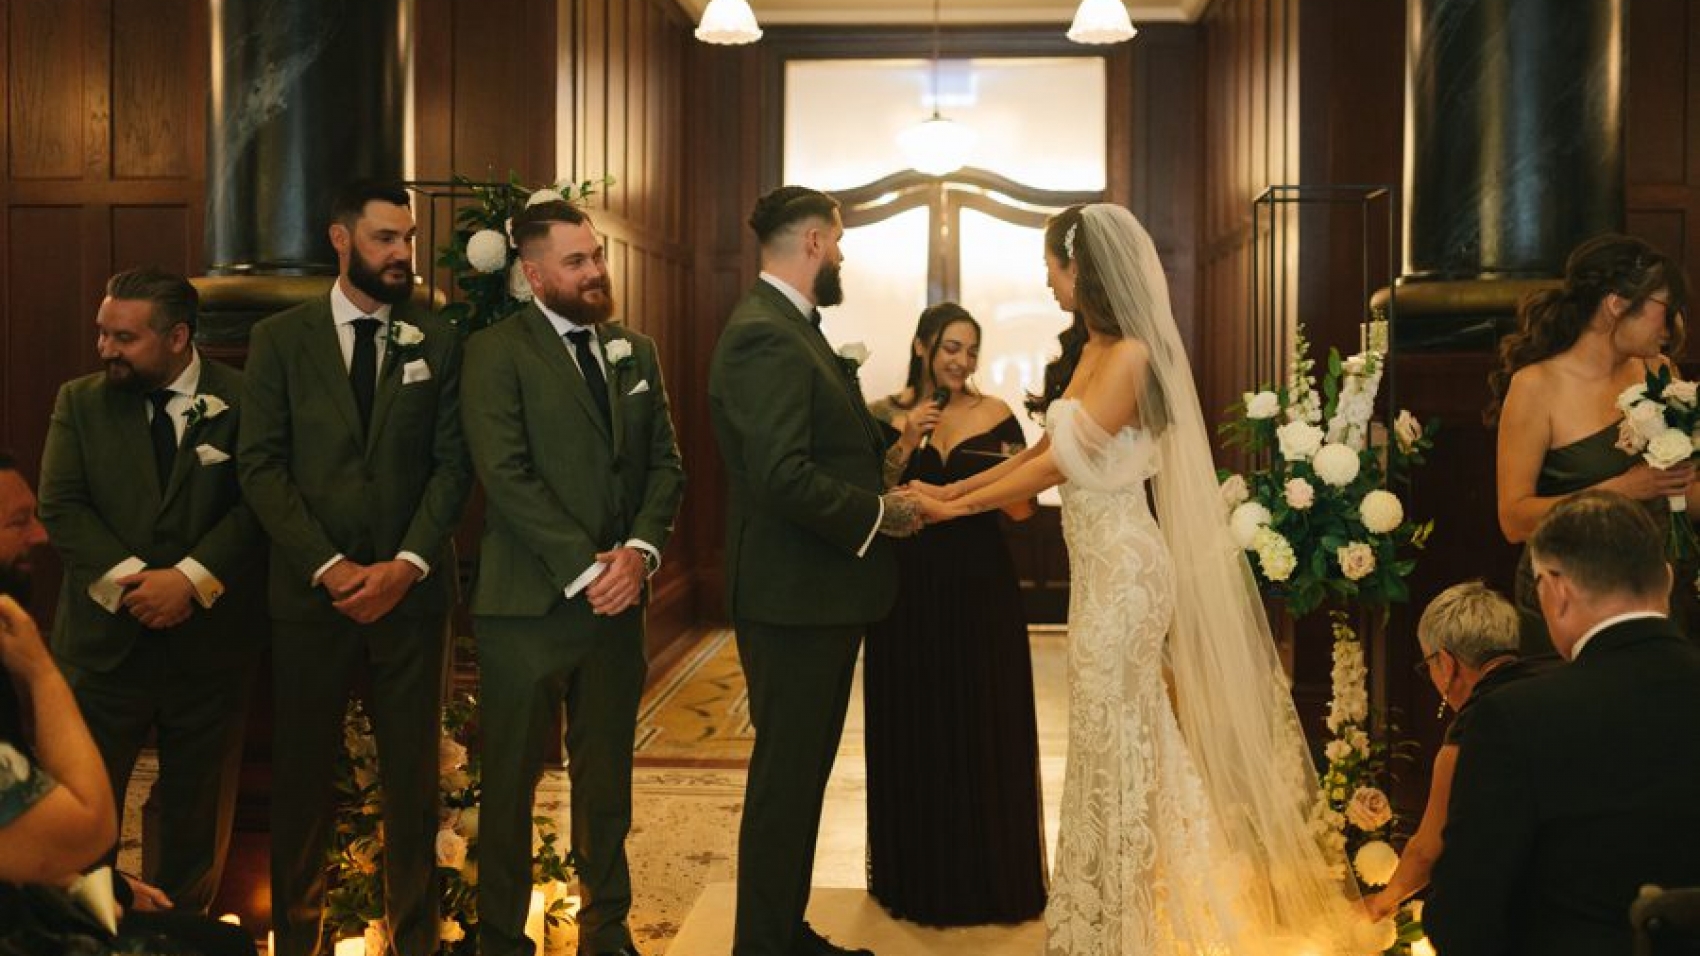
  • Venue Managers: Confirm arrival times and loading zones. Some historic sites like Parliament House restrict access to service elevators, requiring early planning for equipment transport.

Contingency Planning for Unforeseen Disruptions

Even with preparation, unexpected issues can arise. Proactive strategies mitigate risks.

Weather Backup Plans

  • Indoor Alternatives: Identify nearby studios or venues with covered courtyards. For example, if rain cancels a Yarra River shoot, relocate to Abbotsford Convent’s heritage halls.
  • Rain Gear: Pack clear umbrellas and waterproof covers for cameras. Waterproof footwear is essential for muddy park trails after heavy rain.

Technical Failures

  • Redundant Equipment: Carry backup cameras, lenses, and memory cards. A second photographer can step in if the primary device malfunctions.
  • Power Sources: Ensure access to electrical outlets for recharging batteries. Portable power banks are useful for outdoor locations without amenities.

Health and Safety Protocols

  • Hydration and Snacks: Provide water and energy bars to maintain stamina during long sessions. Melbourne’s summer heat can cause dehydration, affecting focus and energy levels.
  • Comfort Breaks: Schedule 10-minute breaks every 2 hours to rest and reapply sunscreen. For winter shoots, offer hand warmers and blankets between takes.

By integrating these strategies, couples and photographers can navigate Melbourne’s unique challenges while creating timeless wedding imagery. Flexibility, preparation, and collaboration are key to transforming potential obstacles into opportunities for creativity.

WUU01794

Notes for Applying for a license for a wedding photography venue in Melbourne

Melbourne Wedding Photography Venue Permit Application: Essential Considerations

Melbourne’s iconic architecture, lush gardens, and cultural landmarks make it a sought-after destination for wedding photography. However, securing permits for public or private venues requires careful planning to avoid disruptions and legal complications. Below are critical factors to consider when applying for photography permits in Melbourne.

wedding photography melbourne

Understanding Venue-Specific Requirements

Each venue in Melbourne has unique rules governing commercial photography. Public spaces like parks, historic buildings, and cultural institutions often require permits, while private venues (e.g., hotels, galleries) may have their own approval processes.

Public Venues:

  • Parliament House Melbourne: Permits are required for photography inside the building or on its grounds. Applications must include the date, duration, and number of participants.
  • Royal Botanic Gardens: Commercial shoots need prior approval, with restrictions on peak seasons (e.g., spring flower displays).
  • St. Patrick’s Cathedral: Photography inside the cathedral is prohibited without written consent. External shots require adherence to noise and time limits.

Private Venues:

  • Wineries in Yarra Valley: Many vineyards charge fees for commercial shoots and mandate liability insurance.
  • Art Galleries: Venues like NGV may require proof of insurance and a detailed shoot itinerary.

Application Process and Documentation

Submitting a complete application is crucial to avoid delays. Key documents typically include:

1. Proof of Insurance
Most venues require public liability insurance (minimum $10 million coverage) to protect against accidents or property damage.

2. Venue Layout and Timeline
Provide a site plan indicating equipment placement, crew positions, and shooting schedules. For example, filming near Melbourne’s military barracks requires avoiding restricted zones marked on maps.

3. Crew and Equipment Details
List all personnel (photographers, assistants, models) and vehicles. Some venues, like historic sites, limit the number of participants to preserve the environment.

4. Noise and Traffic Management
If shooting in busy areas (e.g., Federation Square), outline plans to minimize disruption. This may involve coordinating with local councils for road closures or parking permits.

Timing and Seasonal Considerations

Melbourne’s weather and event calendars significantly impact permit approvals.

Peak Seasons:

  • Spring (September–November): High demand for garden venues like the Royal Botanic Gardens may lead to longer processing times.
  • Summer (December–February): Beach locations (e.g., St. Kilda) often have stricter permits due to tourist traffic.

Lead Times:

  • Apply at least 6–8 weeks in advance for popular venues like Old Treasury Building.
  • Urgent applications may incur additional fees or face rejection.

Weather Contingencies:
Include backup dates in your application. Melbourne’s unpredictable weather (e.g., sudden rain) can disrupt outdoor shoots, and some venues charge rescheduling fees.

Compliance with Local Regulations

Ignoring regulations can result in fines or legal action. Key areas to address include:

1. Cultural Sensitivity

  • Indigenous heritage sites (e.g., Birrarung Marr) require permits from local councils and may prohibit certain activities.
  • Religious venues (e.g., churches) often restrict photography during services or ceremonies.

2. Environmental Protection

  • National parks and nature reserves enforce rules to protect flora and fauna. For example, shooting near Melbourne’s waterways may require permits from Parks Victoria.
  • Avoid blocking pathways or disturbing wildlife in areas like Albert Park.

3. Commercial Use Restrictions

  • Some venues prohibit photography for profit without explicit consent. For instance, using Melbourne’s street art murals for commercial campaigns may require artist permissions.

Post-Approval Responsibilities

Once permits are granted, adhere to all conditions to maintain good relations with venue managers.

On-Site Coordination:

  • Assign a crew member to liaise with venue staff and address concerns promptly.
  • Clean up all equipment and waste after the shoot.

Reporting Requirements:

  • Some venues (e.g., historic buildings) may request a post-shoot report detailing adherence to rules.
  • Share final images with venue managers for approval before publication, if required.

By prioritizing thorough research, timely applications, and compliance with local laws, couples and photographers can ensure a seamless experience while capturing Melbourne’s beauty. Always cross-reference venue guidelines with council regulations to avoid oversights.

WUU02764

Precautions for mosquito prevention in Melbourne Forest Style wedding photos

Melbourne Forest Wedding Photoshoot: Essential Mosquito and Insect Protection Strategies

Melbourne’s lush forests and botanical gardens provide enchanting backdrops for wedding photography, but their natural beauty often comes with uninvited guests: mosquitoes, ticks, and other biting insects. To ensure your photoshoot remains itch-free and focused on capturing perfect moments, follow these practical, environmentally conscious tips tailored to Melbourne’s unique ecosystem.

wedding photography melbourne

Understanding Melbourne’s Forest Insect Activity

Melbourne’s forests host a variety of insects, with mosquitoes and ticks being the most common nuisances. Mosquito activity peaks during warmer months (December–March), especially near water bodies like creeks or wetlands. Ticks thrive in tall grass and bushland, posing risks in outer-suburban parks or rural forest areas.

Time of Day Matters:

  • Dawn and Dusk: Mosquitoes are most active during these periods. Schedule outdoor shots for mid-morning or early afternoon when insect activity dips.
  • Weather Conditions: Still, humid days create ideal breeding grounds for mosquitoes. Windy conditions naturally reduce their presence, so leverage breezy spots for outdoor poses.

Location-Specific Risks:

  • Wetlands or Riverside Venues: Higher mosquito populations require proactive protection.
  • Dense Bushland: Ticks may lurk in overgrown areas; stick to cleared paths or manicured garden sections.

Pre-Shoot Preparation: Building a Defense Barrier

Preventative measures taken before your photoshoot significantly reduce insect-related disruptions.

Clothing Choices as a First Line of Defense

  • Long Sleeves and Pants: Opt for lightweight, breathable fabrics like cotton or linen in loose fits to cover skin without overheating. Tuck pants into socks to block ticks from crawling upward.
  • Light Colors: Mosquitoes are drawn to dark hues; wear whites, pastels, or neutrals to minimize attraction.
  • Sealed Seams: Choose clothing with sealed seams or treat gaps with permethrin (a non-toxic insect repellent) for added protection.

Natural Repellent Strategies

  • Essential Oils: Mix lemon eucalyptus, lavender, or citronella oils with water in a spray bottle for a DIY repellent. Apply to pulse points (wrists, ankles, neck) but avoid direct contact with eyes.
  • Herbal Sachets: Tuck dried herbs like rosemary, mint, or basil into pockets or bouquets to deter insects with their scent.
  • Smoke Barriers: If permitted, use citronella candles or smudge sticks (like sage) to create a protective perimeter around your shoot area.

Timing and Location Adjustments

  • Scout Locations Early: Visit your chosen forest spot beforehand to identify insect hotspots (e.g., stagnant water, dense undergrowth) and avoid them.
  • Plan Indoor Breaks: Schedule hair, makeup, or outfit changes in a nearby indoor space to minimize prolonged outdoor exposure.

On-the-Day Tactics: Staying Protected During the Shoot

Even with preparation, insects may still appear. Stay vigilant with these real-time strategies.

Maintaining Personal Hygiene

  • Avoid Strong Scents: Skip perfumes, scented lotions, or hair products, as floral or sweet fragrances attract mosquitoes.
  • Stay Dry: Sweat and moisture lure insects; use absorbent powders or blotting papers to keep skin dry between shots.
  • Clean Up Post-Snacks: Food crumbs or sugary drinks left outdoors attract ants and flies; dispose of waste promptly.

Environmental Controls During the Shoot

  • Fan Circulation: Position portable fans near seating areas or posed shots to disrupt mosquito flight patterns.
  • Natural Windbreaks: Use trees or tall plants as natural barriers against insects blowing in from adjacent areas.
  • Water Management: If near a creek or pond, stay at least 10 meters away to reduce mosquito encounters.

Quick Relief for Bites

  • Cold Compress: Apply a cold, damp cloth to bites to reduce swelling and itching.
  • Aloe Vera Gel: Soothe irritated skin with pure aloe vera, which has natural anti-inflammatory properties.
  • Avoid Scratching: Encourage the wedding party to resist scratching bites to prevent infections or scarring.

Post-Shoot Care: Addressing Any Lingering Effects

Even with precautions, a few bites may occur. Post-shoot care ensures quick recovery.

Skin Soothing Routines

  • Gentle Cleansing: Wash exposed skin with mild soap and water to remove any lingering insect repellents or pollutants.
  • Hydrating Lotions: Apply fragrance-free moisturizers to prevent dryness from frequent washing or outdoor exposure.
  • Over-the-Counter Remedies: Use hydrocortisone cream or antihistamines (if needed) to alleviate severe itching or swelling.

Inspecting for Ticks

  • Full-Body Check: After spending time in bushland, inspect skin for ticks, especially in hidden areas like armpits, groin, or scalp.
  • Proper Removal: If a tick is found, use fine-tipped tweezers to grasp it close to the skin’s surface and pull upward gently. Clean the area with antiseptic.

Monitoring for Reactions

  • Allergic Responses: Seek medical attention if bites cause hives, difficulty breathing, or swelling beyond the bite site.
  • Infection Signs: Watch for redness, warmth, or pus around bites, which may indicate infection and require treatment.

By combining proactive preparation, real-time tactics, and post-shoot care, you can enjoy Melbourne’s forest wedding photography without the distraction of insects. These strategies prioritize both comfort and safety, ensuring your focus remains on creating timeless memories.

DSC09206

Notes on clothing matching for wedding photos at Melbourne Castle

Melbourne Castle Wedding Photoshoot: Essential Wardrobe Tips for Timeless Elegance

Melbourne’s historic castles and grand estates offer a fairytale backdrop for wedding photography, blending European opulence with Australia’s natural beauty. To ensure your attire complements these iconic settings while reflecting personal style, consider these expert-approved wardrobe strategies tailored to Melbourne’s climate and architectural grandeur.

wedding photography melbourne

Understanding Melbourne’s Castle Settings and Climate

Melbourne’s castle venues range from 19th-century Gothic revival structures to baroque-inspired estates with sprawling gardens. These locations demand attire that balances drama with practicality, as Melbourne’s weather can shift rapidly—even within a single photoshoot.

Seasonal Considerations:

  • Summer (December-February): Opt for breathable fabrics like chiffon or organza to stay cool during daytime shoots. Avoid heavy satins that may cause discomfort under the sun.
  • Autumn/Spring (March-May, September-November): Layering is key. Pair a lightweight lace gown with a detachable tulle overskirt for versatility.
  • Winter (June-August): Choose thermal underlayers for outdoor shots, and consider faux-fur stoles or velvet capes to add warmth and regality.

Architectural Synergy:

  • Gothic Castles: A-line or ball gown silhouettes with intricate beading echo the grandeur of stone arches and stained-glass windows.
  • Baroque Estates: Baroque-style dresses with voluminous skirts and off-the-shoulder necklines harmonize with ornate ceilings and gilded mirrors.
  • Garden Settings: Flowing bohemian lace or tulle gowns with floral appliqués complement manicured lawns and blooming roses.

Dress Selection: Balancing Tradition and Individuality

The right gown should flatter your body type while aligning with the castle’s aesthetic.

Silhouette Strategies:

  • Petite Frames: High-waisted A-line gowns elongate the legs, while tea-length dresses showcase footwear without overwhelming height.
  • Curvy Figures: Mermaid or trumpet styles accentuate curves, but opt for softer fabrics like tulle to avoid stiffness.
  • Athletic Builds: Ball gowns with structured bodices create an hourglass illusion, balancing broader shoulders.

Fabric and Detail Choices:

  • Lace: Delicate floral lace overlays add romance to Gothic settings, while heavier brocades suit baroque interiors.
  • Color Palettes: Ivory or champagne tones photograph beautifully against stone walls, while muted blues or blush pinks complement garden foliage.
  • Train Length: Cathedral trains work for grand staircases, but opt for sweep trains for mobility during outdoor shots.

Groom’s Attire Coordination:

  • Classic Tuxedos: Pair with velvet bow ties for formal castle interiors.
  • Tailored Suits: Lightweight wool suits in charcoal or navy suit spring/autumn shoots, while tweed blazers add texture for winter.
  • Accessories: Pocket squares, cufflinks, or vintage watches tie the groom’s look to the era of the venue.

Accessorizing for Regal Sophistication

Accessories elevate your outfit while respecting the castle’s historic charm.

Headpieces and Veils:

  • Birdcage Veils: Short veils with lace trim suit vintage-inspired castles.
  • Cathedral Veils: Floor-length veils with embroidery create drama in grand halls.
  • Tiaras: Opt for understated pearl or crystal designs to avoid overshadowing the venue’s architecture.

Jewelry and Footwear:

  • Statement Earrings: Drop earrings with gemstones add sparkle without competing with necklines.
  • Bracelets: Delicate bangles or cuffs complement sleeveless gowns.
  • Shoes: Block heels or wedges provide stability on uneven castle grounds, while embellished flats suit garden paths.

Outerwear for Practicality:

  • Wraps: Silk shawls or pashminas in complementary hues keep shoulders warm during chilly outdoor sessions.
  • Capes: Faux-fur or velvet capes add drama for winter shoots, especially in snow-dusted courtyards.

Final Checks Before the Shoot

  • Fitting Sessions: Schedule multiple fittings to ensure comfort, especially for gowns with corsets or heavy skirts.
  • Weather Backup: Pack a portable steamer to remove wrinkles from travel, and carry clear umbrellas for unexpected rain.
  • Emergency Kit: Include double-sided tape, safety pins, and blister pads for on-the-go adjustments.

By harmonizing your wardrobe with Melbourne’s castle venues and climate, you’ll create a cohesive visual narrative that feels both timeless and authentic. The key lies in selecting pieces that celebrate your individuality while paying homage to the grandeur of your surroundings.

WUU00073

Sun protection precautions for outdoor wedding photography in Melbourne

Melbourne Outdoor Wedding Photography: Essential Sun Protection Tips

Planning an outdoor wedding photoshoot in Melbourne’s vibrant landscapes is a dream for many couples. However, the city’s unpredictable weather and strong UV radiation demand meticulous sun protection strategies to ensure your skin stays healthy and your photos remain flawless. Below are practical, expert-backed tips to safeguard your skin during your Melbourne outdoor wedding photography session.

wedding photography melbourne

Understanding Melbourne’s UV Climate

Melbourne’s UV index often peaks during summer, with levels reaching extreme categories (UV 11+) even on cloudy days. Unlike heat, UV radiation isn’t blocked by clouds, meaning your skin remains vulnerable regardless of visible sunlight. This invisible threat can cause sunburn, premature aging, and long-term skin damage if unprotected.

Key Insight: Always check the daily UV forecast via the Bureau of Meteorology or SunSmart app before your shoot. Aim for sessions during early mornings (before 10 AM) or late afternoons (after 4 PM) when UV levels are lower, reducing exposure risk.

Layered Sun Protection Strategies

Effective sun protection requires combining multiple methods to address different exposure scenarios.

1. Physical Barriers as Your First Line of Defense

  • Wide-Brimmed Hats: Opt for hats with at least a 10 cm brim to shield your face, neck, and ears. Choose breathable materials like cotton or straw to prevent overheating.
  • UPF-Rated Clothing: Wear long-sleeved shirts or dresses made from UPF 50+ fabric, which blocks 98% of UV rays. Lightweight, loose-fitting styles in breathable fabrics like linen or moisture-wicking synthetic blends enhance comfort.
  • UV-Blocking Accessories: Sunglasses with 100% UV protection safeguard your eyes and delicate eyelid skin. Consider clear UV-blocking visors for grooms or bridesmaids to maintain visibility while reducing glare.

2. High-SPF Sunscreen Application Techniques

  • Broad-Spectrum Formula: Use a water-resistant, broad-spectrum sunscreen (SPF 30+ or higher) that protects against both UVA (aging) and UVB (burning) rays. Apply 15–30 minutes before stepping outside to allow absorption.
  • Targeted Application: Cover all exposed areas, including ears, back of the neck, hands, and feet. For low-cut dresses, extend application to the décolletage. Use a lip balm with SPF 30+ to prevent chapping and sun damage.
  • Reapplication Schedule: Reapply every 2 hours, or immediately after swimming, sweating, or towel-drying. Keep a travel-sized sunscreen in your photography kit for quick touch-ups between shots.

3. Environmental Adaptation Tactics

  • Seek Shade During Breaks: Use natural shade from trees, buildings, or portable canopies during outfit changes or rest periods. Position your photography setup near shaded areas to minimize direct exposure.
  • Hydration and Cooling: Carry a reusable water bottle to stay hydrated. Use cooling towels or misting fans to lower body temperature during hot spells. Avoid caffeine and alcohol, which can dehydrate your skin.
  • Wind and Dust Protection: Melbourne’s coastal breezes can carry sand and pollen, irritating sun-exposed skin. Secure loose hair with clips or headbands and use a gentle facial mist to keep skin refreshed.

Post-Shoot Skin Recovery

Even with diligent protection, prolonged outdoor exposure may cause mild redness or dryness. Post-shoot care is crucial to restore skin health.

1. Gentle Cleansing
Remove sunscreen, makeup, and environmental pollutants with a mild, fragrance-free cleanser. Avoid harsh scrubs, which can aggravate sun-exposed skin.

2. Intensive Hydration
Apply a soothing, alcohol-free moisturizer containing ceramides or hyaluronic acid to replenish lost moisture. For redness, use a cold compress or aloe vera gel to calm inflammation.

3. Avoid Irritants
Skip exfoliating products or retinoids for 48 hours post-shoot to prevent further irritation. Opt for mineral-based makeup if retouching photos, as it’s less likely to clog pores.

Final Thoughts

Melbourne’s outdoor wedding photography offers endless creative possibilities, but sun protection should never be an afterthought. By combining physical barriers, strategic sunscreen use, and environmental adaptation, you can enjoy your session without compromising skin health. Remember, sun damage is cumulative—consistent protection today ensures your wedding memories remain vibrant for years to come.

WUU00289

Lighting arrangement tips for interior studio wedding photography in Melbourne

Mastering Indoor Studio Lighting for Melbourne Wedding Photography

Creating timeless wedding portraits in Melbourne’s indoor studios hinges on strategic lighting setups that balance creativity with technical precision. Unlike outdoor shoots, studio environments demand meticulous control over light intensity, direction, and quality to achieve professional results. Here’s a guide to elevating your indoor wedding photography through advanced lighting techniques.

wedding photography melbourne

Understanding Core Lighting Principles

Every effective studio setup begins with mastering foundational lighting concepts. The interplay between key lightfill light, and background light determines the mood, dimensionality, and overall aesthetic of your images.

Key Light: The Dominant Force

The key light serves as the primary illumination source, shaping the subject’s facial features and body contours. For wedding portraits, place the key light at a 45-degree angle to the subject’s face, slightly elevated to mimic natural sunlight. This angle creates gentle shadows that enhance depth without appearing harsh.

When working with couples, adjust the key light’s height to ensure both faces are evenly lit. For example, positioning the light 1.5 meters above ground level and angled downward prevents flat lighting, which can make subjects appear washed out.

Fill Light: Balancing Shadows

Fill light softens the shadows cast by the key light, preventing excessive contrast. Use a secondary light source—such as a softbox or reflector—placed opposite the key light at a lower intensity. The goal is to maintain a 2:1 or 3:1 light ratio (key light twice or three times brighter than fill light) for a natural, flattering effect.

In group shots, position fill lights at waist level to avoid overexposing facial details. A white foam board reflector can also serve as a cost-effective fill light alternative, bouncing ambient light onto darker areas of the frame.

Background Light: Setting the Scene

Background lighting isolates subjects from their surroundings, adding depth and context. For clean, minimalist portraits, use a single background light positioned behind the subject to create a subtle gradient. To emphasize texture, such as in bridal gown details, add a second background light at a 90-degree angle to highlight patterns or fabric folds.

When photographing couples against textured backdrops, like wooden panels or floral walls, adjust background light intensity to avoid overpowering the subject. A dimmer switch allows for real-time adjustments during the shoot.

Advanced Techniques for Dynamic Portraits

Beyond the basics, incorporating specialized lighting setups can transform ordinary shots into cinematic masterpieces.

Rim Lighting: Adding Drama

Rim lighting outlines the subject’s edges with a delicate glow, separating them from the background. Position a strip light or snooted flash behind the subject at a 135-degree angle to the camera. This technique works exceptionally well for bridal veil shots, where the light accentuates the fabric’s transparency and flow.

For couples, use rim lighting to highlight interaction details, such as intertwined hands or shared glances. Keep the rim light’s power 1–2 stops below the key light to maintain balance.

High-Key vs. Low-Key Lighting

High-key lighting produces bright, airy images with minimal shadows, ideal for cheerful, romantic themes. Achieve this by surrounding the subject with multiple softbox lights at equal intensity. Low-key lighting, conversely, uses deep shadows and focused illumination to convey intimacy or mystery. Position the key light close to the subject and eliminate fill light entirely for a moody effect.

When shooting in Melbourne’s compact studios, high-key setups require careful placement of lights to avoid spillage onto walls. Use black flags or barn doors to control light direction.

Creative Light Modifiers

Modifiers like grids, gels, and gobos add artistic flair. A grid attached to a softbox narrows the light beam, creating precise highlights on facial features or gown details. Colored gels can evoke seasonal themes—warm amber for autumn weddings or cool blue for winter ceremonies.

For a unique touch, project patterns onto the background using a gobo (a stencil placed over the light source). This technique works well for themed shoots, such as vintage or bohemian weddings.

Practical Tips for Melbourne Studios

Melbourne’s variable weather and studio sizes necessitate adaptable lighting strategies.

Adapting to Studio Size

In small studios (under 50 square meters), prioritize compact light sources like LED panels or portable strobes. Use bouncers or reflectors to maximize natural light from windows. For larger spaces, invest in ceiling-mounted lights to free up floor area and ensure consistent illumination.

Managing Mixed Lighting

Many Melbourne studios combine tungsten, fluorescent, and LED lights. To avoid color casts, set your camera’s white balance to “auto” or use a gray card for custom calibration. During post-processing, adjust highlights and shadows individually to maintain skin tone accuracy.

Client Communication

Before the shoot, discuss lighting preferences with the couple. Some may prefer soft, even lighting for a timeless look, while others might opt for dramatic contrasts. Show them mood boards or test shots to align expectations.

During the session, use a monitor or tethered shooting setup to review images in real time. This allows for immediate adjustments to lighting or composition, ensuring client satisfaction.

Final Considerations

  • Test Your Setup: Conduct a lighting test before the shoot to identify and resolve issues like glare or uneven exposure.
  • Safety First: Secure all lights and cables to prevent tripping hazards, especially in busy studios.
  • Stay Flexible: Be prepared to tweak your setup based on the couple’s poses, expressions, or unexpected changes in weather (if shooting near windows).

By combining technical expertise with creative experimentation, you can craft indoor wedding portraits that capture the essence of Melbourne’s romantic charm. Whether you’re working in a cozy boutique studio or a spacious warehouse, these lighting techniques will elevate your craft and delight your clients.

DSC02004

Preparations for planning the shooting route of wedding photography in Melbourne

Crafting a Seamless Melbourne Wedding Photography Itinerary: Key Planning Considerations

Planning a wedding photoshoot in Melbourne requires balancing iconic landmarks, natural beauty, and logistical efficiency. From navigating traffic to maximizing golden-hour light, a well-structured route ensures you capture every memorable moment without stress. Here’s how to design a photography itinerary tailored to Melbourne’s unique offerings.

wedding photography melbourne

Understanding Melbourne’s Seasonal and Lighting Dynamics

Melbourne’s weather and daylight hours vary dramatically across seasons, impacting everything from location accessibility to the quality of natural light. Tailor your route to align with these factors.

Sunrise and Sunset Timing

Golden-hour light—the period shortly after sunrise or before sunset—creates soft, flattering shadows and warm tones. Use online tools to determine exact times for your shoot date. For sunrise sessions, prioritize locations east of the CBD, such as Brighton Beach or the Royal Botanic Gardens’ eastern lawns. For sunset, head west to spots like Williamstown or the Melbourne SkyDeck observation deck. Avoid midday shoots in summer, when harsh overhead light can cause unflattering shadows.

Weather Contingency Planning

Melbourne’s reputation for “four seasons in one day” demands flexibility. If rain is forecast, identify indoor alternatives with natural light, such as art galleries, historic libraries, or cafes with large windows. For windy conditions, choose sheltered locations like arcaded laneways in the CBD or covered walkways in parks. Communicate backup plans with your photographer in advance to avoid last-minute scrambles.

Seasonal Highlights and Crowds

Spring and autumn offer mild temperatures and vibrant foliage, making parks like Fitzroy Gardens or the University of Melbourne’s grounds ideal. Summer attracts crowds to popular beaches and outdoor venues, so arrive early or consider weekday shoots. Winter’s crisp air and golden afternoon light suit cozy urban settings, such as the State Library of Victoria or cozy alleyways in Degraves Street.

Mapping Out Logistical Flow and Accessibility

A smooth route minimizes travel time between locations, leaving more time for creative shots. Consider distance, transportation, and venue-specific rules when planning your path.

Proximity Between Locations

Group nearby landmarks to reduce transit delays. For example, combine a CBD shoot with stops at Flinders Street Station, Hosier Lane, and the Yarra River, all within walking distance. If moving between districts, use trams or rideshare services to avoid parking hassles. For multi-region itineraries (e.g., St. Kilda to the Dandenong Ranges), allocate buffer time for traffic, especially during peak hours.

Venue Entry Requirements

Some iconic locations, like the Royal Exhibition Building or St. Paul’s Cathedral, require permits for commercial photography. Contact venue managers weeks in advance to secure permissions and clarify restrictions (e.g., tripod use, flash photography). For private properties or gardens, obtain written consent from owners. Keep copies of permits and contact details handy during the shoot.

Transportation and Parking Considerations

Melbourne’s CBD has limited parking, so opt for public transport or rideshares for urban shoots. If driving, research nearby parking garages or street parking rules. For beach locations like Port Melbourne or Elwood, arrive early to secure spots. If your route includes remote areas, such as the Yarra Valley wineries, consider hiring a driver or renting a vehicle with ample trunk space for equipment.

Curating a Mix of Iconic and Hidden Gems

Balance Melbourne’s famous sights with lesser-known spots to create a unique, personalized itinerary.

Iconic Melbourne Landmarks

Include must-visit locations like the Melbourne SkyDeck for panoramic city views, the Brighton Bathing Boxes for colorful coastal shots, or the State Library’s grand dome for timeless portraits. These spots offer recognizable backdrops but can be crowded, so schedule them during off-peak hours (e.g., early morning for the Bathing Boxes).

Lesser-Known Photogenic Spots

Explore hidden gems like the Abbotsford Convent for bohemian vibes, the Collins Street arcades for vintage charm, or the Westgate Park salt lakes for surreal, otherworldly photos. These locations often provide more privacy and creative freedom. Research local blogs or photography forums for up-and-coming spots that align with your aesthetic.

Combining Urban and Natural Settings

Melbourne’s diverse landscape allows for dynamic contrasts. Pair a gritty urban shoot in Hosier Lane with a serene nature walk in the Royal Botanic Gardens, or contrast the industrial docks of Docklands with the lush greenery of Albert Park. This variety adds depth to your photo gallery and showcases Melbourne’s multifaceted character.

Final Tips for a Stress-Free Shoot Day

  • Scout Locations in Advance: Visit each site at the same time of day as your shoot to assess lighting, crowds, and accessibility.
  • Build in Buffer Time: Add 15–30 minutes between locations to account for unexpected delays like traffic or reshooting due to lighting changes.
  • Communicate with Your Photographer: Share your priority locations and any physical limitations (e.g., difficulty walking long distances) to tailor the route accordingly.

By thoughtfully planning your Melbourne wedding photography itinerary, you’ll create a day that flows effortlessly while capturing the city’s magic. Flexibility, preparation, and a mix of iconic and intimate spots ensure your photos tell a story as unique as your love.

71407_Farm_Vigano_SELECTION_0012

Preparations for emergency makeup touch-ups in Melbourne wedding photography

Essential Touch-Up Makeup Items for Melbourne Wedding Photography: Preparation Guide

Melbourne’s unpredictable weather and long wedding days can challenge even the most flawless makeup looks. Whether dealing with humidity, wind, or tears of joy, having the right touch-up tools ensures you stay photo-ready from ceremony to sunset. Here’s what to pack for seamless makeup maintenance during your shoot.

wedding photography melbourne

Skin-Specific Touch-Up Essentials

Your skin type dictates which products work best for maintaining a fresh look. Tailor your kit to address oiliness, dryness, or sensitivity without clogging pores or causing irritation.

Oil Control for Humid Days

Melbourne’s coastal areas and summer months often bring high humidity, leading to shine and makeup breakdown. Pack oil-absorbing sheets or a translucent powder to mattify your T-zone without adding layers of product. For sensitive skin, opt for blotting papers infused with soothing ingredients like aloe vera or chamomile. Avoid heavy powders that can look cakey in photos.

Hydration for Dry or Windy Conditions

Cold winds or indoor heating can leave skin feeling tight and flaky. Carry a travel-sized hydrating mist to refresh your complexion between shots. Look for formulas with glycerin or hyaluronic acid to lock in moisture without disrupting makeup. A lightweight, non-greasy moisturizer is also useful for spot-treating dry patches on cheeks or around the nose.

SPF Protection for Outdoor Shoots

If your photoshoot includes outdoor locations like gardens or beaches, sun protection is non-negotiable. Choose a sunscreen with SPF 30 or higher that doubles as a primer to prevent makeup from sliding. Mineral-based options with zinc oxide or titanium dioxide are ideal for sensitive skin and won’t leave a white cast in flash photography. Reapply every two hours, especially if sweating or swimming.

Makeup Longevity Enhancers

Extending the life of your foundation, lipstick, and eye makeup requires strategic products that resist fading, creasing, or smudging. These items help your look stay intact through hugs, kisses, and emotional moments.

Setting Sprays for All-Day Wear

A quality setting spray acts as a protective barrier against humidity, sweat, and accidental touches. Opt for a matte finish if you have oily skin or a dewy formula for dry complexions. Mist your face lightly after applying makeup and again before heading outdoors. Some formulas even contain skin-nourishing ingredients like vitamins or antioxidants.

Lip Color Refreshers

Long-wearing lipsticks often fade unevenly, leaving a ring of color around the lips. Pack a lip liner in a matching shade to redefine edges and prevent feathering. A small tube of tinted lip balm or a sheer lipstick can replenish moisture and color without requiring a full reapplication. For bold shades, bring a cotton swab dipped in micellar water to clean up mistakes quickly.

Eye Makeup Fixers

Eyeliner smudges and mascara flakes are common issues during emotional ceremonies or windy outdoor shoots. A waterproof eyeliner and mascara are must-haves, but even these can weaken over time. Carry a compact mirror and a Q-tip to wipe away smudges discreetly. For creased eyeshadow, a neutral eyeshadow stick or a small palette with matte shades can touch up the crease without starting from scratch.

Emergency Tools for Quick Fixes

Unexpected issues like runny mascara, static hair, or a broken lipstick require fast solutions. These compact tools fit easily into a clutch or bridesmaid’s bag for on-the-go repairs.

Portable Mirrors and Lighting

A small, foldable mirror with built-in LED lights ensures you can check your makeup in any setting, from dimly lit venues to bright outdoor locations. Look for models with adjustable brightness levels to mimic natural light. Some mirrors even attach to keychains or phones for convenience.

Cotton Swabs and Pads

Cotton swabs are versatile for fixing eyeliner mistakes, cleaning up lipstick smudges, or dabbing away excess powder. Pre-moistened cotton pads with micellar water are handy for removing sweat or oil without stripping makeup. Pack them in individual packets to keep them clean and portable.

Hair and Makeup Clips

Static electricity or wind can wreak havoc on carefully styled hair, causing flyaways or strands sticking to lips. Keep a few small clips or bobby pins in your kit to secure loose sections. A travel-sized hairspray or anti-static spray can also tame frizz without leaving residue. For makeup, clips can hold back hair while touching up your face.

Final Tips for Stress-Free Touch-Ups

  • Test Products Beforehand: Use your touch-up items during your makeup trial to ensure they work well with your skin and don’t cause reactions.
  • Organize Your Kit: Use a small, clear cosmetic bag to separate products by category (e.g., skin, lips, eyes) for easy access.
  • Delegate Responsibilities: Assign a bridesmaid or family member to carry your touch-up kit and remind you to reapply sunscreen or blot oil.

By packing these essentials, you’ll be prepared for Melbourne’s unpredictable weather and the demands of a full-day wedding shoot. Staying proactive about touch-ups ensures your photos capture your best self, no matter what surprises come your way.

DSC03855

Notes for Adjusting the State of newlyweds in Melbourne Wedding Photography

Essential Tips for Brides and Grooms to Optimize Their Energy and Composure During Melbourne Wedding Photography

Wedding photography sessions in Melbourne often span several hours, requiring couples to maintain poise, enthusiasm, and physical stamina. Adjusting to the demands of posing, moving between locations, and managing emotions can be challenging. Here’s how to ensure both partners feel confident, relaxed, and camera-ready throughout the day.

wedding photography melbourne

Prioritizing Physical Comfort: Avoiding Fatigue and Discomfort

Long photography sessions demand physical endurance. Simple adjustments to attire, footwear, and posture can prevent exhaustion and ensure natural expressions.

Choosing Practical Footwear

  • Heel Height: Brides should opt for wedges or block heels instead of stilettos for outdoor shoots, as they provide better stability on uneven terrain like grass or cobblestones.
  • Break-In Period: Wear new shoes for at least a week before the wedding to soften the material and reduce blisters.
  • Backup Options: Pack a pair of comfortable flats or sneakers to change into during breaks or transitions between locations.

Managing Gown and Suit Constraints

  • Mobility Adjustments: For gowns with heavy trains or corsets, practice walking and sitting beforehand to avoid tripping or restricted movement.
  • Layering Strategies: Grooms wearing suits in variable Melbourne weather can unbutton jackets or remove ties during warmer segments of the shoot.
  • Posture Awareness: Stand tall with shoulders relaxed to avoid stiffness. Use props like chairs or walls for support during prolonged poses.

Hydration and Snacks

  • Discreet Water Bottles: Carry small, spill-proof bottles to stay hydrated without ruining makeup or attire.
  • Energy-Boosting Snacks: Pack light, non-messy snacks like nuts, energy bars, or fruit to maintain energy levels between meals.
  • Timing: Schedule a substantial breakfast before the shoot and a quick lunch break if the session extends past midday.

Emotional Preparation: Staying Calm and Connected

Wedding photography can amplify nerves, especially in front of the camera. Techniques to manage anxiety and foster intimacy ensure genuine smiles and interactions.

Breathing and Relaxation Techniques

  • Deep Breathing: Pause for 30 seconds before key shots to inhale deeply through the nose and exhale slowly through the mouth, reducing tension in the shoulders and jaw.
  • Progressive Muscle Relaxation: Tense and release muscle groups from the toes upward to alleviate physical stress during stationary poses.
  • Visualization: Imagine a calm, happy memory (e.g., the proposal) to trigger authentic smiles and reduce self-consciousness.

Communication with Your Partner

  • Private Jokes: Share a lighthearted inside joke to break the ice and elicit natural laughter during posed shots.
  • Eye Contact: Focus on each other’s eyes rather than the camera to create intimate, unposed moments.
  • Physical Touch: Hold hands, rest heads together, or link arms to convey connection and comfort.

Handling Unexpected Emotions

  • Acknowledge Nerves: It’s normal to feel overwhelmed; openly discuss fears with your partner or photographer to alleviate pressure.
  • Take Mini-Breaks: Step aside for a few minutes to compose yourself if emotions become intense.
  • Reframe Mistakes: If a pose feels awkward, laugh it off and try again—imperfections often make for the most memorable photos.

Timing and Pacing: Balancing Efficiency and Enjoyment

Melbourne’s unpredictable weather and daylight hours require strategic scheduling. Aligning the shoot’s flow with energy levels ensures productivity without burnout.

Morning vs. Afternoon Energy Levels

  • Early Starts: Schedule outdoor shoots during the golden hour (sunrise) when clients are typically more alert and light is soft.
  • Afternoon Adjustments: If shooting later, incorporate breaks in shaded areas or indoors to avoid midday heat and fatigue.
  • Flexible Timelines: Build buffer time between locations to account for traffic, wardrobe changes, or unexpected delays.

Breaks and Transitions

  • Scheduled Pauses: Plan 5–10-minute breaks every hour to rest, hydrate, and adjust attire.
  • Change of Scenery: Switch between indoor and outdoor settings to keep the session dynamic and mentally stimulating.
  • Transportation Comfort: Use private vehicles or rideshares to avoid walking long distances in formal attire, especially in heat or rain.

Photographer Collaboration

  • Clear Communication: Share preferences for pose frequency, break timing, and shot types to align expectations.
  • Feedback Loops: Regularly check in with the photographer to review photos and adjust directions if certain angles feel uncomfortable.
  • Trust the Process: Rely on the photographer’s expertise to guide poses and lighting, reducing decision fatigue for the couple.

Final Touches: Small Details That Elevate Comfort

Subtle adjustments to accessories, timing, and mindset can transform a good shoot into a great one.

  • Lip Balm and Blotting Sheets: Keep these on hand to prevent chapped lips or shiny skin in photos.
  • Emergency Kit: Pack safety pins, sewing kits, and stain removers for last-minute wardrobe fixes.
  • Positive Affirmations: Repeat phrases like “We look amazing” or “This is fun” to boost confidence and reduce self-doubt.

By prioritizing physical comfort, emotional connection, and strategic timing, couples can navigate Melbourne’s wedding photography sessions with ease and joy.

WUU00231

Precautions for Dealing with sudden weather changes in Melbourne wedding photography

Navigating Weather Changes During Melbourne Wedding Photography: Essential Tips

Melbourne’s notorious “four seasons in one day” weather demands flexibility and preparedness during wedding photography sessions. Sudden rain, wind, or heatwaves can disrupt schedules and affect attire, lighting, and client comfort. Here’s how to adapt quickly and ensure stunning results despite unpredictable conditions.

wedding photography melbourne

Rain Preparedness: Protecting Gear, Attire, and Clients

Rain is common in Melbourne, especially during spring and autumn. Proactive measures can turn a wet day into a creative opportunity.

Waterproofing Equipment and Accessories

  • Camera and Lens Protection: Use rain covers or plastic sleeves designed for cameras to shield gear from moisture. Keep silica gel packets in camera bags to absorb humidity.
  • Lens Care: Wipe lenses with a microfiber cloth frequently to prevent water spots. Avoid changing lenses outdoors in heavy rain to minimize exposure.
  • Backup Gear: Pack a second camera body and extra batteries, as cold and damp conditions can drain power faster. Store gear in waterproof cases when not in use.

Client Comfort and Attire Safety

  • Umbrellas and Canopies: Provide clear or white umbrellas for the couple to stay dry while posing. A portable canopy or pop-up tent offers shelter during breaks.
  • Quick-Dry Fabrics: Advise couples to choose gowns and suits made from synthetic blends or treated cotton, which dry faster than silk or lace.
  • Footwear Alternatives: Suggest waterproof shoes or boots for outdoor shoots. For the bride, a short heel or flat shoe can prevent sinking into muddy ground.

Creative Rain Photography Opportunities

  • Reflective Surfaces: Use puddles to capture dramatic reflections of the couple or venue. Shoot from a low angle to emphasize water droplets.
  • Motion and Movement: Encourage the couple to walk or dance under umbrellas for dynamic shots. Slow shutter speeds can create a dreamy, blurred effect.
  • Mood Lighting: Combine rain with off-camera flash or string lights to add warmth and contrast to gloomy skies.

Wind Management: Securing Attire and Poses

Melbourne’s coastal breezes and sudden gusts can wreak havoc on loose fabrics, veils, and hair. Stabilizing elements ensures polished photos.

Stabilizing Loose Fabrics and Accessories

  • Veil Weights: Use small clips or weights sewn into the hem of veils to prevent them from flying away. Alternatively, opt for a shorter veil or hairpiece.
  • Gown Tacks: Temporarily secure loose layers of the gown with fashion tape or small stitches to keep hems in place.
  • Hair and Makeup: Recommend updos or textured hairstyles that resist wind. Use strong-hold hairspray and consider a hairnet for intricate styles.

Posing Techniques for Windy Conditions

  • Angle Adjustments: Position the couple with their backs to the wind to minimize fabric flapping. Use natural windbreaks like buildings or trees.
  • Dynamic Poses: Capture the energy of the wind by having the couple embrace or lean into each other. Shoot in burst mode to catch mid-movement expressions.
  • Close-Up Shots: Focus on facial expressions or details like hands or rings to avoid distracting fabric movement in wide shots.

Gear Protection and Safety

  • Sandbags and Weights: Secure light stands, reflectors, and backdrops with sandbags to prevent them from toppling in strong gusts.
  • Lens Filters: Use UV or polarizing filters to reduce glare and protect lenses from wind-blown debris.
  • Client Communication: Warn the couple before sudden gusts to avoid startled reactions. Keep breaks short to limit exposure to harsh winds.

Extreme Heat and Sun: Keeping Clients Comfortable

Melbourne summers can bring intense heat and glare. Prioritizing client comfort and safety prevents exhaustion and sweaty skin in photos.

Hydration and Shade Strategies

  • Water Stations: Provide chilled water bottles and encourage frequent hydration. Offer electrolyte drinks if shooting in extreme heat.
  • Portable Shade: Use parasols, pop-up tents, or natural shade from trees to keep clients cool during poses. Schedule outdoor shoots for early morning or late afternoon.
  • Cooling Accessories: Hand out cooling towels or fans to help clients stay comfortable. Suggest lightweight, breathable fabrics for attire.

Managing Sweat and Glow

  • Blotting Papers and Powder: Keep oil-absorbing sheets and translucent powder on hand to touch up shiny skin between shots.
  • Strategic Posing: Avoid direct sunlight, which accentuates sweat and shadows. Use diffusers or reflectors to soften harsh light.
  • Attire Adjustments: For the groom, recommend undershirts to absorb sweat. For the bride, a detachable train can reduce layering in heat.

Heatwave Scheduling Flexibility

  • Rescheduling Options: Discuss backup dates or indoor locations with clients in case of prolonged heatwaves.
  • Shorter Sessions: Break the shoot into smaller segments with breaks in air-conditioned spaces.
  • Client Communication: Check in regularly with the couple to assess their comfort levels. Prioritize their well-being over rigid timelines.

Final Checks: Contingency Plans and Communication

A proactive approach minimizes stress when weather changes strike.

  • Weather Apps and Alerts: Monitor real-time forecasts using reliable apps. Set up alerts for sudden rain, wind, or heat warnings.
  • Backup Locations: Identify nearby indoor venues, such as cafes, galleries, or studios, as alternatives to outdoor shoots.
  • Client Agreements: Outline weather-related contingencies in contracts, including rescheduling policies and additional fees (if any).

By staying adaptable and prioritizing client comfort, photographers can turn Melbourne’s unpredictable weather into a unique element of the wedding story.