wedding photography melbourne

The pre-wedding trial shoot schedule for wedding photography in Melbourne

Melbourne Pre-Wedding Photoshoot Timing Guide: Planning for Success
A pre-wedding photoshoot in Melbourne offers couples a chance to refine their poses, test lighting conditions, and build confidence before the big day. However, coordinating schedules, weather, and locations requires careful planning to ensure a smooth experience.

wedding photography melbourne

Choosing the Right Time of Day for Optimal Lighting

Melbourne’s variable weather and daylight hours demand strategic timing to capture natural, flattering light.

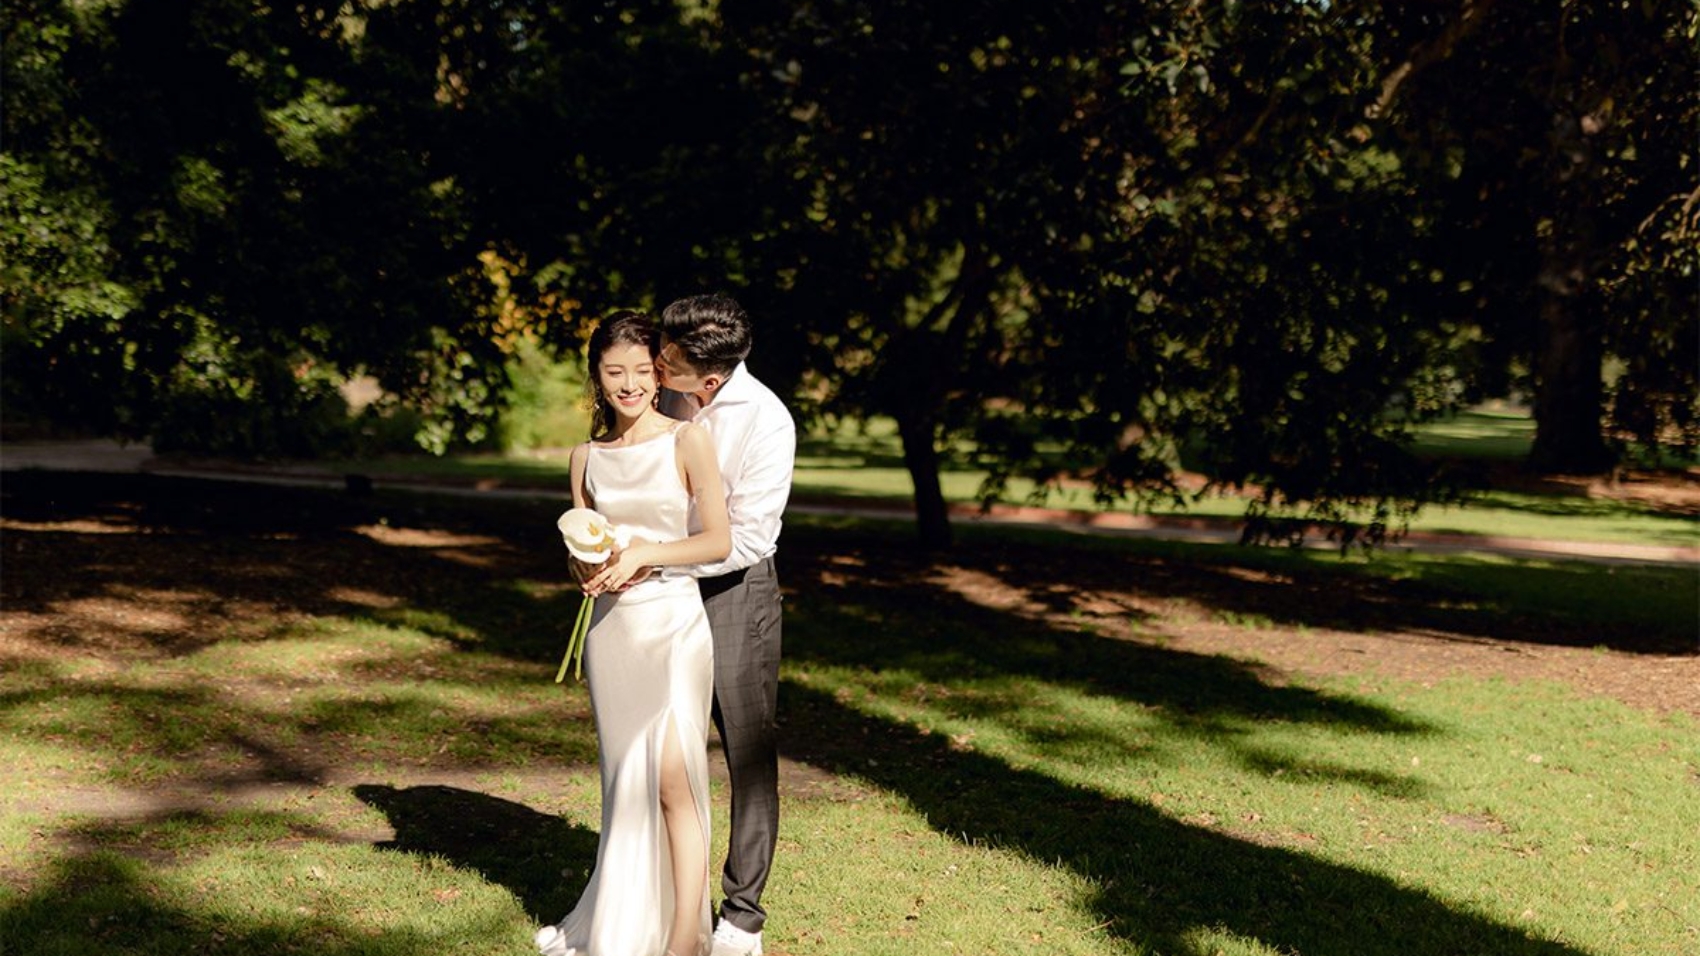
  • Morning Sessions (9:00 AM–11:00 AM): Early light is soft and golden, ideal for outdoor portraits in parks or gardens. This window avoids harsh midday shadows and provides ample time for multiple location changes.
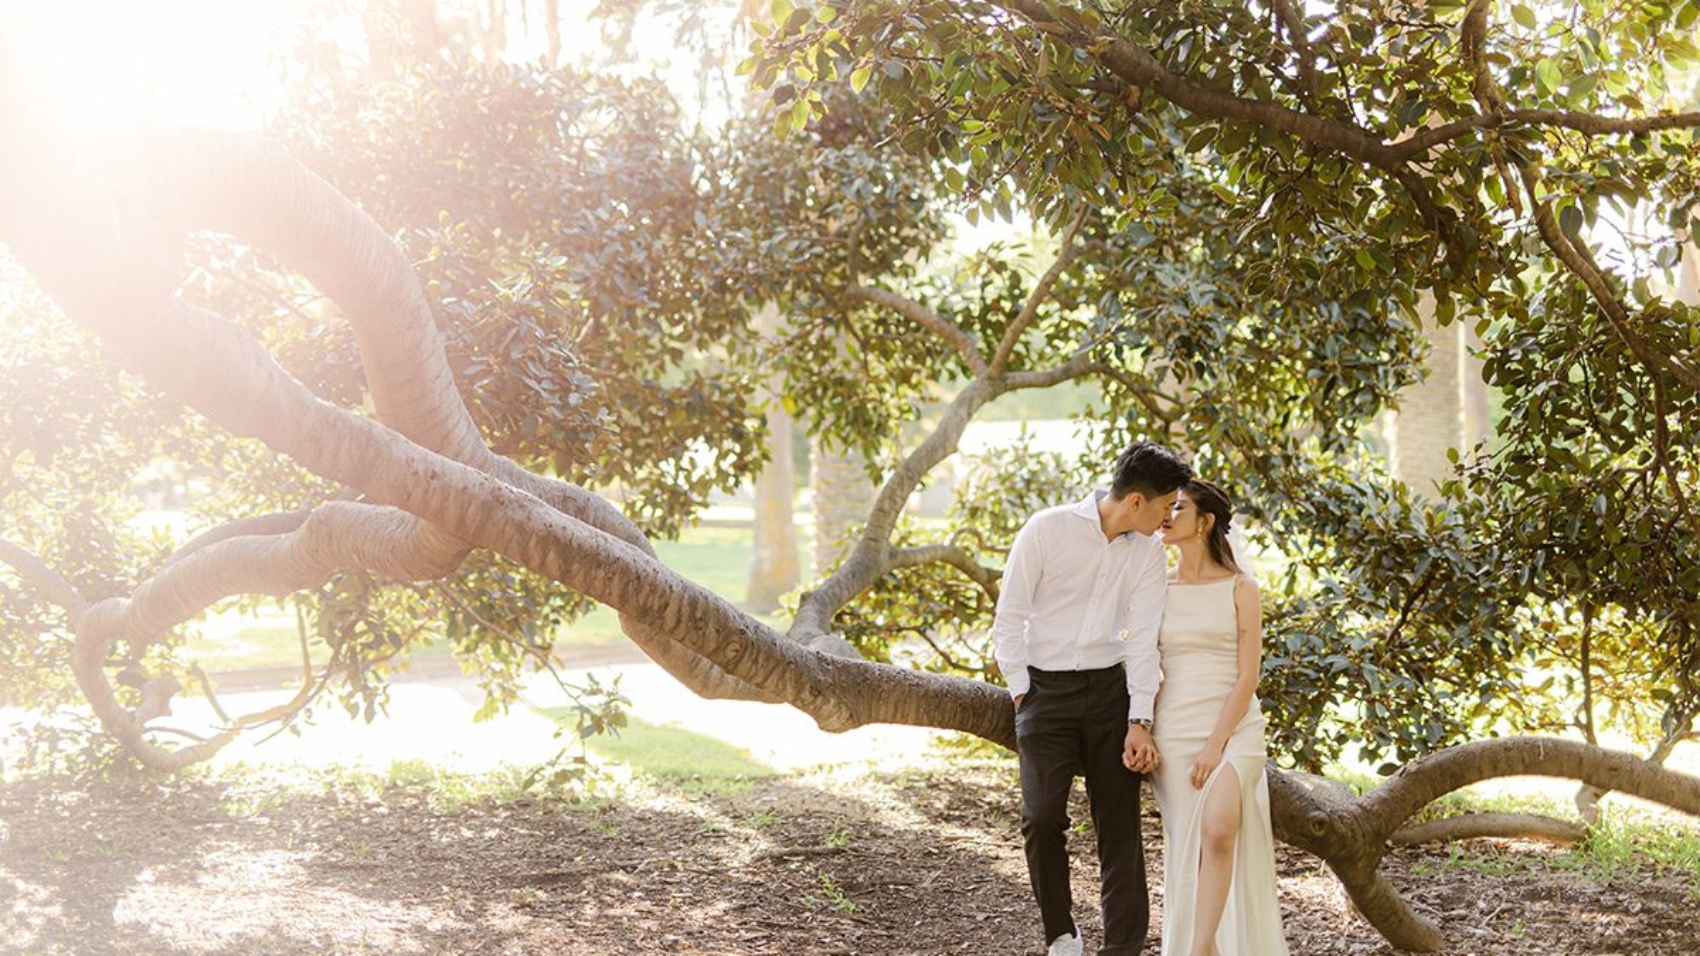
  • Late Afternoon to Early Evening (3:00 PM–5:00 PM): For couples preferring a romantic glow, late afternoon offers warmer tones. Golden hour in Melbourne peaks around 5:30 PM in summer and 4:00 PM in winter, so adjust accordingly based on the season.
  • Avoiding Midday (12:00 PM–2:00 PM): Direct sunlight can create unflattering contrasts, especially in open areas like beaches. If midday is unavoidable, seek shaded spots under trees or archways to diffuse light.

Example: A 2024 couple scheduled their St. Kilda Beach trial shoot at 10:00 AM to leverage morning light, later moving to a nearby café for indoor shots as the sun intensified.

Seasonal Considerations for Melbourne’s Climate

Melbourne’s four distinct seasons influence everything from wardrobe choices to location accessibility.

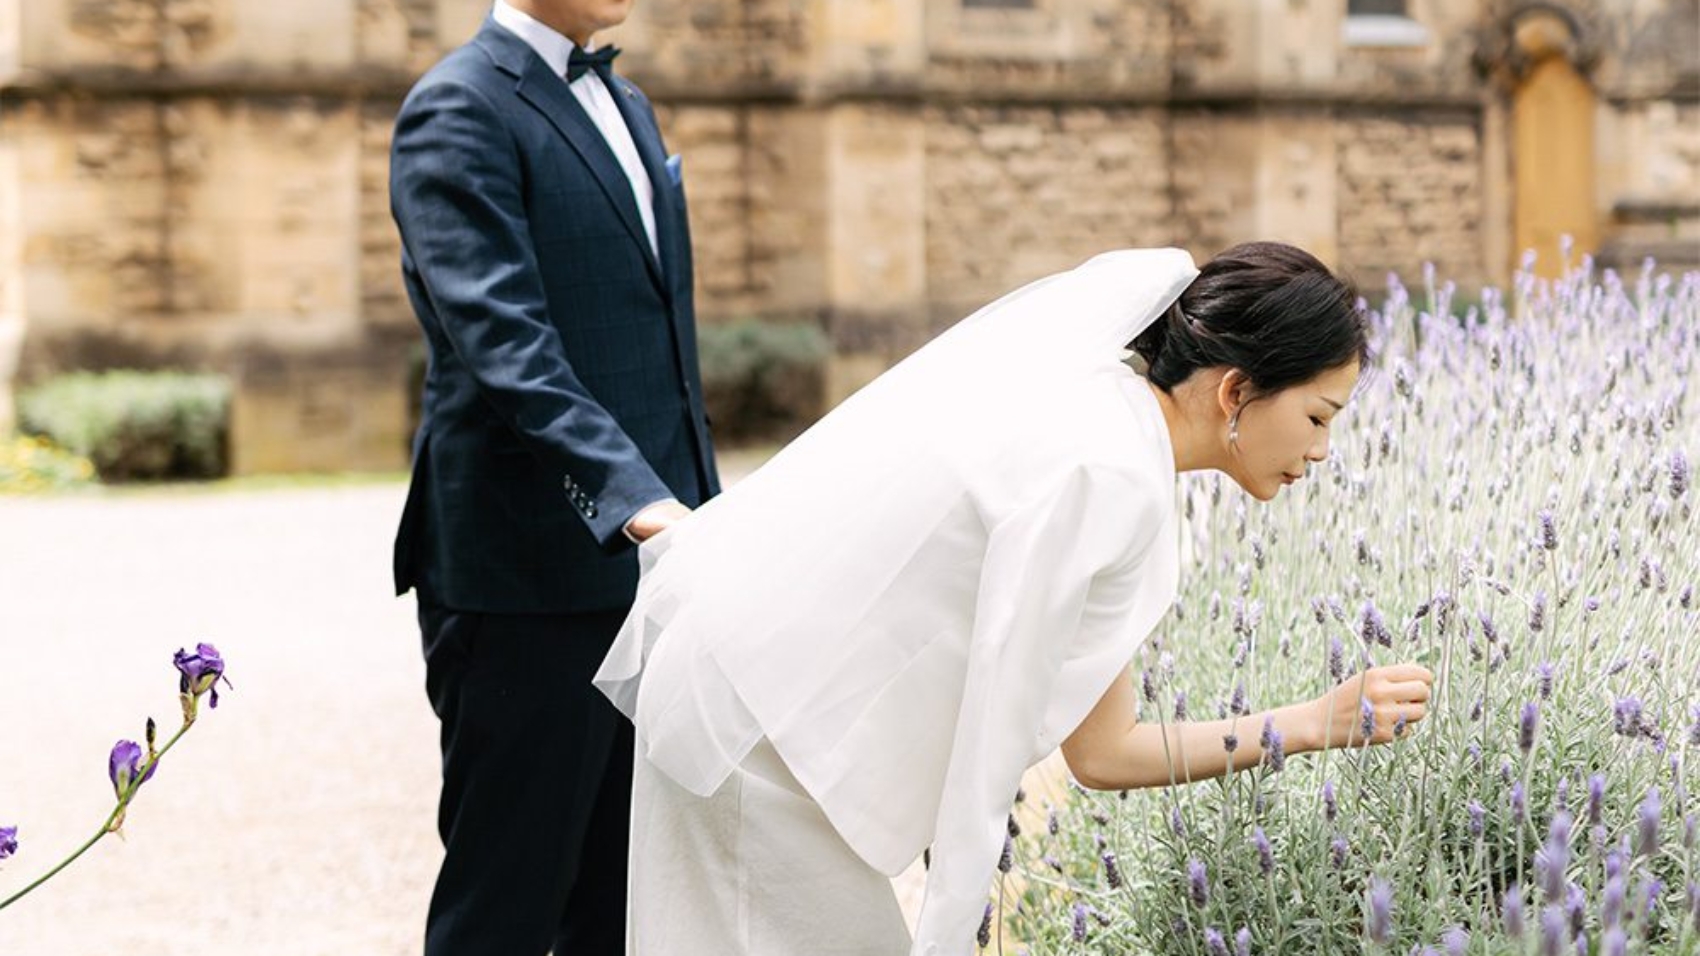
  • Spring (September–November): Mild temperatures and blooming flora make parks like the Royal Botanic Gardens ideal. However, spring rain showers require flexible scheduling and backup indoor venues.
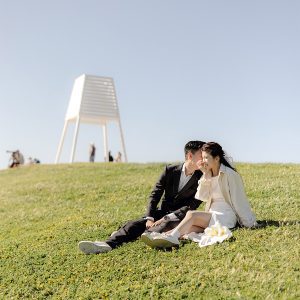
  • Summer (December–February): Longer daylight hours allow for extended sessions, but heatwaves demand hydration breaks and early/late timing to avoid peak temperatures.
  • Autumn (March–May): Cooler weather and golden foliage in Fitzroy Gardens create a picturesque backdrop. Autumn’s reliable weather makes it a popular choice for trial shoots.
  • Winter (June–August): Short days and chilly temperatures call for efficient planning. Prioritize indoor-outdoor hybrid sessions, starting with outdoor shots at midday and transitioning to heated venues by afternoon.

Case Study: A 2025 winter trial shoot combined a 1-hour outdoor session at Carlton Gardens (noon) with a 2-hour indoor shoot at a vintage-themed studio to maximize daylight and comfort.

Logistical Coordination for a Stress-Free Experience

Effective communication and preparation prevent last-minute hiccups during your trial photoshoot.

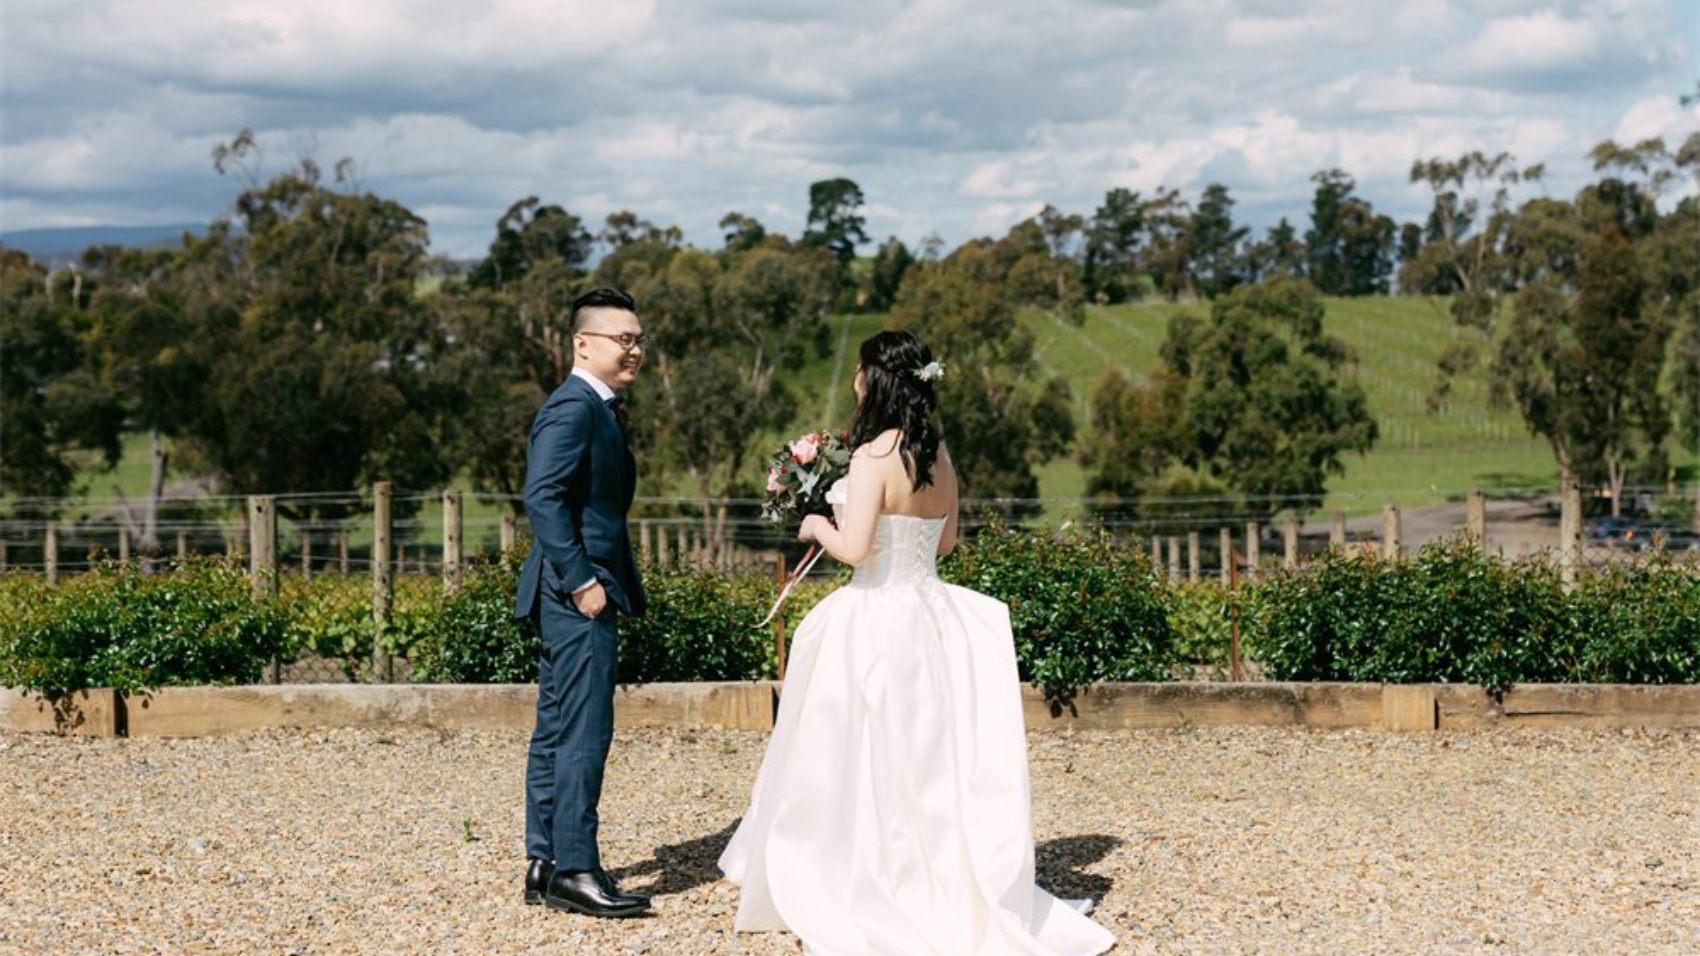
  • Photographer Collaboration: Share your vision and concerns with your photographer beforehand. Discuss preferred poses, location ideas, and contingency plans for bad weather.
  • Wardrobe Preparation: Pack outfits that align with your chosen locations (e.g., flowy dresses for beaches, formal attire for urban settings). Bring layers for winter shoots and breathable fabrics for summer.
  • Transportation and Timing: Factor in travel time between locations, especially during peak traffic hours. Allow 15–20 minutes of buffer time for hair/makeup touch-ups or unexpected delays.

Pro Tip: Conduct a virtual walkthrough with your photographer via video call to scout locations and identify photo-worthy spots in advance. This saves time on the shoot day.

Maximizing the Value of Your Trial Session

A pre-wedding trial is more than just practice—it’s an opportunity to refine your style and build rapport with your photographer.

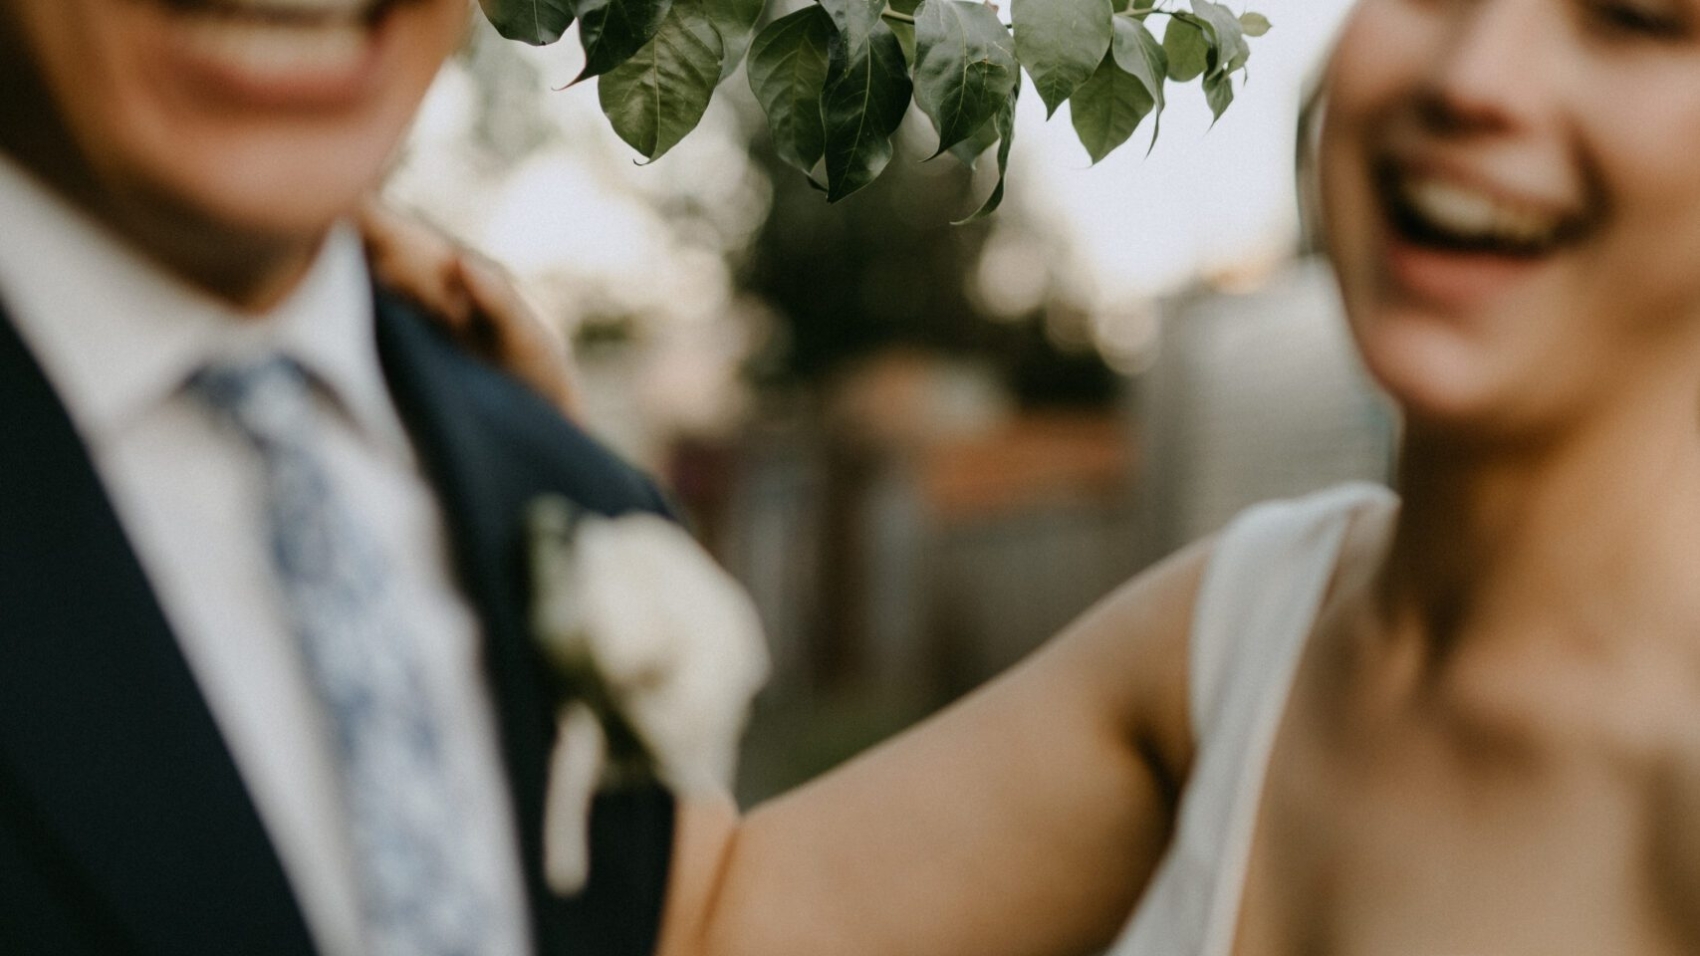
  • Experiment with Poses: Use the trial to test candid moments, romantic embraces, and playful interactions. Note which poses feel natural and which need adjustment.
  • Test Lighting and Angles: If planning an outdoor wedding, replicate the lighting conditions of your venue (e.g., sunset direction, shade patterns) to ensure consistency.
  • Gather Feedback: After the shoot, review the images with your photographer to discuss what worked and what could improve. Use this feedback to adjust your wedding day timeline or shot list.

Example: A 2023 couple used their trial shoot to realize they preferred candid laughter over posed smiles, leading their photographer to focus on spontaneous moments during the wedding.

By aligning your trial photoshoot with Melbourne’s seasonal rhythms, communicating openly with your team, and treating the session as a collaborative experiment, you’ll gain the confidence and clarity needed to create unforgettable wedding memories.

IMG_0134

The rescheduling schedule for wedding photography in Melbourne due to rainy days

Rainy Day Rescheduling Strategies for Melbourne Wedding Photography
Melbourne’s unpredictable winter weather, characterized by frequent rain and overcast skies, can disrupt outdoor wedding photography plans. However, with strategic adjustments and creative solutions, couples can still achieve stunning results without compromising their timeline.

wedding photography melbourne

Assessing Rain Intensity and Adjusting Plans

The first step in managing rainy-day photography is evaluating the severity of the weather.

  • Light Drizzle: If rain is minimal, consider embracing the atmosphere by shooting rain-themed portraits. Use transparent umbrellas, reflective puddles, or soft lighting to create moody, romantic images. Ensure your photographer has waterproof gear and lenses to protect equipment.
  • Heavy Rain: For persistent downpours, prioritize indoor venues like historic libraries, art galleries, or cozy cafés. These locations offer controlled lighting and shelter while maintaining a warm, intimate ambiance.
  • Intermittent Rain: If rain is expected to pause, schedule outdoor shots during dry intervals. Work with your photographer to identify nearby covered spots (e.g., arcades, verandas) for quick transitions.

Example: A 2024 Melbourne couple shifted their Royal Botanic Gardens shoot to a nearby indoor studio during heavy rain, later capturing sunset portraits in the dry hours of the evening.

Communicating with Vendors for Flexible Scheduling

Open dialogue with your photography team and venue providers is critical to minimizing disruptions.

  • Photographer Policies: Inquire about rescheduling fees and availability. Many studios offer complimentary date changes for weather-related delays, especially during winter.
  • Venue Backup Plans: Confirm whether your outdoor location has indoor alternatives or nearby shelters. For instance, St. Kilda Beach can transition to a nearby pier or café if rain intensifies.
  • Timeline Adjustments: If rescheduling is unavoidable, aim for a date within 1–2 weeks of the original shoot to maintain continuity in styling and mood. Avoid peak wedding seasons (October–November) to secure faster availability.

Case Study: A 2025 winter wedding postponed their outdoor ceremony by three days due to storm warnings, working with their photographer to replicate the original lighting and composition in a new setting.

Essential Rainy-Day Photography Gear and Preparation

Equipping yourself with the right tools can transform a rainy shoot into a creative opportunity.

  • Waterproof Accessories: Pack clear umbrellas, rain boots, and microfiber cloths for equipment. Avoid bulky raincoats that may restrict movement or appear in shots.
  • Lighting Solutions: If shooting indoors, bring portable LED panels or softboxes to counteract dim natural light. For outdoor night scenes, use string lights or fairy lights to add warmth.
  • Wardrobe Adjustments: Opt for shorter hemlines or water-resistant fabrics to avoid mud stains. Brides might choose stiletto heels with grip soles, while grooms can layer lightweight jackets over suits.

Pro Tip: Test your gear in advance by simulating rainy conditions (e.g., using a hose outdoors) to troubleshoot issues like lens fogging or umbrella stability.

Creative Alternatives to Outdoor Shoots

Rainy weather can inspire unique photographic styles that stand out from traditional sunlit portraits.

  • Moody Urban Scenes: Capture reflections in wet city streets or foggy laneways. Melbourne’s Hosier Lane or Degraves Street offers vibrant backdrops even in gloomy weather.
  • Indoor Storytelling: Focus on intimate details like hands, rings, or shared laughter in a cozy setting. Use props like vintage books, tea sets, or candles to enhance the narrative.
  • Post-Rain Opportunities: If rain clears, head outdoors for golden-hour shots with glistening foliage or puddles. The soft light after a storm creates a natural, flattering glow.

Example: A 2023 couple incorporated raindrops on their wedding attire into close-up shots, using the wet textures to add depth and emotion to their album.

By staying adaptable, communicating proactively, and embracing rain as a creative catalyst, couples can ensure their Melbourne winter wedding photography remains memorable—regardless of the forecast.

IMG_0143

Short daytime shooting time arrangement for winter wedding photography in Melbourne

Winter Wedding Photography Timing in Melbourne: Maximizing Short Days
Melbourne’s winter months (June–August) bring cooler temperatures and shorter daylight hours, averaging 10–12 hours of daylight per day. For couples planning a winter wedding shoot, strategic timing and location choices are essential to capture high-quality images without rushing.

wedding photography melbourne

Optimal Time Slots for Winter Photography

The key to winter photography in Melbourne lies in leveraging the limited daylight effectively.

  • Mid-Morning to Early Afternoon (10:00 AM–2:00 PM): This window offers the brightest natural light, ideal for outdoor scenes. Early starts are crucial, as sunrise occurs around 7:30 AM, but soft morning light minimizes harsh shadows.
  • Golden Hour Adjustments: Winter’s golden hour shifts earlier, with sunset around 5:00 PM. Allocate 30–45 minutes before sunset for warm, diffused lighting, perfect for romantic portraits.
  • Indoor Alternatives: On overcast or rainy days, prioritize indoor venues like the Royal Arcade or historic cafés. These spaces provide controlled lighting and protection from the elements, ensuring consistent results.

Example: A 2024 winter shoot in Carlton Gardens utilized mid-morning light for bridal portraits, transitioning to a nearby indoor studio by 1:30 PM to avoid fading daylight.

Balancing Indoor and Outdoor Scenes

Winter’s unpredictable weather demands flexibility. Here’s how to balance both settings:

  • Start Indoors: Begin with detail shots (e.g., rings, invitations) or couple portraits in well-lit venues. This allows time for outdoor location scouting while the bride and groom are in makeup.
  • Outdoor Efficiency: Limit outdoor sessions to 1–2 hours, focusing on iconic spots like Flinders Street Station or St. Paul’s Cathedral. Use faster shutter speeds to counteract low light and avoid motion blur.
  • Backup Plans: Always have a list of indoor alternatives ready. For instance, if rain disrupts a Yarra River shoot, relocate to the Melbourne Museum’s atrium for dramatic architectural backdrops.

Case Study: A 2025 winter wedding incorporated a 45-minute outdoor session at dawn for snow-dusted (simulated via artificial flakes) portraits, followed by indoor shots at a vintage-themed café to maintain warmth and comfort.

Logistical Tips for Winter Shoots

Cold temperatures and limited daylight require meticulous planning:

  • Schedule Buffer Time: Add 15–20 minutes between locations to account for traffic, wardrobe changes, or weather delays. Melbourne’s winter traffic peaks during morning commutes, so avoid scheduling tight transitions.
  • Wardrobe Considerations: Layer clothing for outdoor sessions. Brides can wear thermal leggings under dresses, while grooms might opt for heavy coats during breaks. Provide hand warmers and blankets for comfort during pauses.
  • Lighting Equipment: If shooting later in the day, bring portable LED lights or reflectors to fill in shadows. This is particularly useful for group shots or dimly lit indoor venues.

Pro Tip: Communicate with your photographer about winter-specific needs, such as adjusting camera settings for low light or using faster lenses to capture crisp images in dim conditions.

Leveraging Melbourne’s Winter Aesthetic

Winter offers unique visual opportunities:

  • Moodier Tones: Embrace the season’s cool palette by incorporating deep blues and grays in outfits or backdrops. For example, a navy bridesmaid dress against a cloudy sky creates a striking contrast.
  • Festive Elements: If shooting near Christmas, incorporate twinkling lights or decorations for a cozy, holiday-themed aesthetic. Queen Victoria Market’s winter night market provides a lively, illuminated setting.
  • Snow Simulation: For couples craving a winter wonderland vibe, artificial snow or frosted branches can transform urban locations like Federation Square into a magical scene.

By aligning your schedule with Melbourne’s winter light patterns and preparing for weather-related challenges, you can create a stunning wedding album that captures the season’s charm without compromising on quality.

z&d-sp-0046

The delivery schedule for post-processing and photo editing of wedding photography in Melbourne

Melbourne Wedding Photography Post-Production Timelines: What to Expect
Planning a wedding in Melbourne involves meticulous coordination, especially when it comes to photography timelines. Understanding the post-production process—from shooting to final delivery—ensures you avoid last-minute stress. Here’s a breakdown of key stages and influencing factors.

wedding photography melbourne

Typical Post-Production Phases

The journey from raw images to polished albums involves multiple steps, each with its own timeline:

  • Initial Editing (7–14 Days): After your shoot, photographers cull and lightly edit images to remove duplicates or blurred shots. This stage focuses on technical corrections like exposure and color balance.
  • Detailed Retouching (15–25 Days): The bulk of time is spent on retouching, where skin tones, backgrounds, and lighting are refined. Couples often review drafts during this phase, requesting adjustments (e.g., softening blemishes or enhancing landscapes).
  • Design and Layout (3–7 Days): Once retouching is approved, images are arranged into albums or digital galleries. This includes selecting layouts, adding text overlays, and ensuring visual consistency.
  • Final Production and Delivery (10–20 Days): Printed albums are sent to labs for binding, while digital files are uploaded to secure platforms. Shipping delays may occur during peak seasons like November–December.

Real-World Example: A 2024 case study noted that a Melbourne couple’s autumn shoot required 18 days for retouching due to intricate foliage edits, followed by 12 days for album production.

Factors Affecting Delivery Speed

Several variables can extend or shorten timelines:

  • Seasonal Demand: October–November and March–April are peak periods, with studios handling 30–50% more orders. During these months, retouching queues may add 5–10 days.
  • Revision Requests: If couples ask for significant changes (e.g., swapping backgrounds or altering poses), retouching can reset by 7–14 days. Minor tweaks, like brightening a smile, typically take 1–3 days.
  • Studio Workflow: Boutique studios with smaller teams may prioritize quality over speed, taking 40–50 days total. Larger operations with dedicated editors might deliver in 30–35 days.
  • Weather Delays: Outdoor shoots affected by rain or extreme heat may require rescheduling, pushing back all post-production stages.

Insider Tip: A 2023 survey of Melbourne photographers revealed that 60% offer “rush services” for an additional fee, reducing timelines by 10–15 days.

Strategies to Expedite the Process

To ensure your photos arrive on schedule, consider these proactive steps:

  • Book Early: Secure your photographer 4–6 months ahead, especially for spring or autumn dates. This allows buffer time for revisions and unexpected delays.
  • Communicate Clearly: Provide a detailed shot list and style preferences upfront to minimize post-shoot edits. For example, specifying “warm, golden-hour tones” reduces back-and-forth.
  • Opt for Digital Previews: Request low-resolution drafts within 1–2 weeks to approve retouching direction early. This prevents major overhauls later.
  • Leverage Off-Peak Discounts: Scheduling a winter shoot (June–August) may qualify you for faster service, as studios have lighter workloads.

Case Study: A Melbourne couple who booked in January for a July wedding received their digital gallery in 28 days by approving drafts promptly and avoiding holiday-season congestion.

Navigating Common Challenges

Even with careful planning, hiccups can arise. Here’s how to address them:

  • Delayed Revisions: If your photographer misses a deadline, politely inquire about progress and request a revised timeline. Offer flexibility (e.g., accepting partial deliveries).
  • Quality Concerns: Address issues like over-editing or missed details during the review phase. Most studios allow 2–3 rounds of revisions at no extra cost.
  • Shipping Issues: For physical albums, track packages and notify the studio immediately if delivery is late. Some offer local pickup to bypass couriers.

By understanding these timelines and adopting proactive strategies, you can ensure your Melbourne wedding photos are delivered as beautifully as you envisioned—without the wait.

81909-Wu-1782

The reservation schedule for the peak season of wedding photography in Melbourne

Melbourne Wedding Photography: Navigating Peak Season Bookings
Melbourne’s vibrant seasons and iconic landscapes make it a top destination for wedding photography, but securing your preferred date during peak periods requires strategic planning. Understanding seasonal trends, booking timelines, and contingency measures can ensure a seamless experience.

wedding photography melbourne

Peak Seasons in Melbourne: When to Expect High Demand

Melbourne’s wedding photography calendar aligns with its climatic cycles. The spring months (September to November) and autumn (March to May) are universally recognized as peak seasons. Spring offers blooming flora in gardens like Carlton Gardens, where golden-leaved梧桐 (plane trees) and cherry blossoms create a romantic backdrop. Autumn, meanwhile, transforms Victoria Barracks and the University of Melbourne’s campus into a tapestry of red and orange hues, ideal for couples seeking warm, earthy tones.

These seasons also coincide with milder temperatures, reducing the risk of extreme weather disrupting outdoor shoots. However, popularity spikes during October, as seen in a 2017 social media post by a local photographer noting just one available slot left for the month. Similarly, spring weekends and public holidays (e.g., Melbourne Cup Week) see rapid booking, necessitating early action.

How Far in Advance Should You Book?

The general rule for peak seasons is 4–6 months ahead, though this varies based on your needs:

  • Standard Packages: Couples opting for popular locations (e.g., Mornington Peninsula beaches or Flinders Street Station) should aim to book at least 4 months prior to their desired date.
  • Customized Themes: If your vision involves unique props (like vintage trains) or niche locations (e.g., Royal Arcade’s art deco interiors), extend your timeline to 6 months to allow for logistical coordination.
  • Last-Minute Risks: A 2025 guide emphasizes that waiting until 1–2 months before your wedding may limit options to weekdays or less desirable time slots, especially in October or around holidays.

For off-peak seasons (June–August or December–February), a 2–3 month lead time often suffices, though winter shoots may require indoor alternatives (e.g., cozy cafés in Degraves Street) due to shorter daylight hours and unpredictable rain.

Post-Booking Timeline: From Shoot to Delivery

Once your date is secured, the process unfolds in stages:

  1. Pre-Shoot Preparation (1–2 Weeks Before):
    • Finalize wardrobe choices with your stylist, ensuring outfits complement the season (e.g., light fabrics for spring, layered looks for autumn).
    • Confirm weather backups, as Melbourne’s “four seasons in one day” climate may necessitate rescheduling. A 2023 study highlights that 15% of shoots require adjustments due to rain.
  2. Shoot Day:
    • Morning sessions capitalize on soft natural light, while afternoon shoots benefit from golden-hour warmth.
    • Allow flexibility for location changes; for instance, moving from Carlton Gardens to a nearby indoor venue if clouds gather.
  3. Post-Production (3–8 Weeks):
    • Initial edits arrive within 3–7 days for review, followed by 7–20 days for final refinements and album design.
    • Peak seasons may extend this to 6–8 weeks due to higher volume. A 2025 timeline suggests adding a 2-week buffer to accommodate revisions or unexpected delays (e.g., printer issues).

Proactive Strategies for Stress-Free Booking

  • Early Engagement: Begin researching photographers 6–8 months before your wedding, even if you’re unsure of exact dates. Many studios offer flexible rescheduling.
  • Weekday Advantage: If your schedule permits, book a Tuesday or Wednesday to avoid weekend competition.
  • Digital Contracts: Opt for studios using e-signatures to expedite confirmations, reducing the risk of manual errors.

By aligning your booking strategy with Melbourne’s seasonal rhythms and production timelines, you can secure a picturesque wedding album without last-minute stress. Whether capturing the first blush of spring or autumn’s fiery farewell, thoughtful planning turns fleeting moments into timeless memories.

81909-Wu-1468

Time arrangement for the preparation stage before wedding photography in Melbourne

Melbourne Wedding Photography Pre-Shoot Checklist: Timing and Tasks for a Flawless Day

Preparing for a wedding photoshoot in Melbourne requires meticulous planning to ensure every detail aligns with the couple’s vision and the city’s unpredictable weather. From logistical coordination to creative brainstorming, here’s how to structure the weeks and days leading up to the shoot for a seamless experience.

wedding photography melbourne

Two Months Prior: Finalizing Logistics and Creative Direction

At this stage, focus on securing essential elements and refining the artistic approach.

  • Location Scouting: Research Melbourne’s diverse settings, from coastal vistas like St Kilda Beach to historic landmarks such as Parliament House. Visit potential sites at different times of day to assess lighting, crowd levels, and accessibility.
  • Permits and Permissions: Check if locations require permits (e.g., Royal Botanic Gardens or Brighton Beach’s bathing boxes). Apply early to avoid delays.
  • Mood Board Creation: Collaborate with the couple to build a visual inspiration board. Include color palettes, poses, and themes (e.g., “urban romance” or “nature-inspired”). This ensures alignment on aesthetic goals.

Weather Backup: Identify indoor venues with natural light, such as Melbourne Museum’s atrium or Carlton Gardens’ conservatory, for rainy-day alternatives.

One Month Prior: Wardrobe, Accessories, and Timeline Refinement

With the location locked in, shift attention to wardrobe coordination and scheduling.

  • Outfit Selection: Advise the couple to choose outfits that complement the setting. For coastal shoots, flowing fabrics work well; for urban scenes, structured silhouettes add contrast. Encourage trying on outfits a week prior to check fit and comfort.
  • Accessory Coordination: Discuss props like veils, bouquets, or heirloom items (e.g., grandparent’s watch) that add personal flair. Coordinate colors to avoid clashing with backgrounds.
  • Day-Of Timeline Draft: Create a rough schedule, allocating time for travel, hair/makeup, and shoots. Factor in Melbourne’s traffic by adding buffer periods between locations (e.g., 15 minutes extra for CBD-to-Yarra Valley trips).

Communication: Share the draft timeline with vendors (florists, stylists) and the wedding party to ensure everyone is informed.

Two Weeks Prior: Final Checks and Weather Monitoring

As the shoot nears, prioritize flexibility and contingency planning.

  • Weather Tracking: Use Melbourne-specific forecasts (e.g., BOM or Weatherzone) to monitor conditions. If rain is predicted, adjust outdoor segments to morning or evening slots when light is softer.
  • Equipment Test: If the photographer is self-sufficient, verify cameras, lenses, and lighting gear. For couples hiring professionals, confirm equipment is in working order and backup gear is available.
  • Emergency Kit Prep: Pack essentials like safety pins, bobby pins, tissue, and a portable steamer for last-minute outfit fixes. Include snacks and water to keep energy levels high.

Venue Walkthrough: Revisit key locations with the photographer to finalize shot lists and identify shaded areas for midday shoots.

One Week Prior: Confirmations and Last-Minute Adjustments

The final week is about tying up loose ends and ensuring all parties are prepared.

  • Vendor Confirmations: Reach out to hair/makeup artists, florists, and transportation services to confirm arrival times. Share the updated timeline with all vendors.
  • Final Fittings: Schedule a quick try-on session for the couple to ensure outfits fit perfectly. Address any alterations needed for dresses, suits, or shoes.
  • Guest Coordination: If including family or bridal party in shots, assign a point person to gather everyone on time. Provide clear instructions on attire and meeting points.

Photographer Briefing: Share a list of “must-have” shots (e.g., parent-child portraits, ring details) and prioritize them in case time runs short.

Day Before the Shoot: Relaxation and Preparation

The eve of the photoshoot should focus on rest and minor logistical checks.

  • Skin and Hair Prep: Advise the couple to hydrate, avoid tan lines, and get a good night’s sleep. For hair, recommend washing it the night before to reduce frizz.
  • Packing Checklist: Verify all items are packed, including outfits, accessories, touch-up makeup, and the emergency kit. Charge camera batteries and clear memory cards.
  • Mental Preparation: Encourage the couple to discuss their comfort levels with posing. Remind them to enjoy the moment and trust the photographer’s guidance.

Transport Test: If renting a car, do a quick drive to the first location to gauge travel time and parking availability.

By breaking down tasks into manageable phases and prioritizing communication, couples can minimize stress and maximize creativity on their wedding photoshoot day. Melbourne’s dynamic environment demands adaptability, but thorough preparation ensures every fleeting moment is captured beautifully.

81909-Wu-1393

The blooming period schedule for cherry blossom wedding photos in Melbourne during spring

Melbourne Spring Cherry Blossom Wedding Photography: Timing Guide for a Dreamy Shoot

Melbourne’s spring transforms the city into a floral paradise, with cherry blossoms stealing the spotlight for their ephemeral beauty. The brief blooming window—often just two weeks—demands precise planning to capture these ethereal moments. Here’s how to align your wedding photography schedule with nature’s fleeting artistry.

wedding photography melbourne

Peak Bloom Periods: When to Capture the Magic

Cherry blossoms in Melbourne typically peak between late September and early October, though exact timing varies annually due to weather fluctuations. The iconic CherryHill Orchards in the Yarra Valley hosts an annual Cherry Blossom Festival from mid-September to early October, offering a concentrated burst of pink and white blooms.

  • Early Bloomers: Some varieties, like the wild mountain cherry, may start flowering in early September. Scout locations like Banksia Park or Alowyn Gardens for early-season shots.
  • Prime Window: Late September to early October is ideal for most cultivated varieties. The festival at CherryHill coincides with this period, featuring over 2,000 cherry trees in full bloom.
  • Late Bloomers: A few trees may linger into mid-October, especially in sheltered areas like Monsalvat or Malvern East’s Darling Road.

Pro Tip: Check CherryHill’s social media or local gardening forums for real-time updates. A sudden heatwave or cold snap can shorten the blooming period by days.

Lighting Strategies: Maximizing Golden Hour Glow

Melbourne’s spring sunlight is softer than summer’s, but timing remains critical for flattering portraits.

  • Morning Sessions: Arrive at sunrise (around 6:30 AM in late September) to photograph blossoms against a golden backdrop. The low angle of the sun creates a delicate balance of light and shadow, perfect for highlighting intricate petal details.
  • Afternoon Transitions: As the sun rises, move to shaded areas like under cherry tree canopies or near historic buildings (e.g., Parliament House). Diffused light reduces harsh contrasts on faces and dresses.
  • Evening Magic: Stay until dusk (around 7:00 PM in early October) for a romantic “blue hour” effect. Pair twilight shots with city lights in the background, such as from Brighton Beach’s colorful bathing boxes.

Weather Considerations: Overcast days soften light evenly, ideal for group shots. If rain is forecast, use clear umbrellas to add whimsy or retreat to covered venues like Carlton Gardens’ conservatory.

Logistical Coordination: Navigating Crowds and Locations

Cherry blossom hotspots draw crowds, especially during festivals. Plan strategically to avoid delays.

  • Early Arrival: Reach CherryHill Orchards by 8:00 AM to secure parking and quiet spots before the 10:00 AM rush. Weekdays are less crowded than weekends.
  • Alternate Venues: If CherryHill is packed, consider Werribee Mansion’s gardens or Dandenong Ranges’ Alfred Nicolas Memorial Gardens, which offer secluded cherry groves.
  • Transport Tips: Use private vehicles to travel between sites like St Kilda and Yarra Valley. Public transport may add unexpected delays during peak bloom.

Backup Plan: Have a list of indoor venues with large windows, such as Melbourne Museum’s atrium, to shoot if weather turns gloomy.

Cultural Touches: Incorporating Local Flavors

Enhance your photoshoot with Melbourne’s unique offerings.

  • Festival Activities: At CherryHill, capture moments with cherry-themed treats like cider or ice cream. A couple sharing a cone under a blossom tree adds a playful, local touch.
  • Historic Contrasts: Pair cherry blossoms with Melbourne’s colonial architecture. Photograph the bride near St Patrick’s Cathedral or the groom leaning against Hosier Lane’s graffiti walls for a blend of old and new.
  • Natural Framing: Use blossom branches to frame shots of the couple at Flinders Street Station or Docklands’ modern piers, creating depth and context.

Seasonal Synergy: Combine cherry blossoms with other spring flowers like tulips at Tesselaar Tulip Farm or lavender at Red Hill Lavender Farm for a multi-floral backdrop.

By aligning your schedule with bloom cycles, lighting conditions, and local culture, you can transform Melbourne’s spring into a visually cohesive narrative. Flexibility, early planning, and creativity are key to immortalizing these transient moments.

81909-Wu-1743

The prime time schedule for wedding photography in Melbourne within one day

Maximizing Your Melbourne Wedding Photography Day: Timing Strategies for Golden Hour Magic

Melbourne’s dynamic weather and ever-changing light conditions demand strategic planning to capture stunning wedding photos. The city’s “golden hours”—the periods shortly after sunrise and before sunset—offer soft, flattering light that enhances skin tones and creates dreamy backgrounds. However, coordinating these windows with ceremony times, travel between locations, and group shots requires precision. Here’s how to structure your day for photographic excellence.

wedding photography melbourne

Morning Golden Hour: Soft Light for Intimate Moments

Melbourne’s sunrise golden hour typically lasts from 30 minutes before to 30 minutes after the sun breaks the horizon. This timeframe is ideal for intimate portraits, detail shots of the dress or suit, and quiet moments between the couple.

  • Start Early: Schedule your first photoshoot 45 minutes before sunrise to allow time for setup and adjustments. Early mornings also avoid crowds at popular locations like St Kilda Beach or the Royal Botanic Gardens.
  • Focus on Details: Use this period to photograph rings, bouquets, and accessories. The low angle of the sun casts gentle shadows, adding depth without harsh contrasts.
  • Couple Portraits: Plan 15–20 minutes for posed shots with the couple. The calm morning light minimizes squinting and creates a romantic atmosphere.

Midday Challenges and Creative Solutions

Between 10 AM and 3 PM, Melbourne’s sunlight becomes harsh, casting strong shadows and creating overexposure risks. Instead of forcing outdoor shots, pivot to indoor or shaded locations.

  • Indoor Venues: Utilize the venue’s architecture, such as stained-glass windows in historic churches or modern interiors in urban lofts. Natural light filtering through large windows can mimic golden hour qualities.
  • Shaded Areas: Seek out tree-lined streets in Fitzroy or undercover markets like Queen Victoria Market. Diffused light reduces blemishes and keeps colors vibrant.
  • Group Photos: Schedule family and bridal party shots during this time. Shade ensures everyone’s facial features are evenly lit, avoiding awkward shadows.

Afternoon Transition: Preparing for Evening Magic

As the sun begins its descent, the light softens again, creating a second golden hour. This period is perfect for grand outdoor scenes and dynamic couple shots.

  • Location Scouting: Identify spots with unobstructed views of the horizon, such as Brighton Beach’s colorful bathing boxes or the Melbourne Skydeck. Arrive 30 minutes before sunset to set up.
  • Dynamic Poses: Use the warm, directional light for dramatic silhouettes or backlit portraits. Encourage movement, like walking hand-in-hand, to add energy to the frame.
  • Blue Hour Opportunity: After sunset, the sky transitions to a deep blue known as “blue hour.” Capture moody cityscapes or twilight portraits with artificial lights for contrast.

Weather Adaptability: Working Around Melbourne’s Climate

Melbourne’s notorious “four seasons in one day” weather requires flexibility. Cloudy skies, sudden rain, or wind can disrupt plans, but they also offer unique photographic opportunities.

  • Overcast Days: Diffused light from clouds eliminates harsh shadows, making it ideal for group shots and detail photography. Embrace moody tones by shooting in grayscale or adjusting white balance for cooler tones.
  • Rainy Scenes: Use clear umbrellas or waterproof gear to capture reflective puddles and romantic drizzle. Indoor venues with large windows can still benefit from soft, natural light.
  • Wind Management: Secure veils and loose fabrics with clips. Position the couple facing away from strong gusts to avoid disheveled hair. Use faster shutter speeds to freeze motion.

Logistical Coordination: Timing Between Locations

Travel time between Melbourne’s iconic spots—such as moving from the CBD to the Yarra Valley—can eat into your golden hours. Plan routes efficiently to maximize shooting time.

  • Buffer Periods: Allow 15–20 minutes between locations for traffic delays or last-minute adjustments. Use this buffer to capture candid moments in transit, like the couple laughing in the car.
  • Car Lighting: If traveling during midday, use the vehicle’s interior light for quick detail shots of rings or invitations. Roll down windows for natural light portraits during stops.
  • Driver Communication: Coordinate with your photographer and driver to ensure timely arrivals. Share the day’s itinerary with all parties to avoid confusion.

Final Touches: Wrapping Up the Day

As the evening golden hour fades, prioritize shots that require minimal setup. Night photography in Melbourne’s illuminated laneways or against the city skyline can add a cinematic finish.

  • Night Portraits: Use off-camera flashes or string lights to create bokeh effects. Position the couple near streetlamps or neon signs for a vibrant backdrop.
  • Farewell Shots: Capture the couple’s exit with sparklers or glow sticks. Long exposures can turn moving lights into artistic trails.
  • Backup Plan: If weather worsens, pivot to indoor venues with dramatic lighting, such as art galleries or industrial warehouses.

By aligning your schedule with Melbourne’s natural light cycles and weather patterns, you can transform a single day into a visually cohesive story. Flexibility, preparation, and creativity are key to overcoming the city’s unpredictable conditions and capturing timeless memories.

81909-Wu-1738

The schedule for taking sunset wedding photos at Melbourne Beach

Melbourne Beach Sunset Wedding Photography: Timing Guide for Golden Hour Magic

Melbourne’s coastal stretches offer dramatic backdrops for sunset wedding photography, with shifting tides, soft light, and moody skies. Capturing these moments requires precision timing, awareness of seasonal light patterns, and adaptability to coastal weather. This guide breaks down the essentials for planning a flawless beach sunset shoot.

wedding photography melbourne

Understanding Melbourne’s Sunset Timeline

Melbourne’s latitude and seasonal tilt dictate how quickly daylight fades. The “golden hour”—the period shortly after sunrise or before sunset—varies in duration and intensity across seasons.

Seasonal Sunset Variations:

  • Summer (December–February): Sunset occurs between 8:30 PM and 9:00 PM. Golden hour stretches for 45–60 minutes, with warm, golden tones.
  • Autumn (March–May): Sunset shifts to 6:30 PM–7:30 PM. Light softens earlier, offering pastel hues ideal for romantic portraits.
  • Winter (June–August): Sunset falls as early as 5:00 PM. Golden hour is brief (20–30 minutes), but the low sun angle creates long shadows and dramatic contrasts.
  • Spring (September–November): Sunset returns to 7:00 PM–8:00 PM. Light balances warmth and clarity, perfect for vibrant yet natural shots.

Practical Tips:

  • Use apps like Sun Surveyor or The Photographer’s Ephemeris to track sun angles and exact sunset times for your chosen date.
  • Arrive at the beach 90 minutes before sunset to scout locations, set up gear, and account for travel delays.
  • Communicate timing with your photographer in advance. Discuss backup plans if clouds obscure the sun.

Choosing the Right Beach for Sunset Shoots

Melbourne’s beaches vary in accessibility, crowd levels, and landscape features. Selecting a location that aligns with your aesthetic and logistical needs is key.

Popular Coastal Spots:

  • Brighton Beach: Known for its colorful bathing boxes, this spot offers playful frames. Shoot during low tide to include the boxes and wet sand reflections.
  • St Kilda Beach: The pier and promenade provide urban contrasts. Time your shoot to capture the sun dipping behind the city skyline.
  • Mornington Peninsula Beaches (Sorrento, Portsea): These quieter stretches offer rugged cliffs and unobstructed horizons. Ideal for couples seeking seclusion.
  • Half Moon Bay (Black Rock): The historic Fort Black Rock adds texture. Use the fort’s arches or grassy dunes for varied compositions.

Lighting and Composition Considerations:

  • Position subjects with the sun behind them for silhouettes or backlighting. Use reflectors to bounce light onto faces if shooting into the sun.
  • Tides impact accessibility. High tide may shrink the beach, while low tide reveals tidal pools or sandbars for creative framing.
  • Wind direction matters. Onshore breezes can tousle hair or dresses; offshore winds keep hairstyles intact but may chill exposed skin.

Practical Tips:

  • Check tidal charts for your shoot date. Aim for low tide if you want expansive sand or tidal pools.
  • Weekday shoots reduce crowds at popular spots like Brighton Beach.
  • Bring a portable steamer for quick dress touch-ups if sand or wind wrinkles fabric.

Navigating Coastal Weather Challenges

Melbourne’s beaches are notorious for unpredictable weather. Sudden winds, clouds, or rain can disrupt plans, but flexibility turns these obstacles into creative opportunities.

Wind Management:

  • Coastal gusts are strongest in the afternoon. Secure veils, hats, or lightweight dresses with hidden clips or weights.
  • Use wind to your advantage: Capture flowing fabrics, tossed hair, or playful moments like kissing in the breeze.
  • If wind is extreme, pivot to sheltered areas like dunes or behind rocks.

Cloud Cover Strategies:

  • Partial clouds diffuse sunlight, creating soft, even lighting. Use this for flattering portraits without harsh shadows.
  • Overcast skies may dull sunset colors, but they offer moody, dramatic tones. Embrace the atmosphere with darker edits or monochrome frames.
  • If clouds threaten to block the sun entirely, reschedule for a clearer day or focus on indoor segments (e.g., nearby cafes, parks).

Rain and Storm Preparedness:

  • Summer storms roll in quickly. Monitor radar apps and have a backup plan (e.g., nearby pavilion, car).
  • Light rain can add romance. Use transparent umbrellas or embrace the drizzle for candid, intimate shots.
  • Protect gear with waterproof covers. Keep towels handy to dry lenses or equipment between shots.

Practical Tips:

  • Dress in layers. Even in summer, coastal breezes can feel chilly after sunset.
  • Pack non-slip shoes for wet sand or rocky shorelines.
  • Communicate weather contingencies with your photographer. Agree on a threshold (e.g., heavy rain, strong winds) to postpone or reschedule.

By aligning your shoot with Melbourne’s sunset rhythms, coastal tides, and weather patterns, you’ll transform fleeting moments into timeless art. Whether chasing the summer’s late glow or winter’s crisp twilight, preparation and adaptability ensure your beach sunset photos shine.

81909-Wu-1752

The best season and time arrangement for wedding photography in Melbourne

Melbourne Wedding Photography: Seasonal Guide for Stunning Portraits

Melbourne’s reverse seasons and diverse landscapes offer unique opportunities for wedding photography year-round. From golden-hour beaches to misty autumn forests, understanding seasonal nuances helps couples align their vision with the city’s natural rhythms. This guide breaks down the best times to shoot, highlighting climate patterns, lighting conditions, and practical considerations for each season.

wedding photography melbourne

Spring (September–November): Blossoms and Soft Light

Spring transforms Melbourne into a pastel paradise, with cherry blossoms, tulips, and wisteria dominating parks and gardens. This season suits couples seeking romantic, nature-driven imagery.

Floral Hotspots:

  • The Royal Botanic Gardens bursts with color in mid-October, offering frames of pink and white blooms. Arrive early to avoid crowds.
  • Carlton Gardens’梧桐 (Chinese parasol trees) turn vibrant yellow, creating golden canopies for overhead shots.
  • University of Melbourne’s campus mixes historic architecture with spring blossoms, though some areas may be under construction.

Lighting and Weather:

  • Days are mild (15–25°C), with overcast skies providing diffused, flattering light. Golden hour lasts longer, stretching from 5 PM to 7 PM.
  • Rain is frequent but brief. Pack transparent umbrellas for creative rainy-day shots or reschedule indoor segments if needed.

Practical Tips:

  • Book garden venues early, as spring is peak season for local weddings.
  • Pollen allergies? Opt for manicured areas like Fitzroy Gardens instead of wildflower fields.
  • Layer clothing for fluctuating temperatures. Morning shoots may require shawls, while afternoon sun calls for breathable fabrics.

Autumn (March–May): Warm Tones and Crisp Air

Autumn paints Melbourne in amber, crimson, and gold, offering a cinematic palette for timeless photography. This season is ideal for couples craving rich colors and cooler temperatures.

Foliage Favorites:

  • Victoria Barracks’枫叶 (maple trees) turn fiery red, contrasting with colonial architecture. The grounds are less crowded than central parks.
  • Brighton Beach’s bathing boxes gain a rustic charm when surrounded by fallen leaves. Shoot during low tide for unobstructed views.
  • Dandenong Ranges’ forests offer dense canopies of orange and yellow, perfect for moody, forest-themed portraits.

Lighting and Weather:

  • Days are mild (15–22°C), with golden-hour light lasting until 6 PM. Overcast skies soften shadows, ideal for close-ups.
  • Evenings cool rapidly. Bring wraps or blazers for twilight shots near waterfronts like St Kilda Pier.

Practical Tips:

  • Autumn winds can disrupt lightweight veils. Secure hairstyles with texturizing spray and bobby pins.
  • Leaf litter on paths may cause slipping. Wear sturdy shoes and clear debris before posing.
  • Weekday shoots minimize crowds at popular spots like Brighton Beach.

Summer (December–February): Sun-Drenched Energy and Coastal Vibes

Summer’s long days and azure skies suit couples seeking vibrant, lively imagery. This season excels for beach and outdoor city shoots.

Beach and Waterfront Scenes:

  • Mornington Peninsula’s vineyards display burnt-orange vines, perfect for rustic-themed shoots. Pair with a bottle of local sparkling wine for props.
  • Port Phillip Bay’s calm waters allow for underwater or floating-dress shots. Hire a local guide for safety.
  • Yarra River’s reflections create mirror-like effects during sunset. Use polarizing filters to reduce glare.

Lighting and Weather:

  • Sunlight is intense. Schedule indoor segments (e.g., cafes, galleries) for midday, saving golden hour for outdoor shots.
  • Temperatures often exceed 30°C. Stay hydrated and apply SPF 50+ every two hours.

Practical Tips:

  • Summer storms roll in quickly. Monitor weather apps and have a backup indoor venue (e.g., Royal Exhibition Building).
  • For beach shoots, avoid high tide times. Check tidal charts to maximize shoreline space.
  • Lightweight fabrics (chiffon, organza) prevent overheating. Opt for breathable undergarments to avoid sweat marks.

Winter (June–August): Intimate Warmth and Urban Elegance

Winter’s cool tones and cozy vibes cater to couples seeking intimate, story-driven photography. This season excels for indoor and architectural shoots.

Indoor and Urban Gems:

  • Hosier Lane’s graffiti walls provide bold backdrops for edgy, modern portraits. Shoot in the morning to avoid crowds.
  • State Library of Victoria’s domed reading room offers grandeur for formal shots. Book permits in advance.
  • Coffee shops like Proud Mary serve as warm, aromatic backdrops. Order lattes for prop interaction.

Lighting and Weather:

  • Days are short, with sunset around 5 PM. Start shoots by mid-afternoon to maximize natural light.
  • Temperatures range from 6–14°C. Layer thermals under dresses and suits. Faux-fur stoles add texture without bulk.

Practical Tips:

  • Winter rain is frequent. Use clear vinyl raincoats over dresses to stay dry while photographing.
  • For snow-themed shoots, travel to Mount Dandenong’s higher elevations. Check weather forecasts for rare snowfall.
  • Indoor venues may require additional lighting. Bring portable LED panels for soft, even illumination.

By aligning shoot schedules with Melbourne’s seasonal strengths, couples can leverage the city’s ever-changing landscapes. Whether chasing autumn’s gold or summer’s sparkle, thoughtful planning ensures each frame tells a story as unique as the love it captures.