wedding photography melbourne

Dress code for wedding photo shoots at Melbourne Church

Melbourne Church Wedding Photography: Dress Code Guidelines for Couples and Guests

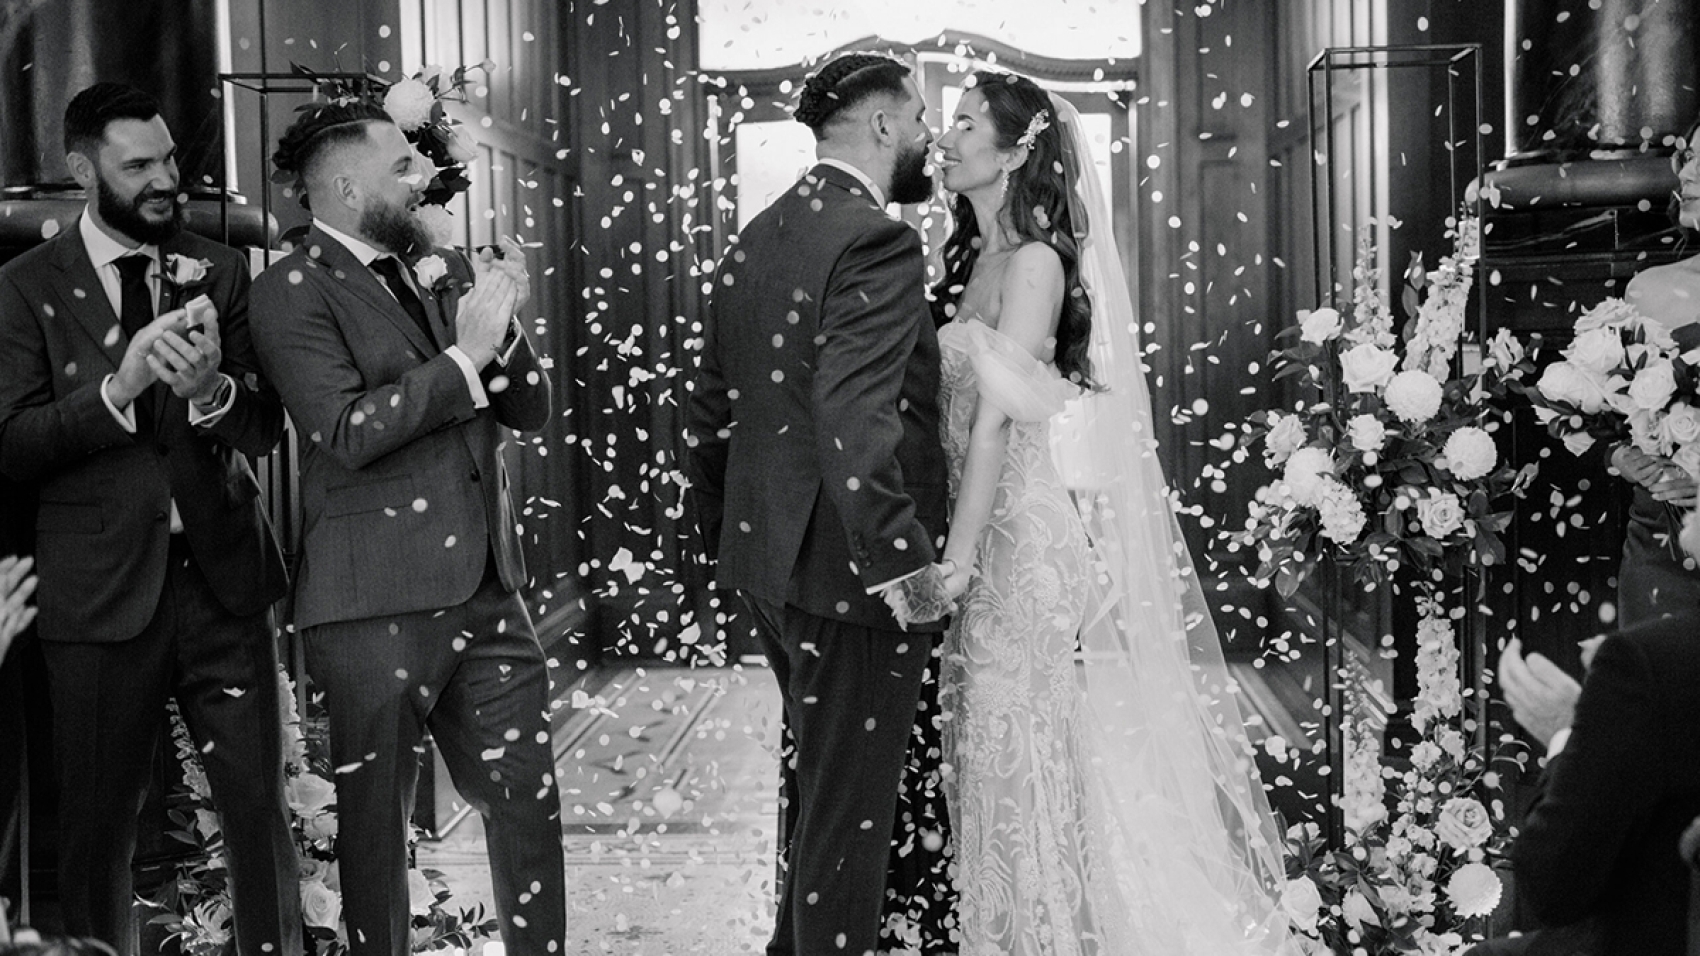
Melbourne’s historic churches, with their Gothic arches, stained glass, and serene interiors, provide a timeless backdrop for wedding photography. However, these sacred spaces often have specific dress codes to maintain dignity and respect. Whether you’re a bride, groom, or guest, understanding these guidelines ensures your attire complements the venue’s atmosphere while allowing your personality to shine.

wedding photography melbourne

Respecting Religious Traditions in Church Settings

Many Melbourne churches, particularly those with centuries-old heritage, uphold traditions that influence dress expectations. These norms vary slightly between denominations but generally prioritize modesty and elegance.

Understanding Denominational Differences

Catholic churches, such as St Patrick’s Cathedral or St Francis’ Church, often emphasize conservative attire. This includes covered shoulders, knees, and midriffs for women, and suits or dress shirts for men. Anglican venues like St Paul’s Cathedral may allow slightly more flexibility, but still discourage overly casual or revealing outfits.

Navigating Modesty Requirements

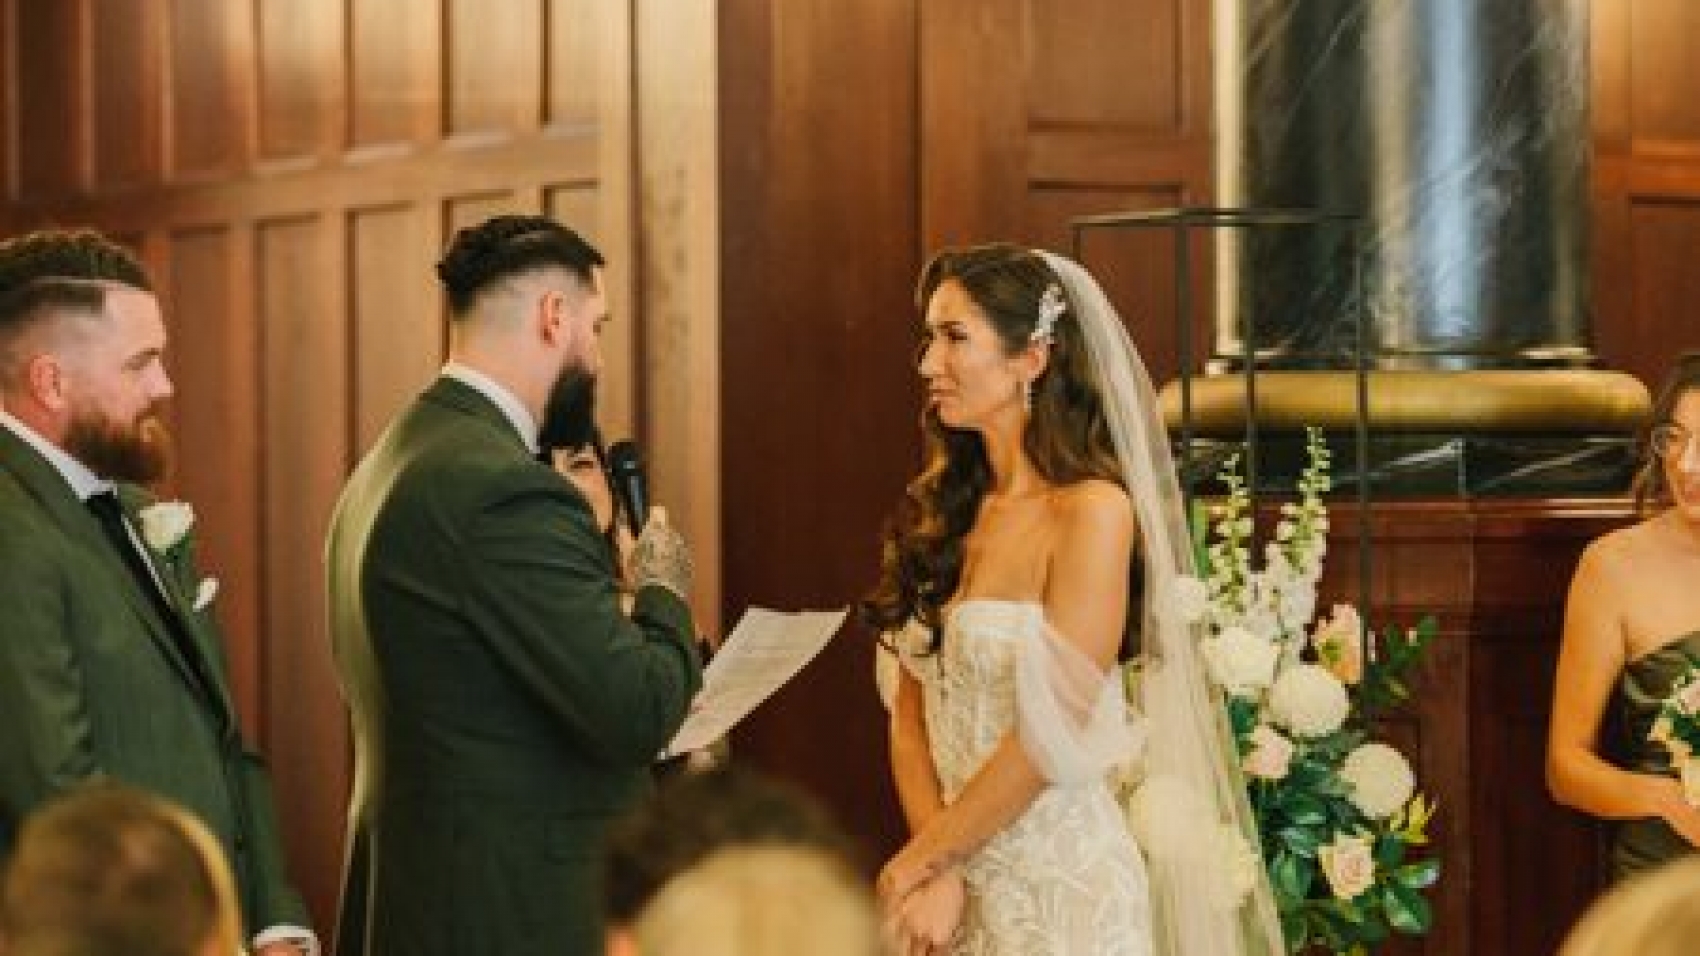
For brides, strapless gowns or dresses with sheer overlays are usually acceptable if paired with a shawl or bolero jacket during the ceremony. Guests should avoid low-cut tops, mini skirts, or ripped jeans. Men’s attire should lean formal—think dress pants, collared shirts, and ties for evening services, though jackets may be optional for daytime ceremonies.

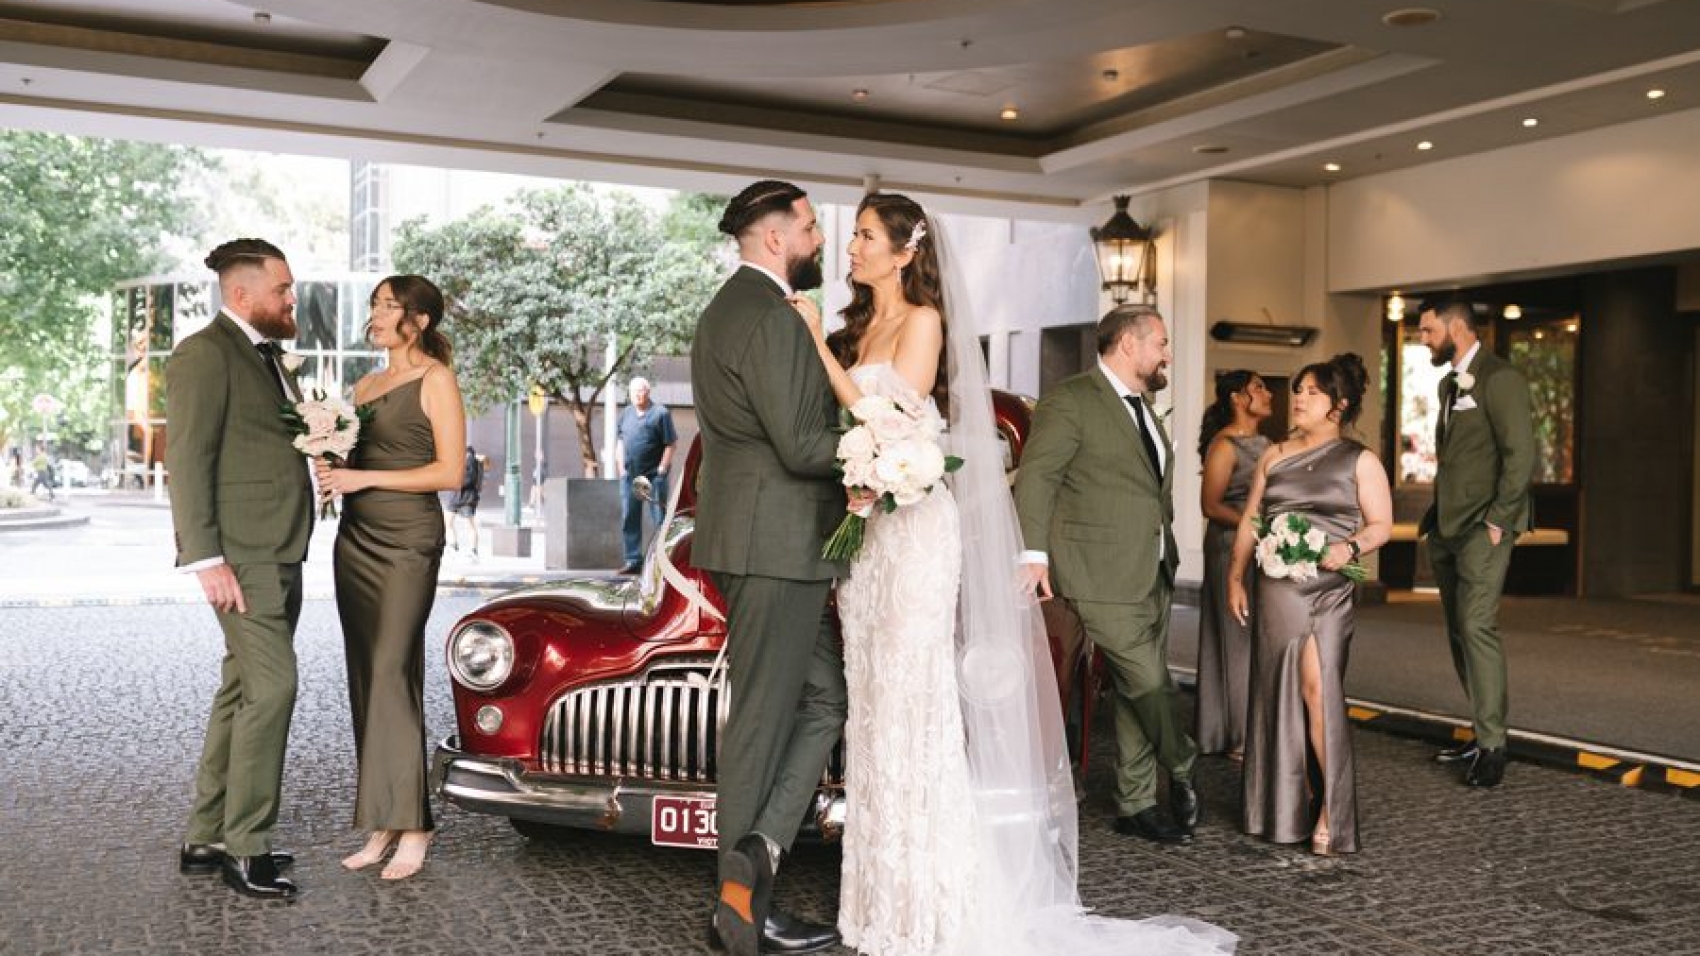
Choosing Wedding Attire That Aligns with Church Aesthetics

Your dress or suit should harmonize with the church’s architecture and lighting. Dark, muted tones or classic whites often photograph best against stone walls and wooden pews, while avoiding distractions from the venue’s features.

Selecting Fabrics and Colors

Opt for lightweight, flowing fabrics like chiffon or organza for brides, as they drape elegantly and move gracefully in photos. Avoid heavy sequins or overly shiny materials that may reflect harshly under church lighting. Guests should stick to neutral palettes—navy, gray, or cream—to blend seamlessly with the setting.

Incorporating Subtle Details

Delicate lace, embroidery, or beading can add sophistication without overwhelming the scene. For grooms, a pocket square or cufflinks in a tone matching the church’s interior (e.g., gold for a space with gilded accents) creates a cohesive look.

Practical Considerations for Movement and Comfort

Church ceremonies often involve walking down aisles, kneeling, or standing for extended periods. Your attire should balance style with practicality to ensure you feel confident throughout the event.

Ensuring Mobility in Long Dresses

Brides should practice walking in their gown beforehand, especially if it has a train or layers of tulle. A bustle or detachable train can make movement easier during the ceremony. For guests, avoid stilettos on uneven church floors; wedges or block heels offer stability.

Layering for Temperature Control

Many Melbourne churches lack air conditioning, so lightweight fabrics are ideal for summer weddings. Conversely, winter ceremonies may call for a faux fur stole or velvet jacket for brides, while guests can layer with cardigans or blazers.

Accessorizing Without Overpowering the Venue

Accessories should enhance your outfit without drawing attention away from the church’s beauty. Keep jewelry understated and meaningful, and choose headpieces that complement rather than compete with the architecture.

Simplifying Jewelry Choices

A delicate necklace or stud earrings often works better than chunky statement pieces in a church setting. For grooms, a classic watch or cufflinks adds polish without fuss.

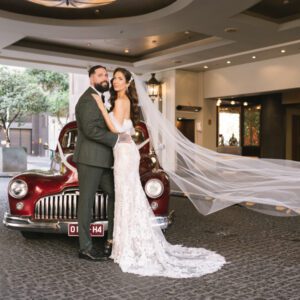
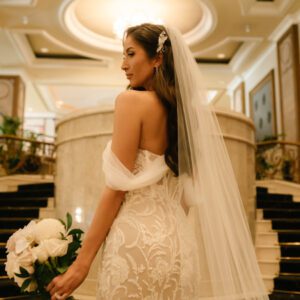
Selecting Headpieces and Veils

Birdcage veils or short blushers photograph well in churches, as they frame the face without obscuring views of the altar. Longer veils can work if they’re sheer and don’t drag on the floor. Guests should avoid large hats or fascinators that block others’ sightlines.

Final Tips for a Flawless Church Wedding Look

  • Arrive early: Test lighting and seating arrangements to adjust your attire if needed.
  • Bring touch-up essentials: A compact mirror, lipstick, and bobby pins help fix stray hairs or smudges.
  • Respect photography rules: Some churches prohibit flash or require permits for professional shoots—check in advance.

By aligning your attire with Melbourne church traditions and practical needs, you’ll create a wedding look that’s both respectful and unforgettable. Whether you’re walking down the aisle or watching from the pews, dressing thoughtfully ensures every photo captures the day’s grace and joy.

80883-Wu-2090

Salt spray protection for wedding photo shoots by the seaside in Melbourne

Navigating Melbourne’s Urban Traffic Planning: Key Insights for Filmmakers and Photographers

Melbourne’s evolving traffic infrastructure presents both challenges and opportunities for capturing dynamic urban scenes. With a population projected to surge to 11.5 million by 2055, the city is implementing transformative measures to manage congestion, enhance safety, and integrate sustainable transport. Here’s what creators need to know to align their projects with Melbourne’s traffic landscape.

wedding photography melbourne

Real-Time Data Systems Shaping Traffic Flow

Melbourne’s Department of Transport has rolled out a network of sensors and AI-driven tools to monitor traffic patterns in real time. Over 200 wireless sensors and 40 digital message boards now feed live data into the central traffic management hub, enabling rapid responses to incidents and congestion. For filmmakers, this means:

Dynamic Light Sequencing at Intersections

Traffic lights across the city are being reprogrammed using crash data and traffic patterns to optimize flow. For example, in high-demand areas like Box Hill and Clayton, sensors detect pedestrian volumes and adjust crossing times accordingly. During peak hours, lights may prioritize public transport routes, creating opportunities to capture buses or trams gliding through green waves.

Smart Intersection Upgrades

Trials of Bluetooth-enabled systems are underway to give priority to high-capacity vehicles like articulated buses. Meanwhile, CCTV cameras and obstructed intersection detection tech help clear accidents faster. Filming near upgraded junctions like those on Melton Highway or Point Cook Road could yield footage of cutting-edge traffic management in action.

School Zones and Residential Speed Limits

Safety-focused reforms are reshaping how traffic moves near schools and homes. Infrastructure Victoria’s 2025 report advocates lowering speed limits to 30 km/h in these areas, citing data showing that even minor speed reductions drastically cut accident risks. Key implications for creators:

Capturing Safer Streetscapes

With 7 child fatalities annually on Victorian roads—most in 50 km/h zones—the shift to 30 km/h limits is redesigning residential areas. Filmmakers can highlight calmer, pedestrian-friendly streets by shooting in suburbs like Glen Waverley or Wantirna South, where new speed regulations are being tested.

Documenting Enforcement Measures

To ensure compliance, authorities have installed 35 new cameras targeting speeding and red-light violations near schools. Locations like Canterbury Road in Box Hill now feature “invisible enforcement” tools, making them ideal for stories about urban safety evolution.

Public Transport Expansion and Non-Peak Incentives

Melbourne’s transport network is undergoing a $57 billion overhaul, with projects like the 90-kilometer Suburban Rail Loop and extended tram lines to Chadstone and Moorabbin reshaping commuter patterns. For creators, this opens doors to:

Filming Next-Gen Transit Infrastructure

The Suburban Rail Loop, set to feature driverless trains and underground stations 40 meters deep, offers futuristic backdrops. Meanwhile, new bus lanes and priority signals on routes like Springvale Road improve reliability, creating smoother shots of moving vehicles.

Non-Peak Hour Discounts

To ease rush-hour pressure, officials are trialing off-peak fare reductions, projected to cut 31 million car trips annually. Documenting early morning or late-afternoon commutes could showcase quieter trains and trams, contrasting with peak-hour crowds.

Traffic Hotspots and Clearway Enforcement

Three priority zones—western suburbs like Werribee, southeastern areas including Dandenong, and eastern districts such as Glen Waverley—are receiving targeted upgrades. Filmmakers should note:

Strict Clearway Rules

Arterial roads within 20 km of the CBD now enforce tow-away zones during clearway hours. Shooting near Main Street in Thomastown or Pascoe Vale Road requires planning around these restrictions to avoid disrupted takes.

Incident Response Crews

Six additional rapid-response teams and dozens of traffic engineers work around the clock to clear blockages. Capturing these crews in action near congestion points like Wurundjeri Way in Docklands could add realism to traffic-themed narratives.

Cycling Infrastructure and Sustainable Mobility

Melbourne’s 250-kilometer priority bike network is transforming how residents move. Filmmakers can leverage:

Protected Bike Lanes

New separated lanes on routes like St Kilda Road offer visually striking, safe spaces for cycling scenes. Pairing these with tram tracks or bus lanes creates layered urban compositions.

E-Bike Adoption Trends

As the city promotes electric bikes to reduce car dependency, shooting riders on upgraded paths like the Capital City Trail could reflect Melbourne’s shift toward greener transport.

By aligning projects with Melbourne’s traffic planning priorities—from real-time data systems to school zone safety and public transport upgrades—creators can produce content that resonates with the city’s dynamic evolution. Whether documenting infrastructure innovation or everyday commutes, understanding these shifts ensures footage that’s both timely and timeless.

80883-Wu-2090

Salt spray protection for wedding photo shoots by the seaside in Melbourne

Melbourne Beach Wedding Photography: Protecting Your Attire and Gear from Salt Spray

Melbourne’s coastal wedding venues offer breathtaking backdrops, but the combination of wind, sand, and salt spray can wreak havoc on delicate fabrics, camera equipment, and even hairstyles. Salt particles in the air accelerate corrosion, stain materials, and leave a gritty residue that’s hard to remove. Whether you’re planning a beach ceremony or a seaside photo session, these practical strategies will help safeguard your wedding attire and gear from salt-related damage.

wedding photography melbourne

Understanding the Risks: How Salt Spray Affects Wedding Elements

Salt spray is a mixture of tiny salt crystals suspended in air, carried by wind and waves. When it settles on surfaces, it attracts moisture, creating a corrosive mixture that can degrade materials over time. For weddings, this means:

Fabric Damage to Dresses and Suits

Salt crystals can embed themselves in fabric fibers, causing stiffness, discoloration, or even weakening delicate materials like lace, silk, or tulle. Over time, salt exposure may lead to fading, yellowing, or permanent stains, especially if the fabric isn’t cleaned promptly.

Corrosion on Camera Equipment

Salt is highly corrosive to metal components in cameras, lenses, and tripods. Even brief exposure can leave a gritty residue that scratches lens coatings, clogs moving parts, or degrades electronic contacts. For photographers, this means reduced image quality, malfunctioning gear, or costly repairs.

Hair and Makeup Challenges

Salt spray can dry out hair, making it frizzy or difficult to style, while also leaving a stiff, crusty texture on strands. For makeup, salt may cause foundation to cake or eyeshadow to crease, especially in humid coastal conditions.

Protecting Your Wedding Attire from Salt Spray

Your dress and suit are central to your wedding look, so shielding them from salt is a top priority. These steps will help minimize damage without compromising style:

Choosing Salt-Resistant Fabrics

Opt for sturdier materials like cotton, polyester, or blended fabrics for beach weddings, as they resist salt absorption better than delicate silks or laces. If you’re set on a more fragile fabric, consider a shorter hemline or a detachable overskirt to reduce surface area exposed to spray.

Applying a Fabric Protector

A water-repellent fabric spray creates a barrier that helps salt crystals slide off instead of embedding into fibers. Lightly mist your dress or suit (focus on hems, sleeves, and train) before heading to the beach, and reapply as needed throughout the day. Avoid heavy applications, which may alter fabric texture.

Using a Cover-Up During Transit

Wrap your wedding attire in a breathable, acid-free garment bag or cotton sheet when moving between locations. This prevents salt-laden air from settling on the fabric while you’re en route to the beach. For extra protection, place the bag inside a sealed plastic container or waterproof duffel.

Shielding Camera Gear from Coastal Corrosion

Photographers and videographers working near the ocean must take extra precautions to keep gear functional. These tactics reduce salt exposure and extend equipment lifespan:

Weatherproofing Lenses and Bodies

Use lens hoods to block salt spray from hitting the front element, and keep lens caps on when not shooting. For cameras, invest in a rain cover or a DIY solution like a plastic bag with a hole cut for the lens. Even a simple shower cap can provide temporary protection during quick shots.

Cleaning Gear Immediately After Use

Wipe down cameras, lenses, and tripods with a microfiber cloth dampened with distilled water (not tap water, which may contain minerals) to remove salt residue. Focus on crevices, buttons, and metal contacts, as these areas are most vulnerable to corrosion. Avoid using compressed air, which can push salt deeper into gear.

Storing Equipment in Airtight Containers

When not in use, place cameras, lenses, and batteries in sealed plastic bins with silica gel packets to absorb moisture. Never leave gear in a damp beach bag or exposed to salty air overnight, as this accelerates corrosion. For long-term storage, consider a dehumidifier cabinet.

Managing Hair and Makeup in Salty Conditions

Salt spray can turn a flawless look into a frizzy, caked mess if you’re not prepared. These tips help hair and makeup stay picture-perfect by the shore:

Using Salt-Resistant Hair Products

Apply a leave-in conditioner or hair oil before styling to create a barrier against salt. These products seal moisture into strands, reducing frizz and stiffness. For updos, use extra bobby pins and hairspray to secure styles, as salt can loosen grips over time.

Opting for Long-Wearing Makeup Formulas

Choose waterproof mascara, long-wear foundation, and setting spray to combat salt-induced creasing or smudging. Avoid heavy powders, which can clump in humid conditions, and focus on matte finishes that resist shine. Bring blotting papers or a translucent powder for touch-ups.

Scheduling Touch-Ups Strategically

Plan for quick hair and makeup refreshes between beach and indoor shots. A portable steamer can smooth frizz, while a cotton swab dipped in makeup remover can fix smudged eyeliner. If possible, shoot beach portraits early in the session to minimize prolonged salt exposure.

Final Thoughts: Enjoying Melbourne’s Coastline Without Compromise

A beach wedding in Melbourne doesn’t have to mean sacrificing style or gear quality to salt spray. By choosing resilient materials, protecting equipment, and preparing hair and makeup for coastal conditions, you can focus on creating memories without worrying about damage. Remember, a little preparation goes a long way—so embrace the ocean breeze, and let your love shine as brightly as the Melbourne sun.

wedding photography melbourne

Precautions for lighting up wedding dresses on a cloudy day in Melbourne

Overcast Sky Wedding Photography in Melbourne: Essential Lighting Tips for Brides and Grooms

Melbourne’s frequent overcast days can create a soft, diffused light that’s flattering for portraits but may lack the warmth or depth needed for truly striking wedding photos. Without direct sunlight, shadows flatten, and skin tones can appear dull if not properly lit. Fortunately, with a few strategic adjustments, you can transform gray skies into a dreamy backdrop that enhances your wedding attire and emotions. Here’s how to master lighting on Melbourne’s cloudy wedding days.

wedding photography melbourne

Understanding Overcast Light: Benefits and Challenges

Cloud cover acts as a natural diffuser, spreading sunlight evenly across the scene. This eliminates harsh shadows and reduces the risk of overexposure, making it easier to capture balanced exposures without blowing out highlights. However, overcast light can also feel cold, flat, or lacking in contrast, especially in midday shots. The key is to use supplemental lighting to add warmth, dimension, and a sense of atmosphere to your images.

The Role of Color Temperature

Overcast skies often cast a blueish tint, which can make skin tones look washed out or cool. To counteract this, adjust your camera’s white balance settings to “Cloudy” or “Shade,” which adds warmth to the scene. If shooting in RAW format, you can fine-tune color temperature during editing, but getting it right in-camera ensures better baseline quality.

Natural Light Enhancement: Working With Available Illumination

Before reaching for artificial lights, maximize the soft, even light an overcast day provides. These techniques help you use ambient light to its fullest potential:

Positioning for Optimal Light

Face your subjects toward the brightest part of the sky (usually where clouds are thinnest) to avoid flat lighting. Avoid shooting directly under thick cloud cover, as this can create a “top-down” light that flattens facial features. Instead, seek open areas where light spills through gaps in the clouds, creating subtle highlights and shadows.

Using Reflectors to Fill Shadows

A simple white or silver reflector can bounce light back onto your subjects’ faces, filling in shadows and adding a gentle glow. Have an assistant hold the reflector below the chin or to the side of the face to brighten eyes and cheekbones. For a more dramatic effect, use a gold reflector to add warmth, especially during golden hour (even on cloudy days).

Time of Day Matters

Overcast mornings and late afternoons often offer the softest, most flattering light, as the sun’s lower angle creates longer, gentler shadows. Midday light under thick clouds can feel harsh and flat, so plan indoor portraits or creative shots during peak brightness and save outdoor sessions for softer light periods.

Artificial Lighting Solutions for Depth and Drama

When natural light isn’t enough, artificial lighting can transform a cloudy scene into a moody, romantic masterpiece. These tools and techniques add control and creativity to your shots:

Off-Camera Flash for Directionality

A portable flash unit mounted on a stand or held by an assistant can mimic natural sunlight by casting light from an angle. Position the flash 45 degrees above and to the side of your subjects to create natural-looking shadows and highlights. Use a diffuser or bounce the flash off a nearby wall or ceiling to soften the output.

Continuous LED Lights for Video and Still Hybrid Shoots

Battery-powered LED panels provide steady, adjustable light without the harshness of flash. They’re ideal for capturing video clips or hybrid photo-video sessions, as they eliminate the need for syncing flash with camera shutters. Dim the LEDs to match the ambient light level, then gradually increase brightness to add a subtle glow to faces or backgrounds.

Creating Depth With Backlighting

Even on cloudy days, backlighting can separate your subjects from the background and add a halo effect to hair or veils. Position a light source behind your subjects (out of frame) and adjust its intensity to avoid overpowering the scene. Use a flag or gobo to block light from hitting the lens directly, preventing flare while maintaining the ethereal quality of backlight.

Post-Processing Tips to Elevate Overcast Images

Editing plays a crucial role in refining photos taken under cloudy skies. These adjustments can enhance mood, warmth, and contrast without overdoing it:

Adjusting Exposure and Contrast

Slightly increase exposure to brighten dull tones, but avoid pushing it too far, as this can introduce noise. Boost contrast to add definition to facial features and clothing textures, but keep it subtle to maintain the soft, romantic feel of overcast light.

Enhancing Color Saturation

Cloudy days can mute colors, especially in greenery or floral arrangements. Gently increase saturation in the red, orange, and yellow channels to make skin tones and decor pop without looking artificial. For a cohesive look, apply the same saturation adjustments to both subjects and background elements.

Adding Vignettes for Focus

A subtle vignette (darkening around the edges of the frame) draws attention to your subjects and creates a sense of intimacy. Use a radial gradient tool in editing software to darken the corners gradually, ensuring the effect doesn’t distract from the main focus of the image.

Final Thoughts: Embracing Melbourne’s Cloudy Canvases

Overcast wedding days in Melbourne don’t have to mean dull, lifeless photos. By understanding how to work with (and enhance) natural light, incorporating artificial lighting when needed, and refining images in post-processing, you can create a collection of photos that feel timeless, emotional, and uniquely yours. Remember, cloudy skies offer a blank canvas—and with the right techniques, you can paint it with light, love, and lasting memories.

wedding photography melbourne

Tips for fixing veils on windy days in Melbourne

Keeping Your Veil in Place on Melbourne’s Windy Wedding Days: Practical Tips for Brides

Melbourne’s unpredictable weather often includes gusty winds, especially near the coast or during spring and summer afternoons. For brides, a飞扬的头纱 (flying veil) can quickly turn from ethereal to chaotic, disrupting photos and causing frustration. Fortunately, with a few clever tricks and strategic planning, you can secure your veil and maintain a polished look, no matter how strong the breeze blows.

wedding photography melbourne

Understanding the Challenge: Why Veils Misbehave in Wind

Veils are lightweight by design, making them vulnerable to even mild gusts. Longer styles like cathedral or chapel veils are particularly prone to lifting, twisting, or clinging to faces, while shorter blusher veils may flutter uncontrollably. The key to taming a wind-tossed veil lies in balancing support with subtlety—ensuring it stays put without looking stiff or over-secured.

The Role of Fabric and Length

Thicker, stiffer fabrics like organza or tulle with a higher thread count resist wind better than delicate chiffon or silk. Similarly, shorter veils (elbow-length or fingertip) are easier to manage than floor-length styles. If you’re set on a long veil, opt for a two-tier design with a detachable top layer for outdoor portions of the day.

Hair Preparation: The Foundation for Veil Security

A stable hairstyle is the first line of defense against windy-day veil disasters. Work with your stylist to create a base that can anchor your veil firmly without damaging your hair or causing discomfort.

Textured Updos for Grip

Loose curls, waves, or a messy bun provide natural texture for comb or clip attachment. Avoid slick, straight styles, as smooth surfaces offer little traction for veil fasteners. For added security, ask your stylist to incorporate a small braid or twist near the crown where the veil will sit.

Using Hidden Bobby Pins

Slide bobby pins through the comb or clips securing your veil, then push them into your hairstyle at an angle (not straight down). This “cross-pinning” technique creates a stronger hold by distributing weight across multiple strands of hair. For extra reinforcement, weave pins through both the veil and your updo in a crisscross pattern.

Adding Volume at the Crown

Teasing or backcombing the roots near your veil’s attachment point creates a cushion of hair for combs to grip. Focus on the section where the veil will sit, then smooth the top layer with a brush to hide the texture. This method works well for fine or slippery hair types that struggle to hold pins.

Veil Attachment Methods for Wind Resistance

The way you fasten your veil to your hair can make or break its ability to stay put. Experiment with these techniques to find the most secure option for your style and wind conditions.

Double-Combing for Long Veils

If your veil has a comb at both the top and bottom (common for two-tier designs), secure the top comb first, then attach the bottom comb to a lower section of your updo. This distributes weight evenly and prevents the veil from sagging or lifting. For single-comb veils, ask your seamstress to add a second comb for extra support.

Sewing in Hidden Snaps or Hooks

A tailor or seamstress can sew small plastic snaps or hooks onto your veil and corresponding hairpiece (like a decorative clip or comb). Snap the veil into place for a discreet, secure hold that won’t budge in the wind. This method is ideal for delicate fabrics that might tear under pin pressure.

Using a Headband or Base

A fabric-covered headband or elasticized hairband can act as a stable base for your veil, especially if your hair is short or fine. Attach the veil’s comb to the headband, then secure the headband to your hair with bobby pins. This creates a multi-layered anchor system that’s both comfortable and wind-resistant.

On-the-Day Adjustments for Sudden Gusts

Even with careful preparation, Melbourne’s winds can be unpredictable. Arm yourself with these quick fixes to tame a rogue veil mid-shoot:

Strategic Hand Placement

Ask your bridesmaid or photographer to gently hold the base of your veil during outdoor portraits, especially in open areas like parks or beaches. Their hand can act as a temporary anchor, preventing the veil from lifting while you pose.

Tucking or Pinning Mid-Shoot

If your veil starts to shift, discreetly tuck a section into your updo or use a spare bobby pin to reattach it. For longer veils, gather a small section at the back and pin it to your hair or dress to shorten the length and reduce wind exposure.

Embracing the Breeze

Sometimes, the best solution is to work with the wind rather than against it. Position yourself so the wind blows the veil away from your face, creating a dramatic, flowing effect. Ask your photographer to capture the movement for candid, artistic shots that highlight the veil’s texture and your hair’s volume.

Final Thoughts: Confidence in the Face of Melbourne’s Winds

A windy wedding day doesn’t have to mean a chaotic veil. By preparing your hair, choosing secure attachment methods, and staying adaptable, you can keep your look polished and photo-ready. Remember, a little movement in your veil can add romance and dynamism to your images—so embrace the breeze, and let your beauty shine through, no matter the weather.

DSC02032

Preparation of props for a rainy wedding photo shoot in Melbourne

Rainy Day Wedding Photography in Melbourne: Essential Prop Ideas for Moody, Romantic Shots

Melbourne’s unpredictable weather often turns sunny forecasts into rainy surprises, but don’t let a downpour dampen your wedding photography dreams. Rain can add drama, intimacy, and a touch of magic to your album, transforming ordinary scenes into cinematic masterpieces. With the right props and creativity, you can embrace the wet weather and capture images that tell a unique, unforgettable story.

wedding photography melbourne

Embracing the Elements: Why Rainy Shoots Work

Rain creates a natural softbox effect, diffusing harsh sunlight and producing even, flattering lighting for portraits. Puddles act as mirrors, reflecting cityscapes or landscapes for double the visual impact, while droplets clinging to flowers or fabrics add texture and depth. By leaning into the rain rather than hiding from it, you’ll create photos that feel authentic, emotional, and timeless.

The Power of Atmosphere

Rainy days evoke emotions like nostalgia, romance, and coziness—perfect for wedding imagery. A couple sharing an umbrella or laughing through a drizzle conveys a sense of partnership and joy, even in challenging conditions. These moments often become favorites, cherished for their raw, unscripted beauty.

Waterproof Accessories for Practicality and Style

Staying dry (or at least comfortably damp) is key to enjoying your rainy-day shoot. These functional yet stylish accessories keep you protected while adding visual interest to photos:

Umbrellas as Statement Pieces

A classic umbrella is a must-have, but don’t settle for basic black. Opt for translucent white for a dreamy, ethereal look, or choose bold colors like deep burgund emerald green to contrast with neutral outfits. For a whimsical touch, consider a patterned design (think polka dots or stripes) or a vintage lace parasol for a romantic, old-world vibe.

Protective Outerwear That Photographs Well

Layering is essential in Melbourne’s fickle climate. A tailored trench coat or cropped denim jacket adds warmth without bulk, while a faux fur stole or cashmere wrap keeps shoulders cozy during outdoor portraits. For grooms, a lightweight scarf or a sleek overcoat elevates formal attire while providing practical coverage.

Footwear for Wet Surfaces

Slick pavements and muddy grass call for sturdy, water-resistant shoes. Brides can opt for block-heeled boots or stylish rain boots that peek out from under dresses, while grooms might choose leather loafers with rubber soles. Bring a spare pair for dancing indoors later to avoid tracking dirt onto reception floors.

Creative Props to Enhance Rainy Scenes

Turn puddles, raindrops, and gray skies into artistic tools with these imaginative additions:

Reflective Surfaces for Double Exposure Effects

Puddles are nature’s mirrors, but you can amplify their impact by bringing small handheld mirrors or acrylic sheets to shoot through. Position them at angles to capture reflections of the couple, surrounding architecture, or foliage, creating surreal, layered compositions.

Glass Jars or Vases for Rainwater Collection

Fill clear glass containers with rainwater and float flower petals or tea lights inside for a delicate, poetic detail. These props work beautifully in flat lays or as foreground elements in outdoor portraits, adding a touch of elegance to muddy or plain backgrounds.

Fabric Swatches for Texture and Movement

Lightweight, water-resistant fabrics like tulle, silk, or chiffon flutter beautifully in the rain, creating dynamic lines and softening harsh weather. Drape them over umbrellas, wrap them around bouquets, or let them billow behind the couple as they walk for a sense of motion and drama.

Lighting Solutions for Gloomy Days

Rain often brings overcast skies, which can flatten images if not addressed. Combat dull lighting with these techniques:

Portable LED Lights for Fill Flash

A small, battery-powered LED panel or ring light provides gentle fill flash to brighten faces without overpowering natural light. Position it off-camera for a more natural look, or ask your photographer to use it to highlight details like rings or bouquets during close-up shots.

Candles or Lanterns for Warmth

Battery-operated candles or lanterns add a cozy, intimate glow to rainy-day portraits. Place them on windowsills, staircases, or near puddles to create golden reflections, or hold them during close-ups to cast a soft, flattering light on skin.

Adapting Your Timeline for Rain

Flexibility is crucial when shooting in wet weather. Work with your photographer to adjust the schedule, prioritizing indoor or covered locations during heavy downpours and venturing outside during lulls. Allocate extra time for drying off, changing shoes, or touching up makeup to ensure everyone stays comfortable and camera-ready.

Final Thoughts: Turning Rain into Art

A rainy wedding day in Melbourne isn’t a setback—it’s an opportunity to create something extraordinary. With the right props, lighting, and mindset, you’ll transform gray skies into a backdrop for romance, laughter, and unforgettable memories. Embrace the weather, stay adaptable, and let your love shine through, rain or shine.

wedding photography melbourne

Sun protection for wedding photo shoots in Melbourne’s hot weather

Staying Safe and Stylish: Sun Protection Tips for Melbourne Wedding Photography in Hot Weather

Melbourne’s summer months can bring intense heat and strong UV rays, posing challenges for outdoor wedding photography. Between capturing candid moments and posing for portraits, couples and their bridal parties risk sunburn, dehydration, and discomfort if unprepared. Fortunately, with strategic planning and smart choices, you can protect your skin and still achieve stunning, sun-kissed images.

wedding photography melbourne

Understanding Melbourne’s Summer Climate

Melbourne’s summer (December–February) is known for its variability, with temperatures often soaring above 30°C (86°F) on sunny days. The city’s coastal location means UV levels can remain high even on cooler days, making sun protection essential regardless of the thermometer reading. Additionally, reflective surfaces like sand, water, or concrete can amplify UV exposure, increasing the risk of burns during beach or urban shoots.

Key Risks to Avoid

  • Sunburn: Prolonged exposure without protection can lead to painful burns, peeling skin, and long-term damage.
  • Dehydration: Heat and physical activity (like walking between locations) can cause fatigue and dizziness if fluids aren’t replenished.
  • Heat exhaustion: Symptoms like nausea, headaches, or clammy skin require immediate attention to prevent more severe conditions.

Sun-Safe Strategies for Outdoor Sessions

Protecting yourself during a hot-weather wedding shoot doesn’t mean sacrificing style or comfort. Here’s how to stay safe while looking your best:

Timing Your Photography Wisely

Schedule outdoor sessions during the coolest parts of the day, such as early morning (before 10 AM) or late afternoon (after 4 pm). These windows offer softer light and lower temperatures, reducing the risk of overheating. If your ceremony or reception is midday, prioritize shaded locations for group photos or limit outdoor time to short, focused bursts.

Leveraging Shade Creatively

Even in sunny Melbourne, natural shade is abundant if you know where to look. Use trees, buildings, or canopies to block direct sunlight, creating flattering, diffused light for portraits. For beach shoots, consider bringing a portable umbrella or pop-up tent to provide relief during breaks. Pro tip: Position subjects with the sun behind them to avoid harsh shadows on faces while maintaining a bright, airy feel.

Dressing for Heat and Style

Lightweight, breathable fabrics like linen, chiffon, or cotton help regulate body temperature and wick away sweat. Opt for loose-fitting silhouettes that allow airflow, especially for groomsmen or bridesmaids in formal attire. For the bride, consider a shorter reception dress or a detachable skirt overlay to stay cool during outdoor portions of the day.

Hydration and Skin Care Essentials

Staying hydrated and nourished is critical during hot-weather shoots. Encourage your bridal party to bring reusable water bottles and sip frequently, even if they don’t feel thirsty. Avoid sugary drinks or alcohol, which can dehydrate the body faster.

Skin Care Before and After

Apply a broad-spectrum sunscreen (SPF 30 or higher) to all exposed skin, including ears, neck, and hands, at least 20 minutes before stepping outside. Reapply every two hours, or more often if sweating or swimming. For sensitive skin, choose mineral-based formulas that sit on top of the skin rather than chemical absorbers. After the shoot, soothe sun-exposed areas with aloe vera gel or a cool, damp cloth to prevent irritation.

Managing Makeup in the Heat

Work with your makeup artist to select long-wearing, waterproof products that resist melting or creasing. A mattifying primer can help control shine, while setting sprays lock in looks for hours. Bring blotting papers or translucent powder for touch-ups between shots, and avoid heavy, oil-based foundations that may clog pores in the heat.

Adapting to Unexpected Changes

Melbourne’s weather can shift rapidly, so have a backup plan if temperatures spike or storms roll in. Identify indoor venues or covered areas near your outdoor locations to retreat to if needed. Communicate with your photographer about adjusting the shot list to prioritize must-have images during cooler intervals, ensuring you don’t miss key moments due to heat fatigue.

Final Thoughts: Embracing Melbourne’s Summer Glow

Hot-weather wedding photography in Melbourne doesn’t have to be a struggle. By planning ahead, staying hydrated, and protecting your skin, you can enjoy every moment of your special day without discomfort. Remember, the goal is to capture joy and love—not sunburn or exhaustion. With these tips, you’ll shine brightly in your photos while staying safe under the Australian sun.

wedding photography melbourne

Prime time selection for wedding photography in Melbourne

The Ultimate Guide to Choosing the Best Time for Melbourne Wedding Photography

Melbourne’s unpredictable weather and dramatic seasonal shifts make timing a critical factor for capturing breathtaking wedding photos. Whether you’re planning an outdoor ceremony or an indoor celebration, understanding the city’s lighting patterns, seasonal advantages, and daily golden hours will transform your album into a visual masterpiece.

wedding photography melbourne

Daily Lighting Magic: The Golden Hour

Photographers worldwide praise the golden hour—the period roughly one hour after sunrise or one hour before sunset—for its soft, diffused light that creates a romantic, ethereal glow. In Melbourne, this window is particularly valuable due to the city’s variable cloud cover and coastal haze, which can soften harsh sunlight. During these times, natural light wraps around subjects, minimizing shadows and highlighting textures like lace veils or floral arrangements.

For couples planning outdoor portraits, scheduling sessions during the golden hour ensures flattering skin tones and a warm, cinematic ambiance. If your venue offers sunset views, such as beachside locations or rooftop terraces, prioritize the late-afternoon slot to capture the sky’s ever-changing hues. Pro tip: Use apps like Sun Surveyor to track exact sunrise/sunset times and angles for your wedding date.

Seasonal Sweet Spots: When Melbourne Shines Brightest

Melbourne’s four distinct seasons each offer unique photographic opportunities, but two periods stand out for their balance of mild weather and visual appeal:

Autumn (March–May): A Palette of Rich Tones

Autumn is a photographer’s dream, with crisp air, golden foliage, and a cozy mood that translates beautifully into images. Parks like the Royal Botanic Gardens or Yarra Bend transform into canvases of amber, rust, and deep green, providing a natural backdrop that complements both formal attire and casual, relaxed poses. The softer sunlight during this season also reduces the risk of overexposure, allowing for longer outdoor sessions without harsh contrasts.

Spring (September–November): Fresh Beginnings

Spring brings a burst of color and energy to Melbourne, with blooming flowers and longer days. This season is ideal for couples who want vibrant, lively photos that reflect renewal and joy. Gardens such as Fitzroy Gardens or the Melbourne Zoo’s floral displays offer endless options for creative compositions. Additionally, spring’s moderate temperatures keep guests comfortable during outdoor ceremonies, reducing the need for frequent indoor breaks.

Weather Considerations: Planning for Melbourne’s Mood Swings

Melbourne’s reputation for “four seasons in one day” demands flexibility. Even during optimal months, sudden rain or wind can disrupt outdoor plans. To mitigate risks:

  • Have a backup indoor location with large windows or skylights to leverage natural light if outdoor plans fall through.
  • Monitor forecasts closely in the days leading up to your wedding. Many photographers recommend finalizing timelines 48 hours in advance based on updated predictions.
  • Embrace overcast skies creatively. Diffused light on cloudy days can produce evenly lit portraits with minimal shadows, perfect for group shots or detailed close-ups of rings or bouquets.

Time of Day: Balancing Ceremony and Portraits

Aligning your schedule with Melbourne’s daylight hours ensures seamless transitions between key moments. For example:

  • Morning ceremonies (9–11 AM) pair well with post-ceremony portraits during the late-morning golden hour, especially in autumn or winter when the sun rises later.
  • Afternoon ceremonies (2–4 PM) allow for golden-hour portraits before sunset, ideal for spring or summer weddings when daylight lasts longer.

Discuss your preferred timeline with your photographer to craft a plan that maximizes natural light while accommodating venue restrictions or guest comfort.

Final Thoughts: Capturing Melbourne’s Essence

The best time for wedding photography in Melbourne isn’t just about light—it’s about weaving the city’s unique character into your story. From autumn’s earthy tones to spring’s vibrant blooms, each season offers a distinct narrative. By leveraging the golden hour, preparing for weather shifts, and aligning your schedule with daylight patterns, you’ll create images that resonate with emotion and authenticity, turning fleeting moments into timeless art.

71407_Farm_Vigano_SELECTION_0055

Key points for controlling the time of outdoor wedding photography in Melbourne

Key Considerations for Time Management in Melbourne Outdoor Wedding Photography
Capturing perfect outdoor wedding photos in Melbourne requires strategic planning, especially given the city’s unique climate and urban-natural landscapes. From leveraging golden hour lighting to avoiding midday heat, here’s how to optimize your schedule for flawless results.

wedding photography melbourne

1. Optimal Lighting Periods: Morning and Dusk

Melbourne’s unpredictable weather demands precise timing to harness natural light. The golden hours—early morning (8–9 AM) and late afternoon (6–7 PM)—offer soft, diffused sunlight that enhances skin tones and minimizes harsh shadows. Avoid midday (11 AM–3 PM), when intense sunlight can cause squinting, overexposure, and uneven lighting. For example, a couple photographing near St Kilda Beach should prioritize dawn sessions to capture serene blue hues without the glare of midday sun.

Seasonal variations also influence lighting. Spring (September–November) and autumn (March–May) provide milder temperatures, making extended shoots feasible. Winter (June–August) days are shorter, so start earlier to maximize daylight. Summer (December–February) demands flexibility; schedule breaks during peak heat to prevent fatigue and sweat-induced makeup smudges.

2. Seasonal Adaptations: Weather and Scenery Synergy

Melbourne’s four-season climate offers distinct visual opportunities, but each comes with challenges.

Spring: Blooming flora in parks like Fitzroy Gardens creates vibrant backdrops. However, sudden rain showers are common; always carry transparent umbrellas or reschedule indoor backups.

Summer: Longer days allow for sunset-themed shoots at Brighton Beach’s colorful bathing boxes. Counteract heat by choosing shaded locations (e.g., under Royal Botanic Gardens’ tree canopies) and scheduling hydration breaks.

Autumn: The Yarra River’s golden foliage provides a warm, romantic ambiance. Cooler temperatures make layered outfits practical, but windy conditions may require hairspray to tame flyaways.

Winter: Overcast skies soften light, ideal for moody, dramatic shots near Melbourne’s historic architecture. Dress couples in warm fabrics and prioritize close-up poses to minimize exposure to chilly winds.

3. Logistical Efficiency: Route Planning and Contingencies

Melbourne’s sprawling layout and traffic congestion can disrupt timelines. Streamline your itinerary by grouping nearby locations. For instance, combine Melbourne University’s Gothic architecture with RMIT Design Hub’s modernist facades, both within a 15-minute drive.

Travel Time Buffer: Allocate 20–30 minutes between sites to account for parking searches and outfit changes. A couple shooting at Parliament House followed by a rooftop bar should factor in city traffic during peak hours.

Safety and Comfort: Prioritize flat terrain to avoid twisted ankles in heels. For coastal shoots (e.g., Port Phillip Bay), check tide schedules to prevent wet footwear. If photographing in remote areas like the Dandenong Ranges, share your route with a colleague and carry a first-aid kit for minor scrapes.

Weather Alternatives: Monitor forecasts 48 hours in advance. If rain threatens an outdoor shoot, pivot to covered venues like Melbourne Museum’s atrium or arcades along Block Place.

4. Client-Centric Pacing: Balancing Productivity and Experience

A rushed shoot stresses couples and compromises creativity. Allocate 10–15 minutes per outfit change, encouraging clients to pre-pack accessories in labeled bags. For multi-location sessions, limit each spot to 45 minutes to maintain energy levels.

Engagement Techniques: Use prompts like “Walk toward me while holding hands” to capture natural interaction. During lulls, share anecdotes about Melbourne’s landmarks (e.g., the Shrine of Remembrance’s significance) to ease nerves.

Flexibility for Spontaneity: Leave room for impromptu shots, such as a street performer’s serenade near Hosier Lane’s graffiti. These candid moments often become favorites, so avoid rigid schedules that stifle creativity.

By aligning timing with Melbourne’s light, seasons, and logistics, photographers can craft timeless images while ensuring couples cherish every moment of their special day.

81909-Wu-1757

Tips for using interior lighting equipment in Melbourne wedding photography

Melbourne Wedding Photography: Indoor Lighting Equipment Techniques

Melbourne’s diverse weather and architectural styles demand precise control over indoor lighting to achieve timeless wedding imagery. From classic studios to modern lofts, mastering lighting equipment techniques ensures natural skin tones, balanced contrasts, and emotional depth. Below are practical methods tailored to Melbourne’s unique indoor environments.

wedding photography melbourne

Leveraging LED Panels for Natural Skin Tones

LED panels are indispensable for their adjustable color temperature and low heat emission, making them ideal for Melbourne’s unpredictable weather. When shooting in studios with neutral backgrounds, set LEDs to 5500K to mimic daylight, ensuring skin tones appear warm without yellowing. For couples in formal attire, position LEDs at a 45-degree angle to the subject’s face to soften shadows while maintaining facial definition.

In smaller venues like historic chapels, use LED panels with diffusers to create even lighting. Attach a softbox to reduce harshness, especially when photographing close-ups of wedding rings or vows. For dynamic shots, adjust brightness mid-session to adapt to changing natural light through windows. A common technique involves pairing LEDs with bounced light—directing panels toward white walls or ceilings to scatter illumination gently.

Flash Techniques for High-Contrast Drama

Flash units excel in creating bold, cinematic effects, particularly in industrial-style venues with exposed brick or concrete. When shooting portraits, use a single off-camera flash positioned behind the subject to outline their silhouette, adding depth to formal gowns or tailored suits. For group shots, place flashes at varying heights to avoid flat lighting; this technique highlights individual expressions while maintaining cohesion.

In fast-paced scenarios, such as capturing candid moments during receptions, wireless flash triggers allow photographers to move freely. Sync flashes with ambient room lights to balance exposure, preventing overexposure in brightly lit halls. A pro tip: attach a grid modifier to flashes to direct light precisely, avoiding spill onto backgrounds. This is effective in venues with intricate details, like stained-glass windows, where controlled lighting preserves architectural features.

Continuous Lighting for Creative Flexibility

Continuous lights, such as tungsten or fluorescent bulbs, offer real-time visibility, enabling photographers to adjust compositions without guessing exposure. In loft-style studios with high ceilings, use continuous lights with barn doors to shape beams, creating dramatic highlights on wedding dresses or suits. For romantic themes, drape sheer fabric over lights to diffuse warmth, mimicking candlelight during intimate vows.

When photographing details like bouquets or invitations, position continuous lights at a low angle to emphasize textures. Adjust color temperature to complement floral arrangements—cooler tones (4000K) for whites and pastels, warmer hues (3200K) for deep reds or golds. In venues with limited space, such as cozy cafes, use LED strips along walls to add ambient glow without cluttering the scene.

Advanced Techniques for Layered Lighting

Combining multiple light sources elevates storytelling. For example, in a studio with a white cyclorama, use LED panels as key lights, flashes for rim lighting, and continuous bulbs for fill. This setup creates three-dimensional depth, making the couple stand out against minimalist backgrounds.

In venues with mixed textures, like timber floors and stone fireplaces, experiment with colored gels on flashes. A subtle orange gel can warm cool tones, while blue gels add moodiness to evening shots. Always test gel combinations beforehand to avoid color clashes with wedding attire.

Practical Considerations for Melbourne’s Climate

Melbourne’s chilly winters and hot summers affect equipment performance. In winter, keep batteries warm to prevent rapid drainage. During summer, use fans to cool down continuous lights, avoiding overheating in non-airconditioned venues.

For outdoor-to-indoor transitions, carry portable LED panels to supplement natural light when moving from gardens to reception halls. This ensures consistent exposure across diverse settings.

By integrating these techniques, photographers can transform Melbourne’s indoor spaces into captivating backdrops, blending technical precision with artistic vision. Mastery of lighting equipment not only enhances image quality but also elevates the emotional resonance of wedding narratives.