wedding photography melbourne

Prime time selection for wedding photography in Melbourne

The Ultimate Guide to Choosing the Best Time for Melbourne Wedding Photography

Melbourne’s unpredictable weather and dramatic seasonal shifts make timing a critical factor for capturing breathtaking wedding photos. Whether you’re planning an outdoor ceremony or an indoor celebration, understanding the city’s lighting patterns, seasonal advantages, and daily golden hours will transform your album into a visual masterpiece.

wedding photography melbourne

Daily Lighting Magic: The Golden Hour

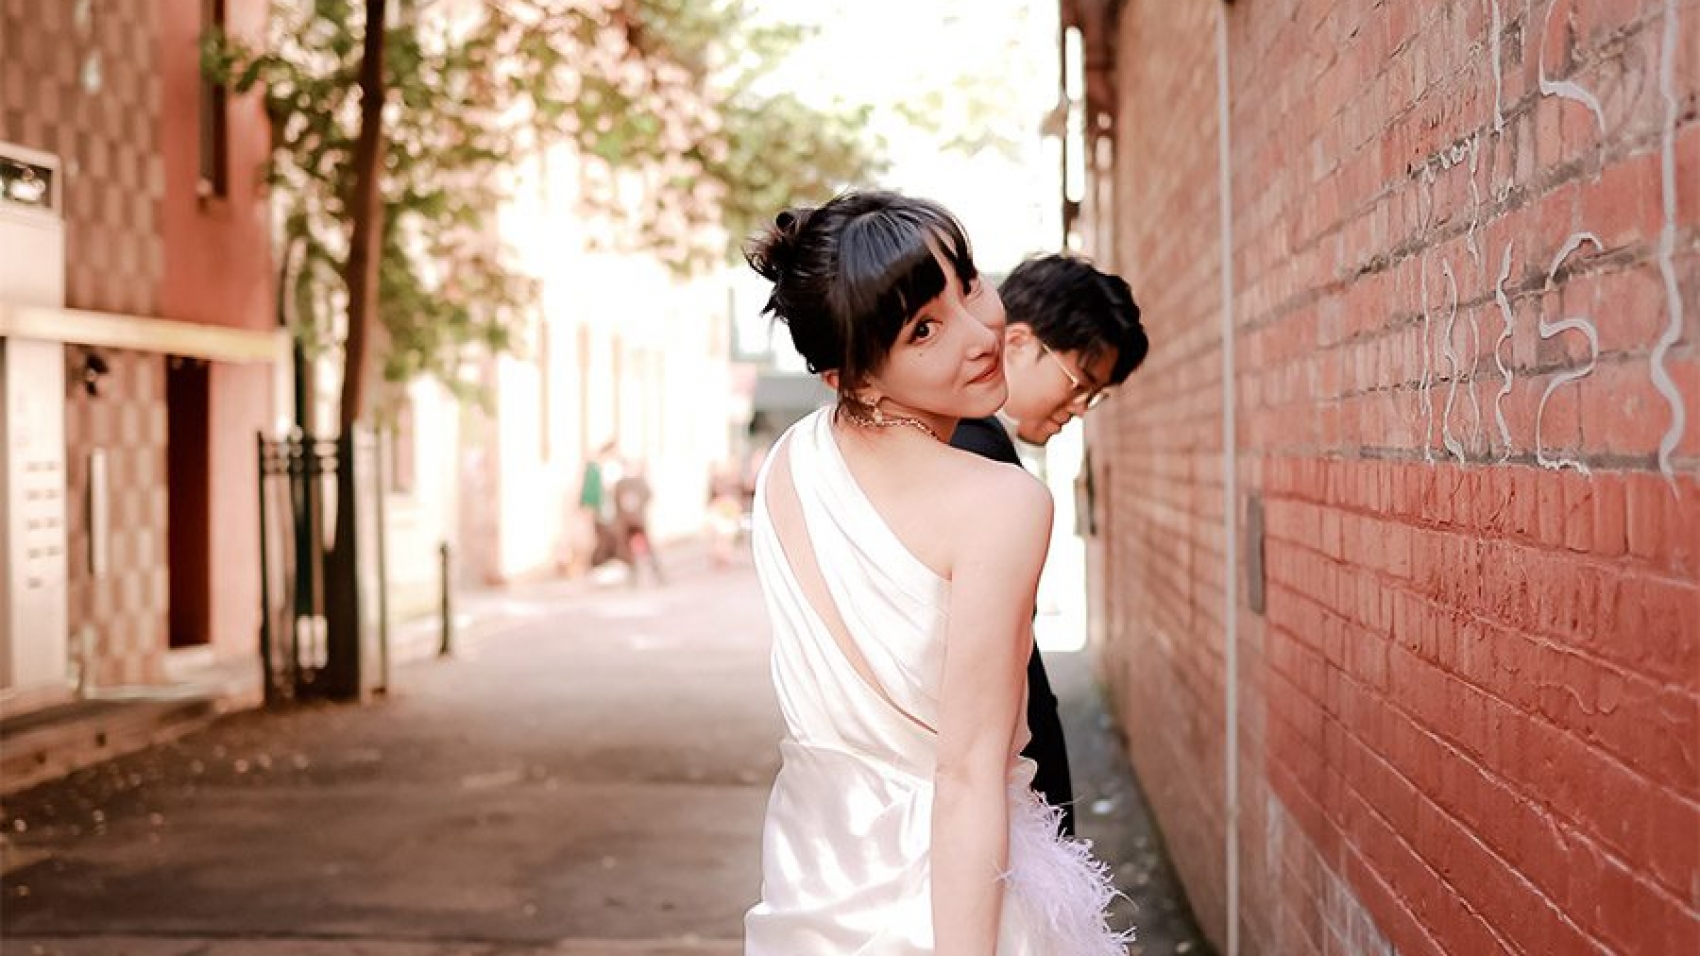
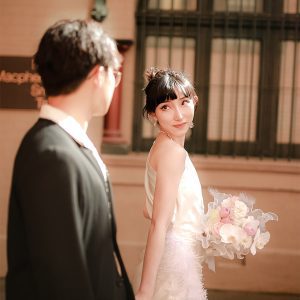
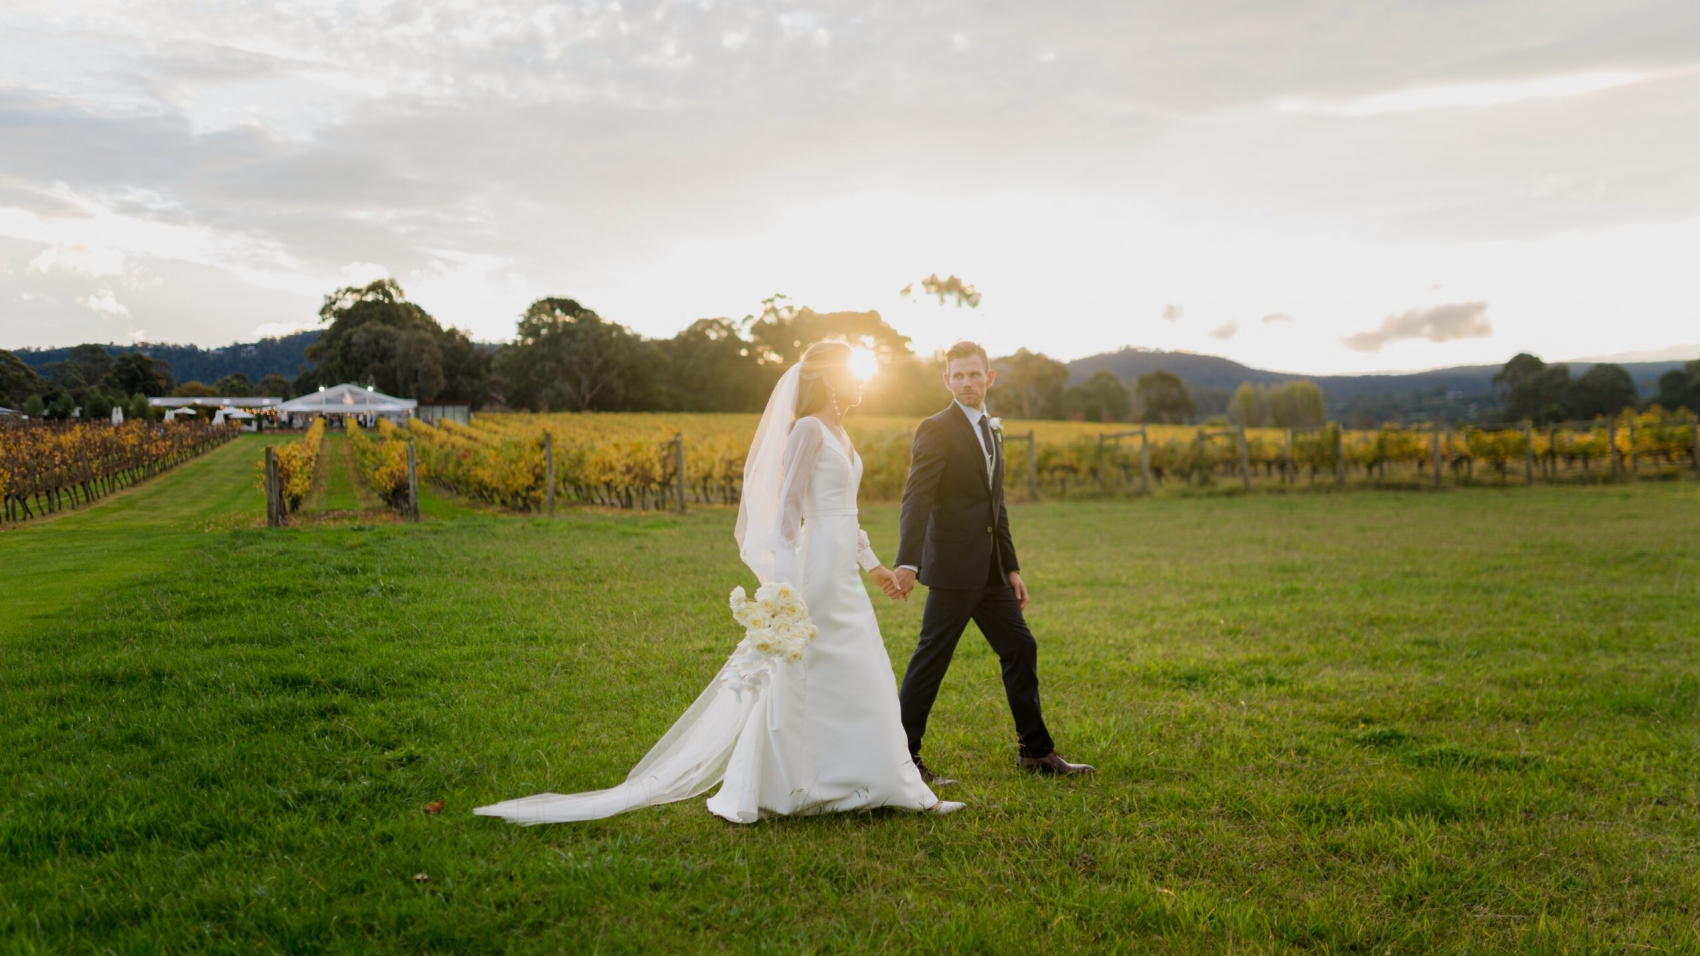
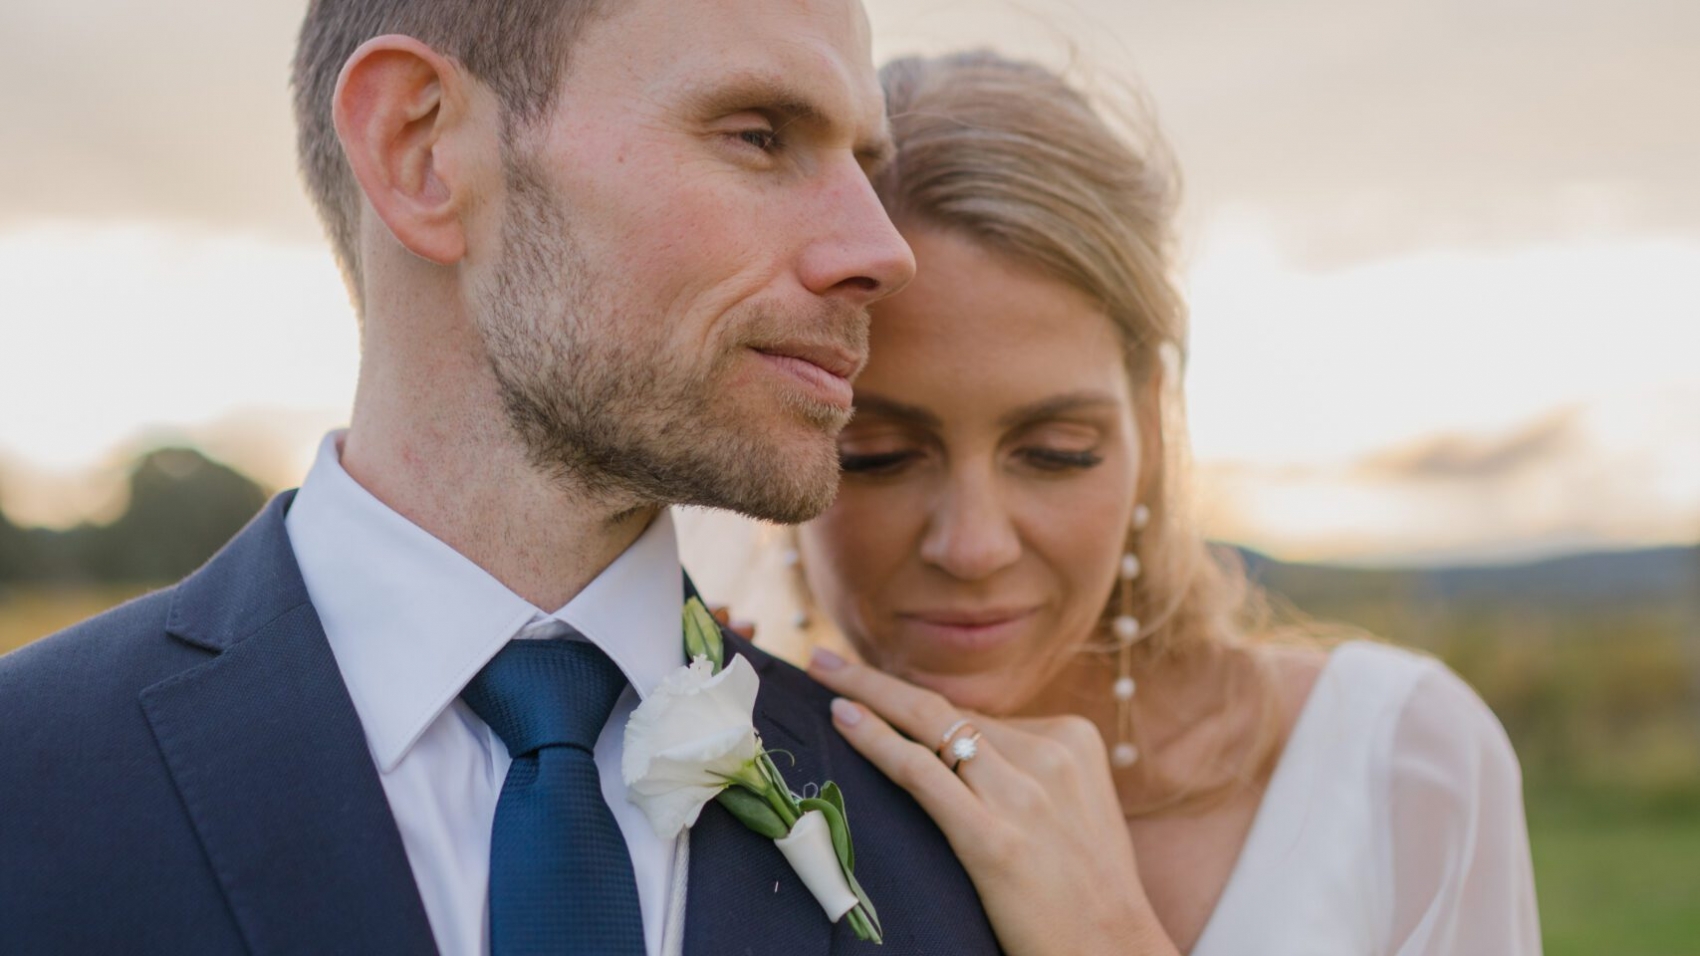
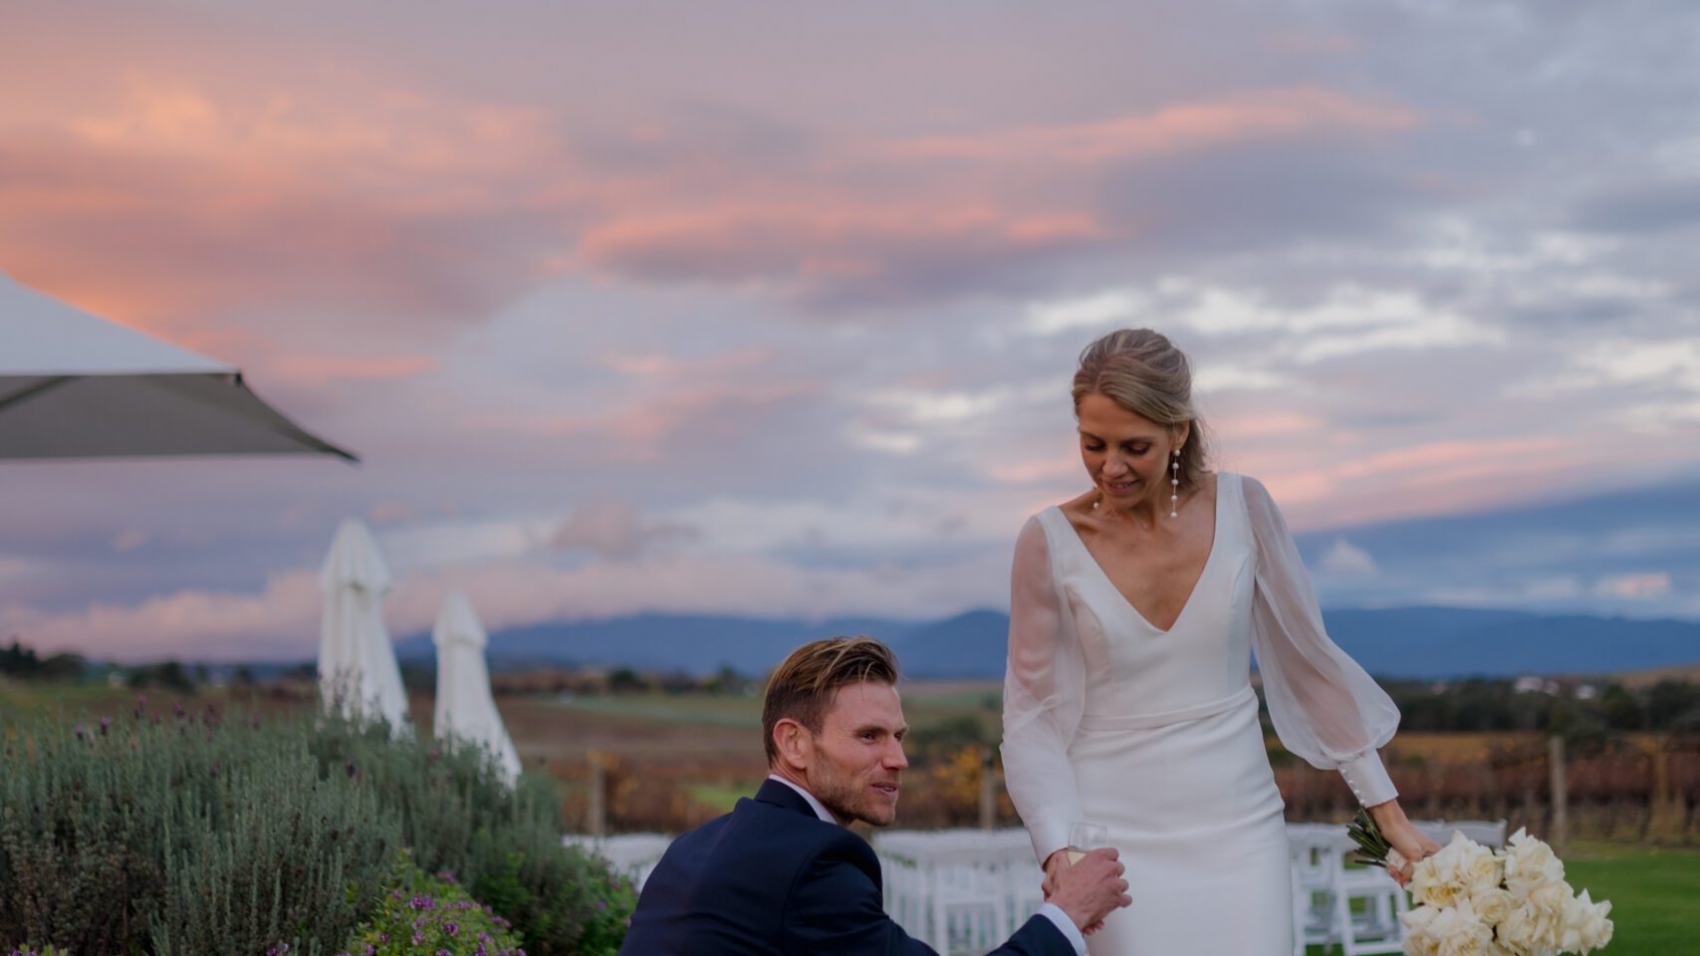
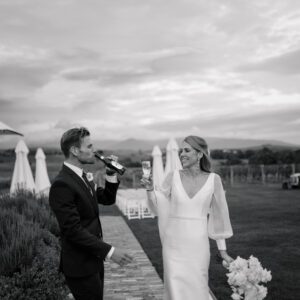
Photographers worldwide praise the golden hour—the period roughly one hour after sunrise or one hour before sunset—for its soft, diffused light that creates a romantic, ethereal glow. In Melbourne, this window is particularly valuable due to the city’s variable cloud cover and coastal haze, which can soften harsh sunlight. During these times, natural light wraps around subjects, minimizing shadows and highlighting textures like lace veils or floral arrangements.

For couples planning outdoor portraits, scheduling sessions during the golden hour ensures flattering skin tones and a warm, cinematic ambiance. If your venue offers sunset views, such as beachside locations or rooftop terraces, prioritize the late-afternoon slot to capture the sky’s ever-changing hues. Pro tip: Use apps like Sun Surveyor to track exact sunrise/sunset times and angles for your wedding date.

Seasonal Sweet Spots: When Melbourne Shines Brightest

Melbourne’s four distinct seasons each offer unique photographic opportunities, but two periods stand out for their balance of mild weather and visual appeal:

Autumn (March–May): A Palette of Rich Tones

Autumn is a photographer’s dream, with crisp air, golden foliage, and a cozy mood that translates beautifully into images. Parks like the Royal Botanic Gardens or Yarra Bend transform into canvases of amber, rust, and deep green, providing a natural backdrop that complements both formal attire and casual, relaxed poses. The softer sunlight during this season also reduces the risk of overexposure, allowing for longer outdoor sessions without harsh contrasts.

Spring (September–November): Fresh Beginnings

Spring brings a burst of color and energy to Melbourne, with blooming flowers and longer days. This season is ideal for couples who want vibrant, lively photos that reflect renewal and joy. Gardens such as Fitzroy Gardens or the Melbourne Zoo’s floral displays offer endless options for creative compositions. Additionally, spring’s moderate temperatures keep guests comfortable during outdoor ceremonies, reducing the need for frequent indoor breaks.

Weather Considerations: Planning for Melbourne’s Mood Swings

Melbourne’s reputation for “four seasons in one day” demands flexibility. Even during optimal months, sudden rain or wind can disrupt outdoor plans. To mitigate risks:

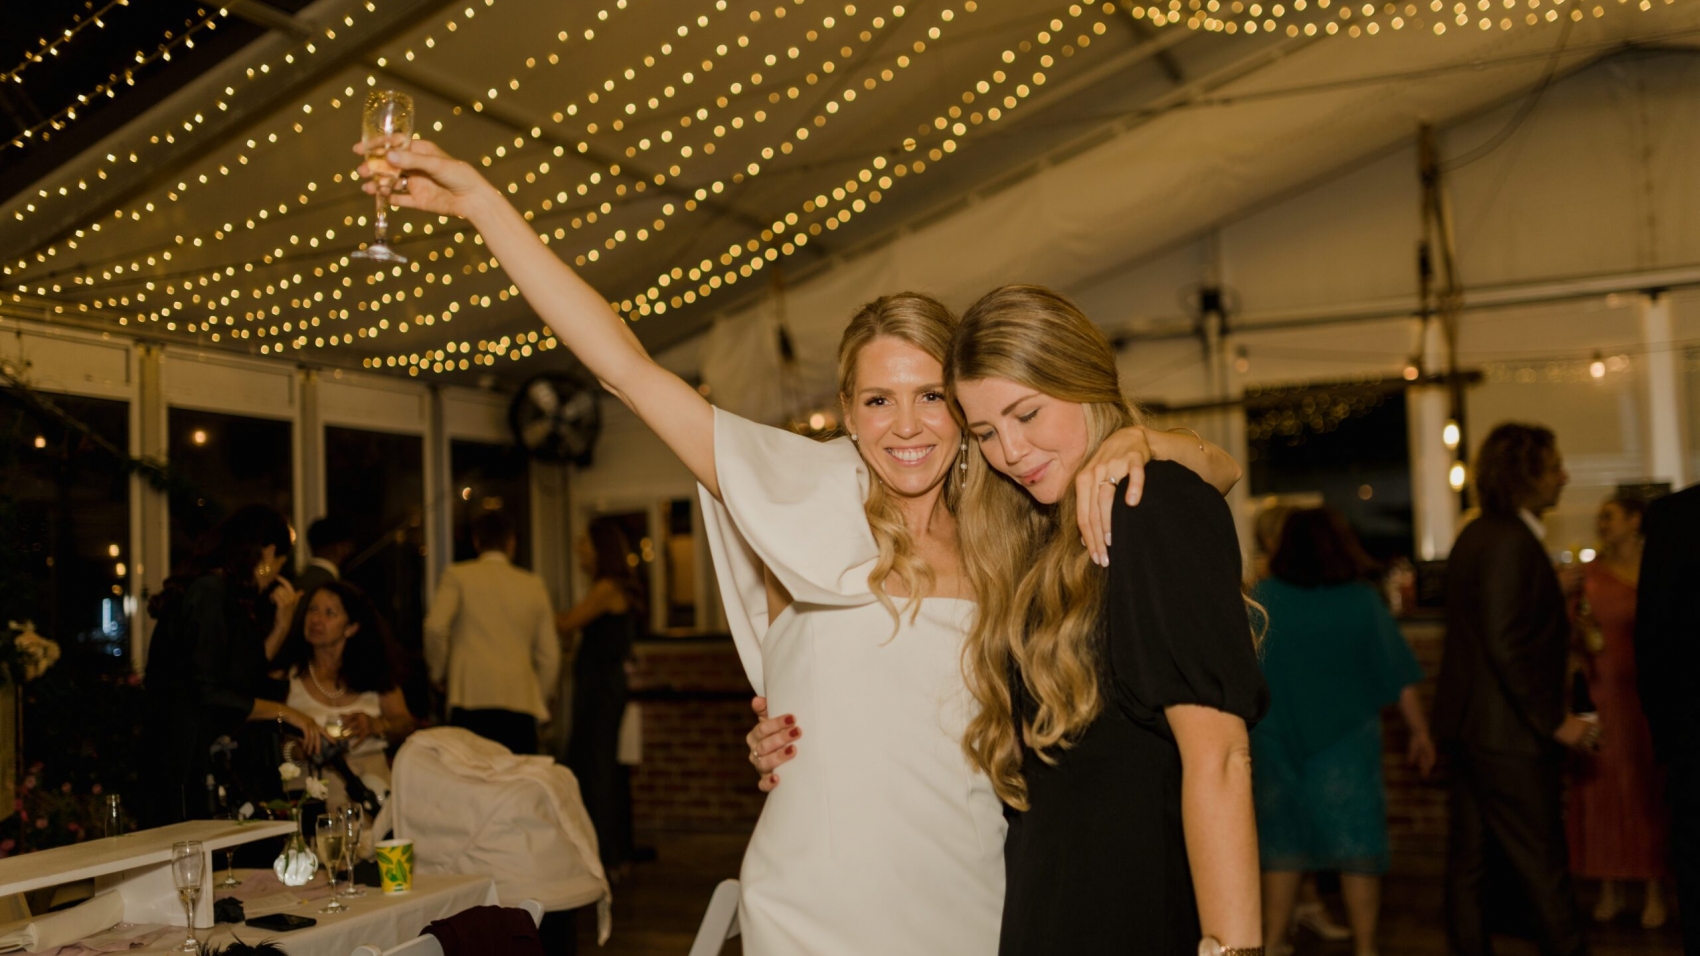
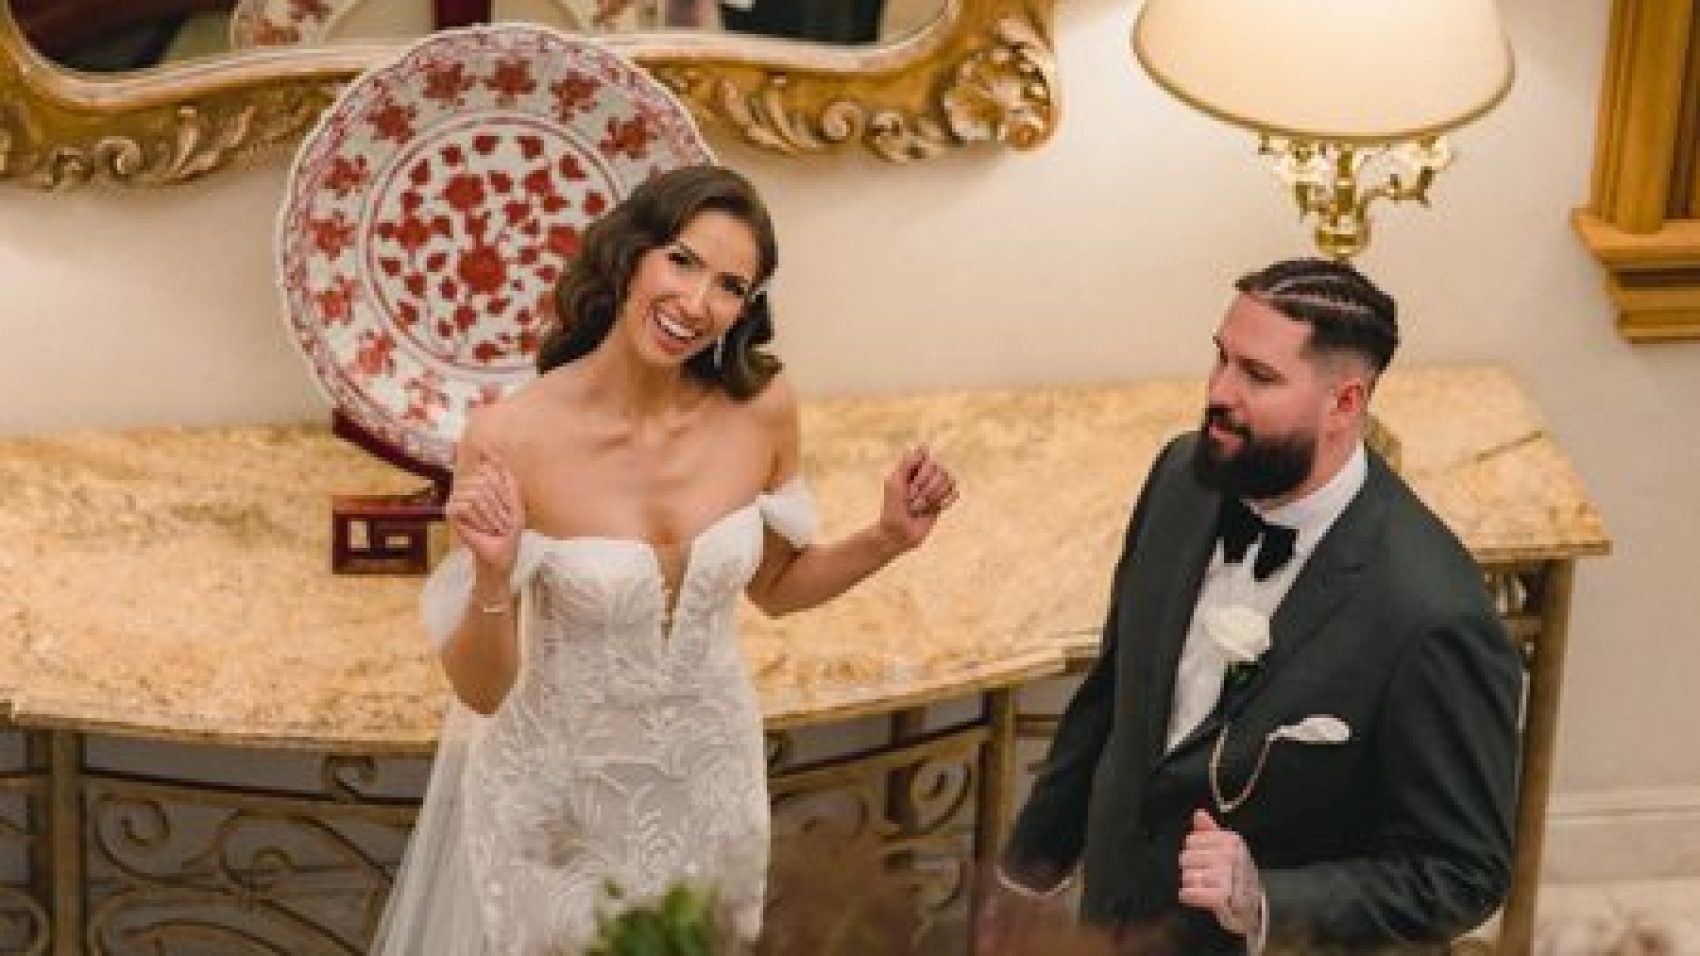
  • Have a backup indoor location with large windows or skylights to leverage natural light if outdoor plans fall through.
  • Monitor forecasts closely in the days leading up to your wedding. Many photographers recommend finalizing timelines 48 hours in advance based on updated predictions.
  • Embrace overcast skies creatively. Diffused light on cloudy days can produce evenly lit portraits with minimal shadows, perfect for group shots or detailed close-ups of rings or bouquets.

Time of Day: Balancing Ceremony and Portraits

Aligning your schedule with Melbourne’s daylight hours ensures seamless transitions between key moments. For example:

  • Morning ceremonies (9–11 AM) pair well with post-ceremony portraits during the late-morning golden hour, especially in autumn or winter when the sun rises later.
  • Afternoon ceremonies (2–4 PM) allow for golden-hour portraits before sunset, ideal for spring or summer weddings when daylight lasts longer.

Discuss your preferred timeline with your photographer to craft a plan that maximizes natural light while accommodating venue restrictions or guest comfort.

Final Thoughts: Capturing Melbourne’s Essence

The best time for wedding photography in Melbourne isn’t just about light—it’s about weaving the city’s unique character into your story. From autumn’s earthy tones to spring’s vibrant blooms, each season offers a distinct narrative. By leveraging the golden hour, preparing for weather shifts, and aligning your schedule with daylight patterns, you’ll create images that resonate with emotion and authenticity, turning fleeting moments into timeless art.

71407_Farm_Vigano_SELECTION_0055

Key points for controlling the time of outdoor wedding photography in Melbourne

Key Considerations for Time Management in Melbourne Outdoor Wedding Photography
Capturing perfect outdoor wedding photos in Melbourne requires strategic planning, especially given the city’s unique climate and urban-natural landscapes. From leveraging golden hour lighting to avoiding midday heat, here’s how to optimize your schedule for flawless results.

wedding photography melbourne

1. Optimal Lighting Periods: Morning and Dusk

Melbourne’s unpredictable weather demands precise timing to harness natural light. The golden hours—early morning (8–9 AM) and late afternoon (6–7 PM)—offer soft, diffused sunlight that enhances skin tones and minimizes harsh shadows. Avoid midday (11 AM–3 PM), when intense sunlight can cause squinting, overexposure, and uneven lighting. For example, a couple photographing near St Kilda Beach should prioritize dawn sessions to capture serene blue hues without the glare of midday sun.

Seasonal variations also influence lighting. Spring (September–November) and autumn (March–May) provide milder temperatures, making extended shoots feasible. Winter (June–August) days are shorter, so start earlier to maximize daylight. Summer (December–February) demands flexibility; schedule breaks during peak heat to prevent fatigue and sweat-induced makeup smudges.

2. Seasonal Adaptations: Weather and Scenery Synergy

Melbourne’s four-season climate offers distinct visual opportunities, but each comes with challenges.

Spring: Blooming flora in parks like Fitzroy Gardens creates vibrant backdrops. However, sudden rain showers are common; always carry transparent umbrellas or reschedule indoor backups.

Summer: Longer days allow for sunset-themed shoots at Brighton Beach’s colorful bathing boxes. Counteract heat by choosing shaded locations (e.g., under Royal Botanic Gardens’ tree canopies) and scheduling hydration breaks.

Autumn: The Yarra River’s golden foliage provides a warm, romantic ambiance. Cooler temperatures make layered outfits practical, but windy conditions may require hairspray to tame flyaways.

Winter: Overcast skies soften light, ideal for moody, dramatic shots near Melbourne’s historic architecture. Dress couples in warm fabrics and prioritize close-up poses to minimize exposure to chilly winds.

3. Logistical Efficiency: Route Planning and Contingencies

Melbourne’s sprawling layout and traffic congestion can disrupt timelines. Streamline your itinerary by grouping nearby locations. For instance, combine Melbourne University’s Gothic architecture with RMIT Design Hub’s modernist facades, both within a 15-minute drive.

Travel Time Buffer: Allocate 20–30 minutes between sites to account for parking searches and outfit changes. A couple shooting at Parliament House followed by a rooftop bar should factor in city traffic during peak hours.

Safety and Comfort: Prioritize flat terrain to avoid twisted ankles in heels. For coastal shoots (e.g., Port Phillip Bay), check tide schedules to prevent wet footwear. If photographing in remote areas like the Dandenong Ranges, share your route with a colleague and carry a first-aid kit for minor scrapes.

Weather Alternatives: Monitor forecasts 48 hours in advance. If rain threatens an outdoor shoot, pivot to covered venues like Melbourne Museum’s atrium or arcades along Block Place.

4. Client-Centric Pacing: Balancing Productivity and Experience

A rushed shoot stresses couples and compromises creativity. Allocate 10–15 minutes per outfit change, encouraging clients to pre-pack accessories in labeled bags. For multi-location sessions, limit each spot to 45 minutes to maintain energy levels.

Engagement Techniques: Use prompts like “Walk toward me while holding hands” to capture natural interaction. During lulls, share anecdotes about Melbourne’s landmarks (e.g., the Shrine of Remembrance’s significance) to ease nerves.

Flexibility for Spontaneity: Leave room for impromptu shots, such as a street performer’s serenade near Hosier Lane’s graffiti. These candid moments often become favorites, so avoid rigid schedules that stifle creativity.

By aligning timing with Melbourne’s light, seasons, and logistics, photographers can craft timeless images while ensuring couples cherish every moment of their special day.

81909-Wu-1757

Tips for using interior lighting equipment in Melbourne wedding photography

Melbourne Wedding Photography: Indoor Lighting Equipment Techniques

Melbourne’s diverse weather and architectural styles demand precise control over indoor lighting to achieve timeless wedding imagery. From classic studios to modern lofts, mastering lighting equipment techniques ensures natural skin tones, balanced contrasts, and emotional depth. Below are practical methods tailored to Melbourne’s unique indoor environments.

wedding photography melbourne

Leveraging LED Panels for Natural Skin Tones

LED panels are indispensable for their adjustable color temperature and low heat emission, making them ideal for Melbourne’s unpredictable weather. When shooting in studios with neutral backgrounds, set LEDs to 5500K to mimic daylight, ensuring skin tones appear warm without yellowing. For couples in formal attire, position LEDs at a 45-degree angle to the subject’s face to soften shadows while maintaining facial definition.

In smaller venues like historic chapels, use LED panels with diffusers to create even lighting. Attach a softbox to reduce harshness, especially when photographing close-ups of wedding rings or vows. For dynamic shots, adjust brightness mid-session to adapt to changing natural light through windows. A common technique involves pairing LEDs with bounced light—directing panels toward white walls or ceilings to scatter illumination gently.

Flash Techniques for High-Contrast Drama

Flash units excel in creating bold, cinematic effects, particularly in industrial-style venues with exposed brick or concrete. When shooting portraits, use a single off-camera flash positioned behind the subject to outline their silhouette, adding depth to formal gowns or tailored suits. For group shots, place flashes at varying heights to avoid flat lighting; this technique highlights individual expressions while maintaining cohesion.

In fast-paced scenarios, such as capturing candid moments during receptions, wireless flash triggers allow photographers to move freely. Sync flashes with ambient room lights to balance exposure, preventing overexposure in brightly lit halls. A pro tip: attach a grid modifier to flashes to direct light precisely, avoiding spill onto backgrounds. This is effective in venues with intricate details, like stained-glass windows, where controlled lighting preserves architectural features.

Continuous Lighting for Creative Flexibility

Continuous lights, such as tungsten or fluorescent bulbs, offer real-time visibility, enabling photographers to adjust compositions without guessing exposure. In loft-style studios with high ceilings, use continuous lights with barn doors to shape beams, creating dramatic highlights on wedding dresses or suits. For romantic themes, drape sheer fabric over lights to diffuse warmth, mimicking candlelight during intimate vows.

When photographing details like bouquets or invitations, position continuous lights at a low angle to emphasize textures. Adjust color temperature to complement floral arrangements—cooler tones (4000K) for whites and pastels, warmer hues (3200K) for deep reds or golds. In venues with limited space, such as cozy cafes, use LED strips along walls to add ambient glow without cluttering the scene.

Advanced Techniques for Layered Lighting

Combining multiple light sources elevates storytelling. For example, in a studio with a white cyclorama, use LED panels as key lights, flashes for rim lighting, and continuous bulbs for fill. This setup creates three-dimensional depth, making the couple stand out against minimalist backgrounds.

In venues with mixed textures, like timber floors and stone fireplaces, experiment with colored gels on flashes. A subtle orange gel can warm cool tones, while blue gels add moodiness to evening shots. Always test gel combinations beforehand to avoid color clashes with wedding attire.

Practical Considerations for Melbourne’s Climate

Melbourne’s chilly winters and hot summers affect equipment performance. In winter, keep batteries warm to prevent rapid drainage. During summer, use fans to cool down continuous lights, avoiding overheating in non-airconditioned venues.

For outdoor-to-indoor transitions, carry portable LED panels to supplement natural light when moving from gardens to reception halls. This ensures consistent exposure across diverse settings.

By integrating these techniques, photographers can transform Melbourne’s indoor spaces into captivating backdrops, blending technical precision with artistic vision. Mastery of lighting equipment not only enhances image quality but also elevates the emotional resonance of wedding narratives.

wedding photography melbourne

Seasonal feature capture methods for outdoor wedding photography in Melbourne

Melbourne Wedding Photography: Seasonal Outdoor Scene Capture Techniques

Melbourne’s diverse climate and landscape offer unique opportunities for wedding photography across four distinct seasons. Understanding how to leverage seasonal characteristics—from light quality to natural backdrops—can elevate outdoor shoots and create timeless imagery. Below are practical techniques tailored to each season’s strengths.

wedding photography melbourne

Spring (September–November): Blossoms and Golden Hour Magic

Spring in Melbourne brings mild temperatures (15–25°C) and an explosion of flora, making it ideal for romantic, nature-inspired shoots.

Flower Gardens and Public Parks: Locations like the Royal Botanic Gardens or Alowyn Gardens (known for its springtime wisteria) provide vibrant color palettes. To avoid overexposure in bright settings, photographers often use diffusers or natural shade to soften harsh sunlight. For close-ups, positioning couples under blossoming trees with dappled light creates a dreamy, ethereal effect.

Golden Hour Flexibility: Spring’s earlier sunsets (around 6 PM) allow for extended golden hour sessions. During this time, backlighting techniques—such as framing couples against sunset-lit foliage—can highlight hair details and create a warm, glowing aura. A common approach is to have the couple face away from the sun, using a reflector to bounce light onto their faces and avoid shadows.

Dynamic Movement: Spring’s moderate weather encourages playful shots. Incorporating actions like twirling under flower arches or walking hand-in-hand through garden paths adds energy. Long exposure shots (1/8–1/15 sec) can capture motion blur in dresses or veils, contrasting with the sharpness of the couple for artistic effect.

Summer (December–February): Coastal Breezes and Sunset Drama

Summer’s warmer temperatures (20–35°C) and longer days suit beach and urban settings, with a focus on vibrant colors and dramatic lighting.

Beach and Coastal Scenes: Locations like Brighton Beach or St Kilda Pier offer iconic backdrops. To manage harsh midday sunlight, photographers shift sessions to early morning or late afternoon. For sunset shots, positioning the couple with the ocean behind them and using a wide aperture (f/2.8–f/4) creates silhouettes with bokeh effects from crashing waves.

Urban Exploration: Melbourne’s cityscape, including Federation Square and Hosier Lane, thrives in summer. Utilizing natural light reflections off glass buildings or capturing candid moments in shaded laneways adds depth. During peak heat, scheduling indoor breaks or opting for shorter sessions (2–3 hours) prevents fatigue and maintains natural expressions.

Water Interactions: Incorporating water elements—such as having the couple dip toes in the ocean or walk through shallow tide pools—adds spontaneity. Using a fast shutter speed (1/500 sec) freezes motion, while slower speeds (1/125 sec) create gentle blur in flowing fabrics.

Autumn (March–May): Warm Tones and Textured Backdrops

Autumn’s cooler temperatures (15–25°C) and golden-hued foliage make it perfect for moodier, textured imagery.

Historic and Natural Settings: Carlton Gardens and the Dandenong Ranges offer rich autumnal colors. Photographers often use side lighting to emphasize leaf textures, casting warm tones on the couple’s faces. For close-ups, framing the couple against a backdrop of falling leaves (captured mid-descent with a fast shutter) adds dynamism.

Layered Clothing: As temperatures drop, couples can incorporate cozy elements like knit shawls or tailored blazers. These accessories not only provide warmth but also add visual interest. Photographers guide couples to interact naturally with their attire, such as adjusting a scarf or sharing a jacket, to capture candid moments.

Muted Color Palettes: Autumn’s earthy tones (browns, oranges, deep greens) pair well with neutral wedding attire. To avoid color clashes, photographers suggest avoiding bright accessories and instead opting for muted accessories like beige or ivory.

Winter (June–August): Crisp Light and Intimate Atmospheres

Winter’s cooler days (10–20°C) and soft, diffused light create opportunities for intimate, cozy shoots.

Urban and Architectural Focus: Melbourne’s cityscape, including Parliament House and the Royal Exhibition Building, shines in winter. The low angle of winter sunlight casts long shadows, adding depth to architectural shots. For indoor-outdoor hybrid sessions, photographers use doorways or arches to frame couples against wintry skies.

Warm Lighting Techniques: To counteract the lack of natural warmth, photographers incorporate golden-hour mimicking techniques. Using off-camera flashes with orange gels or reflecting sunlight from windows can create a sunset-like glow. For night shots, leveraging city lights or fairy lights in parks adds a magical touch.

Layered Posing: Winter attire (faux fur stoles, velvet dresses) allows for creative layering. Photographers often position couples in close embraces to showcase texture details while maintaining warmth. Slow-motion shots of couples walking through parks with breath visible in the air can evoke a nostalgic, cinematic feel.

By tailoring techniques to each season’s unique qualities—from spring’s blossoms to winter’s crisp light—photographers can craft outdoor wedding imagery that feels both timeless and contextually rich.

IMG_6419-2

Suggestions for choosing interior background styles for wedding photography in Melbourne

Melbourne Wedding Photography: Indoor Backdrop Style Selection Guide

Choosing the right indoor backdrop for wedding photography in Melbourne involves balancing aesthetic preferences, space constraints, and lighting conditions. Whether couples prefer timeless elegance or modern creativity, understanding how different styles interact with their surroundings can elevate the final images. Below are key considerations for selecting backdrops that align with Melbourne’s diverse photography studios.

wedding photography melbourne

Classic and Timeless Backdrops for Elegant Portraits

Classic backdrops remain popular for their ability to create a sense of refinement and sophistication. These styles often feature neutral tones, subtle textures, and symmetrical designs, making them ideal for couples seeking a traditional aesthetic.

Neutral Color Palettes: Soft whites, creams, and muted grays provide a versatile canvas that complements any wedding attire. A plain white wall with a hint of texture, such as a subtle fabric drape, can highlight the couple’s expressions without distractions. This approach works particularly well in studios with limited natural light, as neutral tones reflect ambient illumination evenly.

Textured Fabrics and Wallpapers: Incorporating materials like linen, velvet, or damask wallpaper adds depth without overwhelming the scene. For example, a couple seated against a textured cream backdrop can create a warm, intimate atmosphere. Photographers often adjust lighting angles to emphasize fabric folds or wallpaper patterns, ensuring they enhance rather than compete with the subjects.

Symmetrical Designs: Classic backdrops frequently include symmetrical elements, such as arches, columns, or framed mirrors. These features create balance and focus attention on the couple. A studio with a faux marble archway, for instance, can frame the bride and groom in a way that feels both grand and timeless.

Modern and Minimalist Backdrops for Contemporary Looks

Modern backdrops prioritize simplicity, clean lines, and geometric shapes, appealing to couples who prefer a sleek, understated aesthetic. These styles often leverage negative space and bold contrasts to create striking visuals.

Monochromatic Schemes: Black, white, or gray backdrops with sharp contrasts can produce dramatic, high-impact images. A couple posed against a black wall with white geometric accents, such as stripes or triangles, creates a bold, artistic look. This style is particularly effective for full-body shots or dynamic poses, as the simplicity of the backdrop draws attention to movement and interaction.

Geometric Patterns: Modern studios may incorporate abstract shapes, such as hexagons, circles, or angular lines, to add visual interest. These patterns work well in smaller spaces, as they create the illusion of depth without clutter. For example, a bride leaning against a wall with intersecting metallic lines can appear both elegant and avant-garde.

Negative Space Utilization: Leaving large areas of the backdrop empty emphasizes the couple’s presence. A minimalist approach, such as positioning the bride and groom in the center of a plain gray wall with a single prop like a modern chair, creates a sense of focus and intimacy. This technique is ideal for couples who want their emotions and connection to take center stage.

Vintage and Rustic Backdrops for Warm, Nostalgic Vibes

Vintage and rustic backdrops evoke a sense of nostalgia and warmth, making them popular for couples who want to incorporate a touch of history or natural charm into their photos. These styles often feature weathered materials, antique props, and earthy tones.

Weathered Wood and Brick: Exposed wooden beams, reclaimed barn doors, or faux brick walls can create a rustic, country-inspired atmosphere. A couple seated on a wooden bench against a brick backdrop, for instance, can convey a sense of timeless romance. Photographers often use warm lighting, such as tungsten bulbs or golden-hour sunlight, to enhance the earthy tones and create a cozy ambiance.

Antique Props and Furniture: Incorporating vintage items like old suitcases, lace tablecloths, or antique mirrors adds character to the scene. For example, a bride holding a vintage parasol or a groom leaning against a weathered wooden ladder can create a whimsical, storybook feel. These props should complement the backdrop without overpowering the couple, ensuring a harmonious balance.

Earth-Toned Color Schemes: Rustic backdrops frequently use muted browns, greens, and terracotta to mimic natural environments. A studio with a faux stone wall or earthy fabric drapes can provide a grounding effect, making the couple appear both approachable and elegant. Adjusting lighting to soften shadows and highlight textures ensures the backdrop feels organic rather than staged.

Themed and Creative Backdrops for Unique Personalization

Themed backdrops allow couples to express their personalities or interests, creating photos that feel truly one-of-a-kind. These styles range from whimsical to artistic, often incorporating unconventional materials or concepts.

Artistic Installations: Some studios offer abstract installations, such as floating balloons, paper flowers, or hanging lights, to create a dreamy, ethereal atmosphere. A couple surrounded by cascading paper cranes or fairy lights can appear whimsical and romantic. These setups require careful lighting to avoid harsh shadows and ensure the installation enhances the mood.

Cultural or Hobby-Inspired Themes: Couples may incorporate elements from their heritage or hobbies, such as traditional textiles, musical instruments, or sports equipment. For example, a bride and groom posing with a vintage guitar against a music-themed backdrop can reflect their shared passion. These themes should feel authentic and intentional, avoiding clichés or forced props.

Interactive Backdrops: Some studios design backdrops that encourage movement or interaction, such as chalkboard walls, photo booths, or mirror installations. A couple writing messages on a chalkboard backdrop or taking playful selfies in a vintage photo booth can create lighthearted, memorable images. These setups work best when the couple feels comfortable engaging with the environment.

By carefully considering the style, lighting, and props, couples and photographers can select indoor backdrops that align with their vision and enhance the emotional impact of the images. Whether aiming for classic elegance, modern simplicity, rustic charm, or creative personalization, Melbourne’s studios offer diverse options to suit every wedding aesthetic.

WUU01843

Safety guarantee measures for outdoor wedding photography in Melbourne

Essential Safety Measures for Melbourne Outdoor Wedding Photography

Outdoor wedding photography in Melbourne offers stunning natural backdrops, from coastal vistas to urban landscapes. However, ensuring safety for couples and photography teams requires meticulous planning. Below are actionable strategies to mitigate risks and create memorable experiences.

wedding photography melbourne

Environmental Risk Assessment and Site Selection

Choosing a safe location is the foundation of any outdoor shoot. Melbourne’s diverse terrain—including beaches, forests, and cityscapes—demands tailored safety checks.

Terrain Stability: Avoid uneven surfaces, cliff edges, or wetlands, especially after rainfall. For example, shooting near the Yarra River requires assessing soil moisture to prevent slips. Similarly, coastal locations like St Kilda Beach demand scrutiny of tide schedules to avoid being stranded on rocky outcrops.

Wildlife and Vegetation Hazards: Melbourne’s parks and bushlands may harbor venomous snakes, spiders, or stinging plants. Teams should maintain a 5-meter distance from dense foliage and instruct couples to avoid sitting on unverified ground. In areas like the Dandenong Ranges, photographers often carry snake repellent and first-aid kits containing antivenom.

Traffic and Urban Dangers: City shoots near Federation Square or Hosier Lane require monitoring pedestrian and vehicle flow. Teams should position couples away from curbs, use traffic cones to mark boundaries, and assign assistants to guide crowds.

Weather Preparedness and Contingency Planning

Melbourne’s notorious “four seasons in one day” climate demands flexible scheduling.

Real-Time Weather Monitoring: Prior to the shoot, teams should check the Bureau of Meteorology’s updates for sudden wind shifts, thunderstorms, or heatwaves. For instance, a planned sunset shoot at Brighton Beach could be rerouted to a sheltered studio if gale-force winds are forecast.

Heat and Sun Protection: During summer, couples risk dehydration or sunburn during prolonged outdoor sessions. Photographers often provide portable shade tents, UV-protection sprays, and scheduled breaks in air-conditioned vehicles. Case studies show that teams shooting in Royal Botanic Gardens Victoria reduce midday exposure by 50%, opting for early morning or late afternoon light.

Cold Weather Adaptations: Winter shoots in locations like Mount Macedon require couples to wear thermal layers beneath wedding attire. Photographers may use portable heaters and prioritize 15-minute intervals between shots to prevent hypothermia.

Emergency Protocols and Equipment Readiness

A proactive approach to crises ensures swift responses.

First-Aid Kits and Training: Every team member should be certified in basic first aid, with kits stocked for cuts, insect bites, and allergic reactions. In remote areas like the Mornington Peninsula, kits often include satellite communicators and emergency blankets.

Communication Systems: Poor mobile reception in places like the Great Ocean Road necessitates two-way radios or satellite phones. Teams designate a “safety officer” to monitor group movements and relay distress signals.

Evacuation Routes: Before shooting in national parks like Grampians, teams map escape paths to the nearest medical facility. For example, a 2024 incident in the You Yangs required a couple to be airlifted after a fall, underscoring the need for pre-planned extraction strategies.

Clothing and Gear Safety Standards

Apparel and equipment choices directly impact safety.

Footwear: High heels are discouraged on uneven terrain like the Melbourne Docklands’ cobblestones. Couples often opt for low-heeled shoes or bare feet (after ground checks for glass or debris). Photographers recommend bringing spare footwear for sudden weather changes.

Dress Mobility: Heavy gowns with long trains are risky in windy areas like Port Phillip Bay. Teams suggest lightweight fabrics or tucking trains during movement-heavy shots. A 2023 survey found that 78% of Melbourne photographers advise against corseted dresses for hikes in the Dandenongs.

Equipment Stability: Tripods and lighting rigs must be secured on soft ground using sandbags or weighted bases. In windy conditions, teams anchor gear to vehicles or permanent structures. Drones, if used, require CASA compliance and no-fly zone awareness near airports.

Legal Compliance and Insurance

Adhering to regulations protects all parties.

Public Liability Insurance: Teams must carry coverage for accidents on public or private land. For example, shooting in Federation Square requires permits from Melbourne City Council, with insurance certificates submitted beforehand.

Drone and Traffic Laws: Aerial photography near the Melbourne CBD demands CASA certification and adherence to airspace restrictions. Similarly, roadside shoots require compliance with VicRoads guidelines, including high-visibility vests for teams.

Client Waivers: Couples should sign liability waivers acknowledging risks like insect bites or minor injuries. Transparent communication about safety measures builds trust and reduces disputes.

By integrating these measures, Melbourne’s wedding photographers can balance creativity with safety, ensuring couples cherish their special day without unnecessary risks.

wedding photography melbourne

Interior space utilization techniques for wedding photography in Melbourne

Maximizing Indoor Space for Melbourne Wedding Photography: Creative Strategies for Stunning Portraits

Melbourne’s indoor photography studios, whether spacious or compact, offer unique opportunities to craft intimate, elegant wedding portraits. The key lies in understanding how to manipulate space, light, and angles to highlight the couple while maintaining a sense of depth and authenticity. Below are practical techniques to transform even the smallest studio into a versatile backdrop for timeless imagery.

wedding photography melbourne

Structuring Layouts for Flow and Visual Interest

The arrangement of furniture and props within a studio significantly impacts the mood and movement of a shoot. Start by defining zones for different poses—a seating area for relaxed interactions, a standing space for full-body shots, and a clean backdrop for close-ups. This division prevents clutter and ensures a smooth transition between poses. For example, place a vintage sofa near a window for soft, natural light portraits, then move the couple to a plain wall with a draped fabric for dramatic silhouettes.

Vertical space is often underutilized in studios. Use tall props like arches, ladders, or hanging floral installations to draw the eye upward, creating a sense of grandeur. A bride standing beneath a cascading greenery arch or a groom leaning against a textured wall with vertical lines can add height and elegance to compositions. This technique works particularly well in rooms with high ceilings, emphasizing the studio’s scale.

Negative space—the empty areas around the couple—is equally important. Avoid overcrowding frames with props or furniture. Instead, leave room for the subjects to breathe, allowing their expressions and connection to take center stage. A minimalist approach, such as positioning the couple in the center of a plain wall with a single prop like a vintage mirror or a potted plant, can create a striking, modern aesthetic.

Playing with Perspectives to Enhance Depth

Changing the photographer’s vantage point can transform a flat, static image into a dynamic portrait. Shooting from a low angle, for instance, elongates the couple’s figures and makes the ceiling appear closer, adding drama to the scene. This technique works well when the bride is seated or the groom is kneeling, as it emphasizes their height difference and creates a sense of intimacy.

Conversely, shooting from above—such as from a balcony or ladder—offers a bird’s-eye view that flattens the space, ideal for capturing symmetrical compositions or playful interactions. A couple lying on the floor surrounded by scattered petals or holding hands in a circular formation can appear whimsical and artistic when viewed from above. Ensure the studio has enough ceiling height to execute this safely and effectively.

Diagonal lines are another powerful tool for adding depth. Position the couple at an angle to the camera, with their bodies turned slightly toward or away from the lens. This creates leading lines that guide the viewer’s eye through the image, preventing it from feeling two-dimensional. For example, have the bride stand with one shoulder facing the camera while the groom stands behind her at a 45-degree angle, creating a layered, dimensional effect.

Using Lighting to Define and Shape Space

Lighting is the cornerstone of indoor photography, dictating the mood, texture, and perceived size of a studio. Natural light from large windows can create soft, flattering illumination, but its intensity varies throughout the day. Schedule key shots during morning or late afternoon when the light is gentle, or use sheer curtains to diffuse harsh midday sun. Position the couple near the window with their bodies turned toward the light to highlight facial features and create a natural glow.

Artificial lighting, such as studio strobes or continuous lights, offers more control over the environment. Use a key light to illuminate the couple’s faces, then add a fill light to soften shadows and balance the exposure. For dramatic portraits, position the key light to one side of the couple, casting deep shadows on the opposite side. This technique, called Rembrandt lighting, adds depth and mystery to the image.

Backlighting can also transform a studio shoot. Place a light source behind the couple, such as a strobe with a gel for colored effects, to create a halo of light around their silhouette. This approach works well for high-contrast shots or when the couple is wearing sheer fabrics like veils or lace. Ensure the background is dark enough to make the backlight stand out, and use a reflector or fill light to prevent the subjects from appearing too dark.

Incorporating Props and Textures to Add Context

Props and textures enrich indoor portraits by providing visual interest and context. Choose items that align with the couple’s personality or wedding theme, such as vintage suitcases for a travel-inspired shoot or antique frames for a classic aesthetic. Avoid overloading the scene; one or two well-chosen props can enhance the image without distracting from the couple. For example, a bride holding a lace parasol or a groom resting his hand on a weathered wooden door can add character to the shot.

Textures play a similar role in defining space. A studio with exposed brick walls, wooden floors, or textured drapes can create a rustic, warm atmosphere. Use these elements as backdrops for full-body shots or close-ups, allowing the couple to interact with the environment. A bride leaning against a brick wall or a groom running his fingers along a wooden beam can add authenticity to the portrait.

Mirrors are another versatile prop for indoor shoots. They can double the visual space, create reflections, or add a touch of glamour. Position a full-length mirror behind the couple to capture their reflection, or have the bride hold a handheld mirror to frame her face. This technique works particularly well in small studios, as it creates the illusion of a larger, more open environment.

Adapting to Small Studios with Clever Tricks

Not all Melbourne studios are spacious, but creativity can overcome limited square footage. Use wide-angle lenses to capture more of the room without distorting the subjects, but avoid shooting too close to prevent unflattering perspectives. Instead, step back and use the lens’s natural distortion to emphasize the studio’s unique features, such as a high ceiling or intricate molding.

Forced perspective is another small-space solution. Position the couple near the background and use a shallow depth of field to blur the surroundings, making the studio appear larger than it is. This technique works well for headshots or close-ups, where the focus remains on the couple’s expressions rather than the environment.

Finally, embrace the studio’s limitations by incorporating them into the narrative. A cramped space can evoke a sense of intimacy, as if the couple is sharing a private moment away from the world. Use tight framing to capture their hands, eyes, or subtle gestures, emphasizing their connection over the setting.

By thoughtfully structuring layouts, experimenting with perspectives, manipulating lighting, and incorporating props, photographers can turn any Melbourne studio into a versatile canvas for wedding portraits. The goal is to create images that feel both intentional and effortless, capturing the couple’s love while celebrating the studio’s unique character.

WUU01990

The way natural elements are integrated into outdoor wedding photography in Melbourne

Integrating Natural Elements into Melbourne Outdoor Wedding Photography: Creative Techniques for Authentic Imagery

Melbourne’s outdoor landscapes—from coastal stretches to lush parks—provide a stunning backdrop for wedding photography. To create images that feel both timeless and deeply connected to the environment, photographers must skillfully incorporate natural elements into compositions. Below are practical methods to weave Melbourne’s flora, water, and terrain into portraits without overpowering the couple’s story.

wedding photography melbourne

Leveraging Flora for Frame and Texture

Melbourne’s parks and gardens, such as the Royal Botanic Gardens or Fitzroy Gardens, offer abundant foliage to enhance outdoor portraits. Use tree branches, flower bushes, or vines to frame the couple naturally. For example, positioning the bride and groom beneath an archway of blossoming wisteria creates a romantic, organic border that draws the eye inward. Encourage the couple to interact with the flora—a bride tucking a flower behind her ear or a groom holding a sprig of rosemary—to add personality to the shot.

Falling leaves or petals can inject movement and whimsy into static poses. During autumn in Melbourne, capture the couple standing beneath a tree as leaves drift downward, or toss dried petals manually for a controlled effect. This technique works particularly well during golden hour, when soft light highlights the textures of both the couple’s attire and the surrounding plants.

Greenery also serves as a natural filler for empty spaces in compositions. If shooting near a hedge or tall grass, have the couple kneel or sit to balance the height of the background. This approach prevents the image from feeling top-heavy while maintaining a cohesive, earthy aesthetic.

Incorporating Water for Reflection and Drama

Melbourne’s waterfront locations, including St Kilda Beach and the Yarra River, provide opportunities to use water as a dynamic element. Reflections in calm lakes or ponds can double the visual impact of a pose. Position the couple near the water’s edge, angling the camera to capture their mirrored image below. This works best during early morning or late afternoon when light is gentle and wind is minimal, ensuring still water for clear reflections.

For more energetic shots, focus on water’s movement. A bride and groom walking along the shoreline as waves gently lap at their feet creates a sense of motion and intimacy. If shooting at the beach, use a fast shutter speed to freeze droplets mid-air during a playful splash, or a slower speed to blur water into a soft, ethereal mist.

Rain is another natural element to embrace. A light drizzle can add a romantic, moody atmosphere to portraits. Use umbrellas as props, having the couple share one or hold them at an angle to catch raindrops. Alternatively, shoot through a rain-speckled window or use a protective lens filter to capture the couple laughing in the rain, emphasizing their connection despite the weather.

Using Terrain to Add Depth and Context

Melbourne’s varied terrain—from rocky cliffs to rolling hills—offers unique opportunities to ground wedding portraits in the landscape. When shooting near cliffs, such as those in Mornington Peninsula, position the couple at the edge with the ocean stretching behind them. This creates a dramatic sense of scale while highlighting the location’s natural beauty. Ensure safety by choosing stable ground and avoiding risky poses.

Hilly landscapes, like those in the Dandenong Ranges, allow for creative angling. Have the couple stand or sit on a slope, with the photographer shooting from a lower vantage point to emphasize the elevation. This technique elongates their figures and adds grandeur to the image. For flatter areas, use leading lines—such as a path winding through a field or a row of trees—to draw the viewer’s eye toward the couple.

Urban terrain, like the cobblestone streets of Degraves Street or the graffiti-covered lanes of Hosier Lane, can also serve as a backdrop. Incorporate the environment by having the couple lean against a brick wall or sit on a set of stairs, blending the natural with the man-made. This approach works well for couples seeking a mix of rustic and modern aesthetics in their photos.

Capturing Wildlife for Spontaneity and Charm

Melbourne’s outdoor spaces are often home to wildlife, from seagulls at the beach to parrots in parks. While unplanned, incorporating animals can add a touch of spontaneity to portraits. A seagull flying overhead during a beach shoot or a kookaburra perching on a nearby branch can create a memorable, candid moment. Encourage the couple to react naturally—laughing at a bird’s call or glancing upward—to capture genuine emotion.

If wildlife is scarce, use insects or plants with interesting details, like butterflies or ferns, as subtle accents. A bride’s bouquet attracting a bee or a groom’s lapel featuring a small flower can add a layer of storytelling without distracting from the couple. These details emphasize the harmony between the humans and their environment.

Timing the Shoot to Align with Natural Phenomena

Melbourne’s ever-changing weather and light conditions offer unique photographic opportunities. Sunrise and sunset, known as golden hour, bathe scenes in warm, soft light that flatters skin tones and enhances natural colors. Schedule key portraits during these times, using the low angle of the sun to create long shadows and a golden glow.

Midday sun, while harsh for some shots, can be ideal for high-contrast images. Position the couple in shaded areas, such as beneath a tree canopy, to avoid squinting while using the bright light to highlight textures in the background. Alternatively, embrace the intensity by shooting silhouettes against a bright sky or using reflectors to bounce light onto their faces.

Fog and mist, common in Melbourne’s coastal and hilly regions, add mystery and atmosphere to portraits. Early morning shoots near the bay or in the Yarra Valley may yield ethereal conditions where the couple appears to float in a dreamlike haze. Use a wide aperture to keep the focus on the subjects while blurring the background into a soft, white veil.

By thoughtfully integrating Melbourne’s natural elements—from flora and water to terrain and wildlife—photographers can create wedding portraits that feel both rooted in place and uniquely personal. The key lies in observing the environment, adapting to its quirks, and guiding the couple to interact with their surroundings in ways that feel authentic and unforced.

WUU02194

Key points for pose guidance for indoor studio wedding photography in Melbourne

Melbourne Studio Wedding Photography Posing Guide: Essential Tips for Timeless Portraits

Studio photography in Melbourne offers a controlled environment to capture intimate, elegant wedding portraits. Unlike outdoor shoots, indoor settings allow couples to focus on expression and connection without distractions. However, mastering poses that feel natural yet polished requires understanding body language, lighting, and emotional storytelling. Below are key techniques to elevate studio posing for Melbourne’s diverse couples.

wedding photography melbourne

Creating Natural Connection Through Body Language

The foundation of compelling studio poses lies in authentic interaction between partners. Encourage couples to maintain subtle physical contact, such as holding hands, resting foreheads together, or linking arms. These gestures convey intimacy without appearing stiff. For example, a bride leaning her head on the groom’s shoulder while he wraps an arm around her waist creates a relaxed, loving dynamic.

Eye contact is equally critical. Directing couples to gaze into each other’s eyes fosters genuine emotion, but vary the intensity to avoid monotony. A soft, smiling look works for romantic shots, while a deeper, focused stare adds drama. If the couple feels self-conscious, suggest they focus on a specific feature of their partner, like the groom’s eyes or the bride’s smile, to make the connection feel more organic.

Angle and posture adjustments can also enhance connection. Positioning the couple at a slight diagonal to the camera, rather than facing it directly, creates depth and prevents flat, unflattering compositions. Have the taller partner stand slightly behind the shorter one, with their body turned toward the camera, to maintain balance and visual interest.

Playing with Light and Shadow for Dynamic Poses

Melbourne’s studio lighting setups—whether natural light from large windows or artificial sources like softboxes—offer opportunities to sculpt poses with contrast. Use light to highlight facial features and create mood. For instance, positioning the couple near a window with sheer curtains can cast a delicate, diffused glow, ideal for soft, romantic shots.

Shadows add drama when used intentionally. Place the couple so that one side of their face is illuminated while the other falls into shadow, emphasizing bone structure and emotion. A bride tilting her head slightly toward the light while the groom gazes into her eyes can create a striking interplay of light and dark.

Backlighting techniques also work well in studios. Positioning the couple with a light source behind them, such as a studio strobe, can create a halo effect around their silhouette. This approach is particularly effective for dramatic, high-contrast portraits. Encourage the couple to embrace or hold hands in front of their bodies to add texture and prevent the pose from feeling too static.

Incorporating Movement to Add Authenticity

Static poses risk appearing staged, but subtle movement can inject life into studio portraits. Start with gentle actions, like the bride adjusting her veil or the groom brushing a strand of hair from her face. These small gestures feel spontaneous and highlight the couple’s comfort with each other.

For more dynamic shots, guide the couple through slow, controlled movements. A walk-and-pause sequence, where they take a few steps toward the camera and pause to smile or laugh, can yield natural, candid frames. Alternatively, have them spin slightly in place, capturing the flow of fabrics and the joy in their expressions.

Dancing poses also work well in studios. Even without music, couples can mimic a slow dance, with the groom holding the bride’s waist and her placing a hand on his shoulder. This pose encourages fluid movement and genuine smiles, especially when photographers capture mid-laugh or a tender glance.

Using Props and Furniture to Enhance Poses

Melbourne’s studios often feature versatile props and furniture, from vintage sofas to minimalist stools. These elements provide support and context, making poses feel more natural. A bride sitting on the edge of a couch with her legs crossed, while the groom kneels beside her, creates a relaxed, conversational vibe.

Chairs and stools are particularly useful for varying heights and angles. Have the bride sit backward on a chair, resting her arms on the back, while the groom stands behind her with his hands on her shoulders. This pose elongates her neck and adds a playful, flirtatious energy. For taller couples, a step stool can help balance heights without forcing awkward postures.

Props like bouquets, hats, or signage also add personality. Encourage the bride to hold her bouquet at waist level, angled slightly away from her body, to avoid covering her dress. The groom can hold his jacket or a pocket square, adding a touch of sophistication. These details ground the poses in the wedding’s theme while keeping hands occupied naturally.

Guiding Individual Poses for Flattering Angles

While couple poses are central to wedding photography, individual shots deserve equal attention. For the bride, guide her to turn her body slightly to the side, with her shoulders down and chin tilted forward to elongate her neck. A hand on the hip or gently touching her hair adds grace without stiffness.

The groom benefits from a relaxed stance, with weight shifted to one leg and his hands in pockets or loosely by his sides. Avoid having him stand straight on, as this can appear rigid. Instead, suggest he lean against a wall or prop his elbow on a nearby surface for a casual, confident look.

Facial expressions are key in individual poses. Encourage the bride to smile softly with her eyes, avoiding a forced grin. The groom can adopt a subtle smirk or a thoughtful gaze, depending on his personality. Capturing a mix of serious and playful expressions ensures a versatile gallery.

By focusing on connection, light, movement, and context, Melbourne studio photographers can guide couples into poses that feel authentic and visually striking. The goal is to create portraits that reflect the couple’s unique bond while leveraging the studio’s controlled environment to its fullest potential.

WUU02764

The efficiency of outdoor scene switching for wedding photography in Melbourne has been improved

Streamlining Outdoor Scene Transitions for Melbourne Wedding Photography: Enhancing Efficiency Without Sacrificing Creativity

Melbourne’s diverse landscapes—from coastal cliffs to urban laneways—offer endless possibilities for outdoor wedding photography. However, switching between scenes efficiently is crucial to maximize shooting time, especially during the city’s notoriously unpredictable weather. Below are strategies to optimize transitions, ensuring couples capture every desired shot without unnecessary delays.

Pre-Shoot Planning: Mapping Locations and Logistics

Thorough pre-shoot planning is the foundation of seamless scene transitions. Begin by scouting Melbourne’s outdoor venues in advance, identifying key spots within walking distance or a short drive. For example, a ceremony at Fitzroy Gardens could transition to a portrait session in nearby Treasury Gardens, minimizing travel time. Use digital mapping tools to visualize routes and estimate walking times between locations, accounting for Melbourne’s hilly terrain or crowded streets during peak hours.

Create a prioritized shot list that groups similar scenes together. If a couple desires both urban and natural backdrops, schedule cityscape shots in the morning when light is soft, then move to parks or beaches in the late afternoon for golden-hour portraits. Communicate this timeline clearly with the couple and any assistants, ensuring everyone understands the flow and reduces on-site decision-making.

Lightweight Gear Organization: Minimizing Setup Time

Efficient gear management is critical for quick scene changes. Invest in a modular camera bag system that allows photographers to access lenses, filters, and lighting equipment rapidly. For example, keep a dedicated pouch for prime lenses used in outdoor portraits, separate from zoom lenses for dynamic shots. Labeling gear compartments or using color-coded straps can further speed up retrieval.

When shooting in Melbourne’s variable weather, prepare for sudden changes by packing waterproof covers for cameras and quick-dry cloths for lenses. If transitioning from a sunny beach to a shaded forest, adjust camera settings (such as ISO and aperture) in advance to avoid missed shots during reconfiguration. Assign an assistant to handle gear swaps, freeing the photographer to focus on composition and directing the couple.

Transportation Strategies: Navigating Melbourne’s Terrain

Melbourne’s sprawling layout demands smart transportation choices. For venues spread across suburbs like St Kilda and Brighton, consider renting a compact vehicle with ample trunk space for gear. Alternatively, use public transport for central locations like the CBD or Docklands, but account for potential delays during peak commutes.

For back-to-back shoots in the same neighborhood, such as moving from a café in Degraves Street to a nearby alleyway for street-art portraits, opt for walking or cycling. This approach not only saves time but also adds a spontaneous, local flavor to the images. If driving is unavoidable, park in centralized locations and use trolleys or rolling cases to transport gear short distances.

Wardrobe and Prop Coordination: Reducing Downtime

Smooth wardrobe and prop transitions prevent lulls during scene changes. Encourage couples to pack outfits in labeled garment bags, grouping items by location (e.g., beach attire in one bag, urban outfits in another). For props like bouquets, hats, or signage, use sturdy containers that can be carried easily between spots.

If the couple plans multiple outfit changes, schedule them strategically. For instance, a gown swap could occur during a midday break when light is harsh, allowing time for adjustments while avoiding suboptimal shooting conditions. Assign a bridesmaid or family member to manage wardrobe changes, ensuring the couple remains focused on posing and emotion.

Time-Saving Posing Techniques: Maximizing Shooting Efficiency

Efficient posing reduces the need for repeated takes, freeing up time for scene transitions. Begin with group shots to capture formal portraits early in the session, then move to couple-focused poses that require less coordination. Use natural landmarks in Melbourne’s outdoor settings—such as leaning against a historic tram or sitting on Yarra River steps—to create relaxed, authentic poses without extensive direction.

Incorporate movement to add variety quickly. A simple walk-and-talk sequence through a laneway or along the beach can yield multiple usable frames in minutes. For static poses, use a “pose, shoot, adjust” rhythm: take a few shots, tweak the couple’s positioning slightly, and repeat. This method ensures a steady flow of images while minimizing downtime.

Contingency Plans: Adapting to Melbourne’s Weather

Melbourne’s weather can disrupt even the best-laid plans, making contingency strategies essential. Monitor forecasts closely and identify backup indoor locations near primary outdoor spots. For example, if rain threatens a beach shoot, pivot to a nearby café with large windows or a heritage building with verandas.

Communicate weather-related changes promptly with the couple, explaining how adjustments will maintain the session’s flow. Use rain as an opportunity for creative shots, such as capturing reflections in puddles or using umbrellas as props. If extreme weather forces a complete relocation, prioritize scenes that align with the couple’s vision while respecting time constraints.

By integrating these strategies, Melbourne wedding photographers can navigate outdoor scene transitions with precision, ensuring couples receive a diverse, high-quality gallery without unnecessary delays. The key lies in balancing preparation with adaptability, turning logistical challenges into opportunities for unique, memorable imagery.