DSC02847

The process of selecting wedding photography clothing in Melbourne

Navigating the Wedding Attire Selection Process for Melbourne Photoshoots

Choosing the right outfits for a Melbourne wedding photoshoot involves balancing personal style, location aesthetics, and practical considerations. The city’s diverse settings—from coastal beaches to urban streets—demand attire that complements the backdrop while reflecting the couple’s vision. A structured approach to outfit selection ensures harmony between clothing, environment, and mood, resulting in photos that feel cohesive and authentic. Here’s a step-by-step guide to simplifying the process.

wedding photography melbourne

Understanding the Photoshoot’s Aesthetic and Location

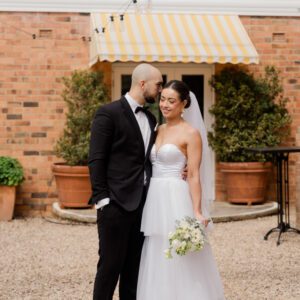
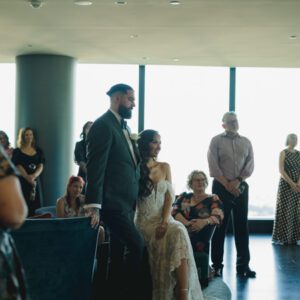
Begin by revisiting the agreed-upon style and locations for the shoot. A beach session in St Kilda calls for lightweight, flowing fabrics that move with the breeze, such as linen or chiffon, while a historic venue like Como House might suit elegant, structured silhouettes like tailored suits or ball gowns. Discuss how each location’s colors and textures will interact with the outfits. For example, earthy tones blend seamlessly into the Yarra Valley’s greenery, whereas bold hues pop against the CBD’s neutral concrete.

Consider the time of day and weather conditions. Morning shoots in the Royal Botanic Gardens may require layers to stay warm, while midday beach sessions demand breathable materials to avoid discomfort. If the shoot spans multiple locations, prioritize versatile pieces that transition well between settings. A jumpsuit or a dress with detachable sleeves can adapt to changing environments without requiring full wardrobe changes.

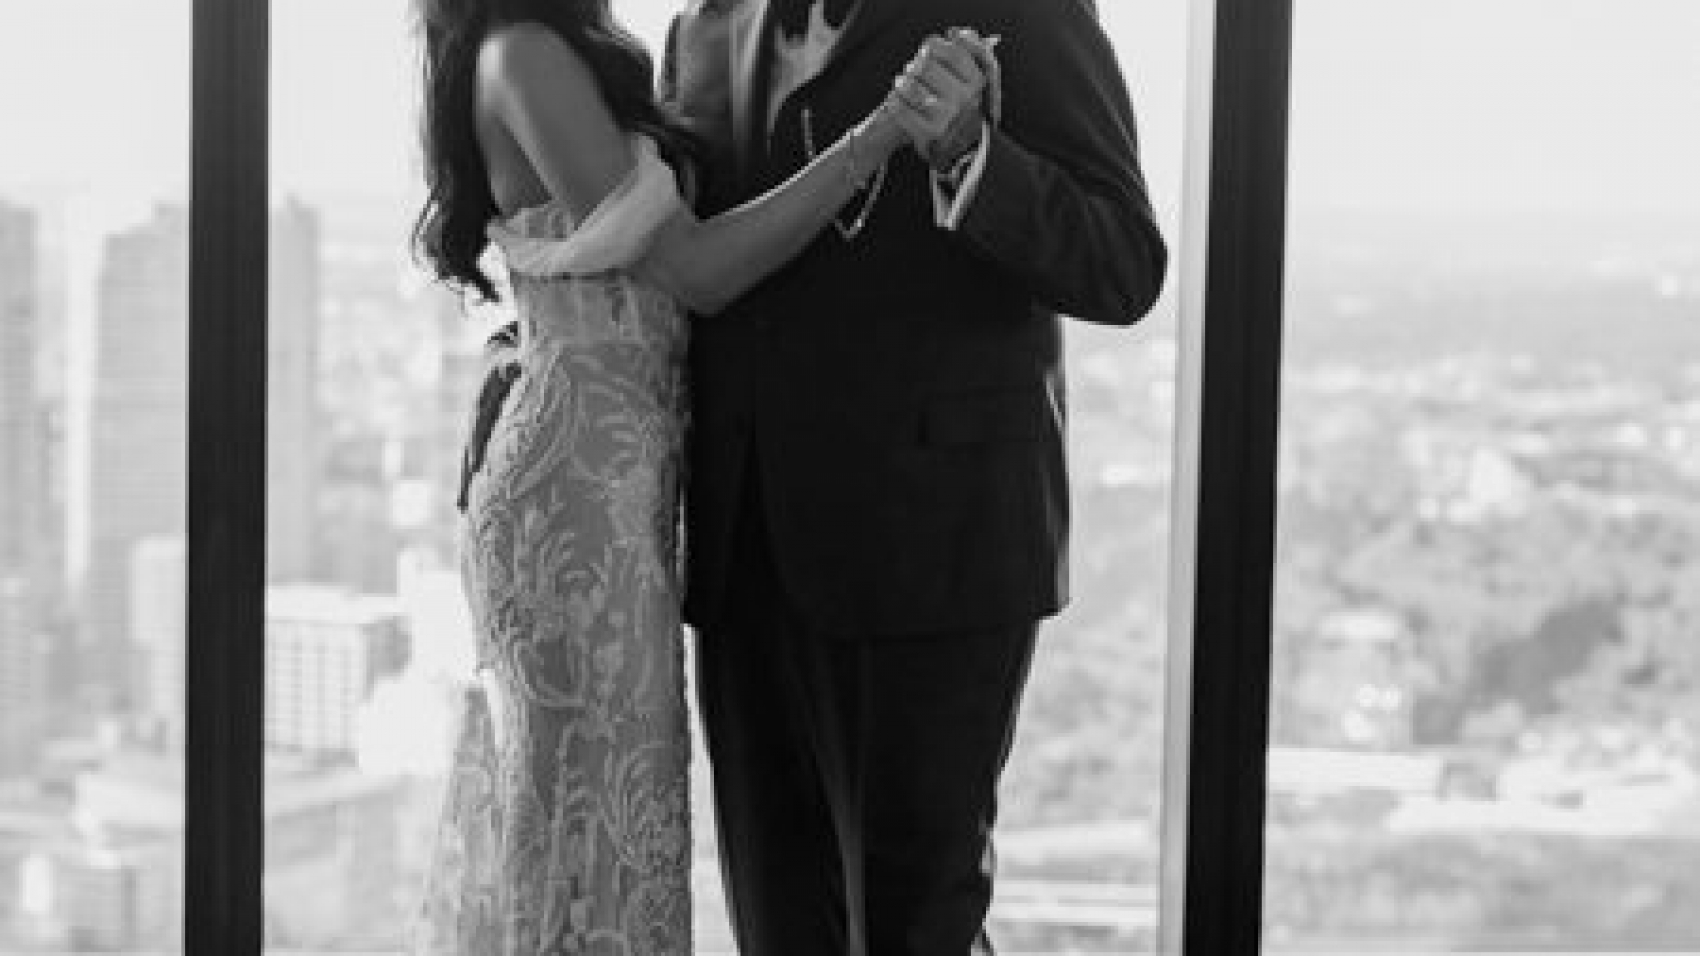
Finally, align outfits with the shoot’s overall mood. Soft, romantic themes pair well with delicate lace or pastel shades, while edgy, modern vibes suit monochromatic palettes or unconventional cuts. Share inspiration images with your photographer to ensure your choices resonate with the visual narrative you’ve planned.

Coordinating Outfits Between Partners Without Matching Exactly

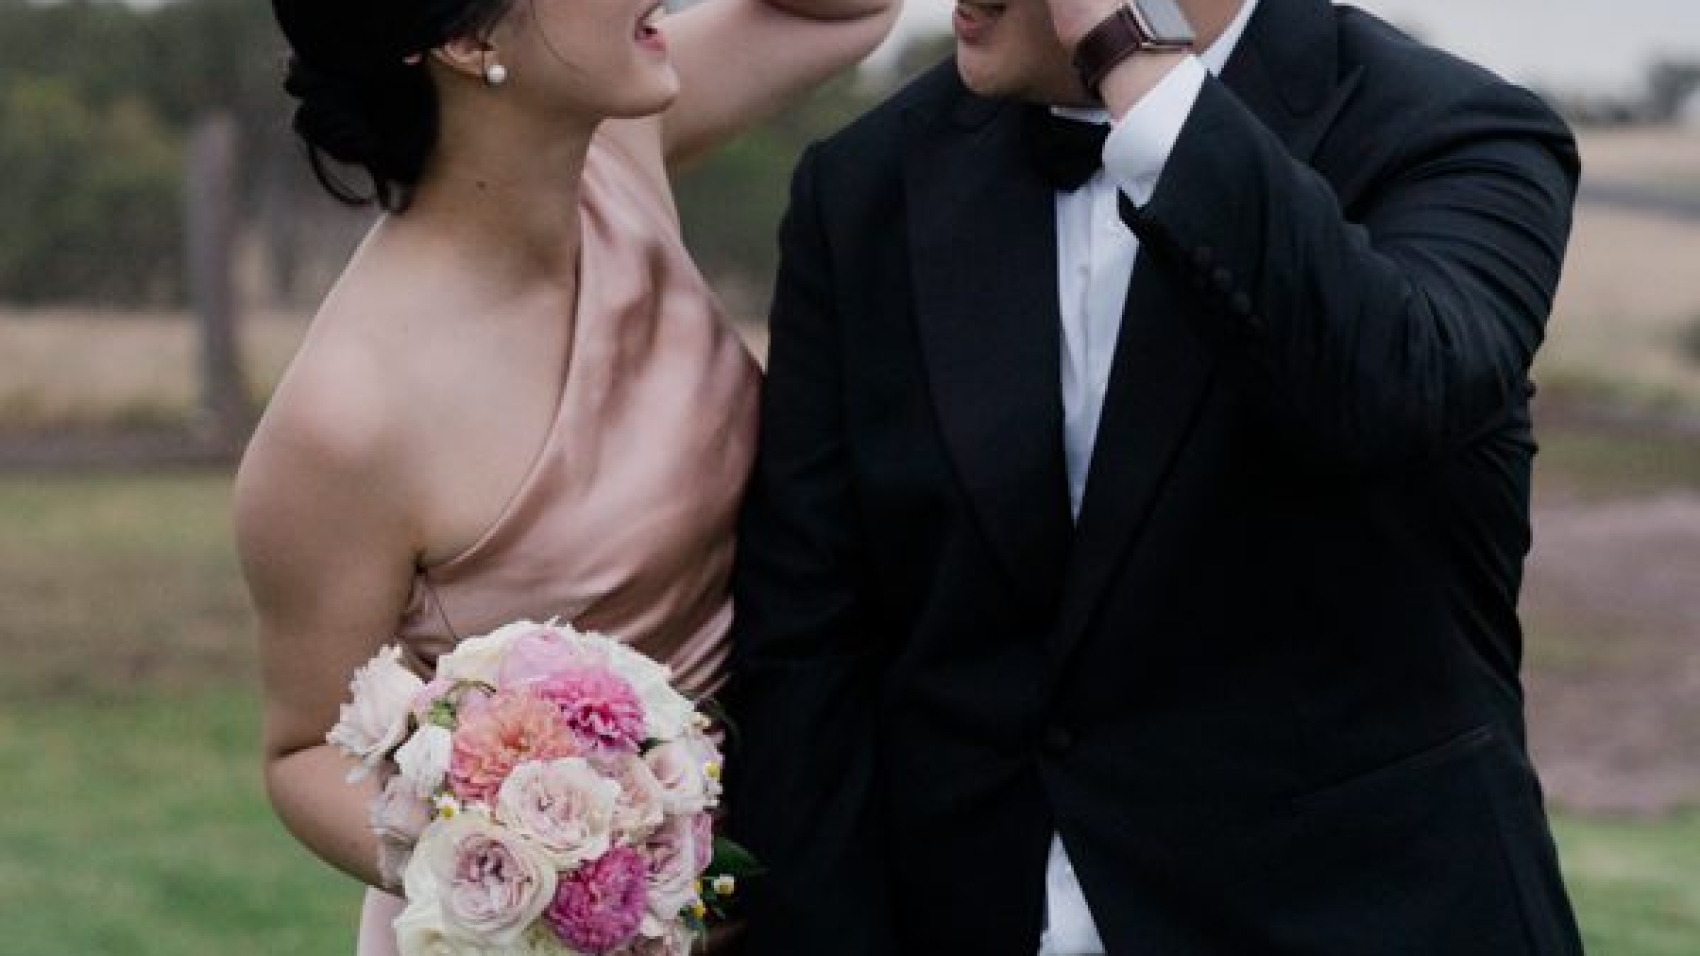
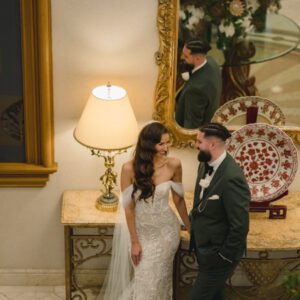
Striking a balance between coordination and individuality is key to creating visually appealing photos. Instead of identical outfits, focus on complementary elements like color palettes, fabric textures, or style themes. For instance, if one partner wears a floral-patterned dress, the other could opt for a solid-colored suit in a shade pulled from the print. This creates harmony without sacrificing personal flair.

Pay attention to formalities. If one partner chooses a formal gown, the other should avoid overly casual attire like jeans or sneakers. A tailored suit or a dressy jumpsuit maintains equilibrium while allowing room for personal expression. Discuss accessories, too—a statement necklace or a patterned tie can tie two looks together subtly.

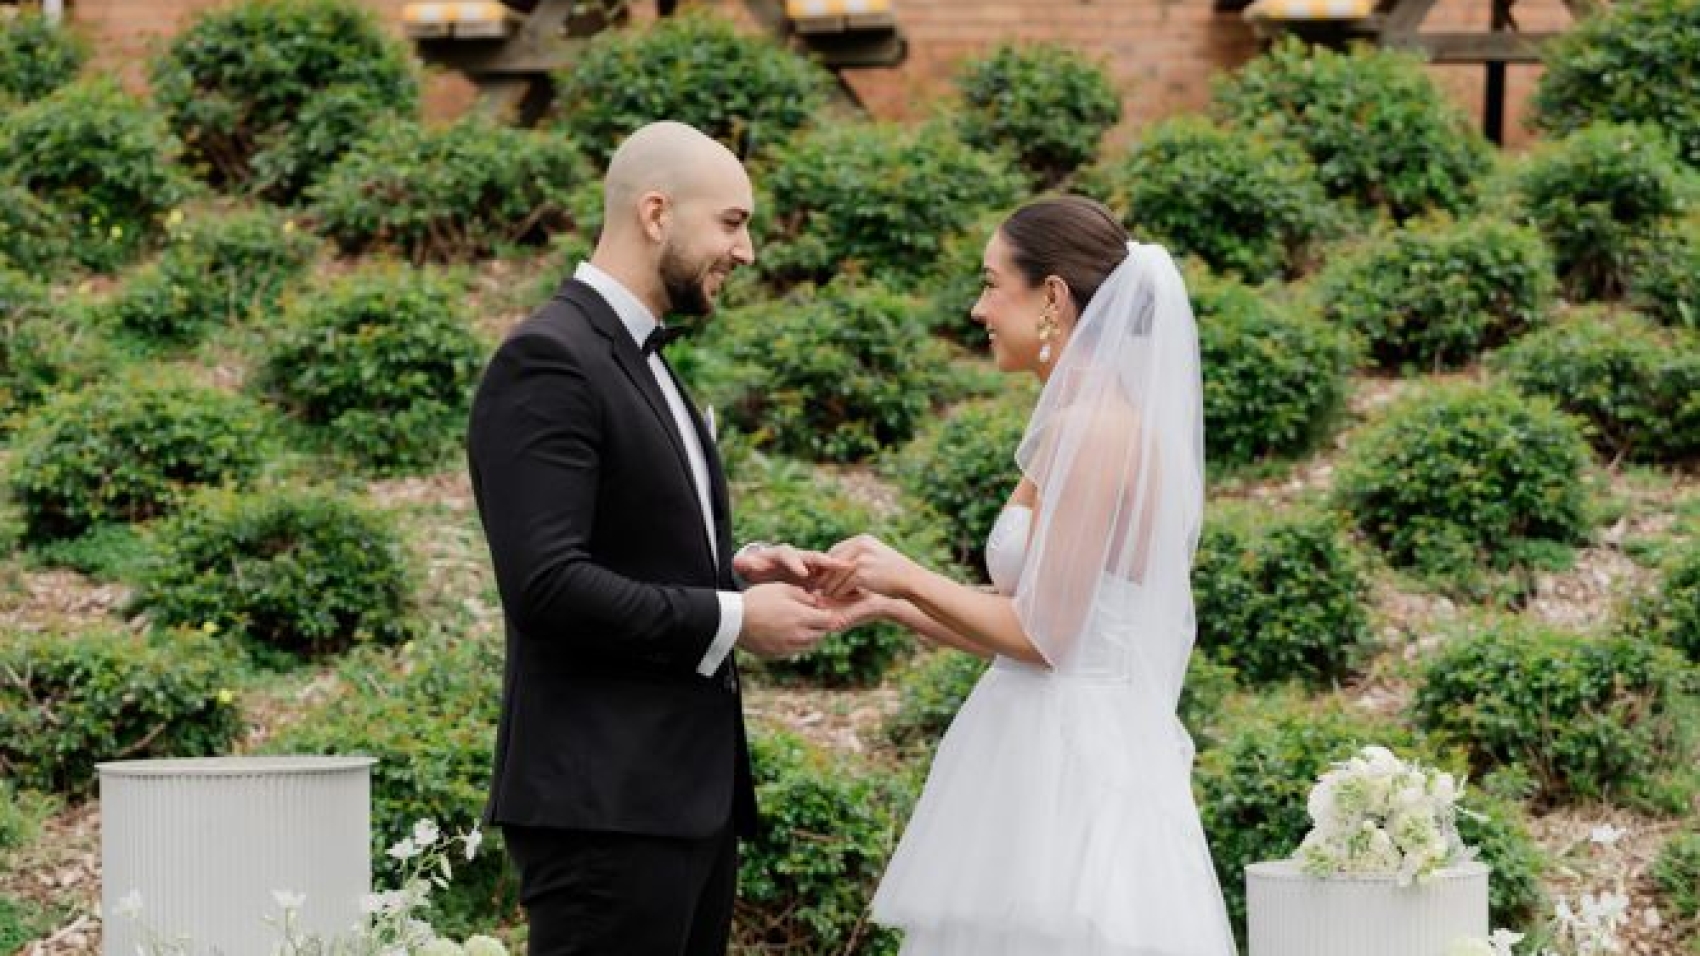
Consider the shoot’s narrative when coordinating outfits. If the theme is “timeless elegance,” both partners might lean toward classic silhouettes in neutral tones. For a “bohemian adventure” vibe, flowy fabrics and earthy colors can unify the looks. Share your ideas with your photographer, who can offer insights on how outfits will photograph together and suggest adjustments if needed.

Prioritizing Comfort and Practicality for Long Sessions

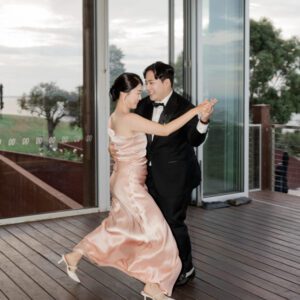
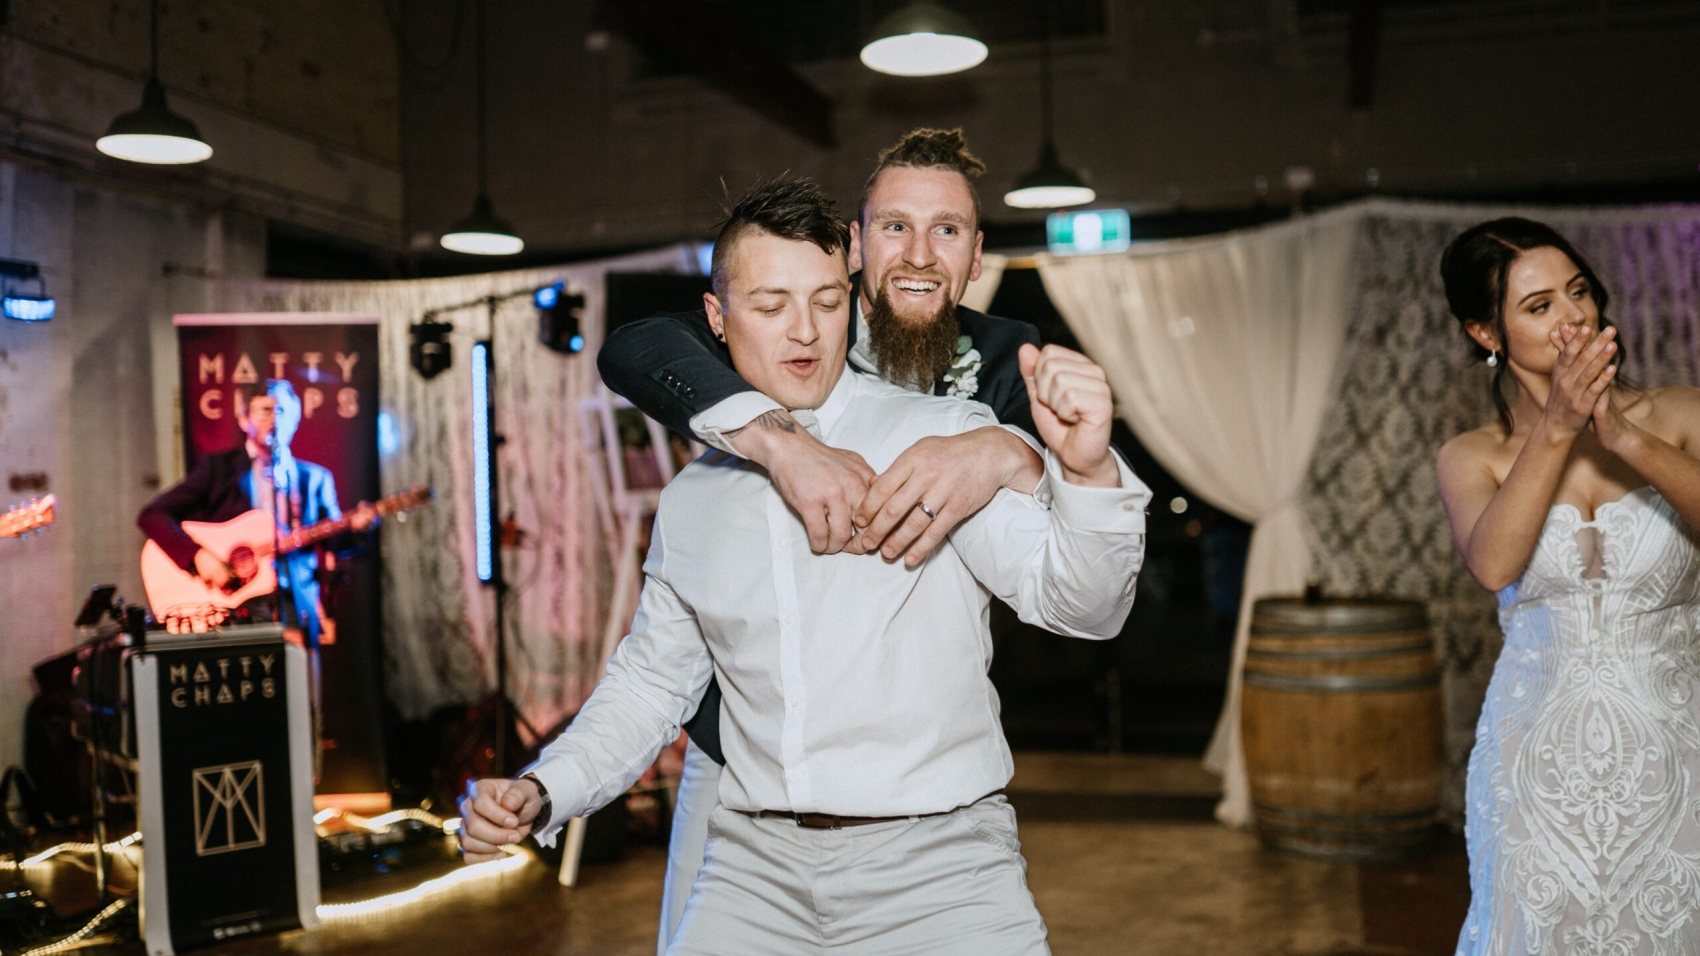
A wedding photoshoot often lasts several hours, so comfort is non-negotiable. Avoid stiff, restrictive clothing that limits movement or causes discomfort. Opt for breathable, stretchy fabrics that allow you to sit, walk, and pose freely. For example, a mermaid-style gown with a flexible waistband might be more comfortable than a corseted design for a day-long shoot.

Test outfits beforehand by wearing them around the house or for a short outing. Notice how they feel during activities like sitting, bending, or dancing. If a dress rides up or a suit jacket feels scratchy, reconsider the choice. Bring backup options like a shawl or a cardigan for outdoor shoots in cooler weather, and ensure shoes are broken in to prevent blisters.

Practicality extends to logistics, too. Choose outfits that are easy to change into if the shoot involves multiple locations. Dresses with zippers or suits with elasticated waistbands simplify quick transitions. If you’re wearing heels, pack flats for walking between sites to avoid fatigue. Let your photographer know about any practical concerns so they can plan shoot locations and timing accordingly.

Finalizing Choices and Planning for Contingencies

Once you’ve narrowed down your options, do a trial run with hair, makeup, and accessories to see how everything comes together. Photograph yourself in natural light to assess how colors and textures appear on camera. Share these trial photos with your photographer for feedback—they might suggest tweaks like adjusting a hemline or swapping a belt for better visual balance.

Create a checklist of all outfit components, including undergarments, shoes, and accessories, to avoid last-minute omissions. Pack extras like safety pins, fabric tape, or a sewing kit for minor repairs on the day. If you’re renting or borrowing items, confirm return policies and insurance coverage in case of damage.

Finally, discuss contingency plans with your photographer. Weather changes or unexpected wardrobe malfunctions might require adjustments, like moving an outdoor shoot indoors or switching to backup outfits. Flexibility ensures the shoot stays on track, even if plans shift. By prioritizing comfort, coordination, and practicality, you’ll create a wardrobe that enhances your Melbourne wedding photoshoot without overshadowing the moment.

Evermore_weddings_Jack_Rabbit_Winery-80

Communication steps for wedding photography styles in Melbourne

Effective Communication Steps for Defining Wedding Photoshoot Styles in Melbourne

Capturing a couple’s vision for their Melbourne wedding photoshoot requires clear, collaborative communication about style preferences. From coastal elegance to urban edginess, the city’s diverse backdrops demand alignment on aesthetics, mood, and practical details. Miscommunication can lead to mismatched expectations, so structuring conversations around key themes ensures both clients and photographers stay on the same page. Here’s how to navigate style discussions for a seamless experience.

wedding photography melbourne

Initiating the Conversation with Inspiration Gathering

Start by encouraging couples to collect visual references that resonate with them. Suggest they browse platforms like Pinterest, Instagram, or wedding blogs to curate mood boards featuring colors, poses, and settings they love. For example, a board might include soft pastel hues for a romantic vibe or bold contrasts for a modern look. These references act as a visual starting point, helping photographers grasp the couple’s tastes without relying on vague descriptions like “dreamy” or “classic.”

Ask clients to note specific elements they admire in each image. Do they prefer candid moments or posed shots? Are they drawn to natural light or dramatic studio lighting? Highlighting these details helps narrow down styles—such as documentary-style photography versus fine art—and ensures both parties prioritize the same features. Encourage couples to share images that don’t appeal to them, too, to avoid missteps.

Finally, discuss the couple’s personalities and relationship dynamics. A playful, outgoing pair might thrive in dynamic, action-packed shots, while introverted clients may prefer quiet, intimate compositions. Linking style choices to their unique bond ensures photos feel authentic and reflective of their story.

Exploring Melbourne’s Unique Settings and Their Stylistic Impact

Melbourne’s geography offers a wealth of stylistic opportunities, from coastal landscapes to urban grit. Guide couples through how different locations influence a photoshoot’s aesthetic. For instance, a beach shoot in St Kilda lends itself to airy, light-filled images with soft sand and ocean blues, while a CBD session in Degraves Street’s laneways creates a moody, artistic vibe with graffiti and textured brickwork.

Discuss how weather and time of day shape each location’s mood. Early morning light in the Royal Botanic Gardens casts a golden glow perfect for romantic portraits, while sunset at Brighton Beach adds warmth to candid moments. Conversely, overcast skies in the Dandenong Ranges can create dramatic, moody tones for couples seeking a bold, editorial look. Aligning location choices with desired aesthetics ensures consistency across shots.

Encourage couples to consider practical factors like crowd levels and accessibility. Popular spots like Flinders Street Station may require strategic timing to avoid tourists, while remote areas like the Mornington Peninsula offer privacy but demand travel planning. Balancing stylistic preferences with logistical ease prevents stress on the wedding day.

Refining Details: Poses, Lighting, and Post-Production Preferences

Once the overarching style is clear, dive into specifics like posing, lighting, and editing. Ask clients how they envision interacting during the shoot—do they want structured, guided poses or spontaneous, natural interactions? Some couples may prefer traditional, timeless compositions, while others might crave quirky, playful arrangements that showcase their chemistry.

Lighting plays a pivotal role in defining mood. Discuss preferences for natural light versus artificial setups. A couple aiming for a soft, ethereal look might prioritize golden hour shoots, while those seeking high-contrast, dramatic images could opt for indoor studio sessions with controlled lighting. For outdoor shoots, plan backup strategies for unexpected weather, like using reflectors or diffusers to manage harsh sunlight.

Post-production editing is another critical area. Clarify expectations around color grading, contrast, and retouching. Some clients prefer vibrant, saturated tones for a lively feel, while others lean toward muted, desaturated palettes for a vintage or minimalist aesthetic. Address retouching boundaries, too—whether to preserve natural skin textures or smooth imperfections—to ensure the final images align with the couple’s vision.

Finalizing Agreements and Setting Expectations

After discussing styles, poses, and editing, summarize key decisions in writing. Outline the agreed-upon aesthetic, locations, timing, and any special requests (e.g., incorporating heirloom props or pets). This document serves as a reference point to prevent misunderstandings and ensures both parties are accountable for their roles.

Encourage open dialogue throughout the process. Let clients know they can voice concerns or adjust preferences as the wedding date approaches. Flexibility is key, especially if weather or unforeseen circumstances force changes to the plan. Reassure them that minor tweaks won’t compromise the overall style but will enhance the final results.

Finally, schedule a pre-wedding consultation to review the plan and address last-minute questions. This meeting builds trust and confirms everyone is aligned before the big day. By prioritizing communication at every stage, couples and photographers can collaborate to create wedding photos that truly reflect their unique love story in Melbourne’s vibrant setting.

71407_Farm_Vigano_SELECTION_0007

The pre-scene investigation process for wedding photography in Melbourne

Pre-Wedding Photoshoot Location Scouting Process in Melbourne

Planning a wedding photoshoot in Melbourne requires meticulous location scouting to ensure every frame captures the city’s unique charm. From coastal vistas to urban landmarks, Melbourne offers diverse backdrops, but each site demands careful evaluation for logistics, lighting, and aesthetic appeal. A structured scouting process helps couples and photographers identify ideal spots while anticipating challenges like weather, permits, or crowd control. Here’s a step-by-step guide to navigating Melbourne’s most picturesque locales.

wedding photography melbourne

Identifying Potential Locations Based on Themes and Vibes

Start by defining the photoshoot’s aesthetic goals. Do you envision romantic coastal scenes, urban chic portraits, or rustic natural settings? Melbourne’s districts cater to varied themes: St Kilda Beach suits breezy, casual vibes, while the CBD’s historic laneways offer gritty, artistic backdrops. For lush greenery, the Royal Botanic Gardens or Dandenong Ranges provide serene options. List 3–5 primary locations that align with your vision, then research their accessibility and restrictions.

Consider the time of year and day for each site. Summer shoots in Brighton Beach might face harsh midday sunlight, while autumn in the Yarra Valley offers soft, golden light. Early mornings or late afternoons often yield the best lighting, but some locations (e.g., popular landmarks) may be crowded during these times. Scout each spot at your intended shoot time to assess crowd levels and lighting conditions.

Finally, evaluate the emotional resonance of each location. A spot with personal significance—like where the couple met or a favorite café—adds authenticity to photos. Balance sentimentality with practicality; a meaningful but noisy location might require backup plans for quieter shots.

Assessing Logistical Feasibility and Accessibility

Once you’ve shortlisted locations, dive into logistics. Check parking availability, especially in busy districts like Carlton or Southbank. Limited parking can delay setup or force gear-heavy teams to haul equipment long distances. For beach shoots, verify whether vehicles can access sandy areas or if you’ll need to carry gear from parking lots.

Public transport accessibility is crucial for clients or teams relying on trains or trams. Locations near stations (e.g., Flinders Street Station for urban shoots) simplify travel, but remote areas like the Mornington Peninsula may require ride-sharing services. Note transit schedules, especially for weekend shoots when services might be reduced.

Permits and regulations vary by location. Public parks like Fitzroy Gardens may require booking permits for professional photography, while historic sites like St Paul’s Cathedral have strict rules about tripods or commercial use. Contact local councils or property managers in advance to avoid last-minute cancellations. Some beaches also restrict photography during peak tourist seasons or events.

Evaluating Lighting, Weather, and Environmental Factors

Melbourne’s climate demands flexible planning. Coastal areas like Williamstown are prone to sudden wind gusts that can disrupt hair or fabrics, while inland districts like the Dandenong Ranges experience cooler temperatures year-round. Check weather forecasts a week before scouting and have indoor backup venues in mind if rain is likely.

Lighting quality varies dramatically across districts. Open spaces like Albert Park Lake offer even, natural light, but urban shoots in narrow laneways may struggle with harsh shadows. Scout locations during your intended shoot time to see how sunlight interacts with surfaces—brick walls, for example, can create warm reflections or deep contrasts.

Environmental noise is another consideration. Busy areas like Degraves Street or Bourke Street Mall have constant background chatter, which might affect audio recordings if you plan to capture vows or interviews. For quieter shots, explore lesser-known alleys or early-morning sessions before crowds arrive.

Testing Gear and Composition at Each Site

Bring a basic camera setup during scouting to test framing and angles. Capture test shots at different times of day to see how light shifts across the scene. For example, a spot facing west might look flat in the morning but glow during sunset. Note any obstructions like power lines, trees, or construction that could ruin shots later.

Experiment with compositions that highlight the location’s unique features. A bench in a park can serve as a prop for intimate moments, while a graffiti wall in Hosier Lane adds urban edge. Consider how clients will move through the space—wide pathways allow for dynamic walking shots, while cramped areas might limit poses.

Finally, assess the site’s versatility. Can it accommodate multiple outfit changes or theme shifts? A single location with varied backdrops (e.g., a garden with a pond, a stone archway, and open lawns) reduces travel time between shots. If a site feels too one-dimensional, prioritize others that offer creative flexibility.

Finalizing Locations and Creating a Contingency Plan

After scouting, narrow your list to 2–3 primary locations and 1–2 backups. Share options with clients, highlighting pros and cons like lighting, crowd levels, and travel time. Once selections are made, draft a detailed itinerary with addresses, parking tips, and permit details.

Develop a contingency plan for bad weather or unexpected closures. Indoor venues like galleries, cafés, or studios can mimic outdoor themes (e.g., a rustic café for a countryside vibe). Keep a list of emergency contacts, including local transport services or nearby vendors who can provide last-minute assistance.

By following this structured scouting process, couples and photographers can transform Melbourne’s diverse landscapes into timeless wedding memories. Thorough preparation ensures every shot reflects the city’s beauty while minimizing stress on the big day.

71407_Farm_Vigano_SELECTION_0060

Emergency touch-up tools for wedding photography in Melbourne

Essential Emergency Touch-Up Tools for Melbourne Wedding Photoshoots

A Melbourne wedding photoshoot demands flawless makeup that withstands the city’s unpredictable weather, from coastal breezes to urban humidity. Even with professional application, factors like tears, sweat, or sudden rain can disrupt your look. Carrying a compact, versatile emergency makeup kit ensures you stay camera-ready throughout the day, whether shooting by the Yarra River or atop a CBD rooftop. Here’s how to assemble a practical, climate-proof touch-up arsenal.

wedding photography melbourne

Building a Weather-Resistant Base Layer

Melbourne’s variable climate means your foundation must adapt to shifting conditions. Opt for a long-wear, matte formula that resists oil and humidity, ideal for summer shoots in districts like St Kilda or Southbank. For cooler, windier days in areas such as the Dandenong Ranges, choose a hydrating foundation with a dewy finish to prevent flakiness. Pack a small, travel-sized bottle of setting spray to lock in your base—a matte spray combats shine, while a hydrating mist refreshes dry patches without disturbing makeup.

Concealer is another critical tool for hiding blemishes, dark circles, or redness. Select a creamy, high-coverage formula that blends seamlessly and stays put under masks or headpieces. A tiny jar of color-correcting concealer (e.g., green for redness, peach for dark circles) can neutralize stubborn discoloration before applying foundation. Keep both concealers in your kit for quick fixes during transitions between locations.

Powder plays a dual role in controlling shine and setting makeup. A translucent loose powder is ideal for most skin tones, as it doesn’t alter your foundation’s color. For oily skin, a pressed powder with oil-absorbing properties can touch up T-zone areas without caking. Use a small, fluffy brush to apply powder lightly—overdoing it can create a dry, aged appearance in photos.

Tackling Common Makeup Mishaps On the Go

Tears of joy or windy conditions can smudge eyeliner or mascara, requiring immediate attention. Pack waterproof eyeliner and mascara to minimize smudging, but keep a cotton swab dipped in micellar water for quick corrections. For raccoon eyes, gently swipe the inner corners of your lids to remove excess product without ruining the rest of your eye makeup.

Lip color fading or transferring onto teeth is another frequent issue. Choose long-wearing lip stains or matte liquid lipsticks that resist feathering and drinking. A lip liner in a matching shade can prevent color from bleeding outside the lip line. Carry a small mirror and a tissue to blot lips after eating or drinking, then reapply color sparingly to maintain a natural finish.

Blush and bronzer can disappear after hours of shooting, especially in cold or windy weather. Cream blushes blend seamlessly into the skin and last longer than powders, but a powder blush in a similar shade can refresh your look without adding shine. For bronzer, a matte formula with a neutral undertone complements most skin tones and adds warmth without looking muddy. Use a small, angled brush to apply blush to the apples of your cheeks and bronzer to the hollows of your cheeks for a sculpted effect.

Adapting to Melbourne’s Unique Environmental Challenges

Coastal shoots near Brighton Beach or Williamstown expose skin to saltwater spray and sand, which can cling to makeup and cause irritation. A gentle, fragrance-free facial mist can hydrate skin and remove debris without stripping makeup. Pack a pack of oil-absorbing sheets to blot excess oil without disturbing your base, especially in humid conditions.

Urban shoots in the CBD or Fitzroy often involve walking between locations, leading to sweat or friction from clothing. Antiperspirant wipes can keep underarms dry, while a small tube of hand cream prevents chapped skin from frequent hand washing. For shoots in grassy areas like the Royal Botanic Gardens, carry a travel-sized insect repellent to avoid bites that could swell or itch in photos.

If shooting in windy districts like the Docklands or along the Maribyrnong River, secure hairpieces or veils with strong bobby pins or hairspray to prevent them from shifting. A small comb and hairspray can tame flyaways or restyle hair after helmet or hat removal for bike-themed shoots.

Organizing Your Kit for Efficiency and Accessibility

A well-organized emergency kit saves time during touch-ups. Use a clear, zippered pouch to store liquids and powders, separating them from brushes and tools to avoid spills. Label each compartment or use small, resealable bags to group similar items (e.g., eye products, lip tools, skincare).

Include a compact mirror with magnification for precise application, especially when fixing eyeliner or lipstick. A set of travel-sized brushes (blush, eyeshadow, powder) ensures you can apply products evenly without using fingers, which can transfer oils onto the skin. Disposable sponges or wedges are handy for blending concealer or foundation in a pinch.

Finally, pack a few essential skincare items to address sudden dryness or irritation. A travel-sized moisturizer, lip balm, and soothing facial wipes can refresh skin between shots without requiring a full skincare routine. If you have sensitive skin, include a small tube of hydrocortisone cream for unexpected rashes or bites.

By assembling a thoughtful, climate-proof emergency makeup kit, you’ll stay confident and camera-ready throughout your Melbourne wedding photoshoot. Prioritize multi-use products, organize tools efficiently, and adapt to the city’s environmental quirks to ensure every shot captures your best self.

71407_Farm_Vigano_SELECTION_0035

Reserve time for cross-regional shooting in Melbourne

Planning Time Buffers for Cross-District Photoshoots in Melbourne

Capturing Melbourne’s diverse landscapes—from the bustling CBD to the serene Dandenong Ranges—requires meticulous scheduling to account for travel delays, lighting changes, and unexpected challenges. Cross-district photoshoots often involve navigating traffic, public transport gaps, or weather shifts, all of which can disrupt timelines. By strategically allocating time buffers, photographers and clients can ensure a smooth experience without sacrificing creative flexibility. Here’s how to optimize your schedule for Melbourne’s unique geography.

wedding photography melbourne

Understanding Melbourne’s Traffic and Transit Patterns

Melbourne’s layout spans sprawling suburbs connected by a mix of highways, trams, and trains, each with its own peak-hour quirks. The CBD and inner-city areas like Southbank or Docklands experience heavy congestion during morning and evening rush hours (7–9 AM and 4–6 PM), which can double travel times between locations. If your shoot includes stops in these zones, plan to arrive early or reschedule sensitive segments (e.g., golden-hour portraits) to avoid delays.

Public transport, while reliable, isn’t immune to disruptions. Tram and train lines occasionally face delays due to maintenance or signal issues, especially on weekends. For shoots relying on trains to reach outer districts like Brighton or Williamstown, check real-time updates via Melbourne’s official transit apps and add a 15–20 minute buffer to account for potential holdups.

Accounting for Lighting and Weather Variability

Melbourne’s infamous “four seasons in one day” climate demands adaptive scheduling. Sudden rain showers or cloud cover can alter lighting conditions, forcing you to rethink shot lists or locations. For example, a shoot planned for St Kilda Beach at sunset might need a backup indoor spot nearby if storm clouds roll in. Always scout backup venues close to your primary locations to minimize travel time during weather shifts.

Lighting changes throughout the day also impact your timeline. Midday sunlight in districts like Carlton or Fitzroy can create harsh shadows, requiring diffusers or repositioning subjects. If you’re shooting in multiple districts with varying sunlight exposure (e.g., shaded parks vs. open streets), allocate extra time to adjust equipment or wait for softer light. For golden-hour shots, arrive at least 30 minutes early to set up, as the sun sets faster near the coast or in elevated areas like the Yarra Valley.

Managing Setup and Transition Times Between Locations

Every location change involves packing gear, traveling, and unpacking—tasks that often take longer than anticipated. Factor in 10–15 minutes per transition for small teams or 20–30 minutes for larger setups with lighting equipment or props. For example, moving from a CBD rooftop to a hidden laneway in Degraves Street requires descending buildings, navigating crowds, and repositioning tripods, all of which eat into your shooting window.

If your shoot involves multiple outfits or themes, build in buffer time for costume changes or hair/makeup touch-ups. A 10-minute gap between looks prevents rushed transitions, especially if clients need to change in public spaces or vehicles. For elaborate setups (e.g., drone shots or large group arrangements), add an extra 20–30 minutes to account for technical adjustments or reshoots.

Navigating Melbourne’s Hidden Geographic Challenges

Some districts pose unexpected logistical hurdles. The Yarra River’s winding paths, for instance, can add 10–15 minutes to walks between shoot spots, even if they seem close on a map. Similarly, the Dandenong Ranges’ narrow, winding roads slow down travel, especially during tourist seasons. Research route alternatives in advance and avoid roads prone to closures (e.g., those near construction zones or events like the Melbourne Grand Prix).

Parking availability also varies by district. The CBD and trendy areas like Brunswick often have limited street parking, forcing you to circle blocks or use paid lots. If shooting in these zones, arrive 15 minutes early to secure parking or use ride-sharing services to drop off gear before parking elsewhere. For beachside districts like Elwood, check parking restrictions during peak summer months to avoid fines or delays.

Communicating Clearly With Clients and Teams

Transparent communication is vital for managing expectations. Share your timeline with clients upfront, highlighting buffer periods and potential risks (e.g., “We’ve allocated 30 minutes for travel between the CBD and St Kilda, but traffic may extend this to 45 minutes”). Use shared calendars or scheduling tools to keep everyone informed of updates, especially if delays occur.

For team shoots involving assistants or stylists, assign roles in advance to streamline transitions. Designate someone to pack gear while others scout the next location or assist clients with changes. A well-coordinated team can shave minutes off each transition, freeing up time for creative flexibility.

By anticipating Melbourne’s traffic, weather, and geographic quirks, you can create a realistic schedule that accommodates the unexpected. Flexibility is key—leave room for spontaneous shots or extended sessions at favorite spots without derailing the entire itinerary. With careful planning, cross-district shoots can capture the best of Melbourne’s contrasts without the stress of tight timelines.

wedding photography melbourne

Skin moisturizing preparation for wedding photography in Melbourne

Essential Skin Hydration Tips for Melbourne Wedding Photoshoots

A wedding photoshoot in Melbourne demands flawless, glowing skin to complement the city’s picturesque backdrops, from the Yarra River’s shimmering waters to the historic lanes of the CBD. However, Melbourne’s unpredictable weather—ranging from dry winds to sudden humidity—can leave skin dehydrated, causing flakiness, dullness, or uneven texture. Proper hydration is key to achieving a radiant complexion that looks natural under harsh sunlight or soft evening light. Here’s how to prepare your skin for a stress-free, camera-ready glow.

wedding photography melbourne

Prioritize Long-Term Hydration Habits

Healthy skin starts with consistent care, not last-minute fixes. Begin a hydration-focused routine at least a month before your shoot to strengthen your skin’s moisture barrier. Drinking enough water daily is foundational, but topical hydration plays an equally vital role. Opt for lightweight, non-comedogenic moisturizers that lock in water without clogging pores. For dry skin types, layer a hydrating serum beneath your moisturizer to deliver active ingredients like hyaluronic acid, which attracts and retains moisture.

Exfoliation is another critical step, but avoid overdoing it. Gentle exfoliants, such as chemical exfoliators with lactic or glycolic acid, remove dead skin cells without irritating sensitive areas. Limit exfoliation to 1–2 times a week to prevent redness or peeling, especially if you’ll be shooting outdoors in Melbourne’s variable climate.

Adjust Your Routine for Melbourne’s Weather Conditions

Melbourne’s weather can shift dramatically, impacting your skin’s hydration needs. On windy days, such as those common along St Kilda Beach, windburn can strip moisture, leaving skin tight and irritated. Combat this by applying a thicker, occlusive moisturizer or balm to exposed areas like cheeks and lips before heading out. For humid conditions, like those near the Royal Botanic Gardens, switch to a gel-based moisturizer to prevent a greasy finish that might reflect light unflatteringly in photos.

Sun protection is non-negotiable, even on cloudy days. UV rays penetrate clouds and can dehydrate skin, leading to premature aging or uneven tone. Use a broad-spectrum SPF 30+ sunscreen daily, reapplying every two hours if shooting outdoors. For sensitive skin, mineral-based sunscreens with zinc oxide or titanium dioxide are less likely to cause irritation.

Pre-Shoot Skin Prep for a Flawless Finish

The day before your wedding photoshoot, focus on reinforcing hydration without overloading your skin. Avoid trying new products that might trigger breakouts or allergies. Instead, stick to familiar, gentle formulas. A hydrating sheet mask or overnight sleeping mask can provide an extra boost, plumping fine lines and smoothing texture. However, limit usage to once a week to prevent dependency.

On the morning of the shoot, cleanse your face with a mild, pH-balanced cleanser to remove impurities without stripping natural oils. Follow with a lightweight moisturizer and let it absorb fully before applying makeup. If your skin feels tight or dry, mist with a facial spray containing soothing ingredients like rosewater or aloe vera to refresh and hydrate without disturbing makeup.

Address Specific Skin Concerns Without Compromising Hydration

Blemishes or redness can disrupt an otherwise perfect complexion. Treat acne with spot treatments containing salicylic acid or benzoyl peroxide, but use them sparingly to avoid drying out surrounding skin. For under-eye circles or puffiness, apply a cooling eye gel with caffeine or cucumber extract to reduce swelling and brighten the area.

If you have oily skin, don’t skip moisturizer—dehydration can trigger excess oil production. Instead, use oil-free, mattifying formulas that control shine without clogging pores. For combination skin, target dry patches with a richer cream while keeping oilier zones balanced with a lightweight gel.

Stay Hydrated From the Inside Out

Skin health isn’t just about topical products—diet and lifestyle play significant roles. Eat water-rich foods like cucumbers, berries, and leafy greens to boost hydration internally. Avoid excessive caffeine or alcohol, which can dehydrate skin and lead to puffiness. Prioritize sleep in the weeks leading up to your shoot; lack of rest can dull your complexion and exacerbate fine lines.

On the shoot day, bring a reusable water bottle to stay hydrated between locations. Snack on hydrating fruits or nuts to maintain energy levels and prevent skin from looking tired. If you’re shooting in cold weather, like near Mount Dandenong, wear a scarf to protect your face from harsh winds, and apply lip balm frequently to prevent chapping.

By following these tailored hydration strategies, you’ll ensure your skin looks its best in every Melbourne setting, from urban rooftops to coastal cliffs. Consistency is key—start early, adapt to the weather, and prioritize gentle, nourishing products to achieve a luminous, camera-ready complexion.

71407_Farm_Vigano_SELECTION_0055

Tips for avoiding squinting when shooting against the light in Melbourne

How to Avoid Squinting in Backlit Photography in Melbourne

Backlit photography in Melbourne offers a unique opportunity to capture the city’s golden-hour glow, but the intense sunlight can often leave subjects squinting or with harsh shadows. Whether you’re photographing portraits, landscapes, or street scenes, mastering light control is key to achieving natural, flattering results. Here are practical techniques to minimize squinting and enhance your backlit images.

wedding photography melbourne

Adjust Your Shooting Angle to Soften Light

The most straightforward way to avoid squinting is to reposition your subject relative to the light source. Instead of shooting directly into the sun, angle your camera so the light comes from the side (side-backlighting) or slightly behind the subject. This creates a “split lighting” effect, where one side of the face is illuminated while the other remains in shadow, adding depth without forcing the subject to look into harsh light. For example, in Melbourne’s Fitzroy Gardens, position your model with the sun at a 45-degree angle to their face, letting their hair or shoulders catch the light while their eyes remain relaxed.

If shooting at sunrise or sunset, use the low-angle sun to your advantage. The softer, diffused light during these times reduces glare and creates a warm, ethereal glow. In St Kilda Beach, for instance, frame your subject with the sun just above the horizon, casting a golden rim around their silhouette while keeping their facial features visible.

Use Physical Barriers to Block Direct Light

When repositioning isn’t possible, shield your subject from direct sunlight using natural or man-made objects. Trees, buildings, or even a hat can act as diffusers, scattering light and reducing intensity. In Melbourne’s laneways, have your subject stand under an awning or beside a brick wall, letting reflected light fill in shadows without causing squinting. For a more creative approach, use a semi-transparent material like a sheer scarf or umbrella to filter light, creating a soft, dreamy effect.

Another effective method is to position your subject’s body between the camera and the sun. For example, in the Royal Botanic Gardens, ask them to turn slightly sideways, letting their shoulder or arm block the light while their face remains in shadow. This technique also creates a natural “halo” effect around their hair, adding drama to portraits.

Employ Reflectors or Fill Light to Balance Exposure

Backlighting often leaves subjects underexposed, but adding fill light can brighten their face without altering the background’s mood. A reflector is a simple, cost-effective tool for bouncing sunlight back onto the subject. In Melbourne’s Brighton Beach, use a silver or white reflector to direct light onto your model’s face, reducing the contrast between bright backgrounds and dark foregrounds. For a softer look, angle the reflector slightly away from the subject to diffuse the light.

If natural light isn’t sufficient, incorporate artificial fill light. During overcast days in the Melbourne CBD, use a continuous LED light or a camera flash with a diffuser to brighten shadows. Position the light source at a low angle to mimic natural sunlight, avoiding harsh, flat illumination. For nighttime shots, such as along the Yarra River, pair a small LED panel with a softbox to create a gentle glow that complements streetlights or neon signs.

Optimize Camera Settings for Backlit Scenes

Proper camera settings are crucial for managing backlit conditions. Start by switching to manual mode to control exposure independently. For portraits, use spot metering to measure light from the subject’s face, ensuring accurate exposure even if the background is overexposed. If shooting landscapes, switch to matrix metering to balance highlights and shadows across the frame.

Aperture choice also plays a role. A wide aperture (e.g., f/2.8) creates a shallow depth of field, blurring distracting backgrounds while keeping the subject sharp. This works well for portraits in Melbourne’s Degraves Street, where bokeh from string lights or café windows adds ambiance. For landscapes, a narrower aperture (e.g., f/11) ensures sharpness throughout the scene, though you may need a neutral density filter to prevent overexposure during bright daylight.

Shutter speed adjustments help freeze motion or create motion blur. In dynamic settings like Queen Victoria Market, use a faster shutter (1/500s or higher) to capture sharp images of moving subjects. For artistic effects, such as flowing water in the Yarra River, slow the shutter to 1/15s or longer, pairing it with a tripod to avoid camera shake.

Time Your Shoots for Optimal Light

The golden hour—the period shortly after sunrise or before sunset—offers the best light for backlit photography. During these times, the sun’s low angle produces warm tones and long shadows, minimizing glare and squinting. In Melbourne, plan shoots at locations like the Shrine of Remembrance or the Melbourne Cricket Ground during these windows to leverage the soft, directional light.

If shooting midday, seek shaded areas or use diffusers to soften harsh sunlight. In Federation Square, position your subject under a covered walkway or beside a reflective surface to reduce direct exposure. Alternatively, embrace the intensity of midday light by creating high-contrast images, using the sun as a dramatic backlight for silhouettes or abstract compositions.

By combining strategic positioning, light manipulation, and camera adjustments, you can capture stunning backlit images in Melbourne without compromising your subject’s comfort. Experiment with these techniques to find what works best for your style, and let the city’s unique light inspire your creativity.

wedding photography melbourne

Comfort selection of shoes for wedding photography in Melbourne

Choosing Comfortable Footwear for Melbourne Wedding Photoshoots: A Practical Guide

A wedding photoshoot in Melbourne’s diverse settings—from the cobblestone streets of the CBD to the sandy shores of St Kilda—requires footwear that balances style and comfort. Spending hours on your feet while posing in different locations can lead to blisters, soreness, or even injuries if your shoes aren’t up to the task. Here’s how to select footwear that keeps you comfortable without sacrificing aesthetics.

wedding photography melbourne

Understanding the Terrain and Duration

Melbourne’s varied landscapes demand shoes that adapt to different surfaces and activity levels. Before picking a pair, consider the specifics of your shoot.

Urban vs. Natural Settings

City shoots often involve walking on concrete, asphalt, or uneven pavements. Look for shoes with cushioned soles and arch support to absorb shock. For beach or park locations, opt for flat, flexible options that grip soft ground without sinking. Wedges or stilettos may look elegant but can get stuck in sand or grass, causing instability.

Length of the Shoot

A full-day photoshoot spanning multiple locations requires shoes that can withstand prolonged wear. Break in new pairs weeks in advance to avoid painful rubbing. If your itinerary includes dancing or active poses, prioritize flexibility and breathability. Even a short shoot in uncomfortable shoes can leave you distracted and unhappy.

Weather Considerations

Melbourne’s unpredictable weather adds another layer of complexity. Rain can make surfaces slippery, while heat can cause feet to swell. Choose water-resistant materials for outdoor shoots and breathable fabrics for warm days. Avoid synthetic materials that trap moisture, which can lead to blisters.

Prioritizing Comfort Features

Comfort should never be an afterthought. Look for these key elements when selecting wedding footwear.

Arch Support and Cushioning

Proper arch support distributes weight evenly across your feet, reducing fatigue. Test shoes by walking on hard surfaces for several minutes to assess cushioning. Memory foam or gel inserts can enhance comfort, especially for flat-soled styles. If your shoes lack built-in support, consider custom orthotics or removable insoles.

Flexible and Breathable Materials

Natural fabrics like leather or canvas allow airflow, keeping feet cool and dry. Avoid stiff materials that restrict movement, as they can cause chafing. For closed-toe shoes, ensure there’s enough room for toes to wiggle without feeling cramped. Open-toed designs, like sandals or peep-toes, offer ventilation but may not suit all dress styles.

Secure Fit and Adjustability

Shoes that slip or rub can ruin a shoot. Opt for styles with adjustable straps, laces, or buckles to customize the fit. Ankle straps provide stability on uneven ground, while elasticized bands accommodate swelling throughout the day. If trying on shoes in-store, wear the same socks or stockings you’ll use during the shoot to ensure an accurate fit.

Balancing Style and Practicality

Your shoes should complement your dress while meeting practical needs. Here’s how to strike the right balance.

Dress-Appropriate Designs

Long gowns can hide footwear, allowing you to prioritize comfort over style. Choose low-heeled or flat shoes that won’t peek out awkwardly. For shorter dresses or tea-length styles, opt for elegant flats, block heels, or low wedges that elongate the legs without sacrificing stability. Avoid overly ornate designs that might clash with your outfit’s aesthetic.

Color and Material Coordination

Match your shoes to your dress or accessories for a cohesive look. Neutral tones like ivory, beige, or metallics blend seamlessly with most color palettes. If your dress features lace or embroidery, consider shoes with similar textures for subtle harmony. For bold, colorful themes, choose shoes in a complementary shade without overpowering the ensemble.

Versatility for Multiple Outfits

If you’re changing outfits during the shoot, select shoes that work with all looks. A pair of classic flats or low heels can transition from a formal ceremony to a casual beach setting. Alternatively, pack a second pair in a neutral color to switch up styles without compromising comfort.

Testing and Preparing Your Shoes

Even the perfect pair needs preparation to ensure a smooth photoshoot day.

Breaking In New Shoes

Wear your chosen footwear around the house for a few hours each day leading up to the shoot. This helps soften stiff materials and identifies potential problem areas. Focus on activities that mimic your shoot, like standing for long periods or walking on different surfaces.

Protecting Against Blisters

Apply anti-blister balm or petroleum jelly to areas prone to friction, like heels or toes. Consider using silicone heel pads or toe cushions for extra protection. If your shoes have rough edges, smooth them with sandpaper or a nail file to prevent irritation.

Packing Backup Options

Bring a spare pair of comfortable shoes, like foldable flats or sneakers, to change into during breaks. This is especially important for outdoor shoots where weather or terrain might force a switch. Keep backups in a waterproof bag to protect them from rain or sand.

By prioritizing comfort, practicality, and style, you can choose footwear that keeps you happy and confident throughout your Melbourne wedding photoshoot. After all, the best photos capture genuine joy—not the pain of sore feet.

wedding photography melbourne

Anti-loss jewelry for wedding photography in Melbourne

Navigating Environmental Guidelines for Wedding Photoshoots in Melbourne’s Natural Landscapes

Melbourne’s natural beauty—from the rugged cliffs of the Great Ocean Road to the serene wetlands of the Yarra Valley—provides a stunning backdrop for wedding photoshoots. However, capturing these moments responsibly means adhering to environmental guidelines designed to protect fragile ecosystems. By following these practices, couples can create lasting memories without leaving a lasting footprint.

wedding photography melbourne

Understanding Local Regulations

Australia’s national parks and protected areas enforce strict rules to preserve biodiversity and natural habitats. Before planning a shoot, research the specific requirements of your chosen location.

Permits and Restrictions

Many parks require permits for commercial photography, including wedding shoots. Contact the managing authority (e.g., Parks Victoria) to confirm whether your location falls under this category. Some areas may limit group sizes, equipment use, or access hours to minimize disruption. For example, certain sections of the Royal Botanic Gardens Melbourne may restrict tripods or drones during peak visitor times.

Protected Species and Habitats

Avoid disturbing native wildlife or plants. Areas like Phillip Island’s penguin colonies or the Healesville Sanctuary have strict no-go zones to protect animals during breeding seasons. Even seemingly harmless actions, like picking flowers or moving rocks, can disrupt ecosystems. Stay on designated paths and educate your photography team about local conservation efforts.

Waste Management Policies

Pack out all trash, including food wrappers, confetti, or decorations. Biodegradable options aren’t always safe for wildlife—some animals mistake them for food, leading to health issues. Use reusable containers for snacks and drinks, and carry a small trash bag to collect waste. If your shoot involves props, ensure they’re made from natural materials that won’t harm the environment.

Sustainable Transportation Practices

Getting to your location can impact the environment just as much as the shoot itself. Opt for eco-friendly transportation to reduce your carbon footprint.

Public Transport and Carpooling

Melbourne’s extensive train and tram network connects many natural attractions. Consider taking public transport to reduce emissions, especially for shoots near city parks like Treasury Gardens. If driving is necessary, carpool with your photography team or wedding party to minimize the number of vehicles on the road.

Electric or Hybrid Vehicles

If renting a car, choose an electric or hybrid model. Many rental companies in Melbourne now offer low-emission options, particularly for trips to coastal areas like Mornington Peninsula. These vehicles produce fewer pollutants and are quieter, reducing noise disturbance in sensitive habitats.

Off-Road Restrictions

Avoid driving on unpaved trails or grassy areas, which can damage vegetation and soil. Stick to marked roads, even if it means a longer walk to your shoot location. In remote areas like the Grampians National Park, parking regulations are strictly enforced to prevent erosion and protect wildlife corridors.

Eco-Conscious Photography Techniques

The way you capture images can also impact the environment. Adopt practices that prioritize sustainability without sacrificing creativity.

Natural Light Over Artificial Lighting

Maximize natural light to reduce energy consumption. Schedule shoots during daylight hours, especially in shaded areas like the Dandenong Ranges’ fern gullies. If artificial lighting is necessary, use rechargeable batteries and LED lights, which are more energy-efficient and produce less heat.

Minimalist Prop Usage

Keep props simple and reusable to avoid waste. Instead of disposable decorations, use natural elements like leaves, branches, or stones sourced from the ground (without disturbing plants). For dramatic effects, rely on composition and lighting rather than excessive materials.

Digital Over Physical

Opt for digital proofs and albums to cut down on paper use. Many photographers now offer cloud-based galleries where couples can select and share images without printing. If physical copies are needed, choose recycled paper or eco-friendly printing services that use vegetable-based inks.

Respecting Cultural and Historical Sites

Many of Melbourne’s natural landscapes hold cultural significance for Indigenous communities. Acknowledge and honor this heritage during your shoot.

Indigenous Land Acknowledgments

Begin your shoot with a brief acknowledgment of the Traditional Owners of the land. This simple gesture shows respect for their connection to the area and raises awareness about Indigenous history. Research the correct phrasing for your specific location, as protocols vary between regions.

Avoiding Sacred Sites

Some areas, like the Birrarung Marr park along the Yarra River, have cultural importance to the Wurundjeri people. Stay informed about restricted zones and avoid photographing or entering these spaces without permission. Even unintentional trespassing can cause offense and harm cultural heritage.

Supporting Local Communities

Hire local guides or photographers familiar with the area’s cultural context. This not only ensures compliance with guidelines but also supports Indigenous-owned businesses. Many communities offer cultural tours or workshops that can add depth to your wedding story.

By following these guidelines, couples can celebrate their love while protecting Melbourne’s natural treasures. Responsible photography isn’t just about following rules—it’s about leaving the environment as pristine as you found it, ensuring future generations can enjoy its beauty too.

80883-Wu-2090

Anti-loss jewelry for wedding photography in Melbourne

Protecting Your Precious Jewelry During Melbourne Wedding Photoshoots: A Practical Guide

Planning a wedding photoshoot in Melbourne’s picturesque locations—from the Yarra River’s shimmering waters to the historic lanes of the CBD—requires meticulous attention to detail. Among these details, safeguarding your engagement rings, wedding bands, and heirloom pieces is critical. These items aren’t just accessories; they symbolize love, commitment, and family history. Losing or damaging them during a photoshoot could turn a joyful moment into a stressful ordeal. Here’s how to ensure your jewelry stays secure without compromising on style.

wedding photography melbourne

Understanding the Risks

Melbourne’s dynamic environment poses unique challenges for jewelry safety. Outdoor shoots in parks or beaches expose items to dirt, moisture, and accidental drops. Busy urban settings increase the risk of theft or misplacement, especially during quick outfit changes. Even indoor studios aren’t immune—loose items on tables can easily roll away or get overlooked.

Environmental Hazards

Natural elements like wind, sand, or sudden rain can damage delicate settings or gemstones. For example, a loose prong on a ring might go unnoticed until a stone falls out during a pose by the ocean. Similarly, extreme temperatures in enclosed spaces (e.g., heated studios in winter) can affect metal durability.

Human Factors

During photoshoots, jewelry often changes hands between the couple, photographers, or stylists. A necklace handed off for a close-up shot might be forgotten in a rush to move locations. Crowded venues or distracted moments—like adjusting a veil or fixing hair—create opportunities for items to slip off unnoticed.

Proactive Storage Solutions

The first line of defense is secure storage. Instead of leaving jewelry in open trays or pockets, invest in discreet, lockable containers designed for travel.

On-the-Go Organization

Use compact, padded cases with individual compartments to separate rings, earrings, and necklaces. These prevent scratches and tangling while keeping items visible. For larger collections, consider a multi-tiered organizer with a zipper closure.

Hidden Compartments

If your venue lacks a secure area, opt for storage with hidden compartments. Some modern jewelry boxes feature false bottoms or magnetic panels that blend into bags or clothing. This is ideal for quick access during shoots without drawing attention.

Off-Site Safekeeping

For high-value items, rent a safe deposit box at a nearby bank or private vault. Services like Guardian Vaults in Melbourne offer short-term storage with 24/7 access, ensuring your pieces are protected when not in use.

Insurance: Your Safety Net

Even with precautions, accidents happen. Jewelry insurance provides financial protection and peace of mind, covering loss, theft, or damage anywhere in the world.

What to Look For

Choose a policy that offers “agreed value” coverage, meaning you’ll receive the full insured amount without depreciation deductions. Ensure it includes scenarios specific to wedding shoots, such as accidental drops during poses or theft from a photographer’s bag.

Documenting Your Items

Before the shoot, photograph each piece from multiple angles and keep receipts or appraisal certificates. This speeds up claims if needed. Some insurers also offer real-time tracking apps to monitor your jewelry’s location during transit.

Policy Exclusions

Be aware of common exclusions, like leaving items unattended in public areas or failing to report a loss promptly. Clarify whether coverage extends to travel within Australia or internationally if your shoot spans multiple locations.

Travel Tips for Jewelry Safety

If your photoshoot involves moving between venues—say, from a chapel in St Kilda to a beach in Brighton—transport jewelry securely.

Airport Security

Australian airports allow jewelry in carry-on luggage without declaration, but avoid checked bags. Customs may flag large quantities or suspicious packaging, leading to delays. Wear your engagement ring or a discreet travel alternative during flights to keep it safe.

Discreet Transportation

Use a plain, unmarked pouch or small case to carry jewelry between locations. Avoid flashy packaging that might attract unwanted attention. If driving, lock items in the glovebox or trunk when not in use.

Backup Plans

Consider a “decoy” ring for risky shots, like climbing ladders or wading into water. This lets you capture dramatic poses without risking your real pieces. Some couples even use CGI enhancements in post-production to add jewelry digitally.

Final Checks Before the Shoot

A few simple habits can prevent mishaps:

  • Double-check compartments: Before leaving a location, verify all jewelry is accounted for.
  • Assign responsibility: Designate one person (e.g., the best man or maid of honor) to oversee jewelry during transitions.
  • Avoid distractions: Limit jewelry handling during busy moments, like group shots or changing outfits.

By combining secure storage, comprehensive insurance, and mindful travel practices, you can focus on creating memories—not worrying about your jewelry. Melbourne’s beauty deserves to shine through every frame, and with these precautions, your precious pieces will stay safe long after the last click of the camera.