DSC02092

The confirmation process of a wedding photography contract in Melbourne

Finalizing Your Melbourne Wedding Photography Contract: A Clear, Step-by-Step Process

Signing a wedding photography contract is a critical step in securing your Melbourne wedding memories. This document outlines expectations, protects both parties, and ensures your vision is brought to life. To avoid misunderstandings, approach the confirmation process methodically. Here’s how to navigate each stage with confidence.

wedding photography melbourne

Reviewing the Initial Draft Thoroughly

Before agreeing to terms, read the contract carefully from start to finish. Pay attention to sections that define:

Scope of Services

  • Coverage Hours: Confirm the number of hours included and whether overtime is allowed (and how it’s billed).
  • Deliverables: Check what’s promised—e.g., number of edited photos, format (digital files, prints, or albums), and turnaround time.
  • Additional Services: Note if extras like second shooters, engagement sessions, or travel fees are included or require separate fees.

Key Consideration: If any service is vague, ask for clarification. For example, “edited photos” could mean basic color correction or advanced retouching—define this upfront.

Logistical Details

  • Date and Venue: Verify the contract lists your correct wedding date and venue address.
  • Backup Plans: Ensure there’s a clause addressing what happens if the photographer is ill or unable to shoot (e.g., a replacement with similar style).
  • Weather Contingencies: For outdoor shoots, confirm protocols for rescheduling due to rain or extreme weather.

Pro Tip: If your venue has specific rules (e.g., photography restrictions during ceremonies), share these with the photographer to avoid conflicts.

Clarifying Legal and Financial Terms

Contracts exist to protect both you and the photographer, so understand every clause before signing.

Payment Structure

  • Deposit Requirements: Check the amount needed to secure your date and whether it’s refundable under certain conditions.
  • Final Payment Deadline: Note when the remaining balance is due (e.g., 30 days before the wedding or on the day).
  • Late Fees: Confirm if penalties apply for missed payments and how they’re calculated.

Cancellation and Rescheduling Policies

  • Client-Initiated Changes: Understand fees or penalties for postponing or canceling your wedding.
  • Photographer-Initiated Changes: Review terms if the photographer needs to reschedule (e.g., due to double-booking or emergencies).

Case Study: One couple avoided stress by discussing cancellation policies upfront. When their venue closed unexpectedly, they rescheduled with minimal hassle because their contract included a flexible rebooking clause.

Discussing Creative and Editorial Control

Your photos should reflect your style, so clarify how much input you’ll have during the process.

Editing and Retouching

  • Style Preferences: Share your vision for edits (e.g., “We prefer warm tones” or “Keep skin textures natural”).
  • Approval Process: Ask if you’ll review a selection of edits before final delivery or if the photographer has full creative control.
  • Revisions: Confirm how many rounds of edits are included and what constitutes an “extra revision” (and its cost).

Usage Rights

  • Personal Use: Ensure you can print, share, and post photos freely on social media or with family.
  • Commercial Use: If you plan to use images for business purposes (e.g., a joint venture), clarify whether this requires additional permissions.

Pro Tip: If you’re uncomfortable with the photographer using your images for promotional purposes, request a clause that limits or prohibits this.

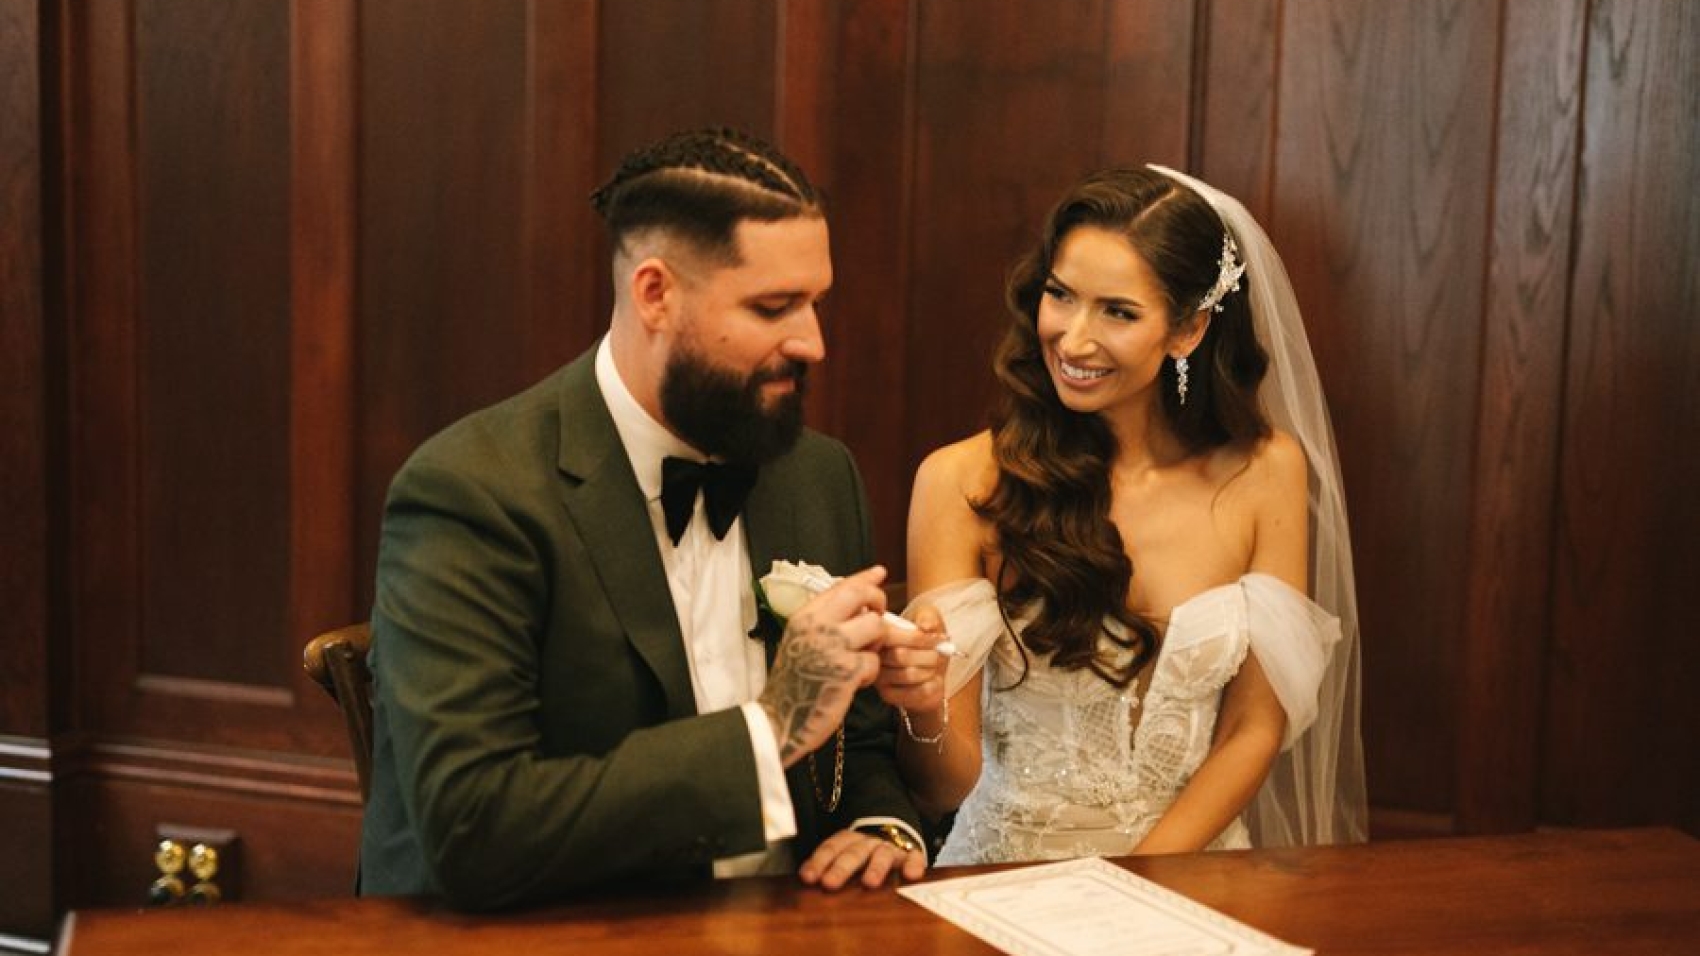
Finalizing and Signing the Agreement

Once all terms are clear and agreed upon, proceed with signing.

Double-Checking Details

  • Names and Contact Information: Verify spelling and accuracy of both parties’ details.
  • Signatures: Ensure all required signatures (yours, your partner’s, and the photographer’s) are present.
  • Date: Confirm the signing date is recorded correctly.

Keeping Records

  • Copies for Both Parties: Request a digital or physical copy of the signed contract for your records.
  • Email Confirmation: Ask the photographer to send a confirmation email summarizing key terms (e.g., date, deliverables, payment schedule).

Final Check: Store the contract in a safe place (e.g., a shared folder with your partner) and reference it if questions arise later, such as payment deadlines or edit requests.

By following these steps, you’ll finalize your Melbourne wedding photography contract with clarity and confidence. A well-drafted agreement ensures your day is captured exactly as you envision it—without unexpected surprises.

wedding photography melbourne

Steps for exploring the demand for wedding photography in Melbourne

Uncovering Your Wedding Photography Needs in Melbourne: A Step-by-Step Guide

Your wedding photos are more than just images—they’re a timeless record of your love story. To ensure your Melbourne wedding photography captures every meaningful detail, start by digging deep into your preferences, priorities, and practical requirements. This guide walks you through the process of identifying what truly matters to you, helping you communicate effectively with photographers and create a vision that feels authentic.

wedding photography melbourne

Reflecting on Your Personal Style and Vision

Before meeting photographers, take time to understand what resonates with you aesthetically. Browse wedding galleries online, save inspiration from platforms like Instagram or Pinterest, and note recurring themes. Ask yourself:

  • Do you prefer candid, unscripted moments or structured, posed portraits?
  • Are you drawn to bright, vibrant colors or soft, muted tones?
  • Do you want your photos to feel timeless or trendy?

Key Consideration: Your style doesn’t have to fit into one category. Many couples blend elements—like mixing documentary-style ceremony shots with creative portraits during golden hour.

Identifying Emotional Priorities

Think beyond aesthetics to the emotions you want your photos to evoke. For example:

  • If family bonds are central to your story, you might prioritize group shots that capture genuine laughter or tears.
  • If your relationship thrives on adventure, you may want images that reflect spontaneity, like exploring Melbourne’s laneways or coastal spots.

Pro Tip: Share these insights with photographers during consultations. A skilled artist will tailor their approach to highlight what matters most to you.

Assessing Logistical and Practical Needs

Photography involves more than creativity—it requires planning. Consider these logistical factors to avoid surprises:

Venue and Timing Constraints

  • Indoor vs. Outdoor: Does your venue have ample natural light, or will you need a photographer experienced in low-light settings?
  • Timeline Flexibility: If your ceremony runs late, will your photographer stay longer (and how does that affect deliverables)?
  • Weather Backup Plans: For outdoor shoots, discuss alternatives like covered locations or indoor portrait sessions if rain is forecast.

Case Study: One couple planned an outdoor ceremony at a Melbourne park but included a nearby indoor venue in their contract as a weather backup. Their photographer adjusted the timeline seamlessly when rain threatened, ensuring no moments were missed.

Technical and Creative Support

  • Second Shooter: Do you want multiple angles of key moments (e.g., the bride walking down the aisle and the groom’s reaction)?
  • Equipment Needs: If you’re hosting a large guest list, ask if the photographer brings additional lighting or lenses to handle crowd shots.
  • Post-Production Style: Clarify how much editing you expect—from basic color correction to advanced retouching of blemishes or backgrounds.

Pro Tip: Be honest about your comfort level with technical jargon. A good photographer will explain options in layman’s terms.

Aligning With Your Partner’s Expectations

Wedding planning is a partnership, so involve your significant other in the photography discussion. Schedule a quiet moment to:

Comparing Notes on Preferences

  • Share inspiration images and note similarities or differences in your tastes.
  • Discuss “must-have” shots (e.g., a portrait with grandparents) versus “nice-to-haves” (e.g., artistic shots of your shoes).
  • Agree on a budget range for photography services, even if it’s flexible.

Resolving Potential Conflicts

If one of you prioritizes candid shots while the other wants traditional portraits, look for photographers who excel in both styles. Many artists blend approaches, offering a mix of documentary and posed imagery.

Example: A couple who disagreed on portrait styles compromised by booking a photographer known for “creative candid” work—capturing natural interactions during portraits while incorporating unique angles and lighting.

Communicating Clearly With Photographers

Once you’ve defined your needs, articulate them clearly during consultations. Use specific language to avoid misunderstandings:

  • Instead of saying, “We want natural photos,” say, “We’d like images that feel unposed, like we’re not even aware of the camera.”
  • If you’re concerned about skin tones, mention, “We want portraits where our skin looks authentic, not overly smoothed or airbrushed.”

Asking Targeted Questions

  • “How do you handle couples who have different photography preferences?”
  • “Can you share examples of weddings with similar logistical challenges to ours?”
  • “What’s your process for incorporating our feedback during editing?”

Final Check: After meetings, jot down notes about each photographer’s style, responsiveness, and ability to address your concerns. This helps compare options later.

By following these steps, you’ll clarify your wedding photography needs and find a Melbourne photographer who aligns with your vision. The result? Photos that feel as unique and genuine as your love story.

wedding photography melbourne

The pre-appointment process for wedding photography in Melbourne

Navigating the Pre-Booking Process for Wedding Photography in Melbourne

Securing a wedding photographer in Melbourne involves more than just picking a date—it’s about aligning schedules, discussing expectations, and ensuring your vision matches their style. Whether you’re planning an intimate elopement or a grand celebration, understanding the early steps of the booking process helps set the foundation for a seamless experience. Here’s how to approach it with clarity and confidence.

wedding photography melbourne

Researching and Shortlisting Photographers

Start by exploring photographers whose work resonates with your aesthetic. Look for portfolios that showcase a range of wedding styles, from candid documentary shots to elegant posed portraits. Pay attention to how they capture emotions, lighting, and details like venue decor or attire.

Key Consideration: Focus on consistency. A photographer whose images consistently reflect a cohesive style is more likely to deliver results that align with your expectations. For example, if you love soft, natural lighting, prioritize artists who excel in outdoor or golden-hour shoots.

Identifying Availability and Key Dates

Once you’ve narrowed down your list, check their availability for your wedding date. Many photographers book months in advance, especially during peak seasons (spring and summer in Melbourne). Reach out early to confirm they’re free and inquire about their booking cutoff dates.

Pro Tip: If your date is flexible, ask about alternative options. Some photographers offer discounts for off-peak days or last-minute bookings, though this varies by artist.

Initial Contact and Communication

When you’re ready to connect, send a detailed inquiry via email or their website’s contact form. Include:

  • Your wedding date and venue location
  • A brief description of your vision (e.g., “We want a mix of candid moments and creative portraits”)
  • Any specific requests, like second shooters or extended coverage

Asking the Right Questions

During your first conversation, clarify logistics to avoid surprises later:

  • Coverage Hours: How many hours are included in their standard package? Can you add more if needed?
  • Backup Plans: What happens if they’re ill or unable to shoot on your date? Do they have a network of colleagues to step in?
  • Delivery Timeline: How long will it take to receive your edited photos?

Case Study: One couple learned their photographer had a policy of bringing a backup camera and lens to every shoot after asking about equipment failures. This reassured them their day wouldn’t be compromised by technical issues.

Reviewing Contracts and Agreements

Before signing anything, read the contract carefully. Ensure it outlines:

  • Deliverables (e.g., number of edited photos, format of files)
  • Payment schedules and cancellation policies
  • Usage rights (e.g., whether you can print or share images freely)

Clarifying Ambiguities

If any terms are unclear, ask for clarification. For example:

  • “Does ‘edited photos’ mean basic color correction or full retouching?”
  • “Are travel fees included if our venue is outside Melbourne?”

Pro Tip: Don’t rush this step. A well-drafted contract protects both you and the photographer, so take time to understand every clause.

Finalizing the Booking

Once you’re comfortable with the terms, confirm your booking by paying a deposit (usually a percentage of the total fee). Most photographers require this to secure your date. After payment, request a written confirmation that includes:

  • Your wedding date and venue
  • Agreed-upon services and hours
  • Contact information for both parties

Final Check: Save all correspondence, including emails and receipts, in a dedicated folder. This makes it easy to reference details later, like payment deadlines or style preferences.

By approaching the pre-booking process methodically, you’ll build a strong foundation with your photographer. Clear communication and attention to detail ensure your wedding day is captured exactly as you envision it—without the stress of last-minute surprises.

DSC08822

Post-production communication for wedding photography in Melbourne

Effective Communication for Post-Production Editing in Melbourne Wedding Photography

The post-production phase of wedding photography is where raw moments transform into polished memories. Clear communication with your photographer during this stage ensures your final images align with your vision while maintaining the authenticity of your day. Whether you’re adjusting lighting, refining skin tones, or enhancing details, here’s how to navigate the editing process with confidence.

wedding photography melbourne

Setting Clear Expectations Before Editing Begins

Before your photographer starts retouching, discuss your preferences openly. Share examples of styles you love—whether it’s soft, natural tones or bold, vibrant colors—and explain what resonates with you. For instance, if you prefer a timeless look, mention that you’d like to avoid overly trendy filters or heavy editing that could date the photos.

Key Consideration: Be specific about your priorities. If you’re concerned about blemishes or distractions in the background, highlight these areas early. Conversely, if you want to preserve natural textures like skin or fabric, make that clear to prevent over-editing.

Providing Detailed Feedback on Draft Edits

Once you receive a batch of edited images, review them carefully and offer constructive feedback. Instead of vague comments like “make it brighter,” describe what you’d like to see. For example:

  • “The colors in the ceremony photos feel a bit muted—could we warm up the tones to match the sunset lighting?”
  • “The group shot has a distracting shadow on the wall—can we soften that without losing the scene’s depth?”

Addressing Common Editing Concerns

  • Skin Retouching: If you’re uncomfortable with heavy airbrushing, ask for a “natural” approach that minimizes imperfections while keeping skin texture intact.
  • Background Distractions: Point out specific elements you’d like removed or toned down, like a stray object or harsh lighting.
  • Color Balance: If certain images look too cool or warm, request adjustments to match the mood of the scene (e.g., a cozy indoor reception vs. a bright outdoor ceremony).

Pro Tip: Use timestamps or image numbers when referencing specific photos to avoid confusion. For example, “In image 12, the bride’s veil appears slightly overexposed—could we balance the highlights?”

Collaborating on Final Adjustments

Editing is rarely a one-and-done process. After your initial feedback, your photographer may share a revised set of images. Use this opportunity to fine-tune details:

  • Consistency Across Albums: Ensure images from the same event segment (e.g., all reception photos) have a cohesive look in terms of brightness, contrast, and color.
  • Emotional Tone: If a photo feels flat, ask if adjusting the shadows or vibrancy could enhance its mood. For example, a dimly lit dance floor shot might benefit from subtle boosts to warmth and contrast.
  • Cropping and Composition: Suggest alternative crops if you feel an image could focus better on a subject or tell a stronger story.

Case Study: One couple noticed that their outdoor portrait series had inconsistent green tones due to varying lighting conditions. By sharing screenshots of their favorite shots and explaining they wanted a “unified earthy palette,” the photographer adjusted the hues to create harmony across the sequence.

Respecting the Photographer’s Expertise

While your input is invaluable, trust your photographer’s judgment on technical matters. They understand how editing choices impact the longevity and quality of your images. For example, excessive sharpening can make photos look artificial over time, while over-saturating colors may fade unevenly in prints.

Final Check: Before finalizing, review images on multiple devices (e.g., a phone, tablet, and computer) to ensure they look consistent across screens. Pay attention to details like skin tones, background elements, and overall balance.

Your wedding photos are a collaboration between your photographer’s skill and your unique vision. By communicating openly and thoughtfully during post-production, you’ll create a collection that feels both polished and true to your day’s magic.

DSC09201

A Guide to the Selection Process of wedding photos in Melbourne

Melbourne Wedding Photography Selection Guide: A Step-by-Step Process to Preserve Your Special Moments

Choosing the right images from your wedding photography collection is more than just picking favorites—it’s about curating a visual narrative that reflects the emotion, authenticity, and unique story of your day. Whether you’re working with a Melbourne-based photographer or reviewing proofs online, this guide will help you navigate the selection process with confidence.

wedding photography melbourne

Understanding Your Photography Style and Vision

Before diving into the selection, revisit the style you discussed with your photographer. Did you prioritize candid moments, posed portraits, or a mix of both? For example, if you opted for a documentary-style approach, focus on images that capture unscripted interactions, like laughter during speeches or quiet moments between partners. If your photographer specializes in romantic storytelling, look for sequences that showcase the progression of your day—from getting ready to the first dance.

Key Consideration: Authenticity matters. Avoid selecting images solely based on technical perfection; prioritize those that evoke genuine emotion. A slightly imperfect photo with a heartfelt expression often outshines a flawless but sterile shot.

Organizing Your Selection Process

Sorting through hundreds of images can feel overwhelming. Break it down into manageable steps:

1. First Pass: Eliminate the Obvious “No’s”

Start by removing duplicates, blurry shots, or images where eyes are closed. This step narrows your pool to the strongest candidates. For instance, if your photographer captured multiple angles of the same moment, keep the one that best conveys the scene’s energy.

2. Categorize by Event Segment

Divide your images into sections like “Getting Ready,” “Ceremony,” “Portraits,” and “Reception.” This helps ensure you’re selecting a balanced representation of your day. For example, if you notice most of your favorites are from the reception, revisit the ceremony photos to check if you’re missing key moments like the vows or ring exchange.

Pro Tip: Use digital tools or sticky notes to tag images by category. This makes it easier to spot gaps in your selection.

3. Prioritize Storytelling Sequences

Your wedding album should flow like a story. Choose images that connect visually and emotionally. For example, a series showing the bride’s dress being fastened, followed by her walk down the aisle, and finally her first look at the groom creates a cohesive narrative. Similarly, group reception photos by activity—speeches, cake cutting, and dancing—to maintain rhythm.

Example: If your photographer captured the groom’s reaction as the bride entered, pair it with a wide shot of the aisle and a close-up of the bride’s bouquet. This trio tells a richer story than three similar angles of the same moment.

Collaborating with Your Photographer

Your photographer’s expertise is invaluable during selection. Many professionals offer guidance based on their understanding of your style and the day’s flow. Don’t hesitate to ask questions like:

  • “Which images do you think best represent our vision?”
  • “Are there any shots we’re missing that would complete the story?”
  • “How would you arrange these for an album?”

Case Study: One couple worked with their photographer to identify overlooked gems, like a candid shot of the bride’s father adjusting her veil. Initially dismissed as “just another getting-ready photo,” it became a cherished addition for its emotional depth.

Finalizing Your Selection

After narrowing down your choices, take a break before reviewing them again with fresh eyes. This helps avoid decision fatigue and ensures you’re satisfied with your picks. If you’re creating an album, consider the layout—alternate between close-ups and wide shots, and balance color tones for visual harmony.

Final Check: Ensure your selection includes:

  • Key moments (vows, first kiss, first dance)
  • Candid interactions (friends laughing, family embracing)
  • Detail shots (rings, flowers, venue decor)
  • Portraits that highlight your personalities

Your wedding photos are more than decorations—they’re heirlooms that will transport you back to your day for decades. By approaching the selection process thoughtfully, you’ll create a collection that feels as timeless as your love.

DSC08988

The order of group shooting for wedding photography in Melbourne

Melbourne Wedding Photography Group Shooting Sequence Guide

Organizing a wedding photo shoot in Melbourne’s diverse locations—from urban streets to coastal landscapes—requires a strategic sequence to maximize natural light, minimize downtime, and capture every key moment. A well-planned shooting order ensures the couple, wedding party, and family members stay engaged while moving efficiently between settings. This guide outlines a step-by-step approach to grouping shots, adapting to Melbourne’s weather, and prioritizing must-have photos.

wedding photography melbourne

Starting with the Couple’s Intimate Portraits

Begin the day by focusing on the newlyweds alone, as their energy and enthusiasm are highest early in the session. This allows for creative, uninterrupted time to experiment with poses, lighting, and locations without the pressure of coordinating larger groups.

Golden Hour Priority: Schedule the couple’s portraits during the first or last hour of daylight for soft, flattering light. In Melbourne, this could mean shooting at sunrise near the Yarra River or at sunset along St Kilda Beach. Use this time for close-ups, walking shots, and romantic poses that highlight their connection.

Location Strategy: Start with a iconic Melbourne backdrop, such as a graffiti-covered laneway or a historic building, then transition to a quieter spot like a park or garden for more intimate, natural-light shots. This variety ensures a mix of urban edge and timeless elegance in the final gallery.

Key Tip: If the couple is wearing multiple outfits, schedule the most formal attire first while they’re fresh, then switch to casual looks for later shots.

Moving to the Wedding Party and Bridal Party

After capturing the couple’s solo portraits, shift focus to the bridal party and groomsmen. These groups are often energetic and playful, making them ideal for dynamic, high-energy shots that showcase personalities.

Group Size Management: Divide larger parties into smaller subgroups (e.g., bridesmaids only, groomsmen only, or mixed groups) to streamline posing and reduce chaos. Start with formal, posed photos in a structured setting, such as in front of a grand staircase or a textured wall, then move to casual arrangements like walking down a street or gathered around a vintage car.

Location Adaptation: Use the same venue or nearby areas to avoid traveling long distances. For example, if the couple’s portraits were taken in a park, position the wedding party around a fountain or under a tree for natural framing. Incorporate Melbourne’s unique elements, like tram tracks or street art, to add local flavor.

Engagement Trick: Keep the mood light by asking the party to share funny stories about the couple or play a quick game (e.g., “Who knows the bride/groom best?”) to generate genuine laughter and interactions.

Capturing Family Formals Efficiently

Family formals are essential but can become time-consuming if not organized properly. Prioritize these shots after the wedding party to maintain momentum while ensuring all key combinations are covered.

Pre-Shoot Planning: Request a list of must-have family groupings (e.g., immediate family, extended relatives, step-parents) from the couple beforehand. Arrange groupings by size, starting with the largest (e.g., both sides of the family together) and working down to smaller pairs or trios.

Location Simplicity: Choose a flat, well-lit area with minimal distractions, such as a clean wall, a bench, or a grassy field. Avoid busy backgrounds that compete for attention. Use a reflector or off-camera flash to fill in shadows if shooting in harsh sunlight or shade.

Efficiency Hack: Assign a family member or friend to help organize groups, calling out names and ensuring everyone is ready before the camera clicks. This keeps the process moving smoothly and reduces stress for the couple.

Incorporating Creative and Candid Shots

Once formal groupings are complete, allocate time for candid, documentary-style photos that capture the day’s spontaneous moments. These shots often become favorites, as they reflect the couple’s true emotions and interactions.

Observation Over Direction: Step back and let the day unfold naturally, photographing details like the bride adjusting her veil, the groom laughing with friends, or the couple stealing a quiet moment together. Use a telephoto lens to shoot from a distance without interrupting the flow.

Location Flexibility: If the main venue has multiple interesting spots (e.g., a rooftop, a courtyard, or a staircase), wander through these areas with the couple, capturing them in unplanned poses or conversations. Melbourne’s eclectic architecture provides endless opportunities for creative framing.

Lighting Awareness: Keep an eye on changing light conditions, especially if shooting outdoors. Move to shaded areas during midday or use diffusers to soften harsh sunlight. For evening shots, embrace twilight hues or use artificial lighting (e.g., fairy lights, lanterns) for a romantic ambiance.

Final Sunset or Nighttime Shots for Drama

Wrap up the shoot with a final session during blue hour or nighttime to add dramatic, mood-filled images to the collection. These shots often stand out for their unique lighting and atmosphere.

Twilight Timing: Schedule this segment 30 minutes before sunset for a mix of natural and artificial light. Position the couple against the skyline or near water for reflections, using a tripod and long exposure to capture light trails or city glow.

Nighttime Creativity: If shooting after dark, use portable LED panels, string lights, or sparklers to illuminate the couple. Experiment with silhouettes, backlighting, or bokeh effects by shooting near streetlights or neon signs. Melbourne’s laneways or docklands offer perfect settings for these shots.

Safety First: Ensure the couple and team are visible if shooting in dimly lit or crowded areas. Use glow sticks or reflective gear to avoid accidents, and stick to well-lit paths or familiar locations.

By following this structured yet flexible sequence, photographers can navigate Melbourne’s dynamic environments while keeping the couple and their guests relaxed and engaged. Thoughtful grouping and timing ensure every moment—from intimate portraits to lively group shots—is captured with beauty and authenticity.

DSC09215-Enhanced-NR

Melbourne wedding photography pose guidance process

Melbourne Wedding Photography Pose Guidance Workflow

Capturing authentic, flattering wedding photos in Melbourne’s diverse settings—from urban streets to coastal vistas—requires thoughtful pose guidance. The right poses highlight the couple’s connection, complement their surroundings, and ensure they feel comfortable in front of the camera. This guide outlines a step-by-step workflow for directing poses, adapting to different locations, and encouraging natural interactions.

wedding photography melbourne

Building Comfort and Connection Before Shooting

The foundation of great poses starts long before the camera clicks. Begin by creating a relaxed atmosphere through casual conversation. Ask the couple about their relationship milestones, shared hobbies, or favorite memories to build rapport. This helps them feel at ease and encourages genuine smiles and laughter during the shoot.

For shy or awkward clients, start with simple, low-pressure poses. Have them stand side by side, holding hands or linking arms, while facing the camera. Use prompts like, “Pretend you’re sharing a secret” or “Whisper something funny in each other’s ears” to spark natural interactions. Gradually introduce movement, such as walking slowly toward the camera or spinning gently, to loosen stiffness and add dynamism.

Tip for Nervous Couples: Suggest they bring a prop like a bouquet, a vintage camera, or a handwritten love note to hold, giving them something to focus on beyond the camera.

Adapting Poses to Melbourne’s Iconic Locations

Melbourne’s unique backdrops—from graffiti-covered laneways to sandy beaches—demand poses that harmonize with the environment. In urban settings, lean into the city’s edgy vibe by having the couple sit on steps, lean against brick walls, or peek around corners. Use architectural lines to frame them, such as positioning them beneath an archway or beside a row of colorful doors.

For coastal shoots, embrace the beach’s casual energy. Have the couple walk barefoot along the shoreline, holding hands or dipping their toes in the water. Incorporate movement by asking them to toss sand into the air or playfully chase each other. If shooting near cliffs or rocky outcrops, use elevation to create dramatic angles, such as having one partner stand above the other or sit on a ledge while the other leans in close.

Natural Light Strategy: In outdoor settings, position the couple to face the light source (e.g., the sun during golden hour) to highlight their faces and create a warm glow. Use reflectors or diffusers to soften harsh shadows if needed.

Dynamic Poses for Movement and Storytelling

Static poses can feel stiff, so incorporate movement to add life to photos. Start with simple actions like having the couple walk toward the camera at a slow pace, holding hands or with arms around each other’s waists. Capture mid-stride shots to convey a sense of journey or adventure, especially in open spaces like parks or bridges.

For playful energy, direct the couple to interact spontaneously. Suggest actions like twirling, dipping, or lifting each other (if physically comfortable). Use prompts like, “Pretend you’re dancing at your reception” or “Act like you’re trying to steal a kiss without getting caught.” These cues encourage laughter and organic moments that feel authentic.

Creative Angle Tip: Shoot from low angles to emphasize height differences or from above for a bird’s-eye view of the couple lying on the grass or sand.

Intimate Poses for Emotional Depth

Close-up shots that capture the couple’s connection require subtle, intentional posing. Have them sit or stand close enough that their shoulders or hips touch, creating a sense of unity. Direct one partner to rest their head on the other’s shoulder or chest, while the other gazes softly at them or the horizon.

For forehead-to-forehead poses, ask the couple to close their eyes and take a deep breath, fostering a moment of quiet intimacy. Use gentle prompts like, “Think about your favorite memory together” or “Imagine it’s just the two of you in this moment” to deepen their emotional expression.

Hand Placement Guidance: Avoid stiff or awkward hand positions by suggesting natural gestures, such as one partner running their fingers through the other’s hair, holding a bouquet, or gently touching their face.

Group Poses for Wedding Parties and Families

When photographing larger groups, organization is key to avoiding chaos. Start by arranging family members or bridesmaids/groomsmen in staggered rows, with taller individuals at the back and shorter ones in front. Use props like chairs or benches to create levels, ensuring everyone is visible in the frame.

For casual group shots, direct the couple to stand in the center while others gather around them in a loose semicircle. Encourage interactions like hugging, high-fiving, or linking arms to create a lively, connected氛围. Use prompts like, “Cheer for the newlyweds!” or “Everyone pretend to steal the bride’s bouquet” to generate spontaneous reactions.

Focus Tip: When shooting groups, use a wide aperture (e.g., f/2.8 or f/4) to keep the couple in sharp focus while slightly blurring the background, drawing attention to the main subjects.

Final Checks for Flattering Angles and Lighting

Before wrapping up, review poses to ensure they flatter the couple’s features and work with the lighting. Check for double chins by having them tilt their chins slightly downward or extend their necks forward. Adjust the couple’s body orientation to minimize unflattering shadows, such as turning them 45 degrees from the light source if shooting in harsh sunlight.

Encourage the couple to shift their weight onto one leg or cross their ankles to create a more relaxed, natural stance. For seated poses, have them sit at the edge of a chair or step to avoid slouching, and angle their bodies toward the camera for a slimming effect.

Lighting Reminder: If shooting indoors, position the couple near windows for natural fill light, or use a reflector to bounce light onto their faces if the room is dimly lit.

By following this workflow, photographers can guide couples through poses that feel authentic, flattering, and tailored to Melbourne’s unique settings. Thoughtful direction transforms awkward moments into timeless memories, ensuring every photo tells a story of love and connection.

DSC09206

Steps for adjusting the lighting for wedding photography in Melbourne

Melbourne Wedding Photography Lighting Adjustment Guide

Mastering lighting for wedding photography in Melbourne’s diverse settings—from sunlit beaches to dimly lit venues—requires adaptability and technical precision. Proper lighting enhances mood, highlights details, and ensures the couple looks their best in every shot. This guide breaks down step-by-step adjustments for common lighting scenarios, helping photographers achieve professional results without relying on specific equipment brands or budget constraints.

wedding photography melbourne

Natural Light Optimization for Outdoor Shoots

Melbourne’s unpredictable weather demands flexibility when working with natural light. Start by assessing the time of day and weather conditions. For midday shoots under harsh sunlight, position the couple in shaded areas like under trees or near buildings with overhangs. Use a reflector to bounce soft light onto their faces, reducing shadows and creating a balanced look.

During golden hour—the hour before sunset—take advantage of warm, directional light. Face the couple toward the sun to capture golden highlights in their hair and a natural glow on their skin. If the sun is too intense, use a diffuser to soften its intensity while maintaining warmth. For backlit shots, adjust exposure settings to prevent silhouettes, or embrace the dramatic effect by framing the couple against the sun with a wide aperture for bokeh.

Tip for Cloudy Days: Overcast skies act as a natural diffuser, providing even lighting. Use this to your advantage by shooting wide-angle shots of the couple in open spaces, ensuring their faces are well-lit without harsh contrasts.

Indoor Venue Lighting Adjustments

Indoor venues like banquet halls, churches, or studios often have mixed lighting sources, including overhead fluorescents, chandeliers, or colored uplighting. Start by turning off all automatic settings on your camera to maintain control over exposure and white balance. Use a gray card or white balance tool to calibrate colors accurately, especially in venues with tungsten or LED lighting that casts warm or cool tones.

For dimly lit spaces, increase ISO settings gradually to capture ambient light without introducing excessive noise. Pair this with a wide aperture (e.g., f/1.8 or f/2.8) to let in more light and create a shallow depth of field, isolating the couple from the background. If flash is necessary, bounce it off ceilings or walls to diffuse harsh direct light, or use a flash diffuser for softer results.

Venue-Specific Strategy: In venues with large windows, position the couple near the light source during the day for natural fill light. At night, use window reflections or city lights outside as creative backdrops, adjusting shutter speed to capture motion blur if desired.

Mixed Lighting Scenarios: Balancing Natural and Artificial Sources

Combining natural and artificial light—such as shooting indoors near windows during daylight or using flash outdoors at dusk—requires careful balancing. Start by setting your white balance to “daylight” or “auto” as a baseline, then fine-tune using custom settings if colors appear off. For example, if window light is cool and indoor tungsten light is warm, adjust white balance to neutralize extremes or embrace the contrast for artistic effect.

When using flash outdoors, sync it with ambient light to avoid overpowering natural tones. Set flash power to a low output (e.g., 1/16 or 1/32) and use high-speed sync if shooting in bright conditions to maintain a natural look. For indoor-outdoor transitions, carry a portable LED panel or continuous light to supplement natural light during cloudy spells or in shaded areas.

Creative Technique: Use gels on flashes or LEDs to match artificial light with ambient tones. For instance, a blue gel can mimic twilight skies, while an orange gel can warm up cool indoor lighting.

Low-Light and Nighttime Shooting Techniques

Melbourne’s evening scenes—from waterfront promenades to rooftop bars—offer romantic backdrops but pose challenges for lighting. In low-light conditions, prioritize stability by using a tripod to avoid camera shake. Switch to manual mode and adjust shutter speed, aperture, and ISO to capture enough light without sacrificing image quality.

For nighttime portraits, use a combination of ambient light and supplemental sources. Position the couple near streetlights, neon signs, or lampposts for natural fill light, then use a flash or LED panel to highlight their faces. Experiment with long exposures to capture light trails from passing cars or ferries, adding dynamic elements to the composition.

Safety Note: When shooting in dark or crowded areas, ensure the couple remains visible to the team and avoid obstructing pathways for others.

Dynamic Lighting for Creative Portraits

To add drama or whimsy to wedding portraits, manipulate light creatively. Use a prism or crystal to refract light onto the couple’s faces, creating rainbow-like patterns or lens flares. For bokeh effects, shoot with a wide aperture and position the couple near light sources like fairy lights, candles, or city lights.

In studio-style setups, experiment with backlighting by placing a light source behind the couple to outline their silhouette. Combine this with a front-facing light at a lower intensity to reveal facial details without losing the ethereal glow. Use colored gels or LED strips to cast hues like gold, pink, or blue for mood-specific shots.

Tip for Movement: If the couple is dancing or walking, use rear-curtain sync flash to freeze their motion while capturing light trails behind them, adding energy to the image.

By mastering these lighting adjustments, photographers can adapt to Melbourne’s ever-changing environments, ensuring every wedding photo tells a story with clarity, emotion, and artistic flair. Whether shooting under bright skies or starlit nights, thoughtful lighting techniques transform ordinary moments into extraordinary memories.

DSC09101

A list of wedding photography props for Melbourne

Essential Prop Checklist for Melbourne Wedding Photography

Capturing timeless wedding photos in Melbourne’s diverse settings—from coastal beaches to urban streets—requires thoughtful prop selection. Props add personality, depth, and storytelling elements to images, transforming ordinary shots into memorable moments. This guide outlines versatile, location-friendly props to elevate your wedding photography experience without relying on specific brands or budget constraints.

wedding photography melbourne

Props for Coastal and Beach Settings

Beach locations demand lightweight, weather-resistant props that complement natural elements like sand, water, and sunlight. Start with a woven picnic basket filled with fresh fruit or artisanal bread, creating a rustic, romantic vibe. Pair it with a vintage-inspired blanket in soft neutrals or pastels to anchor the scene without overwhelming the coastal backdrop.

For playful shots, incorporate oversized sunglasses or wide-brimmed straw hats, which add a touch of glamour while shielding the couple from harsh midday sun. A sheer, flowing fabric—such as chiffon or organza—can be draped over the couple or used as a backdrop for wind-swept portraits. If shooting near tide pools or rocky shores, consider bringing a small bouquet of dried flowers or pampas grass for texture contrast.

Lighting Tip: Use reflective props like metallic picnic sets or silver-framed mirrors to bounce sunlight onto the couple’s faces, softening shadows in bright conditions.

Urban and Architectural Prop Ideas

Cityscapes like Melbourne’s laneways, bridges, or historic buildings call for props that blend sophistication with urban edge. A leather-bound journal or vintage camera adds a nostalgic, artistic flair, perfect for candid shots near graffiti walls or cobblestone streets. Incorporate a small chalkboard sign with handwritten quotes about love or the couple’s wedding date for a personalized touch.

For evening shoots under city lights, bring fairy lights or LED candles in glass jars to create a warm, intimate glow. These props work well in dimly lit alleys or near waterfront promenades. A structured umbrella—preferably in a bold color like burgundy or navy—can double as a stylish accessory and a tool to frame the couple against bright skylines or rainy streets.

Posing Inspiration: Use urban props to guide poses, such as having the couple “read” from the journal or lean against a lamppost while holding the umbrella.

Natural and Garden-Inspired Props

Melbourne’s botanical gardens, parks, or vineyards offer lush, organic settings for wedding photos. Elevate these scenes with props that enhance the natural beauty without feeling forced. A wooden crate filled with wildflowers or herbs—like lavender or rosemary—adds earthy charm and a fragrant element to shots. Pair it with a vintage watering can or terracotta pots for a garden-themed narrative.

For seated or laying-down poses, bring a quilted throw blanket in muted tones like sage green or dusty pink, which complements foliage without clashing. A macramé wall hanging or dreamcatcher can serve as a backdrop for bohemian-style portraits, especially when hung from tree branches or fence posts. If shooting near a lake or pond, consider floating flower petals or biodegradable confetti for a whimsical effect.

Seasonal Adaptation: In autumn, swap fresh flowers for pinecones, acorns, or dried leaves to match the season’s palette. In spring, incorporate potted bulbs or seed packets as symbols of new beginnings.

Props for Rainy or Overcast Days

Melbourne’s unpredictable weather calls for props that thrive in low-light or wet conditions. Clear umbrellas are a practical yet stylish choice, allowing photographers to capture the couple’s faces without obstruction while adding a modern aesthetic. Pair them with matching rain boots in neutral colors like beige or gray to maintain a cohesive look.

For indoor shoots during rainy days, bring textured throws or faux fur blankets to create a cozy, intimate atmosphere. A lantern or string lights draped over a fireplace mantel or staircase railing can transform a bland space into a romantic setting. If the venue has large windows, use sheer curtains to diffuse natural light and soften harsh shadows.

Creative Solution: Use puddles after rain as reflective surfaces for symmetry shots, positioning the couple above or beside them for artistic compositions.

Timeless and Sentimental Props

Incorporating personal, sentimental props adds emotional depth to wedding photos. A handwritten love letter or vintage postcard from a meaningful location (e.g., where the couple met or got engaged) can be held or displayed in the background. Family heirlooms like a grandmother’s brooch, a father’s cufflinks, or a mother’s veil infuse images with generational significance.

For a modern twist, create a custom prop like a framed ultrasound photo (if expecting) or a small chalkboard with the couple’s future last name. These items tell a story beyond the wedding day, making photos feel more authentic and unique.

Display Tip: Arrange sentimental props on a vintage suitcase or wooden tray during detail shots, ensuring they’re visible but not distracting.

By curating a prop collection tailored to Melbourne’s varied settings and weather conditions, couples can ensure their wedding photos reflect their personalities while harmonizing with the environment. Thoughtful prop selection transforms ordinary scenes into extraordinary visual narratives, capturing the essence of the day for years to come.

wedding photography melbourne

The process of scene switching for wedding photography in Melbourne

Melbourne Wedding Photoshoot Scene Transition Guide: Seamless Flow Between Locations

Capturing a wedding photoshoot across Melbourne’s varied landscapes requires strategic planning to ensure smooth transitions between scenes. From coastal stretches to urban landmarks, each location demands careful timing, outfit adjustments, and logistical coordination. This guide breaks down the process into actionable steps, helping couples and photographers navigate scene changes efficiently.

wedding photography melbourne

Preparing for Rapid Scene Shifts: Essential Checklists

Switching between outdoor and indoor settings—or moving between distant locations—requires preparation to avoid delays. Start by creating a detailed itinerary with allocated time slots for each scene, including buffer periods for unexpected issues like traffic or weather changes. Share this schedule with the entire team, including the photographer, stylist, and any assistants.

Pack a portable “transition kit” containing touch-up makeup, hairpins, fabric steamer, and spare accessories. This ensures quick fixes for wrinkled dresses, smudged lipstick, or loose veils during scene changes. If shooting in multiple outfits, organize garments on hangers with protective covers to prevent damage while traveling.

Pro Tip: Assign one team member to manage the kit and coordinate timing, acting as a liaison between the couple and photographer.

Moving Between Coastal and Urban Settings: Lighting and Timing

Melbourne’s coastal areas, like St Kilda Beach, and urban spots, such as Hosier Lane, offer contrasting backdrops but require different lighting approaches. When transitioning from a beach to a city street, prioritize natural light conditions. For example, shoot coastal scenes during golden hour for warm tones, then move to shaded urban alleys to avoid harsh midday sunlight.

If the next location is indoors, such as a café or gallery, use the travel time to adjust outfits. Swap open-toed sandals for closed shoes suitable for paved surfaces, or layer a lightweight jacket over a sleeveless dress for air-conditioned venues. Communicate with the photographer to align these changes with the desired mood of each scene—casual beachside laughter versus sophisticated urban elegance.

Safety Note: When shooting near busy roads or crowded areas, designate a safe zone for outfit changes and ensure the couple remains visible to the team.

Navigating Natural to Architectural Transitions: Props and Posing

Shifting from a natural setting like the Royal Botanic Gardens to an architectural landmark such as Flinders Street Station involves adapting props and posing styles. In gardens, use flowers, branches, or benches as organic elements to frame the couple. For station scenes, incorporate urban props like vintage suitcases, newspapers, or umbrellas to add context.

Posing should evolve with the environment. In nature, encourage fluid movements like walking hand-in-hand or sitting on grassy knolls. Near buildings, opt for structured poses—leaning against walls, standing on steps, or using columns as leading lines. The photographer should guide these adjustments while maintaining a consistent visual narrative across scenes.

Visual Continuity: Repeat a color or texture from one scene to the next, such as carrying a bouquet with hues matching the station’s brickwork, to create cohesion.

Handling Unexpected Delays: Flexibility in Scene Order

Weather disruptions or venue closures can force last-minute changes to the shoot itinerary. Build flexibility into the plan by ranking scenes by priority. For instance, if rain postpones an outdoor shoot, prioritize indoor locations with adjustable lighting, like studios or covered arcades.

During delays, use the time creatively. Capture candid moments of the couple interacting—sharing an umbrella or laughing at a mishap—to add authenticity to the album. If a location becomes inaccessible, research nearby alternatives with similar aesthetics. For example, if a beach is crowded, scout a quieter pier or rocky shoreline with comparable coastal charm.

Communication Strategy: Keep the couple informed about adjustments in real-time, explaining how changes enhance the final result rather than causing inconvenience.

Final Checks Before Wrapping Up

Before leaving each location, perform a quick review to ensure no details are overlooked. Check for lost accessories, tangled hair, or wardrobe malfunctions. Verify that the photographer has captured all requested shots, such as close-ups of rings or wide-angle views of the setting.

If transitioning to a final venue for sunset or nighttime shots, confirm lighting equipment is functional—extra batteries, flash units, or portable LED panels. Assign someone to gather all props and personal items, preventing items from being left behind in the rush.

Memory Keeping: Encourage the couple to take a moment to absorb each location’s ambiance, as these memories will enrich their photo album’s storytelling.

By following these steps, couples and photographers can navigate Melbourne’s diverse wedding photoshoot scenes with confidence, ensuring each transition enhances the overall narrative without sacrificing creativity or efficiency.