DSC05227

Wedding photo shoot at Little Red Riding Hood Lighthouse in Melbourne

Capturing Romance at Melbourne’s Red Bluff Lighthouse: A Wedding Photography Guide

Melbourne’s Red Bluff Lighthouse, with its striking red tower and dramatic coastal backdrop, offers a breathtaking setting for wedding photography. Nestled along the rugged shoreline, this historic landmark provides endless opportunities to create timeless, romantic images. Here’s how to make the most of your shoot at this iconic location.

wedding photography melbourne

Embracing the Natural Light and Scenery

The lighthouse’s coastal location means lighting conditions shift dramatically throughout the day, offering unique moods for every session.
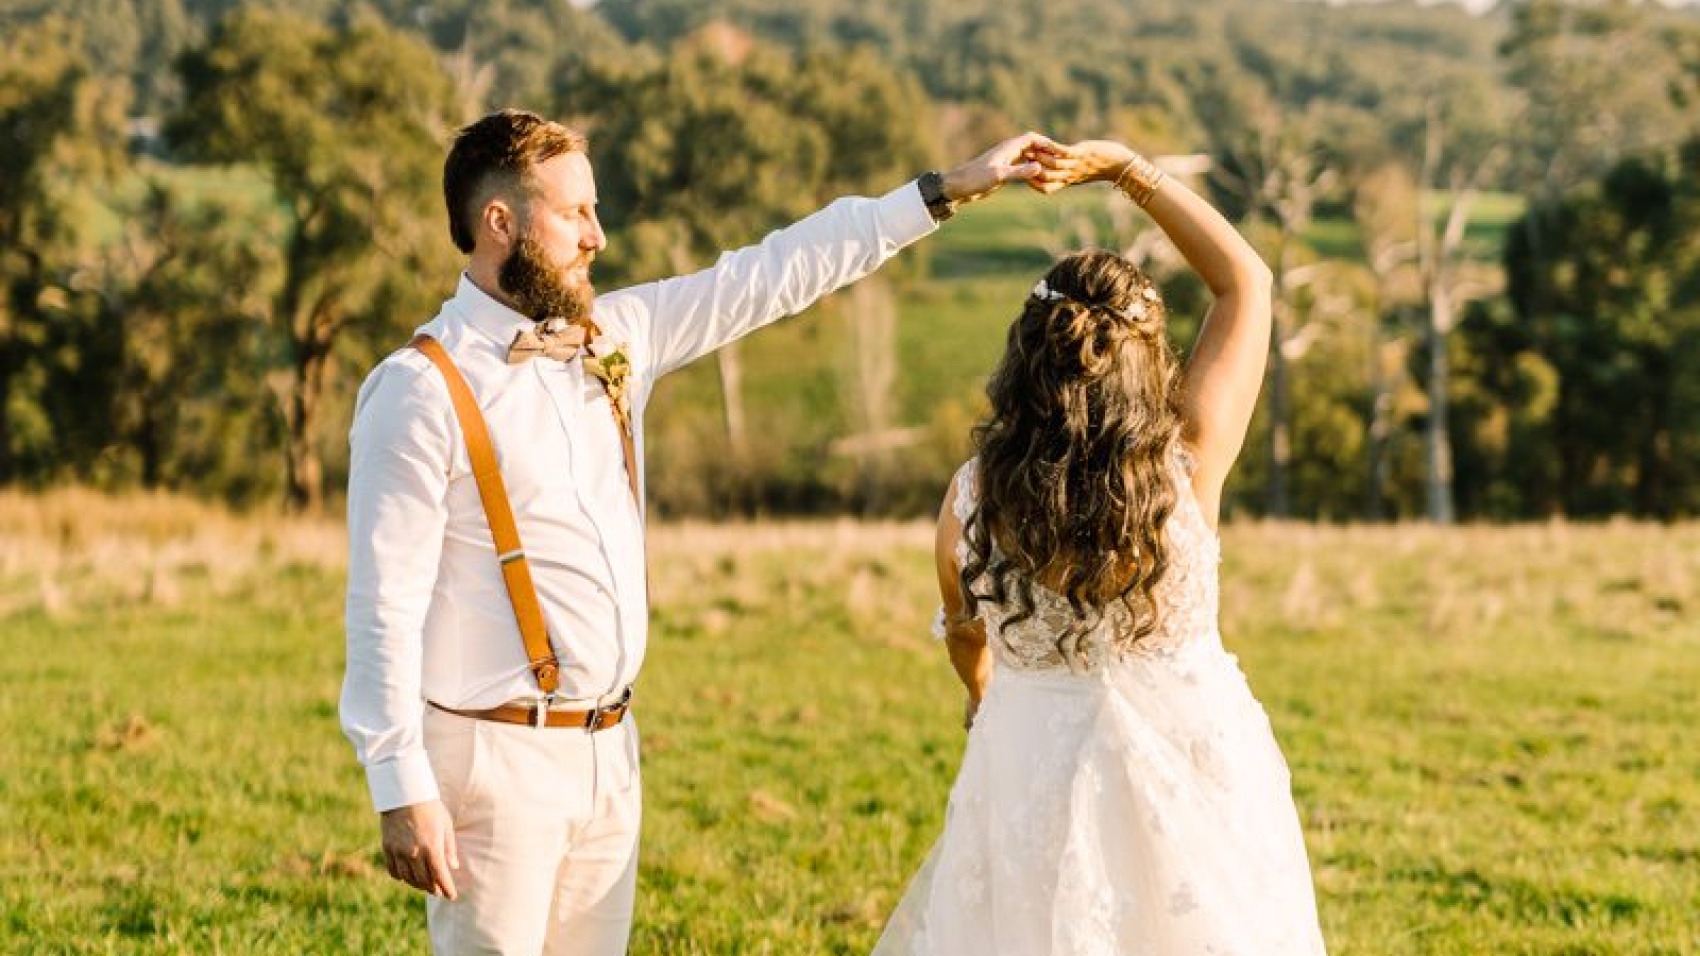
Golden Hour Magic:

The soft, warm light of sunrise or sunset is ideal for wedding portraits. Position the couple near the lighthouse tower, using its red hue as a bold contrast against the golden sky. For intimate close-ups, have them stand near the rocky shoreline, where the low sun casts a gentle glow on their faces. If the wind picks up, let flowing veils or loose hair add movement to the frame, creating a dreamy, ethereal effect.

Midday Clarity for Vibrant Colors:

When the sun is high, the lighthouse’s red paint and the surrounding ocean appear at their most vivid. This is perfect for capturing wide-angle shots of the entire scene, including the couple framed by the tower or standing on the cliff edge. Use a polarizing filter to reduce glare on the water and enhance the saturation of the blues and greens. For softer midday lighting, seek shade under nearby trees or use a diffuser to soften harsh shadows on the couple’s faces.

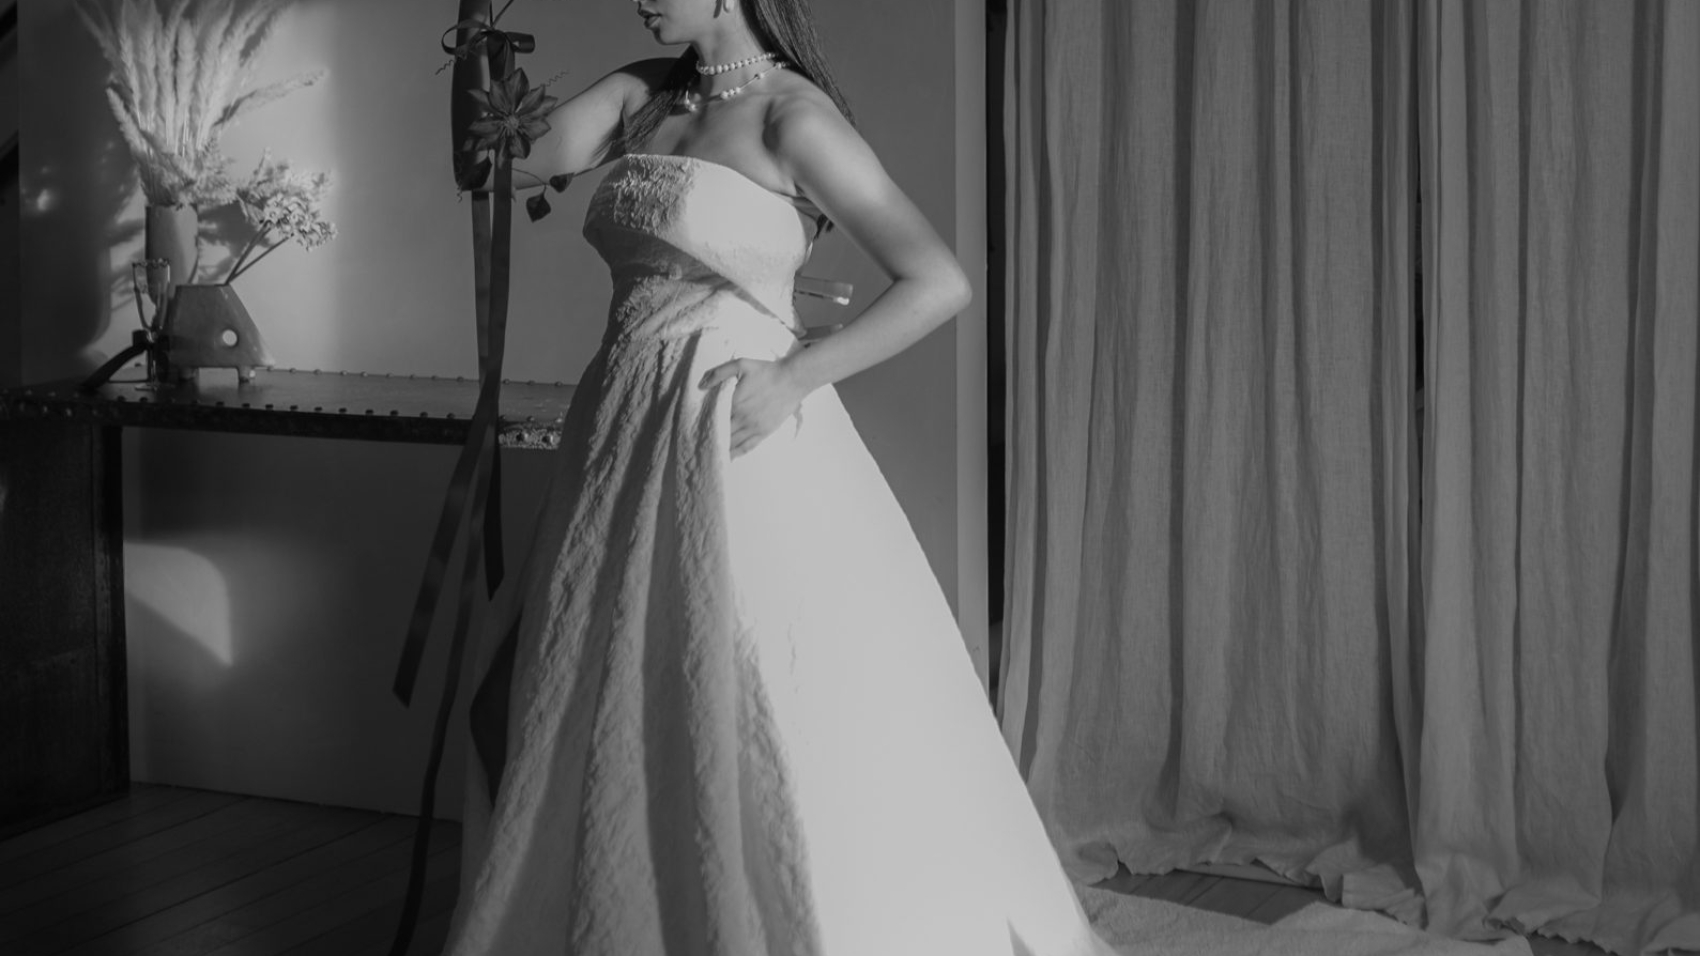
Overcast Skies for Moody Dramatics:

Cloudy days create a diffused, even light that works well for emotional, storytelling shots. The lack of direct sunlight allows you to photograph the couple in deeper shadow, emphasizing the lighthouse’s rugged texture and the ocean’s restless waves. Experiment with long exposures to blur the water into a silky smooth surface, adding a sense of calm to the scene. If rain is in the forecast, bring a clear umbrella for the couple to hold—it can become a prop that adds both practicality and visual interest.

Crafting Compositions That Highlight the Lighthouse’s Charm

The lighthouse’s towering presence and bold color make it the focal point of any image, but creative framing can elevate your photos further.

Leading Lines and Symmetry:

Use the lighthouse’s vertical lines to draw the viewer’s eye toward the couple. Position them at the base of the tower or slightly off-center, allowing the structure to guide attention to their expressions or gestures. For symmetry, shoot straight-on shots of the lighthouse with the couple standing equidistant from the center, creating a balanced, harmonious composition. If there are nearby fences or pathways, incorporate them as leading lines that converge at the lighthouse, adding depth to the shot.

Playing with Scale and Perspective:

The lighthouse’s height offers opportunities to experiment with perspective. Shoot from a low angle to make the tower appear even more imposing, dwarfing the couple and emphasizing the grandeur of the setting. Alternatively, stand back and use a wide-angle lens to capture the entire scene, including the rocky cliffs and endless ocean. For a more intimate feel, zoom in on the couple’s hands holding each other or their intertwined fingers, using the lighthouse as a distant, colorful backdrop.

Incorporating Natural Elements:

The coastal environment provides plenty of natural props to enhance your compositions. Have the couple stand near wildflowers or driftwood for a touch of organic texture, or use the ocean’s waves as a dynamic background. If shooting during high tide, capture the couple’s reflection in a shallow pool of water, creating a mirror-like effect that doubles the visual impact. Be mindful of the wind—a gently blowing veil or a strand of hair can add movement and life to an otherwise static image.

Capturing Candid Moments and Emotional Connections

While posed shots are essential, candid interactions often reveal the true emotion of the day.

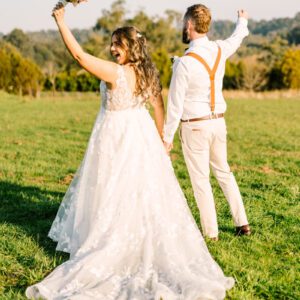
Laughter and Lightheartedness:

Encourage the couple to interact naturally, whether it’s sharing a joke, stealing a kiss, or dancing to an imaginary song. These unscripted moments often result in the most genuine, heartfelt images. Position yourself slightly out of sight to avoid disrupting their flow, and use a fast shutter speed (1/500th of a second or higher) to freeze spontaneous gestures like a mid-laugh smile or a playful nudge.
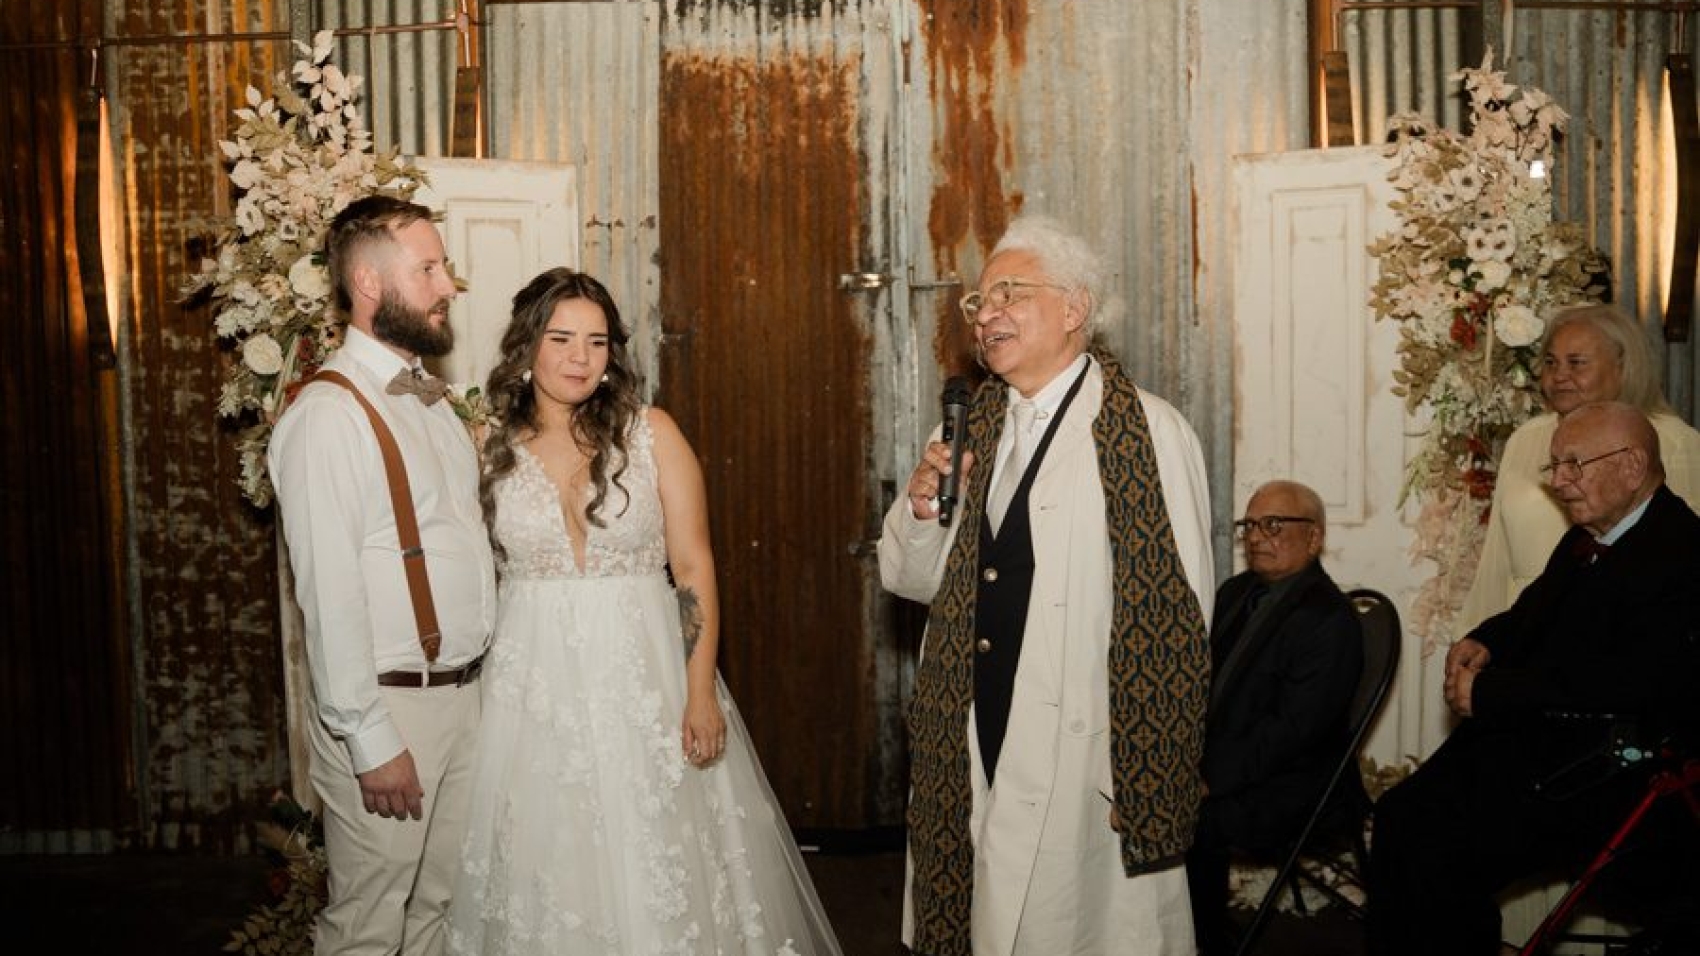
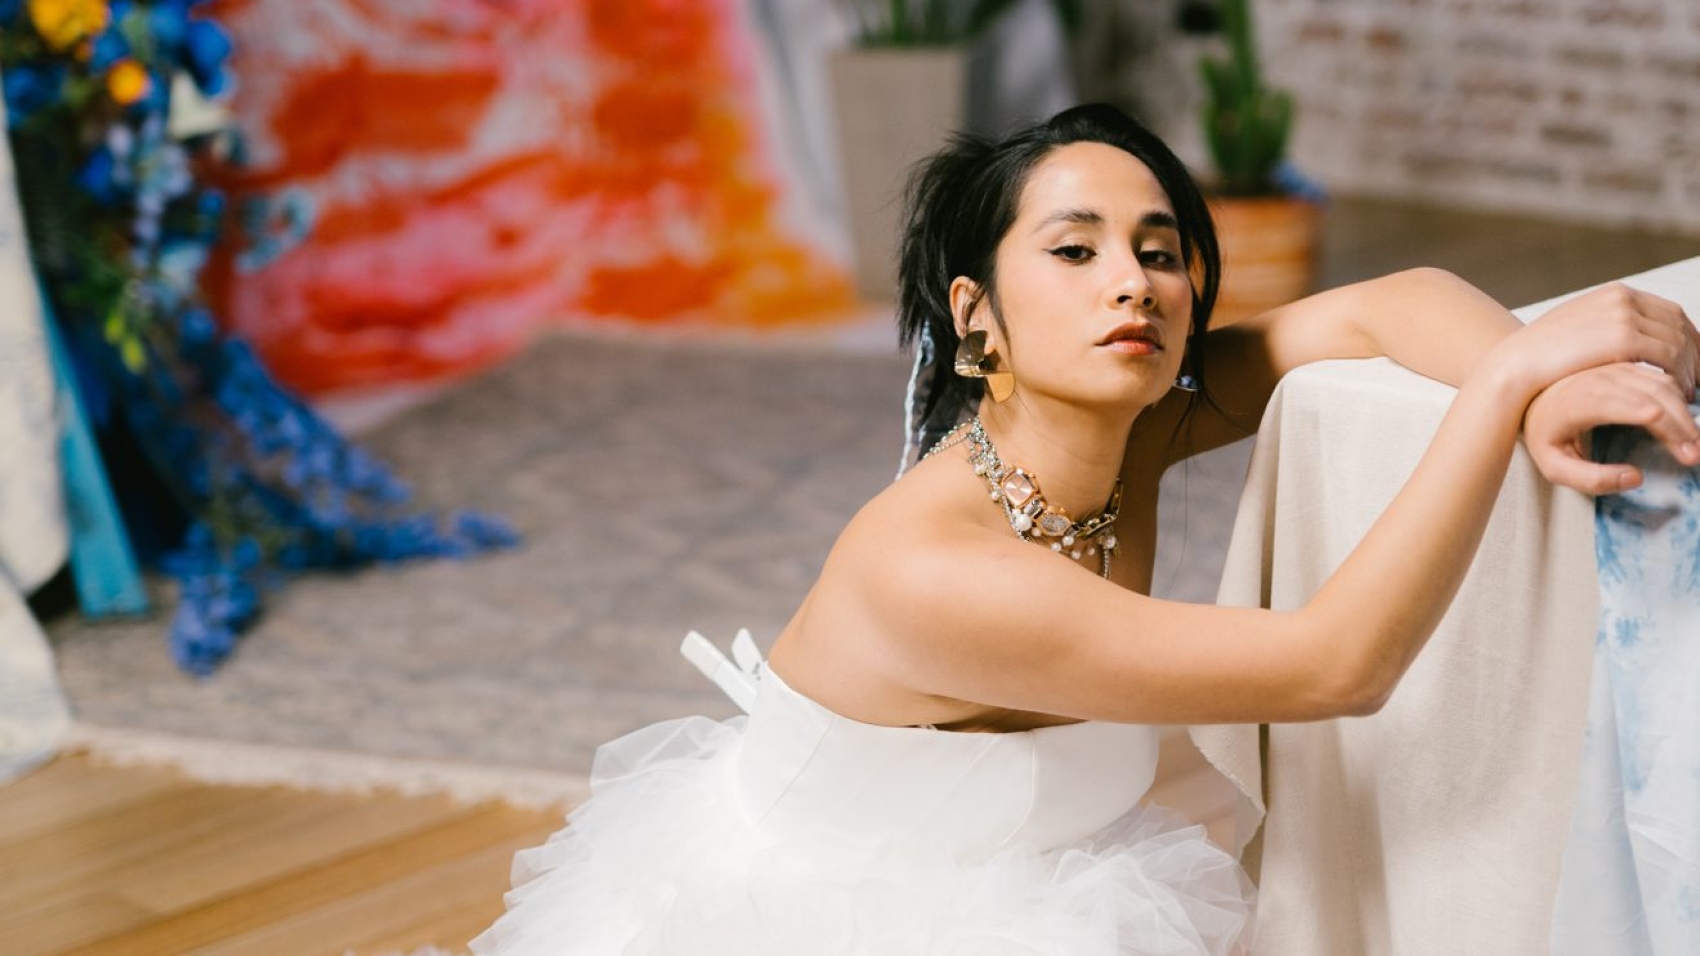
Quiet Intimacy:

Not all romantic moments are loud—sometimes, the most powerful images come from quiet, shared glances or gentle touches. Have the couple stand close together, facing the ocean, and capture the way they lean into each other or hold hands without looking at the camera. Use a shallow depth of field (f/2.8 or lower) to blur the background, keeping the focus on their connection. If the wind is calm, ask them to whisper something to each other—the subtle expressions that follow can be incredibly evocative.

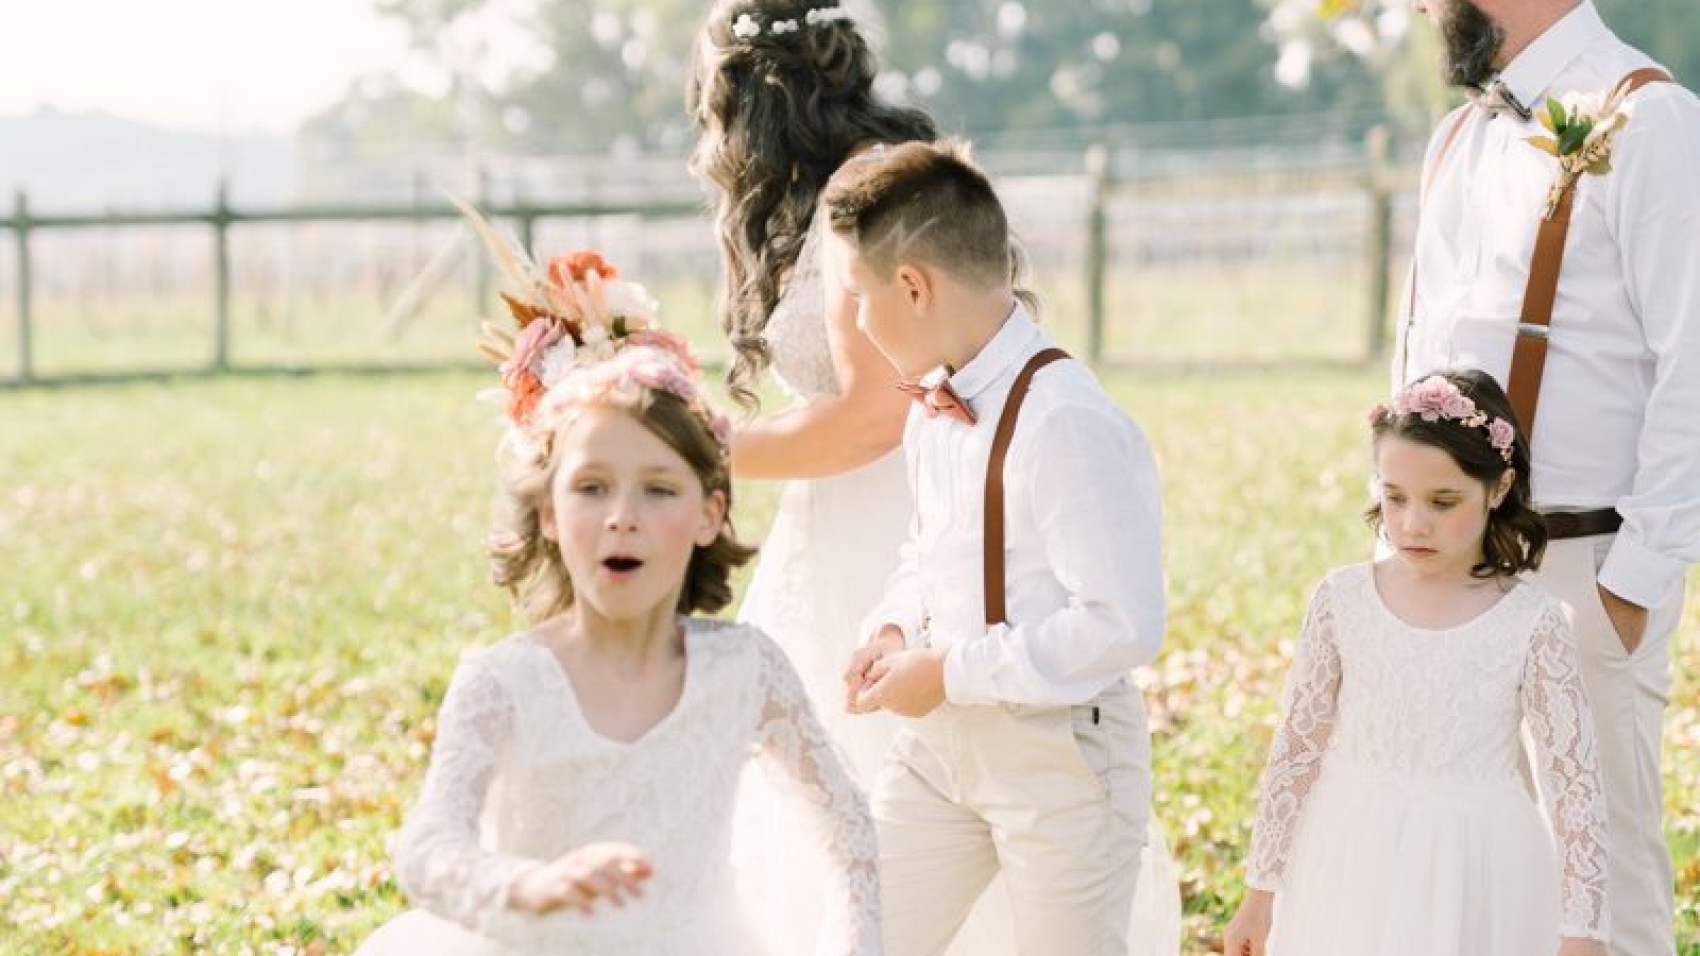
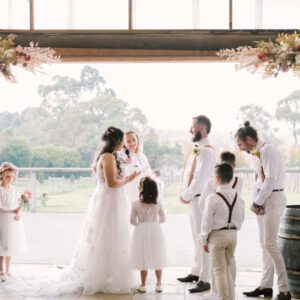
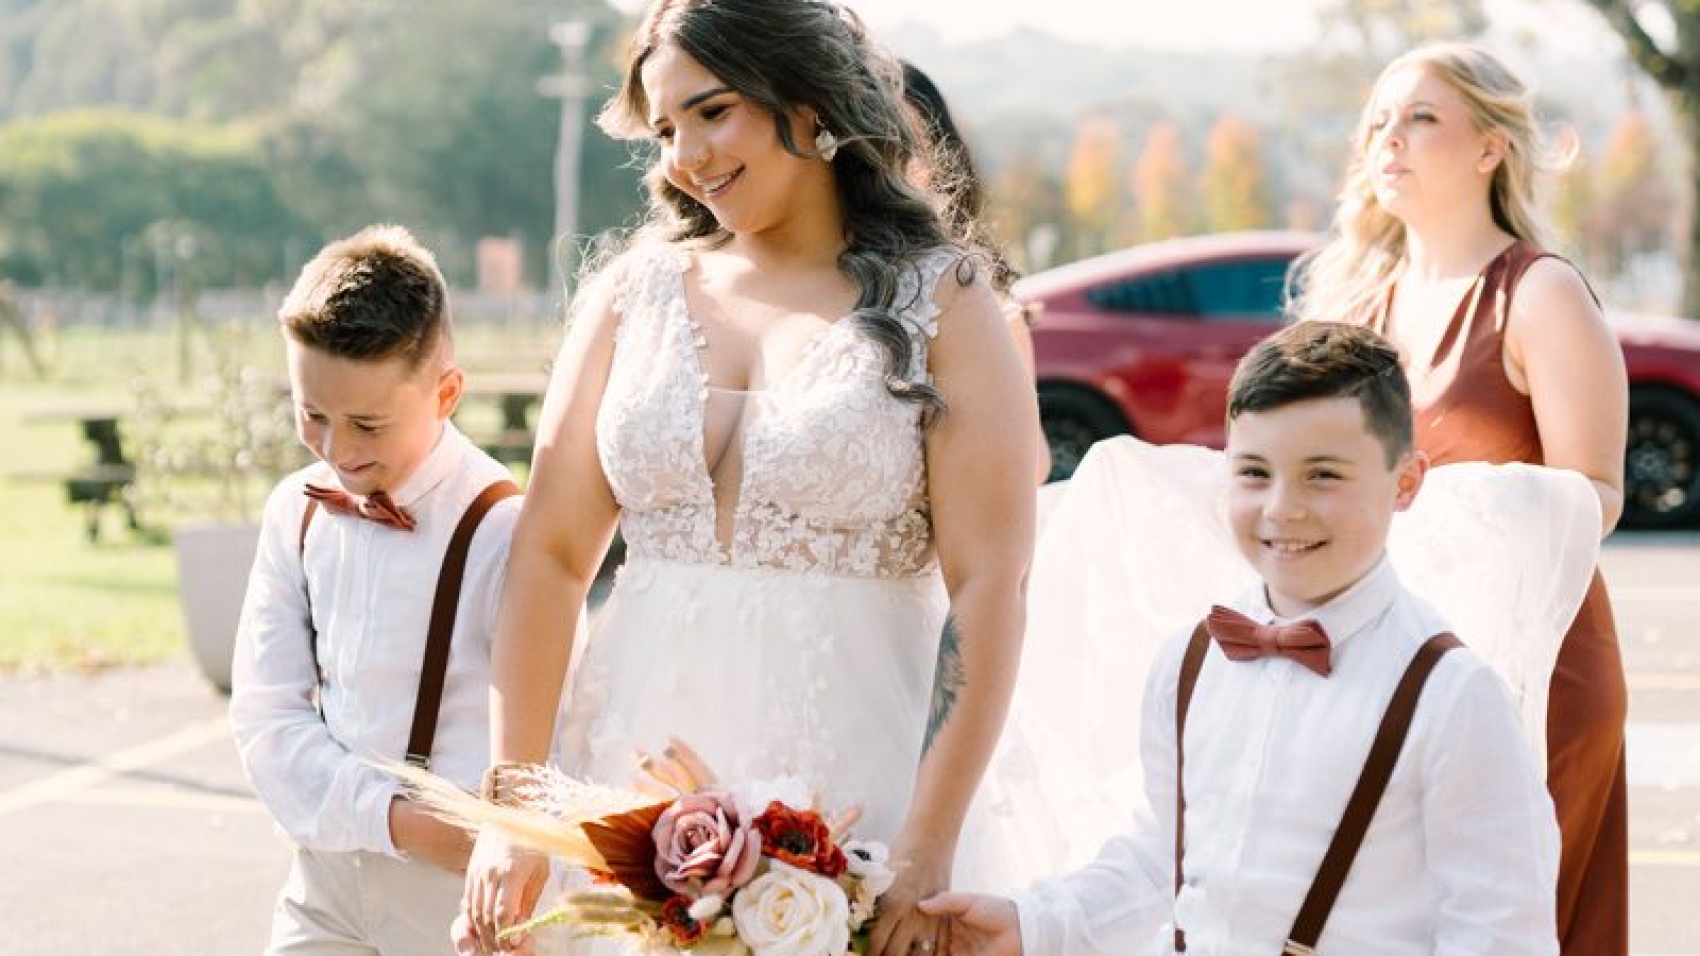
Group Dynamics with Family and Friends:

If the wedding party is joining the shoot, incorporate them into compositions that highlight the lighthouse’s scale. Arrange everyone in a semi-circle around the couple, with the lighthouse towering behind them, or have them stand on different levels of the rocky cliff for a layered, dynamic group shot. For candid group moments, capture the laughter and hugs that naturally occur when loved ones reunite, using the lighthouse as a timeless, unchanging witness to their joy.

Respecting the Location and Its Surroundings

The Red Bluff Lighthouse is a protected historic site, so it’s important to photograph it responsibly.

Staying on Designated Paths:

Stick to marked trails and avoid walking on fragile coastal vegetation or eroding cliffs. Not only does this protect the environment, but it also ensures your safety—unstable rocks or high winds can pose risks. If you need to move closer to the lighthouse for a shot, ask a park ranger or local guide for the safest route.

Minimizing Disturbance:

Keep noise levels low, especially if other visitors are nearby, and avoid blocking access to the lighthouse or its viewing areas. If you’re shooting during peak hours, be patient and wait for crowds to disperse before taking critical shots. Remember that the lighthouse is a working navigational aid, so respect any signs or barriers indicating restricted zones.

Leaving No Trace:

Pack out all trash, including flower petals or confetti, and avoid using props that could harm the environment, such as glitter or non-biodegradable materials. If the couple brings props like blankets or signs, ensure they’re removed after the shoot. By leaving the location as pristine as you found it, you help preserve its beauty for future generations of photographers and visitors.

The Red Bluff Lighthouse is more than just a backdrop—it’s a character in the story of your wedding day. By approaching your photography with creativity, sensitivity, and respect, you’ll create images that capture not only the beauty of the location but also the love and joy of the couple celebrating there.

DSC04607

Photographed on Hosier Lane graffiti Street in Melbourne

Capturing the Vibrant Energy of Hosier Lane in Melbourne: A Photography Guide

Melbourne’s Hosier Lane is a globally renowned destination for street art, where every corner bursts with color, creativity, and cultural expression. This ever-evolving outdoor gallery offers endless opportunities for photographers to document bold murals, intricate stencils, and spontaneous graffiti. Here’s how to make the most of your shoot in this dynamic urban space.

wedding photography melbourne

Navigating Light and Color in a Dynamic environment

Hosier Lane’s narrow alleys and towering walls create a unique interplay of light and shadow, especially during different times of day.

Midday Sun for Vivid Hues:

When the sun is high, the lane’s surfaces come alive with saturated colors. Position yourself to capture direct sunlight hitting a mural’s brightest sections, such as neon yellows or electric blues. This lighting works best for flat-lay shots of smaller artworks or close-ups of detailed tags. If the glare is too intense, use a polarizing filter to reduce reflections and enhance color contrast.

Golden Hour for Soft Contrasts:

During sunrise or sunset, the lane takes on a warmer, more atmospheric tone. The low angle of the sun casts long shadows across the walls, adding depth to your compositions. Look for artworks with darker backgrounds, as the golden light will make the colors pop against them. Experiment with backlighting by shooting toward the sun, which can create dramatic silhouettes of passing pedestrians or street furniture.

Overcast Skies for Even Tones:

Cloudy days diffuse the light, eliminating harsh shadows and allowing you to capture the truest colors of the street art. This is ideal for photographing large-scale murals with multiple tones, as the soft light ensures no part of the image is overexposed or underexposed. Use a slightly higher ISO to compensate for the lower light levels, and consider shooting in RAW format for greater flexibility during post-processing.

Composing Shots to Highlight Artistic Details

The chaos of Hosier Lane demands creative framing to turn clutter into compelling visuals.

Finding Balance in Busy Walls:

Many sections of the lane are covered in overlapping layers of art, making it challenging to focus on a single piece. Look for negative space—areas of plain wall or sky—to frame a mural or tag. For example, position a colorful stencil against a patch of bare brick, or use a window frame to isolate a section of graffiti. This technique helps the viewer’s eye navigate the visual noise.

Playing with Perspective and Scale:

Hosier Lane’s narrowness allows for unique angles that emphasize the height or width of the art. Shoot from a low angle to make a tall mural appear even more imposing, or stand back and use a wide-angle lens to capture an entire wall in one frame. Alternatively, focus on a small detail, like a hand-painted flower or a cleverly placed sticker, and let the surrounding chaos fade into the background.

Incorporating Human Elements:

People add life to the lane’s static artworks. Capture locals or tourists interacting with the murals, such as posing for photos or pausing to admire a piece. Use a fast shutter speed (1/500th of a second or higher) to freeze movement, or a slower speed (1/60th or lower) to create motion blur if someone is walking past. Be respectful and ask permission if photographing someone up close, especially if they’re the main subject of your shot.

Exploring Themes and Narratives in the Art

Hosier Lane’s street art often carries political, social, or personal messages. Documenting these themes can add depth to your photography.

Political and Social Commentary:

Many murals address issues like climate change, inequality, or Indigenous rights. Look for artworks that feature bold text or symbolic imagery, such as a hand holding the Earth or a face masked in protest. To convey the urgency of these messages, shoot during busy times when the lane is filled with people, creating a sense of community engagement. Use a telephoto lens to isolate a specific detail, like a slogan or a protest sign, and let it speak for itself.

Pop Culture and Humor:

Not all of Hosier Lane’s art is serious—some pieces play with humor, nostalgia, or pop culture references. Capture a mural that reimagines a famous movie scene or a stencil that pokes fun at current events. These lighthearted works often attract crowds, so arrive early or late to avoid distractions. Look for interactive elements, like a mural with a cutout where people can insert their faces, and photograph volunteers participating in the fun.

Abstract and Experimental Art:

The lane also features abstract compositions that challenge traditional notions of street art. These might include splatters of paint, geometric patterns, or mixed-media installations. To photograph abstract pieces effectively, focus on texture and form rather than recognizable subjects. Use a macro lens to capture the details of a dripping paint stroke or the rough surface of a collage. Experiment with black-and-white conversion to emphasize contrast and shape.

Respecting the Space and Its Creators

Hosier Lane’s art is temporary by nature, but photographers can help preserve its spirit by being mindful of their impact.

Avoiding Damage to Artworks:

Never touch or lean on the murals, as oils from your skin can degrade the paint over time. Be careful not to block access to the lane or interfere with artists who might be working on new pieces. If you see someone vandalizing or defacing the art, report it to local authorities rather than confronting them yourself.

Giving Credit Where It’s Due:

If you share your photos online, consider tagging the artists or using hashtags like #HosierLane or #MelbourneStreetArt to help promote their work. Many pieces are signed or include social media handles, so take a moment to note these details. If you’re unsure who created a piece, avoid making assumptions—instead, focus on the art itself and its impact.

Supporting the Local Art Scene:

Hosier Lane is part of a broader street art culture in Melbourne. Consider visiting nearby lanes like Rutledge Lane or Union Lane, which also feature impressive works. Attend street art festivals or workshops to learn more about the techniques and stories behind the murals. By engaging with the community, you’ll gain a deeper appreciation for this ever-changing urban canvas.

Hosier Lane is a living, breathing gallery where every visit offers new discoveries. By approaching your photography with creativity, curiosity, and respect, you’ll capture images that celebrate the lane’s vibrant energy and the artists who keep it alive.

DSC05170

Interior view of the Melbourne State Library

Library: A Photography Guide

Melbourne’s State Library, with its iconic domed La Trobe Reading Room and historic architecture, is a treasure trove for photographers seeking to document cultural heritage and architectural beauty. Whether you’re drawn to its grand interiors, intricate details, or quiet study spaces, here’s how to approach shooting inside this iconic institution.

wedding photography melbourne

Mastering Light and Shadow in Historic Spaces

The library’s interiors blend natural and artificial light, creating dynamic contrasts that highlight its architectural features.

Natural Light in the La Trobe Reading Room:

The centerpiece of the library, the La Trobe Reading Room, features a massive glass dome that floods the space with soft, diffused natural light. To capture the room’s ethereal quality, visit during midday when sunlight streams directly through the dome. Position yourself on the upper balconies to photograph the symmetry of the hexagonal desks below, or shoot upward to emphasize the dome’s height and geometric patterns. If the light is too harsh, use a lens hood or adjust your exposure to avoid overexposed highlights.

Artificial Light in Dimly Lit Corridors:

Many of the library’s older sections, such as the heritage-listed corridors and exhibition halls, rely on warm artificial lighting. This creates a cozy, timeless atmosphere perfect for moodier shots. To balance the warm tones, set your white balance to “tungsten” or manually adjust it to counteract the yellowish hue. Use a tripod for long exposures to capture sharp details in low-light conditions, especially when photographing textured walls or ornate doorways.

Golden Hour Reflections on Marble and Glass:

During sunrise or sunset, sunlight bounces off the library’s marble floors and glass cases, creating golden reflections that add warmth to your images. Look for reflective surfaces near windows or in the main entrance hall to capture these fleeting moments. If shooting handheld, increase your ISO slightly to maintain a fast enough shutter speed, or lean against a wall for stability.

Composing Shots Around Architectural Elements

The library’s design is rich with details that offer endless compositional opportunities.

Symmetry and Perspective in the Dome:

The La Trobe Reading Room’s dome is a masterclass in symmetry. Stand directly beneath it and shoot upward to emphasize its circular shape and radial lines. For a more dramatic perspective, use a wide-angle lens to capture the entire dome while including the balconies and desks below. Alternatively, focus on a single section of the dome’s ironwork or stained glass to highlight its intricate craftsmanship.

Leading Lines in Staircases and Hallways:

The library’s staircases and corridors feature strong leading lines that guide the viewer’s eye through the frame. Position yourself at the base of a staircase and shoot upward to emphasize its height, or stand at the end of a hallway to capture its length. Look for repeating patterns, such as the rhythm of balusters or the alignment of bookshelves, to create visual harmony. If the space feels crowded, wait for a moment of quiet to photograph uninterrupted lines.

Framing with Doorways and Arches:

Use the library’s arched doorways and window frames to add depth to your compositions. For example, stand inside a doorway and frame the view of another part of the library through the arch, creating a layered effect. This technique works particularly well when photographing the reading room from adjacent hallways or when capturing views of the exterior through interior windows. Experiment with different angles to find the most compelling framing.

Capturing Human Interaction and Quiet Moments

The library is not just a monument to architecture—it’s a living space where people study, read, and reflect.

Candid Shots of Patrons in Study Areas:

To capture the library’s atmosphere, photograph patrons immersed in their work without disturbing them. Use a telephoto lens to shoot from a distance, or position yourself near study desks with a wide-angle lens to include the surrounding environment. Look for moments of concentration, such as a hand adjusting glasses or a page being turned, to convey the quiet intensity of the space. If shooting indoors, avoid using flash to maintain the natural ambiance.

Environmental Portraits in Historic Settings:

If you have permission, ask a library staff member or visitor to pose in a historically significant location, such as near a stained-glass window or in front of a bookshelf filled with antique volumes. Use natural light from windows to illuminate their face, and choose a background that complements the subject without distracting from them. Encourage your subject to interact with their surroundings, such as holding a book or leaning against a railing, to create a more authentic connection to the space.

Documenting the Library’s Quiet Rhythms:

The library’s beauty lies in its subtle details: the soft shuffle of feet on marble floors, the whisper of pages turning, or the way sunlight filters through dust motes in the air. To capture these moments, use a slow shutter speed (1/30th of a second or slower) to blur slight movements, creating a sense of tranquility. Alternatively, use a fast shutter speed (1/500th of a second or higher) to freeze a fleeting gesture, such as a hand reaching for a book or a shadow crossing a desk.

Respecting the Space and Its Patrons

Photographing inside the State Library requires sensitivity to its role as a public and historical institution.

Following Library Rules and Guidelines:

Before shooting, check the library’s photography policy, as some areas may be restricted or require permission. Avoid using tripods in crowded spaces unless absolutely necessary, and always yield to patrons and staff. If you plan to use additional lighting or equipment, notify library staff in advance to ensure compliance with regulations.

Being Mindful of Noise and Distractions:

The library is a place for study and reflection, so keep noise to a minimum when setting up your gear or moving around. Use headphones to monitor audio levels if recording video, and avoid using loud shutter sounds or continuous shooting modes that could disrupt others. If you need to communicate with a model or assistant, do so quietly or step outside the main reading areas.

Preserving the Library’s Heritage:

Handle all props and equipment with care to avoid damaging the library’s historic features, such as wooden desks, marble floors, or delicate ironwork. Do not move or rearrange furniture unless instructed to do so by staff, and avoid touching or leaning on fragile displays or artifacts. By treating the space with respect, you help ensure it remains a welcoming environment for future photographers and visitors.

By approaching your shoot with thoughtfulness and creativity, you’ll capture the State Library’s blend of history, architecture, and human activity, creating images that resonate with viewers long after they leave the building.

WUU00452

Photographed at the Kerferd Road promenade in Melbourne

Photographing Melbourne’s Kerferd Road Pier: A Guide to Stunning Coastal Imagery

Kerferd Road Pier, nestled along the shores of Port Phillip Bay in Melbourne’s Albert Park, offers a picturesque blend of industrial charm and natural beauty. With its weathered wooden planks, rusted metal structures, and sweeping views of the bay, this location is a favorite among photographers seeking to capture Melbourne’s coastal character. Here’s how to make the most of your shoot at this iconic spot.

wedding photography melbourne

Lighting Strategies for Every Time of Day

The interplay of light and shadow at Kerferd Road Pier changes dramatically throughout the day, offering unique opportunities for creative photography.

Morning Light for Soft Contrast:

Early morning light is gentle and diffused, casting long shadows that highlight the pier’s textures without overwhelming the scene. Arrive before sunrise to photograph the pier as the first rays of light peek over the horizon, warming the wooden planks and creating a serene atmosphere. This time is ideal for capturing the pier’s details, such as peeling paint or rust patterns, with minimal harsh contrasts.

Midday Sun for Bold Colors and Highlights:

While midday sunlight can be harsh, it also brings out the vibrant colors of the bay and the pier’s surroundings. Use this time to experiment with bold compositions, such as shooting straight down the length of the pier to emphasize its perspective. If the sun is high, look for shaded areas near the pier’s supports or under nearby trees to balance the exposure. Alternatively, use a polarizing filter to reduce glare on the water and enhance the sky’s blue tones.

Golden Hour and Twilight for Dramatic Skies:

The golden hour, just before sunset, bathes the pier in warm, golden light, creating a magical glow that transforms the scene. Position yourself to capture the sun as it aligns with the pier’s structure, framing it between the wooden beams or metal supports. After sunset, stay for twilight, when the sky transitions from deep blue to indigo. This period, known as the blue hour, offers cool, moody tones that contrast beautifully with the pier’s warm, weathered surfaces.

Composing Shots with the Pier’s Architecture

Kerferd Road Pier’s industrial elements provide endless opportunities for striking compositions.

Leading Lines and Perspective:

The pier’s long, straight planks create natural leading lines that draw the viewer’s eye into the image. Stand at one end of the pier and shoot straight down its length, using the vanishing point to emphasize depth and scale. For a more dynamic perspective, experiment with shooting from a low angle or from the side, capturing the pier’s diagonal lines as they recede into the distance.

Framing with Structural Elements:

Use the pier’s supports, railings, or ladders to frame your shots and add visual interest. For example, position the camera between two vertical supports to create a natural window through which the bay is visible. This technique adds layers to your composition, guiding the viewer’s gaze toward the horizon or a focal point in the background. Look for patterns in the pier’s structure, such as repeating beams or rusted metal plates, to create rhythmic visual elements.

Incorporating the Bay and Horizon:

The pier extends into Port Phillip Bay, offering a seamless connection between land and water. Include the bay in your compositions by positioning the horizon line one-third of the way up or down the frame, following the rule of thirds. If the sky is particularly dramatic, give it more space in the frame to emphasize its beauty. For a minimalist approach, focus on the reflection of the pier on the water’s surface, capturing its symmetry and calmness.

Capturing Motion and Reflections on the Water

The bay’s gentle waves and occasional boats provide opportunities to photograph movement and reflections.

Long Exposures for Smooth Water Effects:

Use a tripod and a slow shutter speed (1/15th of a second or slower) to blur the movement of waves, creating a silky, mirror-like effect on the water’s surface. This technique emphasizes the pier’s stillness against the dynamic bay, adding a sense of tranquility to your images. Experiment with different shutter speeds to achieve varying levels of blur, from subtle ripples to completely smooth water. If shooting during twilight, adjust your ISO and aperture to compensate for lower light levels.

Freezing Action with Fast Shutter Speeds:

If you want to capture the sparkle of sunlight on the water or the splash of waves, switch to a faster shutter speed (1/500th of a second or higher). This freezes motion, preserving crisp details in the ripples and reflections. Look for patterns in the water, such as the wake from a passing boat or the movement of seabirds, to add visual interest to your shots. For a creative twist, shoot from a low angle to exaggerate the sense of motion and energy.

Reflective Surfaces and Symmetry:

Still pockets of water near the pier’s base can act as natural mirrors, reflecting the pier’s structure and the sky above. Position your camera low to the ground to emphasize these reflections, creating symmetrical compositions that double the impact of the scene. If the tide is out, walk along the water’s edge to find the best reflective spots, or use a polarizing filter to reduce glare and enhance the clarity of the reflections.

Respecting the Environment and Staying Safe

Kerferd Road Pier is a shared space, so it’s important to photograph responsibly and prioritize safety.

Staying on Designated Areas:

Stick to marked pathways and viewing platforms when moving around the pier to avoid damaging the wooden planks or disturbing the surrounding ecosystem. Some sections of the pier may be unstable or slippery, especially after rain, so exercise caution when walking or setting up equipment. Avoid climbing on railings or supports unless they’re explicitly designed for public access.

Being Mindful of Others:

The pier can attract fishermen, joggers, and tourists, so be patient and courteous when setting up your shot. Avoid blocking pathways or obstructing others’ views of the bay. If shooting portraits or timed exposures, work quickly to minimize your time in high-traffic zones. Be aware of your surroundings, especially if you’re focused on your camera settings, to avoid accidents or collisions.

Packing Out Trash and Preserving the Area:

Bring a bag to collect any trash you generate, and pick up litter left by others if possible. Avoid leaving props or equipment behind, and refrain from moving rocks, driftwood, or other natural elements for your shots. By preserving the area’s cleanliness and natural beauty, you help ensure it remains a pristine location for future photographers and visitors.

By following these tips, you’ll capture the unique charm of Kerferd Road Pier, creating images that reflect both its industrial heritage and the serene beauty of Port Phillip Bay. Whether you’re focusing on architecture, landscapes, or creative compositions, a thoughtful approach ensures your photos stand out.

WUU00550

Sunset shooting at Point Ormond, Melbourne

Capturing the Magic of Sunset at Melbourne’s Point Ormond

Point Ormond, a scenic lookout in Melbourne’s Elwood neighborhood, offers breathtaking panoramic views of Port Phillip Bay and the city skyline. As the sun dips below the horizon, the sky transforms into a canvas of warm oranges, pinks, and purples, making it a dream location for sunset photography. Here’s how to make the most of your shoot at this iconic spot.

wedding photography melbourne

Timing Your Visit for the Perfect Light

The key to stunning sunset photos lies in arriving early and staying late to capture the full spectrum of colors.

Arriving Before Sunset:

Plan to arrive at least 30 minutes before the official sunset time to set up your equipment and scout locations. This allows you to photograph the pre-sunset glow, when the sky begins to warm up with soft golden tones. Use this time to test compositions and adjust settings, ensuring you’re ready when the main event begins.

The Golden Hour and Beyond:

The golden hour—the period shortly after sunrise or before sunset—casts a magical, diffused light that enhances textures and colors. At Point Ormond, this light bathes the bay in a warm glow, creating long shadows and a serene atmosphere. After the sun dips below the horizon, don’t pack up immediately; the blue hour (the twilight phase) offers cool, moody tones that contrast beautifully with the remaining warmth in the sky.

Checking Weather Conditions:

Clear skies are ideal for vibrant sunsets, but don’t dismiss partly cloudy days. Clouds act as natural diffusers, scattering sunlight and creating dramatic patterns in the sky. Use weather apps or online forecasts to track cloud cover and plan accordingly. Even on overcast days, the horizon can erupt in unexpected bursts of color during the final minutes of sunlight.

Composing Shots with the Skyline and Bay

Point Ormond’s elevated vantage point lets you incorporate Melbourne’s skyline, the bay, and the coastline into your compositions.

Balancing Foreground and Background:

Include elements like rocks, benches, or coastal vegetation in the foreground to add depth and scale to your images. For example, position a rock formation in the lower third of the frame, with the skyline and sunset visible in the background. This technique anchors the viewer’s eye while showcasing the vastness of the scene.

Using Leading Lines:

The curved pathways and fences at Point Ormond create natural leading lines that draw the eye toward the horizon. Stand at the edge of a pathway or align your camera with a fence to emphasize perspective and guide the viewer’s gaze toward the sunset. This works particularly well when the sun is low, as the lines converge at the vanishing point.

Experimenting with Silhouettes:

Silhouettes add drama and mystery to sunset photos. Position subjects (such as people, trees, or structures) between your camera and the sun to capture their dark outlines against the bright sky. For best results, expose for the sky, letting the foreground fall into shadow. This technique works wonders with the Melbourne skyline, highlighting its iconic buildings as stark, striking shapes.

Capturing Movement and Reflections

The bay’s gentle waves and occasional boats provide opportunities to photograph motion and reflections.

Long Exposures for Smooth Water:

Use a tripod and a slow shutter speed (1/15th of a second or slower) to blur the movement of waves, creating a silky, mirror-like effect on the water’s surface. This technique emphasizes the calmness of the scene and contrasts with the dynamic colors of the sky. If shooting during twilight, adjust your ISO and aperture to compensate for lower light levels.

Freezing Action with Fast Shutter Speeds:

If you want to capture the sparkle of sunlight on the water or the splash of waves, switch to a faster shutter speed (1/500th of a second or higher). This freezes motion, preserving crisp details in the ripples and reflections. Look for patterns in the water, such as the wake from a passing boat, to add visual interest to your shots.

Reflective Surfaces and Symmetry:

Wet sand or still pockets of water near the shore can act as natural mirrors, reflecting the sky and skyline. Position your camera low to the ground to emphasize these reflections, creating symmetrical compositions that double the impact of the sunset. If the tide is out, walk along the water’s edge to find the best reflective spots.

Respecting the Space and Staying Safe

Point Ormond is a popular spot for locals and tourists alike, so it’s important to photograph responsibly and safely.

Staying on Designated Paths:

Stick to marked walkways and viewing areas to avoid damaging coastal vegetation or eroding the landscape. Some sections of the cliff may be unstable, so avoid venturing too close to the edge, especially when carrying equipment. Respect any “No Trespassing” signs or barriers put in place for safety.

Being Mindful of Others:

Sunset at Point Ormond can draw crowds, so be patient and courteous when setting up your shot. Avoid blocking pathways or obstructing others’ views of the sunset. If shooting portraits or timed exposures, work quickly to minimize your time in high-traffic zones.

Packing Out Trash and Leaving No Trace:

Bring a bag to collect any trash you generate, and pick up litter left by others if possible. Avoid leaving props or equipment behind, and refrain from moving rocks or driftwood for your shots. By preserving the area’s natural beauty, you help ensure it remains a pristine location for future photographers.

By following these tips, you’ll capture the enchanting beauty of Point Ormond’s sunsets, creating images that reflect both the vibrancy of Melbourne’s coastline and the tranquility of the moment. Whether you’re focusing on landscapes, cityscapes, or creative compositions, a thoughtful approach ensures your photos stand out.

wedding photography melbourne

Photographed at the Rainbow House in Brighton, Melbourne

Capturing Vibrant Moments at Melbourne’s Brighton Bathing Boxes

Melbourne’s Brighton Bathing Boxes, a row of colorful wooden huts lining the beach, offer a playful and iconic backdrop for photography. With their bright hues, sandy shores, and endless ocean views, these structures provide endless creative opportunities. Here’s how to make the most of your shoot at this beloved coastal spot.

wedding photography melbourne

Choosing the Right Time of Day for Lighting

The quality of light can transform the mood of your photos, so timing your visit to Brighton Bathing Boxes is key.

Golden Hour Magic:

Shoot during sunrise or sunset for soft, warm lighting that enhances the colors of the bathing boxes. The low angle of the sun creates long shadows, adding depth and dimension to your compositions. Position your subjects with the sun behind them for a gentle backlight effect, or face them toward the light for a radiant glow.

Midday Challenges and Solutions:

Midday sunlight can be harsh, casting strong shadows and washing out colors. To mitigate this, look for shaded areas near the bathing boxes, such as under awnings or beside taller structures. Alternatively, use a reflector to bounce light onto your subjects’ faces, balancing the exposure. If shooting portraits, ask your subjects to turn slightly away from the sun to avoid squinting.

Overcast Days for Even Tones:

Cloudy skies diffuse sunlight, creating soft, flattering light with minimal shadows. This is ideal for capturing detailed shots of the bathing boxes’ textures and patterns without worrying about harsh contrasts. Overcast weather also allows you to shoot at any time of day without adjusting settings drastically, making it a versatile option.

Composing Shots with Color and Pattern

The bathing boxes’ vibrant palette and uniform rows offer endless ways to play with color and composition.

Leading Lines and Perspective:

Use the line of bathing boxes to guide the viewer’s eye through the image. Stand at one end of the row and shoot straight down the line, emphasizing their repetition and symmetry. For a dynamic twist, shoot from a low angle to make the boxes appear taller, or from a high vantage point to showcase their arrangement against the ocean.

Framing with Doors and Windows:

Many bathing boxes feature unique doors, windows, or decorations. Use these elements to frame your subjects or focal points. For example, position a couple inside an open doorway, with the beach visible in the background, or capture a detail shot through a colorful window frame. This adds layers and context to your photos.

Playing with Color Contrast:

Highlight the vibrancy of the bathing boxes by positioning subjects in contrasting outfits. For instance, a person in a white dress will stand out against a bold-colored box, while a red outfit can pop against a neutral-toned background. Experiment with complementary colors (e.g., blue and orange) to create visually striking images.

Incorporating the Beach and Ocean into Your Shots

The sandy shore and endless horizon provide natural elements to enhance your compositions.

Foreground Interest:

Add depth to your photos by including beach elements in the foreground, such as seashells, driftwood, or footprints in the sand. Position these items near the bottom of your frame to draw the eye into the scene. For a creative touch, use a wide-angle lens to exaggerate the size of foreground objects relative to the bathing boxes.

Dynamic Water Shots:

If the tide is in, capture the ocean’s movement by using a slower shutter speed (1/30th of a second or slower) to create a silky, blurred effect on the waves. This technique adds a sense of calm and fluidity to your images. For sharper water shots, use a faster shutter speed (1/500th of a second or higher) to freeze the action of crashing waves.

Horizon Placement:

When including the ocean in your shots, be mindful of horizon placement. For a balanced composition, position the horizon one-third of the way up or down the frame, following the rule of thirds. Avoid placing the horizon in the center, as this can make the image feel static. If the sky is particularly dramatic (e.g., during sunset), give it more space in the frame to emphasize its beauty.

Respecting the Space and Local Rules

Brighton Bathing Boxes are a cherished part of Melbourne’s coastal heritage, so it’s important to photograph them respectfully.

Staying on Public Paths:

Stick to designated walkways and public areas when moving around the bathing boxes. Avoid climbing on or entering private boxes unless explicitly permitted, as many are owned by individuals or families. Respect any “No Trespassing” signs or barriers to preserve the site’s integrity.

Minimizing Disruption:

Be mindful of others enjoying the beach, whether they’re tourists, locals, or photographers. Keep noise levels down, avoid blocking pathways, and be patient if waiting for a clear shot. If shooting portraits, work quickly and efficiently to minimize your time in high-traffic areas.

Leaving No Trace:

Pack out all trash, including food wrappers, water bottles, and any props you bring. Avoid moving or rearranging beach elements like rocks or driftwood for your shots, as this can disrupt the natural environment. By leaving the area as you found it, you help protect Brighton’s beauty for future visitors.

By following these tips, you’ll create vibrant, memorable photos at Brighton Bathing Boxes that capture both their colorful charm and coastal serenity. Whether you’re focusing on architecture, portraits, or landscapes, a thoughtful approach ensures your images honor this iconic Melbourne landmark.

WUU00328

Notes for shooting St. Paul’s Cathedral in Melbourne

Essential Tips for Photographing Melbourne’s St. Paul’s Cathedral

Melbourne’s St. Paul’s Cathedral, with its Gothic Revival architecture and stunning stained-glass windows, is a breathtaking location for photography. Whether you’re capturing a wedding, a portrait session, or architectural details, understanding the best practices for shooting here ensures your images stand out. Here’s what to keep in mind.

wedding photography melbourne

Lighting Considerations for Interior Shots

The cathedral’s interior is dimly lit, relying heavily on natural light filtering through stained glass and artificial chandeliers. To avoid overly dark or grainy photos, adjust your camera settings accordingly.

Maximizing Natural Light:

Shoot during daylight hours when sunlight streams through the windows, casting colorful patterns on the floors and walls. Position your subjects near these light sources to highlight their features while maintaining the cathedral’s ambient mood. Avoid using flash, as it can disrupt the serene atmosphere and create harsh reflections on glass surfaces.

Balancing Exposure:

The contrast between bright windows and shadowy corners can challenge your camera’s dynamic range. Use exposure bracketing to capture multiple shots at different exposure levels, then blend them in post-processing for a balanced result. Alternatively, manually adjust your ISO and aperture to retain detail in both highlights and shadows.

Low-Light Techniques:

If shooting in dimmer areas, stabilize your camera with a tripod to prevent blur from slow shutter speeds. Increase your ISO slightly, but be mindful of noise—modern cameras handle higher ISOs better than older models. For handheld shots, opt for a wider aperture (e.g., f/2.8 or lower) to let in more light while keeping the subject sharp.

Composing with Architectural Elements

St. Paul’s Cathedral is rich with intricate details, from soaring arches to ornate carvings. Use these features to frame your shots and add depth to your compositions.

Leading Lines and Symmetry:

The cathedral’s nave and aisles create natural leading lines that draw the eye toward the altar or a focal point. Stand at the center of the aisle and shoot straight ahead to emphasize the space’s grandeur. For symmetry, position your subject equidistant from pillars or arches, creating a balanced, harmonious image.

Framing with Doorways and Windows:

Use the cathedral’s doorways, arches, or stained-glass windows as frames for your subjects. For example, place the couple inside a doorway, with the cathedral’s exterior visible in the background, or capture a portrait through a window to add layers and context. This technique adds visual interest and connects the subject to the setting.

Capturing Details:

Zoom in on smaller elements like carved stone faces, wooden pews, or patterned floor tiles. These shots tell a story of the cathedral’s history and craftsmanship. Use a macro lens or your camera’s macro mode to capture fine textures, and shoot from a low angle to emphasize their scale.

Respecting the Space and Its Rules

St. Paul’s Cathedral is a place of worship, so it’s crucial to photograph respectfully and adhere to any guidelines provided by staff.

Quiet and Discreet Shooting:

Keep noise to a minimum, especially during services or events. Avoid using loud equipment or moving furniture, and be mindful of others praying or touring the space. If using a tripod, set it up quickly and avoid blocking pathways.

Permission for Commercial Use:

If you plan to use your photos for commercial purposes (e.g., selling prints, advertising, or publishing in a magazine), check whether you need permission from the cathedral’s administration. Some religious sites restrict commercial photography to protect their intellectual property and privacy.

Dress Code and Behavior:

Dress modestly out of respect for the cathedral’s sacred nature. Avoid revealing clothing or accessories that might distract from the setting. Similarly, refrain from eating, drinking, or smoking inside, and dispose of trash properly.

Timing Your Visit for Optimal Conditions

The time of day and week can significantly impact your photography experience at St. Paul’s Cathedral.

Avoiding Crowds:

Early mornings or weekdays are often less busy than weekends or holidays, giving you more space to compose shots without interruptions. If shooting during peak hours, be patient and wait for gaps in foot traffic to capture cleaner images.

Weather and Lighting Outside:

For exterior shots, overcast days provide soft, even lighting that minimizes harsh shadows and highlights. If shooting in sunlight, position your subjects in shade or use a reflector to bounce light onto their faces. Sunset and sunrise offer warm, golden tones that enhance the cathedral’s stone facade.

Special Events and Closures:

Check the cathedral’s calendar for events like concerts, weddings, or religious ceremonies, as these may restrict photography access. Similarly, confirm opening hours, as some areas might be closed for restoration or private functions.

By following these tips, you’ll capture stunning, respectful images of St. Paul’s Cathedral that highlight its architectural beauty and spiritual significance. Whether you’re focusing on grand vistas or intimate details, a thoughtful approach ensures your photos honor both the space and its purpose.

DSC09880

Wedding photo shoot by train in Puffenbili, Melbourne

Capturing Romance on Melbourne’s Puffing Billy Railway: Wedding Photography Inspiration

Melbourne’s Puffing Billy Railway, a heritage steam train winding through the Dandenong Ranges, offers a nostalgic and picturesque setting for wedding photography. With its vintage carriages, lush forest surroundings, and charming stations, this iconic railway provides endless opportunities to create timeless, romantic images. Here’s how to make the most of this unique backdrop.

wedding photography melbourne

Vintage Carriage Interiors: Timeless Elegance

The train’s open-sided carriages, with their wooden benches and weathered charm, are perfect for intimate, vintage-inspired shots. Position the couple seated together, leaning against the railing as the train chugs along. Use the carriage’s diagonal lines—from the wooden slats to the tracks stretching into the distance—to create dynamic compositions that draw the eye toward the subjects.

Natural Light Magic:

Shoot during daylight hours when sunlight filters through the trees, casting dappled shadows on the couple’s faces. This soft, diffused light enhances their features while adding a romantic, golden-hour glow. If shooting midday, look for shaded areas inside the carriage to avoid harsh contrasts.

Adding Movement:

Capture the train in motion by using a slower shutter speed (while keeping the couple sharp with a steady hand or tripod). This technique blurs the passing scenery, emphasizing the sense of journey and adventure. Ask the couple to hold hands or share a quiet moment as the world rushes by.

Forest-Framed Portraits Along the Tracks

The Dandenong Ranges’ dense forests and ferns provide a lush, enchanting setting for outdoor portraits. Position the couple beside the tracks, using the tall trees to frame them naturally. Look for spots where sunlight breaks through the canopy, creating pockets of warmth and highlighting their expressions.

Playing with Depth:

Incorporate layers into your composition by placing the couple in the foreground with the train tracks receding into the background. This adds depth and perspective, making the image feel immersive. For a creative twist, use a wide-angle lens to exaggerate the scale of the trees and tracks.

Capturing Candid Moments:

Encourage the couple to interact playfully—stepping over the tracks, whispering secrets, or laughing at an inside joke. These unposed shots often feel more authentic and emotional than staged poses. Keep your camera ready to catch spontaneous gestures, like a brush of the hair or a gentle touch.

Charming Station Stops: Storytelling Scenes

Puffing Billy’s stations, such as Lakeside or Emerald, offer quaint, storybook settings for wedding photos. Use the station’s architecture—from wooden platforms to historic signage—to anchor your compositions. Position the couple near a vintage ticket booth or beneath a striped awning, adding context and charm to the scene.

Incorporating Props Thoughtfully:

A simple prop, like an old-fashioned suitcase or a bouquet of wildflowers, can enhance the narrative without overwhelming the image. For example, have the couple hold a vintage map or a handwritten love letter, symbolizing their journey together. Keep props minimal to let the setting shine.

Weather as a Creative Tool:

Don’t shy away from shooting in light rain or mist—these conditions can add mood and atmosphere to your photos. Use a clear umbrella to shield the couple while keeping the scene visible, or embrace the raindrops as they glisten on their hair and clothing. Overcast skies also soften harsh shadows, creating a balanced, ethereal look.

Bridging the Gap: Scenic Overlooks

Some sections of the railway feature bridges or elevated tracks that offer sweeping views of the valleys below. Position the couple on a bridge, using the railing to frame them against the landscape. This vantage point highlights both their connection and the grandeur of the surroundings.

Using Leading Lines:

The bridge’s structure naturally guides the viewer’s eye toward the couple, creating a strong focal point. Experiment with different angles—shooting from the side to emphasize the bridge’s length or from below to capture the couple against the sky.

Sunset Glow:

Time your shoot to coincide with sunset for a magical, golden-hour effect. The warm light will bathe the couple in a soft, flattering glow while casting long shadows that add drama to the scene. If possible, position them so the sun is behind them, creating a subtle halo effect around their silhouettes.

By exploring these composition ideas, you’ll create wedding photos that blend the romance of the couple with the whimsical charm of Puffing Billy Railway. Each location—from vintage carriages to forest pathways—offers unique opportunities to tell a story of love, adventure, and timeless beauty.

WUU00482

Wedding photography composition along the Great Ocean Road in Melbourne

Stunning Wedding Photography Composition Ideas Along Melbourne’s Great Ocean Road

Melbourne’s Great Ocean Road, with its dramatic cliffs, turquoise waters, and rugged coastline, offers a breathtaking backdrop for wedding photography. Whether you’re capturing intimate moments or grand landscapes, these composition techniques will help you create timeless images that highlight both the couple and the natural beauty of the area.

wedding photography melbourne

Dramatic Cliffside Poses

The towering cliffs along the Great Ocean Road, such as those near Loch Ard Gorge or the Twelve Apostles, provide a powerful setting for wedding portraits. Position the couple near the edge (safely!) to emphasize the vastness of the ocean below. Use the cliff’s jagged lines to frame the subjects, drawing the viewer’s eye toward the couple while showcasing the scale of the landscape.

Tips for Natural Posing:

Encourage the couple to interact naturally—holding hands, sharing a laugh, or gazing out at the horizon. Avoid stiff, overly posed shots by letting them move freely. For added drama, capture them mid-stride or with wind tousling their hair, adding movement to the composition.

Time of Day Matters:

Shoot during golden hour, just after sunrise or before sunset, when the soft light enhances the cliffs’ textures and casts a warm glow on the couple. The low angle of the sun also creates long shadows, adding depth to the image.

Oceanfront Silhouettes

The Great Ocean Road’s beaches, like Apollo Bay or Johanna Beach, offer endless opportunities for silhouette photography. Position the couple with their backs to the sun during sunset, letting the bright sky behind them create a striking contrast against their darkened figures. This technique works especially well when the couple is embracing or dancing, adding emotion to the scene.

Playing with Reflections:

If the tide is low, look for wet sand or shallow pools to reflect the couple’s silhouette. This doubles the visual impact and creates a symmetrical composition. For a creative twist, ask the couple to kick up sand or water droplets, capturing the motion in mid-air against the colorful sky.

Weather as a Tool:

Overcast days can soften harsh shadows, making silhouettes more subtle and moody. Use a slightly underexposed setting to ensure the couple remains dark while retaining detail in the sky.

Coastal Pathways and Bridges

The winding pathways and rustic bridges that dot the Great Ocean Road, such as the one near Gibson Steps or the London Bridge arch, add a sense of journey to wedding photos. Frame the couple walking hand-in-hand along a path, using the leading lines to guide the viewer’s eye toward the horizon or a distant landmark.

Incorporating Natural Elements:

Use nearby elements like wildflowers, driftwood, or rock formations to add texture and color to the foreground. For example, position the couple beside a cluster of bright banksias or have them lean against a weathered fence post for a rustic touch.

Dynamic Perspectives:

Experiment with different angles—shoot from a low vantage point to emphasize the pathway’s length, or capture the couple from above as they stroll across a bridge. Varying your perspective keeps the images fresh and engaging.

Rainforest Romance

Parts of the Great Ocean Road, like the Great Otway National Park, are lush with rainforest and ferns. These settings are perfect for soft, intimate shots. Position the couple beneath a canopy of trees or beside a moss-covered boulder, using the greenery to frame them naturally.

Using Dappled Light:

The filtered sunlight that breaks through the forest canopy creates a magical, ethereal effect. Look for spots where light streams in patches, illuminating the couple’s faces or hair while leaving the background in shadow. This technique adds depth and a dreamy quality to the photos.

Adding Props Thoughtfully:

A simple bouquet of native flowers or a woven blanket draped over a rock can enhance the rainforest theme without feeling forced. Keep props minimal to let the natural surroundings shine.

By exploring these composition ideas, you’ll create wedding photos that capture the romance of the couple while celebrating the wild, untamed beauty of Melbourne’s Great Ocean Road. Each location offers unique opportunities—from cliffside drama to rainforest serenity—ensuring your images are as unforgettable as the journey itself.

WUU00428

The shooting Angle of Flinders Station in Melbourne

Iconic Photography Spots at Melbourne’s Flinders Street Station

Flinders Street Station, a Victorian-era architectural masterpiece, serves as Melbourne’s transportation hub and cultural symbol. Its iconic yellow facade, green copper domes, and historic clock towers make it a magnet for photographers. Here are prime angles to capture its essence:

wedding photography melbourne

Full Frontal Grandeur

For a sweeping view of the station’s iconic facade, position yourself across the street at the intersection of Flinders and Swanston Streets. This vantage point, often bustling with trams and pedestrians, frames the station’s arched entrances, clock towers, and intricate stonework. Shoot during golden hour to highlight the warm hues of the building against a softening sky. The symmetry of the composition, with trams passing beneath the clocks, creates a dynamic urban tableau.

Pro Tip:

Use a wide-angle lens to emphasize the station’s scale. If shooting at night, leverage long exposures to blur moving trams into streaks of light, contrasting with the station’s illuminated details.

Clock Tower Close-Ups

The station’s clock towers, installed in 1916 and restored during a 2015–2017 renovation, are architectural focal points. To isolate these details, move to the side of the station along Flinders Street. Capture the towers rising above modern buildings, their weathered faces telling stories of a century of service. For a unique perspective, wait for a tram to pass in the foreground, adding depth and movement to the shot.

Nighttime Magic:

The clocks take on a mystical quality after dark. Use a tripod and low ISO settings to photograph the towers under artificial light, with reflections shimmering on the Yarra River nearby. This angle transforms the station into a beacon of history amidst the city’s glow.

Yarra River Reflections

For a serene, artistic take, head to the Evan Walker Bridge, which spans the Yarra River adjacent to the station. From here, photograph the station’s green domes and clock towers framed by the bridge’s geometric steelwork. The river’s surface often mirrors the station’s lights, creating a doubled image that blurs the line between reality and reflection.

Creative Techniques:

Experiment with polarizing filters to reduce glare on the water, or shoot during blue hour—the period just after sunset—for a moody, cyan-toned scene. Including a passing boat or pedestrian can inject life into the composition without distracting from the architectural subject.

Side Street Surprises

Explore the alleys and side streets around the station for unexpected angles. Elizabeth Street, running parallel to Flinders, offers a head-on view of the clock towers, while Degraves Street—a laneway lined with cafés and street art—provides a lively foreground. Position yourself at the end of Degraves to photograph the station’s dome peeking above colorful umbrellas and bustling diners.

Local Insight:

The area around Flinders Street Station is a microcosm of Melbourne’s culture. Incorporating elements like street performers, vintage trams, or graffiti-covered walls can add narrative depth to your shots, showcasing the station not just as a landmark, but as a living part of the city’s identity.

By exploring these angles, you’ll capture Flinders Street Station’s blend of historic grandeur and modern urban energy, creating images that resonate with both locals and travelers.