DSC08988

The order of group shooting for wedding photography in Melbourne

Melbourne Wedding Photography Group Shooting Sequence Guide

Organizing a wedding photo shoot in Melbourne’s diverse locations—from urban streets to coastal landscapes—requires a strategic sequence to maximize natural light, minimize downtime, and capture every key moment. A well-planned shooting order ensures the couple, wedding party, and family members stay engaged while moving efficiently between settings. This guide outlines a step-by-step approach to grouping shots, adapting to Melbourne’s weather, and prioritizing must-have photos.

wedding photography melbourne

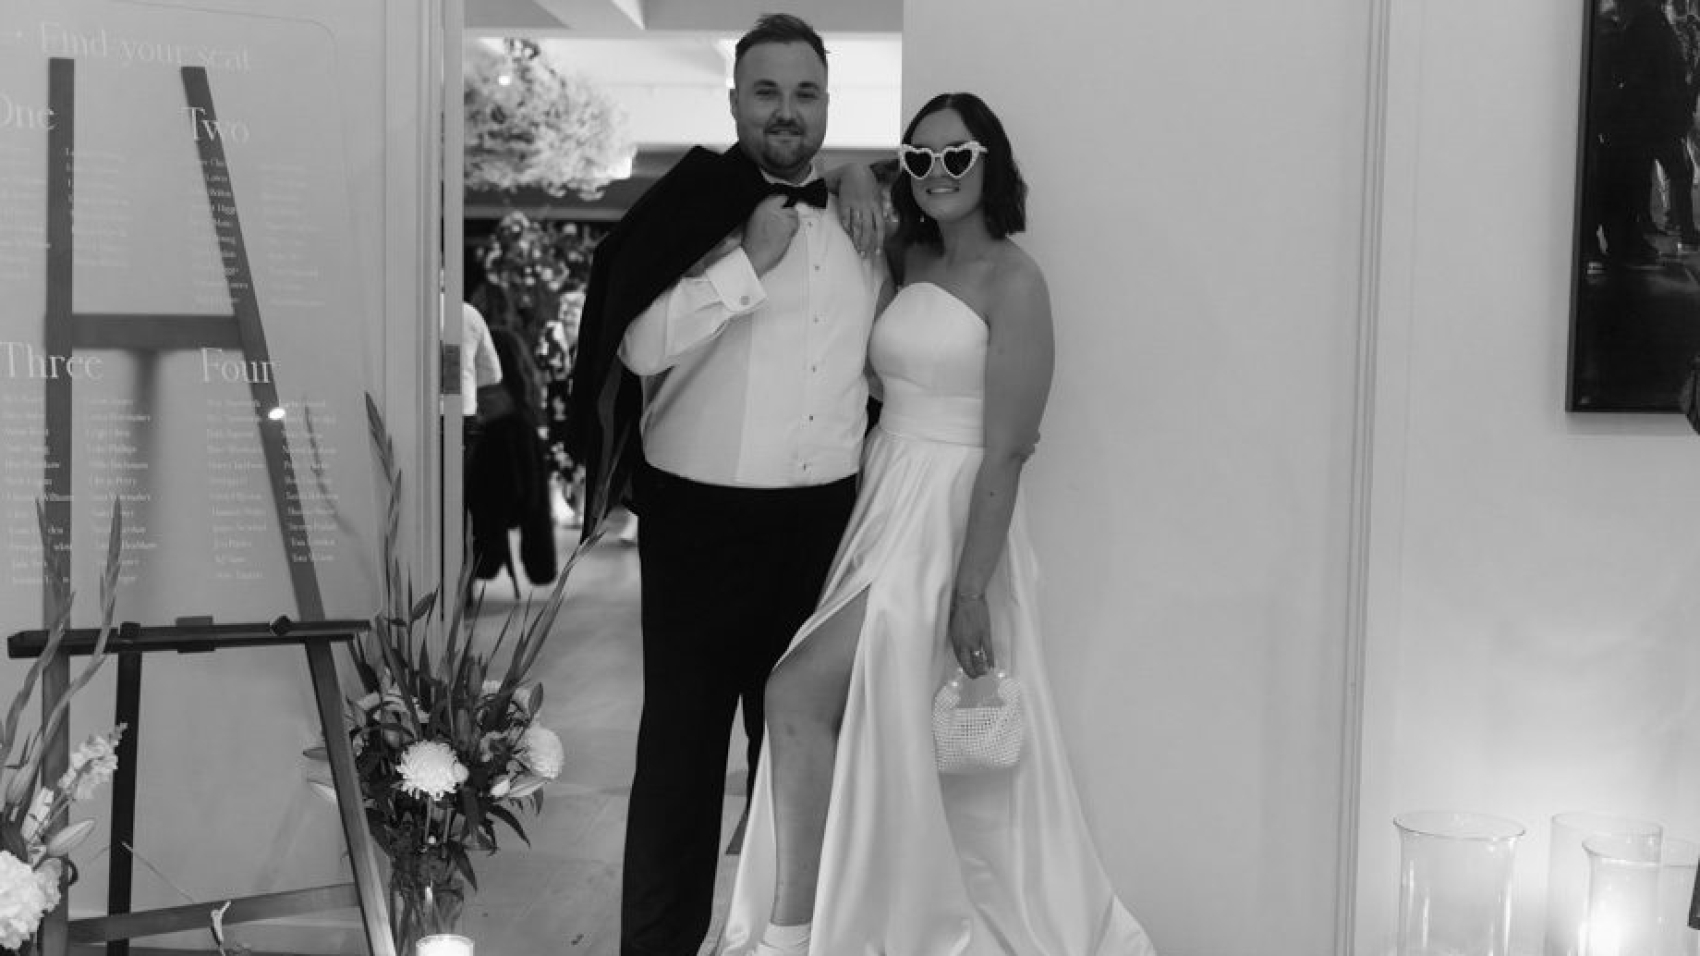
Starting with the Couple’s Intimate Portraits

Begin the day by focusing on the newlyweds alone, as their energy and enthusiasm are highest early in the session. This allows for creative, uninterrupted time to experiment with poses, lighting, and locations without the pressure of coordinating larger groups.

Golden Hour Priority: Schedule the couple’s portraits during the first or last hour of daylight for soft, flattering light. In Melbourne, this could mean shooting at sunrise near the Yarra River or at sunset along St Kilda Beach. Use this time for close-ups, walking shots, and romantic poses that highlight their connection.

Location Strategy: Start with a iconic Melbourne backdrop, such as a graffiti-covered laneway or a historic building, then transition to a quieter spot like a park or garden for more intimate, natural-light shots. This variety ensures a mix of urban edge and timeless elegance in the final gallery.

Key Tip: If the couple is wearing multiple outfits, schedule the most formal attire first while they’re fresh, then switch to casual looks for later shots.

Moving to the Wedding Party and Bridal Party

After capturing the couple’s solo portraits, shift focus to the bridal party and groomsmen. These groups are often energetic and playful, making them ideal for dynamic, high-energy shots that showcase personalities.

Group Size Management: Divide larger parties into smaller subgroups (e.g., bridesmaids only, groomsmen only, or mixed groups) to streamline posing and reduce chaos. Start with formal, posed photos in a structured setting, such as in front of a grand staircase or a textured wall, then move to casual arrangements like walking down a street or gathered around a vintage car.

Location Adaptation: Use the same venue or nearby areas to avoid traveling long distances. For example, if the couple’s portraits were taken in a park, position the wedding party around a fountain or under a tree for natural framing. Incorporate Melbourne’s unique elements, like tram tracks or street art, to add local flavor.

Engagement Trick: Keep the mood light by asking the party to share funny stories about the couple or play a quick game (e.g., “Who knows the bride/groom best?”) to generate genuine laughter and interactions.

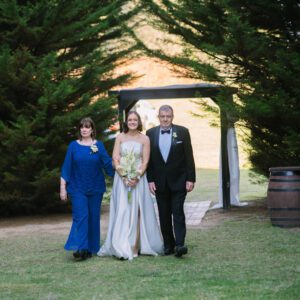
Capturing Family Formals Efficiently

Family formals are essential but can become time-consuming if not organized properly. Prioritize these shots after the wedding party to maintain momentum while ensuring all key combinations are covered.

Pre-Shoot Planning: Request a list of must-have family groupings (e.g., immediate family, extended relatives, step-parents) from the couple beforehand. Arrange groupings by size, starting with the largest (e.g., both sides of the family together) and working down to smaller pairs or trios.

Location Simplicity: Choose a flat, well-lit area with minimal distractions, such as a clean wall, a bench, or a grassy field. Avoid busy backgrounds that compete for attention. Use a reflector or off-camera flash to fill in shadows if shooting in harsh sunlight or shade.

Efficiency Hack: Assign a family member or friend to help organize groups, calling out names and ensuring everyone is ready before the camera clicks. This keeps the process moving smoothly and reduces stress for the couple.

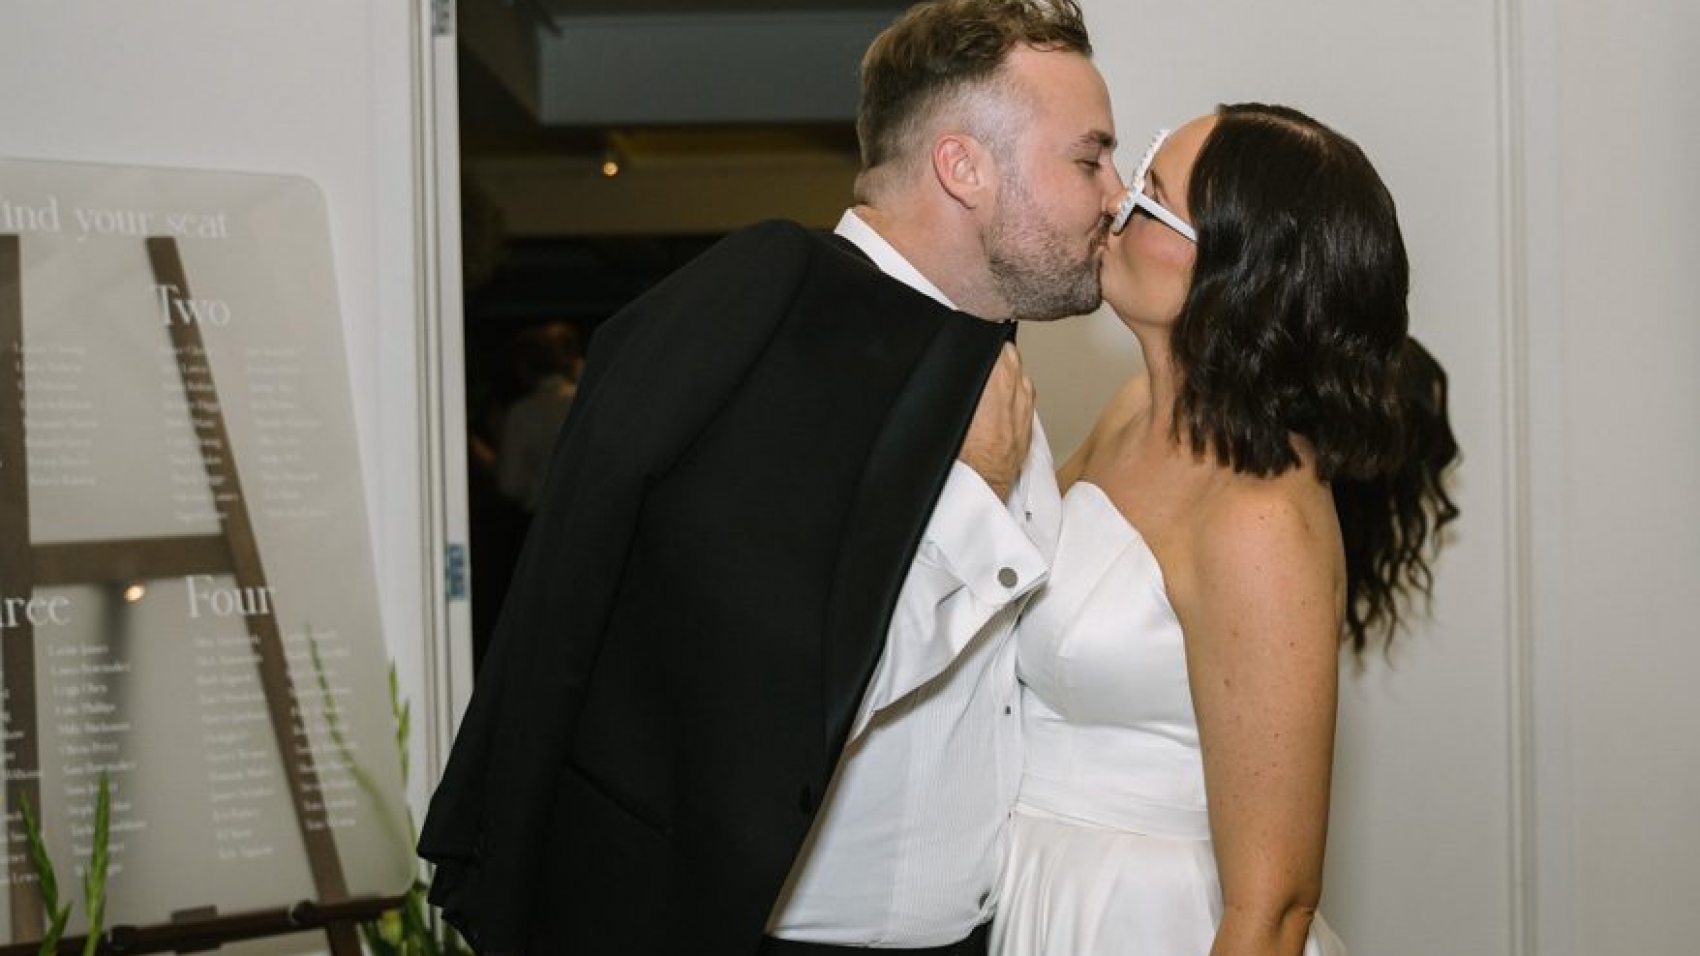
Incorporating Creative and Candid Shots

Once formal groupings are complete, allocate time for candid, documentary-style photos that capture the day’s spontaneous moments. These shots often become favorites, as they reflect the couple’s true emotions and interactions.

Observation Over Direction: Step back and let the day unfold naturally, photographing details like the bride adjusting her veil, the groom laughing with friends, or the couple stealing a quiet moment together. Use a telephoto lens to shoot from a distance without interrupting the flow.

Location Flexibility: If the main venue has multiple interesting spots (e.g., a rooftop, a courtyard, or a staircase), wander through these areas with the couple, capturing them in unplanned poses or conversations. Melbourne’s eclectic architecture provides endless opportunities for creative framing.

Lighting Awareness: Keep an eye on changing light conditions, especially if shooting outdoors. Move to shaded areas during midday or use diffusers to soften harsh sunlight. For evening shots, embrace twilight hues or use artificial lighting (e.g., fairy lights, lanterns) for a romantic ambiance.

Final Sunset or Nighttime Shots for Drama

Wrap up the shoot with a final session during blue hour or nighttime to add dramatic, mood-filled images to the collection. These shots often stand out for their unique lighting and atmosphere.

Twilight Timing: Schedule this segment 30 minutes before sunset for a mix of natural and artificial light. Position the couple against the skyline or near water for reflections, using a tripod and long exposure to capture light trails or city glow.

Nighttime Creativity: If shooting after dark, use portable LED panels, string lights, or sparklers to illuminate the couple. Experiment with silhouettes, backlighting, or bokeh effects by shooting near streetlights or neon signs. Melbourne’s laneways or docklands offer perfect settings for these shots.

Safety First: Ensure the couple and team are visible if shooting in dimly lit or crowded areas. Use glow sticks or reflective gear to avoid accidents, and stick to well-lit paths or familiar locations.

By following this structured yet flexible sequence, photographers can navigate Melbourne’s dynamic environments while keeping the couple and their guests relaxed and engaged. Thoughtful grouping and timing ensure every moment—from intimate portraits to lively group shots—is captured with beauty and authenticity.

DSC09215-Enhanced-NR

Melbourne wedding photography pose guidance process

Melbourne Wedding Photography Pose Guidance Workflow

Capturing authentic, flattering wedding photos in Melbourne’s diverse settings—from urban streets to coastal vistas—requires thoughtful pose guidance. The right poses highlight the couple’s connection, complement their surroundings, and ensure they feel comfortable in front of the camera. This guide outlines a step-by-step workflow for directing poses, adapting to different locations, and encouraging natural interactions.

wedding photography melbourne

Building Comfort and Connection Before Shooting

The foundation of great poses starts long before the camera clicks. Begin by creating a relaxed atmosphere through casual conversation. Ask the couple about their relationship milestones, shared hobbies, or favorite memories to build rapport. This helps them feel at ease and encourages genuine smiles and laughter during the shoot.

For shy or awkward clients, start with simple, low-pressure poses. Have them stand side by side, holding hands or linking arms, while facing the camera. Use prompts like, “Pretend you’re sharing a secret” or “Whisper something funny in each other’s ears” to spark natural interactions. Gradually introduce movement, such as walking slowly toward the camera or spinning gently, to loosen stiffness and add dynamism.

Tip for Nervous Couples: Suggest they bring a prop like a bouquet, a vintage camera, or a handwritten love note to hold, giving them something to focus on beyond the camera.

Adapting Poses to Melbourne’s Iconic Locations

Melbourne’s unique backdrops—from graffiti-covered laneways to sandy beaches—demand poses that harmonize with the environment. In urban settings, lean into the city’s edgy vibe by having the couple sit on steps, lean against brick walls, or peek around corners. Use architectural lines to frame them, such as positioning them beneath an archway or beside a row of colorful doors.

For coastal shoots, embrace the beach’s casual energy. Have the couple walk barefoot along the shoreline, holding hands or dipping their toes in the water. Incorporate movement by asking them to toss sand into the air or playfully chase each other. If shooting near cliffs or rocky outcrops, use elevation to create dramatic angles, such as having one partner stand above the other or sit on a ledge while the other leans in close.

Natural Light Strategy: In outdoor settings, position the couple to face the light source (e.g., the sun during golden hour) to highlight their faces and create a warm glow. Use reflectors or diffusers to soften harsh shadows if needed.

Dynamic Poses for Movement and Storytelling

Static poses can feel stiff, so incorporate movement to add life to photos. Start with simple actions like having the couple walk toward the camera at a slow pace, holding hands or with arms around each other’s waists. Capture mid-stride shots to convey a sense of journey or adventure, especially in open spaces like parks or bridges.

For playful energy, direct the couple to interact spontaneously. Suggest actions like twirling, dipping, or lifting each other (if physically comfortable). Use prompts like, “Pretend you’re dancing at your reception” or “Act like you’re trying to steal a kiss without getting caught.” These cues encourage laughter and organic moments that feel authentic.

Creative Angle Tip: Shoot from low angles to emphasize height differences or from above for a bird’s-eye view of the couple lying on the grass or sand.

Intimate Poses for Emotional Depth

Close-up shots that capture the couple’s connection require subtle, intentional posing. Have them sit or stand close enough that their shoulders or hips touch, creating a sense of unity. Direct one partner to rest their head on the other’s shoulder or chest, while the other gazes softly at them or the horizon.

For forehead-to-forehead poses, ask the couple to close their eyes and take a deep breath, fostering a moment of quiet intimacy. Use gentle prompts like, “Think about your favorite memory together” or “Imagine it’s just the two of you in this moment” to deepen their emotional expression.

Hand Placement Guidance: Avoid stiff or awkward hand positions by suggesting natural gestures, such as one partner running their fingers through the other’s hair, holding a bouquet, or gently touching their face.

Group Poses for Wedding Parties and Families

When photographing larger groups, organization is key to avoiding chaos. Start by arranging family members or bridesmaids/groomsmen in staggered rows, with taller individuals at the back and shorter ones in front. Use props like chairs or benches to create levels, ensuring everyone is visible in the frame.

For casual group shots, direct the couple to stand in the center while others gather around them in a loose semicircle. Encourage interactions like hugging, high-fiving, or linking arms to create a lively, connected氛围. Use prompts like, “Cheer for the newlyweds!” or “Everyone pretend to steal the bride’s bouquet” to generate spontaneous reactions.

Focus Tip: When shooting groups, use a wide aperture (e.g., f/2.8 or f/4) to keep the couple in sharp focus while slightly blurring the background, drawing attention to the main subjects.

Final Checks for Flattering Angles and Lighting

Before wrapping up, review poses to ensure they flatter the couple’s features and work with the lighting. Check for double chins by having them tilt their chins slightly downward or extend their necks forward. Adjust the couple’s body orientation to minimize unflattering shadows, such as turning them 45 degrees from the light source if shooting in harsh sunlight.

Encourage the couple to shift their weight onto one leg or cross their ankles to create a more relaxed, natural stance. For seated poses, have them sit at the edge of a chair or step to avoid slouching, and angle their bodies toward the camera for a slimming effect.

Lighting Reminder: If shooting indoors, position the couple near windows for natural fill light, or use a reflector to bounce light onto their faces if the room is dimly lit.

By following this workflow, photographers can guide couples through poses that feel authentic, flattering, and tailored to Melbourne’s unique settings. Thoughtful direction transforms awkward moments into timeless memories, ensuring every photo tells a story of love and connection.

DSC09206

Steps for adjusting the lighting for wedding photography in Melbourne

Melbourne Wedding Photography Lighting Adjustment Guide

Mastering lighting for wedding photography in Melbourne’s diverse settings—from sunlit beaches to dimly lit venues—requires adaptability and technical precision. Proper lighting enhances mood, highlights details, and ensures the couple looks their best in every shot. This guide breaks down step-by-step adjustments for common lighting scenarios, helping photographers achieve professional results without relying on specific equipment brands or budget constraints.

wedding photography melbourne

Natural Light Optimization for Outdoor Shoots

Melbourne’s unpredictable weather demands flexibility when working with natural light. Start by assessing the time of day and weather conditions. For midday shoots under harsh sunlight, position the couple in shaded areas like under trees or near buildings with overhangs. Use a reflector to bounce soft light onto their faces, reducing shadows and creating a balanced look.

During golden hour—the hour before sunset—take advantage of warm, directional light. Face the couple toward the sun to capture golden highlights in their hair and a natural glow on their skin. If the sun is too intense, use a diffuser to soften its intensity while maintaining warmth. For backlit shots, adjust exposure settings to prevent silhouettes, or embrace the dramatic effect by framing the couple against the sun with a wide aperture for bokeh.

Tip for Cloudy Days: Overcast skies act as a natural diffuser, providing even lighting. Use this to your advantage by shooting wide-angle shots of the couple in open spaces, ensuring their faces are well-lit without harsh contrasts.

Indoor Venue Lighting Adjustments

Indoor venues like banquet halls, churches, or studios often have mixed lighting sources, including overhead fluorescents, chandeliers, or colored uplighting. Start by turning off all automatic settings on your camera to maintain control over exposure and white balance. Use a gray card or white balance tool to calibrate colors accurately, especially in venues with tungsten or LED lighting that casts warm or cool tones.

For dimly lit spaces, increase ISO settings gradually to capture ambient light without introducing excessive noise. Pair this with a wide aperture (e.g., f/1.8 or f/2.8) to let in more light and create a shallow depth of field, isolating the couple from the background. If flash is necessary, bounce it off ceilings or walls to diffuse harsh direct light, or use a flash diffuser for softer results.

Venue-Specific Strategy: In venues with large windows, position the couple near the light source during the day for natural fill light. At night, use window reflections or city lights outside as creative backdrops, adjusting shutter speed to capture motion blur if desired.

Mixed Lighting Scenarios: Balancing Natural and Artificial Sources

Combining natural and artificial light—such as shooting indoors near windows during daylight or using flash outdoors at dusk—requires careful balancing. Start by setting your white balance to “daylight” or “auto” as a baseline, then fine-tune using custom settings if colors appear off. For example, if window light is cool and indoor tungsten light is warm, adjust white balance to neutralize extremes or embrace the contrast for artistic effect.

When using flash outdoors, sync it with ambient light to avoid overpowering natural tones. Set flash power to a low output (e.g., 1/16 or 1/32) and use high-speed sync if shooting in bright conditions to maintain a natural look. For indoor-outdoor transitions, carry a portable LED panel or continuous light to supplement natural light during cloudy spells or in shaded areas.

Creative Technique: Use gels on flashes or LEDs to match artificial light with ambient tones. For instance, a blue gel can mimic twilight skies, while an orange gel can warm up cool indoor lighting.

Low-Light and Nighttime Shooting Techniques

Melbourne’s evening scenes—from waterfront promenades to rooftop bars—offer romantic backdrops but pose challenges for lighting. In low-light conditions, prioritize stability by using a tripod to avoid camera shake. Switch to manual mode and adjust shutter speed, aperture, and ISO to capture enough light without sacrificing image quality.

For nighttime portraits, use a combination of ambient light and supplemental sources. Position the couple near streetlights, neon signs, or lampposts for natural fill light, then use a flash or LED panel to highlight their faces. Experiment with long exposures to capture light trails from passing cars or ferries, adding dynamic elements to the composition.

Safety Note: When shooting in dark or crowded areas, ensure the couple remains visible to the team and avoid obstructing pathways for others.

Dynamic Lighting for Creative Portraits

To add drama or whimsy to wedding portraits, manipulate light creatively. Use a prism or crystal to refract light onto the couple’s faces, creating rainbow-like patterns or lens flares. For bokeh effects, shoot with a wide aperture and position the couple near light sources like fairy lights, candles, or city lights.

In studio-style setups, experiment with backlighting by placing a light source behind the couple to outline their silhouette. Combine this with a front-facing light at a lower intensity to reveal facial details without losing the ethereal glow. Use colored gels or LED strips to cast hues like gold, pink, or blue for mood-specific shots.

Tip for Movement: If the couple is dancing or walking, use rear-curtain sync flash to freeze their motion while capturing light trails behind them, adding energy to the image.

By mastering these lighting adjustments, photographers can adapt to Melbourne’s ever-changing environments, ensuring every wedding photo tells a story with clarity, emotion, and artistic flair. Whether shooting under bright skies or starlit nights, thoughtful lighting techniques transform ordinary moments into extraordinary memories.